Tron Legacy Costume

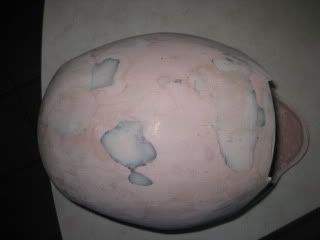
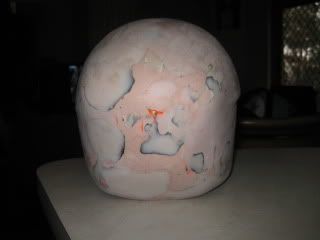
So after talking to a few of you and my boyfriend, who is actually doing all the EL work while I do all the sewing, we decided to go with an EL wire diffusion type thing. I'm not sure exactly how he's doing it, since he lives in Florida and I'm here in NOLA... he's mailing me the pieces as he finishes them so I can put them on the outfit. I think he's making the edging/masked off bits with craft foam, and I think he mentioned something about using silicone caulk instead of shower curtain because it will protect the wires as well as diffusing the light. I'll let you know for sure once the pieces show up at my house. However he did it, they look awesome so far. He's started on the boot lighting first:

299645_559953527176_69501823_31491780_1442938986_n.jpg

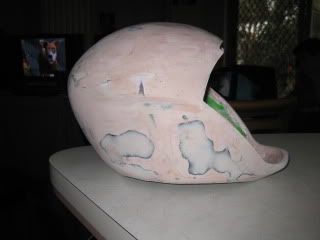
And with the lights off:
300874_559953502226_69501823_31491779_1364865423_n.jpg


Also, if anyone is curious, here's what I'm planning the outfit to look like:
297307_559878352826_69501823_31491311_33567461_n.jpg


Should be practical for pole dancing, recognizable as Tron.... I think this is going to be my new favorite outfit, the management is going to have to pry me out of it after Halloween or I'll wear it all year long.... End of Line dancer! Castor would want pole dancers, right??

I really hope some Tron fans wander into the club so I can give this spiel I've had rolling around in my head... "Welcome, user! You must be new to the Grid. Since our host Castor is unavailable at the moment, I hope you won't mind if I *personally* welcome you to the End of Line Club."

Because if no one recognizes my costume I'll be super sad.

Yea, we are going to need the club address and your schedule once the costume is ready, or before would work... ;)
 
I really hope some Tron fans wander into the club so I can give this spiel I've had rolling around in my head... "Welcome, user! You must be new to the Grid. Since our host Castor is unavailable at the moment, I hope you won't mind if I *personally* welcome you to the End of Line Club."
I like this...awesome idea for an intro.
 
So do yall know if the EL tape can be cut??? Or is soldering necessary (Idk how to do this)? I'm kinda alone on making this costume, and want to know what might be the easiest effect (also inexpensive) to make the glow portions??? :/ Help!
 
That looks awesome, ARC! Your boyfriend did a great job with the diffusion method! And your concept looks fantastic! As Dovi said, let us know which club and when, and I'm sure you'll have a few programs wander in...LOL! ;)
 
Hey, all. Can I get any recommendations on where to buy a 12volt inverter? A specific model would be most appreciated. I have an inverter that I suspect is maybe 3v, because my length of wire (20-25ft) lights up dimly.
 
Hey, all. Can I get any recommendations on where to buy a 12volt inverter? A specific model would be most appreciated. I have an inverter that I suspect is maybe 3v, because my length of wire (20-25ft) lights up dimly.
That's a huge amount of EL tape, and a single inverter might not be powerful enough to run it. The inverters are generally rated in terms of how many square inches of tape (or how many linear feet of wire) they can illuminate. Check earlier in this thread for further discussion. LuminousFilm sells many inverters rated for different amounts of tape/wire, and they might have something that works for you.
 
That's a huge amount of EL tape, and a single inverter might not be powerful enough to run it. The inverters are generally rated in terms of how many square inches of tape (or how many linear feet of wire) they can illuminate. Check earlier in this thread for further discussion. LuminousFilm sells many inverters rated for different amounts of tape/wire, and they might have something that works for you.
It's wire, not tape. Specifically, this: High Bright 2.5mm LyTec - BG - BlueGreen
The 25ft is just in case something goes wrong, I have enough contingency wire. Plus, I don't know how much I'll need since I need to outline each 'panel' of the Tron themed jacket I'm trying to put together.
 
Ok... So after doing some research... even though I'd love to afford the EL tape, I'm going to have to resort to EL wire instead (cheaper on coolight.com) ? (If yall know where to buy cheap EL tape instead, please reply)...
Anyways! so being a broke college student, I'm ebaying around and have found some decent pieces for the base, but the wire seems to be the trickiest... Do yall know how to attach the wire to the clothing? sewing? glue? And also, how easy is it to cut the wire so I can use it for multiple sections of the costume? Sorry for all the questions... but I'm really new to EL products and how to make them work. So far, all I have in my shopping cart is the wire, an inverter, a battery holder and a battery tab. I followed the instructions and I'm using about 6 feet, so I got a battery holder that is 2xAA (3vdc) w/ 9v battery post.
Does this look right???
2xAA (3vdc) Batt Holder w/9v battery post
9v Batt Tab
3v **do not connect 9v battery**

Any help on if the wire can be cut, or how to section it off so I can use it on other pieces of the costume, would be appreciated! Thanks everyone! :)
 
Thanks for all the support guys! I'm so excited, you have no idea. He has both the boot pieces finished now and will be putting them in the mail tomorrow so I should get them around Wednesday:
294823_559985897306_69501823_31492060_1912328181_n.jpg

He promises the color is actually cool white, not blue... I guess the camera does weird things to it. Either way it's pretty, I kind of like the blue too.

If you're interested, he posted a video of the completed leg bits, surrounded by what appears to be the materials he used to make them.
VIDEO0012.3gp - YouTube

Also, holy crap you have no idea how much it would make my LIFE if some of you showed up at the club to see this thing. I work at Larry Flynt's Hustler Club in New Orleans, 225 Bourbon St. I work every Friday and Saturday from around 8pm to 3am (and sometimes other combinations of days/times, depending on how poor I am at the time) and I dance under the stage name 'Envy.' I'll be doing the Friday/Saturday thing the weekend of Halloween, not Halloween night itself because I'm throwing a big party Monday night (which you're welcome to crash)... So, if you want to see me in my Tron getup, show up the evening of the 28th or 29th of October. I'm going to start wearing this outfit to work as soon as it's done so I might have it ready a little earlier. I'm going to try to stand in the entryway of the club as much as possible to flag down Tron fans who will appreciate my costume.

Also you guys should totally come in your own Tron outfits so we can geek out together.


More pictures to come as I get more bits finished!
 
so my tron style leather jacket are finished inkl Disc holder.

the disc lighting are broken so that i remove the whole electric and make it new.
the outer ring are powered thru 36 blue smd led.
the inner ring are 12 blue smd led powered thru a arduino nano board (self-programmed) but at the moment broken. the new board are ordered

the power are LiPo 3 cells (3x 3,7V 820mAh) with 11,1V 820mAh akku.

the disc is a rinzler disc with orange rings

at the attachments are the disc with powered outer ring

the jacket with disc are following in the next days
 
Finally had an hour off at home free to work on my helmet, starting to shape up.
IMG_0934.jpg

IMG_0933.jpg

IMG_0932.jpg

IMG_0931.jpg


Working on some frosted plastic for lit bits and getting ready to wet n dry ot smooth, maybe a while til next post due to work & holidays.
 
so my tron style leather jacket are finished inkl Disc holder.

the disc lighting are broken so that i remove the whole electric and make it new.
the outer ring are powered thru 36 blue smd led.
the inner ring are 12 blue smd led powered thru a arduino nano board (self-programmed) but at the moment broken. the new board are ordered

the power are LiPo 3 cells (3x 3,7V 820mAh) with 11,1V 820mAh akku.

the disc is a rinzler disc with orange rings

at the attachments are the disc with powered outer ring


the jacket with disc are following in the next days

Hi there.:)

I was thinking of going that way myself using a NetDuino Mini for the C ring start up sequence and for that battle ready blade flicker from the film. How hard are these things to program for the beginner?:confused I have good soldering skills:thumbsup but not much electronic design experience. I'm not afraid of a challenge though so will give most things a go. Any help that way would be most appreciated.
 
Hi guys, this is a fantastic forum. I found this about a month ago when I was looking for inspiration to build my Tron Legacy costume and I found plenty of it. Thought I would share a few photos of where Im at so far. The costume started off with the thought of keeping the cost down but trial and error lead me to to spend more. I had planned to use only reflective tape, but as you know it only looks good with flash photography, i decided to add some el wire and also Glow laces. I have most of the materials i need, its just taking time to put everything together. I started off with a basic lyra top n pants and then bought a cheap paint ball armor vest. I thought it was important that I had something quite flat n hard to stick the tape and wire onto. Also i can take the vest and off my no problem without the wires to the invertor getting damaged. I stitched some rubber door material onto the fabric to give it armor and used transparent fishing line to attach everything, i used a inside out rubber plunger to attach the tron disc (£3.99 from a comic store sale), i using hockey shin guards for the legs with glow laces on them. Sorry for the long post but just wanted to get some feedback? Also I used glow laces as they dont break and can be used for joints, im still temped to run el wire over my elbows but im worried they will break after a while?
 
Hi there.:)

I was thinking of going that way myself using a NetDuino Mini for the C ring start up sequence and for that battle ready blade flicker from the film. How hard are these things to program for the beginner?:confused I have good soldering skills:thumbsup but not much electronic design experience. I'm not afraid of a challenge though so will give most things a go. Any help that way would be most appreciated.


mmh i dont know the programm interface of the netduino mini because i use only the arduino board. for the arduino is the programm language on webpages and books declared.
the beneficial of the arduino nano board are that it has a usb port to comunicate with the pc, at the netduino mini you must plug a port on it.
the arduino nano board


i have programt that the inner c ring at pushing the button in 0,3 second distance turn on the following smd led and turn it of after 15 second.
when i set the second switch to on the smd led go on licke by the button but stay on until i set the switch off.

and there is the programm

Code:
/////set what is a input or a output

//  digital pins with the smd leds
int led1 = 13;
int led2 = 12;
int led3 = 11;
int led4 = 10;
int led5 = 9;
int led6 = 8;
int led7 = 7;
int led8 = 6;
int led9 = 5;
int led10 = 4;
int led11 = 3;
int led12 = 2;


// pins that are switch
int taster = 14; //button A0
int schalter = 15; // switch/magnetswitch A1
int schalter2 = 18;


// set the pin to input or output
void setup () { 
  pinMode(led1, OUTPUT); // set the pins to output
  pinMode(led2, OUTPUT);
  pinMode(led3, OUTPUT);
  pinMode(led4, OUTPUT);
  pinMode(led5, OUTPUT);
  pinMode(led6, OUTPUT);
  pinMode(led7, OUTPUT);
  pinMode(led8, OUTPUT);
  pinMode(led9, OUTPUT);
  pinMode(led10, OUTPUT);
  pinMode(led11, OUTPUT);
  pinMode(led12, OUTPUT);
  pinMode(taster, INPUT); // set the button to input
  digitalWrite(taster, HIGH); // set the pin to get gnd 
  pinMode(schalter, INPUT);
  digitalWrite(schalter, HIGH); 
  pinMode(schalter2, INPUT);
  digitalWrite(schalter2, HIGH);

}


///// Programm for the button
void loop() {  
  int val = digitalRead(taster);  //defined that the button are watching
  if (val == LOW) { // query if the button are push
    digitalWrite(led1,HIGH); //set the smd led on in a distance of 0,3seconds
    delay(300);
    digitalWrite(led2,HIGH);
    delay(300);
    digitalWrite(led3,HIGH);
    delay(300);
    digitalWrite(led4,HIGH);
    delay(300);
    digitalWrite(led5,HIGH);
    delay(300);
    digitalWrite(led6,HIGH);
    delay(300);
    digitalWrite(led7,HIGH);
    delay(300);
    digitalWrite(led8,HIGH);
    delay(300);
    digitalWrite(led9,HIGH);
    delay(300);
    digitalWrite(led10,HIGH);
    delay(300);
    digitalWrite(led11,HIGH);
    delay(300);
    digitalWrite(led12,HIGH);
    delay(15000);// waiting 15 seconds then set the smd led off
    digitalWrite(led12, LOW);
    delay(300);
    digitalWrite(led11, LOW);
    delay(300);
    digitalWrite(led10, LOW);
    delay(300);
    digitalWrite(led9, LOW);
    delay(300);
    digitalWrite(led8, LOW);
    delay(300);
    digitalWrite(led7, LOW);
    delay(300);
    digitalWrite(led6, LOW);
    delay(300);
    digitalWrite(led5, LOW);
    delay(300);
    digitalWrite(led4, LOW);
    delay(300);
    digitalWrite(led3, LOW);
    delay(300);
    digitalWrite(led2, LOW);
    delay(300);
    digitalWrite(led1, LOW);
    
      } // 


  /////Programm for switch/magnetswitch

  val = digitalRead(schalter);
  if (val == LOW) {
    digitalWrite(led1,HIGH); 
    delay(300);
    digitalWrite(led2,HIGH);
    delay(300);
    digitalWrite(led3,HIGH);
    delay(300);
    digitalWrite(led4,HIGH);
    delay(300);
    digitalWrite(led5,HIGH);
    delay(300);
    digitalWrite(led6,HIGH);
    delay(300);
    digitalWrite(led7,HIGH);
    delay(300);
    digitalWrite(led8,HIGH);
    delay(300);
    digitalWrite(led9,HIGH);
    delay(300);
    digitalWrite(led10,HIGH);
    delay(300);
    digitalWrite(led11,HIGH);
    delay(300);
    digitalWrite(led12,HIGH);

  } 
  else { // say if the switch are off the smd led go out after 10 seconds
    delay(10000);
    digitalWrite(led12, LOW);
    delay(300);
    digitalWrite(led11, LOW);
    delay(300);
    digitalWrite(led10, LOW);
    delay(300);
    digitalWrite(led9, LOW);
    delay(300);
    digitalWrite(led8, LOW);
    delay(300);
    digitalWrite(led7, LOW);
    delay(300);
    digitalWrite(led6, LOW);
    delay(300);
    digitalWrite(led5, LOW);
    delay(300);
    digitalWrite(led4, LOW);
    delay(300);
    digitalWrite(led3, LOW);
    delay(300);
    digitalWrite(led2, LOW);
    delay(300);
    digitalWrite(led1, LOW);
    
    
  }
  
}
 
Thank you for all the questions. Having been doing this for about 4 weeks now I forget to explain some of the details. i have a couple videos I just made (sorry for the poor quality) that give more depth to my process. I think that my videos explains all the questions asked by "thecountofzero" and I will answer them here.

In picture one the base piece is vinyl. The only thing I used the poster board for was as a pattern.

The silver tape is just duct tape. The "lip" on either side are just for space for the tape that is holding the LEDs in place to stick to the vinyl to keep everything in place.

It shows in the video but i did cover the shower curtain with the red tape to give it the red color.

The jacket Im using I got from ROSS. I have un-stitched the seam of the liner so i can place each segment into the jacket without wires hanging everywhere. from there I am going to cut out the same pattern into the jacket and attach each lighted segment to the jacket from the inside of the jacket. I will re sew the liner in (with battery packs running from pockets or the small of the back) and one master switch probably in my pocket. so when I take off my jacket all you see is the normal inside of a jacket and on the outside TRON!!!
Tron Legacy costume - YouTube
TL costume - YouTube

Awesome job dude. And big thanks for posting those videos. They are going to be a huge help.

What gauge speaker wire are you using and have you figured out what battery pack you will end up going with?
 
Hey everyone,

Here's my first run at modifying my fedora with EL Tape. I'll have to adjust the tape and velcro a bit so that the top is a little more flush, but I'm pretty pleased with how the first couple hours of development ended out.

The EL Tape isn't too hard to work with, however I purchased sticky back velcro thinking that would be easier to put into place for sewing to the hat. However, a hand needle will not punch through that stuff easily enough to make it feasible. I may try a machine, but I don't want to damage it. If anything, I'll remove the sticky back from the fedora and purchase some sew-ready velcro. Just fyi for anyone thinking this, if you plan to sew the velcro, check to make sure the needle will pass through it before buying.

Here's the first few pics:

tron fedora pictures by DigitalBabylon - Photobucket

Apologies for the lack of quality photos. My camera is pretty bad, since the brightness of the EL tape is higher than what the pics reveal.
 
mmh i dont know the programm interface of the netduino mini because i use only the arduino board. for the arduino is the programm language on webpages and books declared.
the beneficial of the arduino nano board are that it has a usb port to comunicate with the pc, at the netduino mini you must plug a port on it.
the arduino nano board


i have programt that the inner c ring at pushing the button in 0,3 second distance turn on the following smd led and turn it of after 15 second.
when i set the second switch to on the smd led go on licke by the button but stay on until i set the switch off.

and there is the programm

Code:
/////set what is a input or a output

//  digital pins with the smd leds
int led1 = 13;
int led2 = 12;
int led3 = 11;
int led4 = 10;
int led5 = 9;
int led6 = 8;
int led7 = 7;
int led8 = 6;
int led9 = 5;
int led10 = 4;
int led11 = 3;
int led12 = 2;


// pins that are switch
int taster = 14; //button A0
int schalter = 15; // switch/magnetswitch A1
int schalter2 = 18;


// set the pin to input or output
void setup () { 
  pinMode(led1, OUTPUT); // set the pins to output
  pinMode(led2, OUTPUT);
  pinMode(led3, OUTPUT);
  pinMode(led4, OUTPUT);
  pinMode(led5, OUTPUT);
  pinMode(led6, OUTPUT);
  pinMode(led7, OUTPUT);
  pinMode(led8, OUTPUT);
  pinMode(led9, OUTPUT);
  pinMode(led10, OUTPUT);
  pinMode(led11, OUTPUT);
  pinMode(led12, OUTPUT);
  pinMode(taster, INPUT); // set the button to input
  digitalWrite(taster, HIGH); // set the pin to get gnd 
  pinMode(schalter, INPUT);
  digitalWrite(schalter, HIGH); 
  pinMode(schalter2, INPUT);
  digitalWrite(schalter2, HIGH);

}


///// Programm for the button
void loop() {  
  int val = digitalRead(taster);  //defined that the button are watching
  if (val == LOW) { // query if the button are push
    digitalWrite(led1,HIGH); //set the smd led on in a distance of 0,3seconds
    delay(300);
    digitalWrite(led2,HIGH);
    delay(300);
    digitalWrite(led3,HIGH);
    delay(300);
    digitalWrite(led4,HIGH);
    delay(300);
    digitalWrite(led5,HIGH);
    delay(300);
    digitalWrite(led6,HIGH);
    delay(300);
    digitalWrite(led7,HIGH);
    delay(300);
    digitalWrite(led8,HIGH);
    delay(300);
    digitalWrite(led9,HIGH);
    delay(300);
    digitalWrite(led10,HIGH);
    delay(300);
    digitalWrite(led11,HIGH);
    delay(300);
    digitalWrite(led12,HIGH);
    delay(15000);// waiting 15 seconds then set the smd led off
    digitalWrite(led12, LOW);
    delay(300);
    digitalWrite(led11, LOW);
    delay(300);
    digitalWrite(led10, LOW);
    delay(300);
    digitalWrite(led9, LOW);
    delay(300);
    digitalWrite(led8, LOW);
    delay(300);
    digitalWrite(led7, LOW);
    delay(300);
    digitalWrite(led6, LOW);
    delay(300);
    digitalWrite(led5, LOW);
    delay(300);
    digitalWrite(led4, LOW);
    delay(300);
    digitalWrite(led3, LOW);
    delay(300);
    digitalWrite(led2, LOW);
    delay(300);
    digitalWrite(led1, LOW);
    
      } // 


  /////Programm for switch/magnetswitch

  val = digitalRead(schalter);
  if (val == LOW) {
    digitalWrite(led1,HIGH); 
    delay(300);
    digitalWrite(led2,HIGH);
    delay(300);
    digitalWrite(led3,HIGH);
    delay(300);
    digitalWrite(led4,HIGH);
    delay(300);
    digitalWrite(led5,HIGH);
    delay(300);
    digitalWrite(led6,HIGH);
    delay(300);
    digitalWrite(led7,HIGH);
    delay(300);
    digitalWrite(led8,HIGH);
    delay(300);
    digitalWrite(led9,HIGH);
    delay(300);
    digitalWrite(led10,HIGH);
    delay(300);
    digitalWrite(led11,HIGH);
    delay(300);
    digitalWrite(led12,HIGH);

  } 
  else { // say if the switch are off the smd led go out after 10 seconds
    delay(10000);
    digitalWrite(led12, LOW);
    delay(300);
    digitalWrite(led11, LOW);
    delay(300);
    digitalWrite(led10, LOW);
    delay(300);
    digitalWrite(led9, LOW);
    delay(300);
    digitalWrite(led8, LOW);
    delay(300);
    digitalWrite(led7, LOW);
    delay(300);
    digitalWrite(led6, LOW);
    delay(300);
    digitalWrite(led5, LOW);
    delay(300);
    digitalWrite(led4, LOW);
    delay(300);
    digitalWrite(led3, LOW);
    delay(300);
    digitalWrite(led2, LOW);
    delay(300);
    digitalWrite(led1, LOW);
    
    
  }
  
}

Thank you for that bit of advice and the coding.:)

I'm going to investigate the Arduino mini now instead if it can do the same as the NetDuino mini. It sound like a lot less hastle.
 
This thread is more than 3 years old.

Your message may be considered spam for the following reasons:

  1. This thread hasn't been active in some time. A new post in this thread might not contribute constructively to this discussion after so long.
If you wish to reply despite these issues, check the box below before replying.
Be aware that malicious compliance may result in more severe penalties.
Back
Top