Rather than try to build the "ear" sections I vac formed them. I didn't want to use expensive mold material for such a simple shape, so I used silicone caulk and it worked pretty well. I just had to make sure that the first layer had no bubbles.
Here are the plaster positives in the vac former.
And here they are on either side of the top fin. I think I made them too tall compared to the drawing, but I like they way it looks, so meh.
A closer look. Tons of Bondo, I know. Most of it was sanded off.
Rear view with the upper wings attached.
And finally time to prime it. After spending a few minutes trying to scribe panel lines with the back of an Exacto blade I ordered a scribe tool from Japan. I wish I had that thing in school, it's awesome. Initially I was going to build this with landing gears down, but I liked the way it looked flying so I skipped it.
I added these pinstripe details that may be in the drawing, it's really hard to tell what is going on back there. I thought it had a cool vintage look like a lot of RMQ stuff.
I added some kit parts from a hind for the undercarriage.
I added some more pipes and venting in the part of the drawing you can't see.
White! It looked so bright when I started the body color. White stuff is really hard to take good photos of, no contrast.
The factory showroom paint job. It looked ok, but really needed some weathering to tone it down. I had a really difficult time finding the right yellow in a spray acrylic, so I got as close as I could, but it's not a match.
The empty cockpit and some pastel weathering.
For the little Sculpey pilot I used the razor style uniform for a model, I'm not a huge fan of the old suede uniforms and king tut helmets. I went for the airbus style joystick just to do something different.
The dash lights on. I wish I had taken a better picture of this where it didn't look so bright, but the canopy is on now.
Building the canopy was the hardest part. I did three tries and I am still not satisfied with the result but I am really, really tired of making little canopies.
I tried to take this shot from the same angle as the drawing. The proportions are a little off, but I am pretty happy with it.
It is dark in space, you would need headlights.
The underside after weathering. I thought I went overboard, but in the photos it still looks pretty clean. I didn't do any paint chipping because it's a concept, but it really needed a little dirt in the nooks and crannies.
The engines turned on. I think the way the inside of the thrusters turned out was may favorite part. It's also the part that I could take the most creative license with, so it was a lot of fun.
I hid the battery cover between the thrusters. Its a really tight fit, but looking at it on you can't really tell it is a separate piece. I'll probably do some more detailing and spruce up the base eventually, but this thing has already eaten a big chunk of time and I think we need some time apart.
 While doing research for work I found this awesome Ralph McQuarrie sketch of a concept for the colonial viper from Battlestar Galactica. I really liked the look, like a Volvo space superiority fighter. After seeing this guy's amazing concept raider I thought I would try to make a concept viper. This is my first posted scratchbuild, so be gentle.
 I did this much less good sketch to try to figure out how the back would go. I couldn't really come up with a good square thruster. It just wouldn't work, so I had to translate them to something round. There was only the one sketch from the front, so I looked to the rebel Y-Wing bomber from Star Wars, which was a Joe Johnston joint I believe. The Y-Wing has a lot in common with this concept sketch though, so there you go.
 For consistent scale I started with the cockpit. I am using a bucket seat from a 1/24th car kit. the final kit should be about 14 inches then. I have had this crackerjack toy I have been sitting on for like 10 years that will make a bitchin' dradis screen.
 The basic skeleton. It's going to be fully lit, so I have to plan all that out before I really go nuts.
 Wiring is done. I decided the high output led in the cockpit was bright enough without using fiber optics. The bending I would have had to do would have made it a waste of time anyway. I also test fit the engines. I think the thruster bells need to get shorter.
 The thrusters were built from a glue stick, ho scale car siding, led diffusers from my wife's lab, and tomcat engine caps sanded down until they were transparent.
 Here's an assembled shot. Sorry so blurry, but I need to get a decent macro lens. The studio vipers used a much cooler light, and I think I may go that way.
 A shot of the front greeblies. The sketch doesn't really show what is going on to well, but I think it's a pretty good match. Space is dark, you would need headlights.
 A test fit of the top stabilizer. I may rebuild this later. I also mocked up the canopy, which will be built from flat stock and clear styrene. The original cockpit dimensions looked cool, but were totally unrealistic. The canopy was just too short for a pilot, so I stretched it out a bit. This required that I lay the angle of the stabilizer back to match. I think it looks a little more predatory this way.
 Building the hood. The model store I shop at hasn't re-ordered anything since 1982 so I had to build the vent from scratch. Hard work that looks like crap anyway.
 Here's a wider shot showing the hood vents and details. I used so much filler I could have just whittled this thing from Bondo and saved myself some time. More to come.
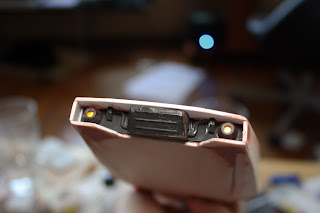
") I definitely love this design
I definitely love this design