Showoff: Geordi's Optical Visor

silverskyes402

Sr Member
RPF PREMIUM MEMBER
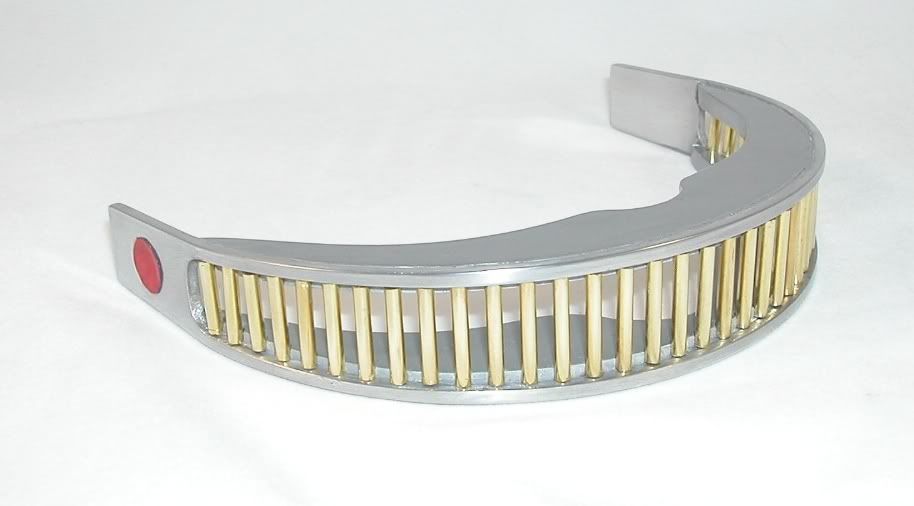
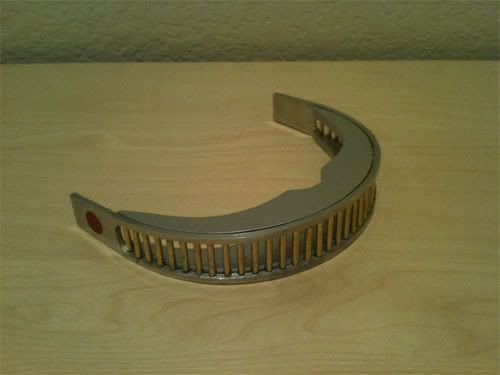
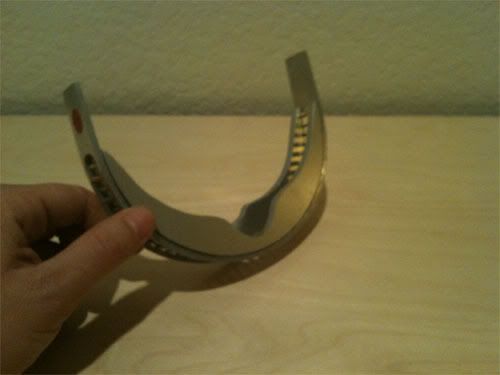
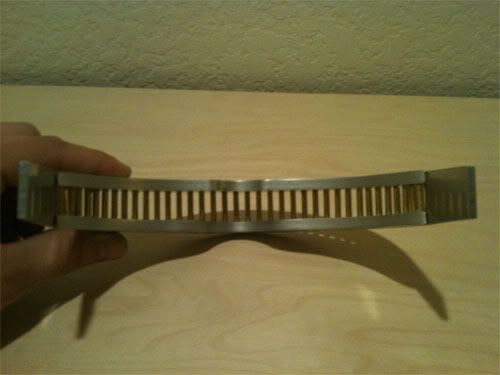
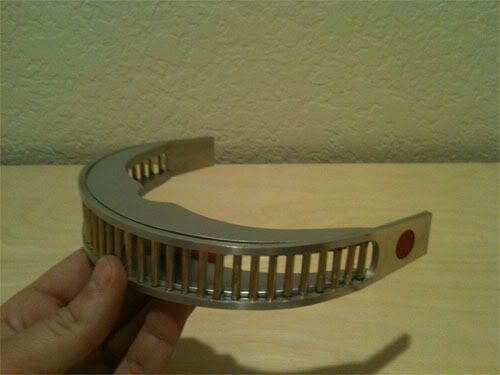
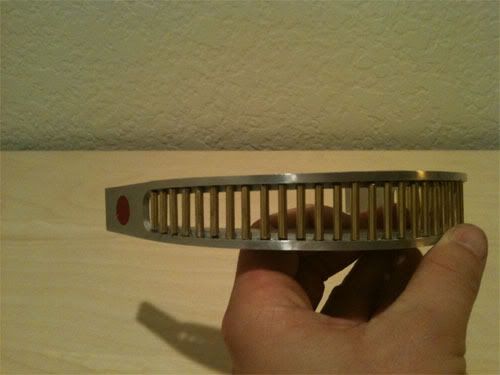
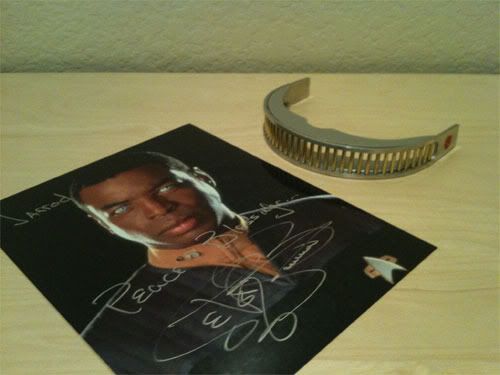
So I finished Droidboy's visor kit that I got acouple days ago and am very pleased with the outcome, he did a incredible job on this kit and cant say enough good things! The kit has been polished and painted and think it looks pretty good. Building this kit is kinda time consuming, but the main part to watch out for is cutting the brass rods, the brass is soft and if you dont take your time you can screw it up, I was just glad there were alittle extra included. I plan on poishing the rods up again one more time, but other than that the piece is finished, hope you like it! Sorry for the crappy pics :)

IMG_2239.jpg


IMG_2237.jpg


IMG_2236.jpg


IMG_2235.jpg


IMG_2234.jpg


IMG_2233.jpg
 
Last edited:
Looks great!! What kind of glue did you use to attach the upper and lower parts to the metal?
 
Thanks, I used just a plain 2 part apoxy, I was thinking of using jb weld for a better hold to the metal frame, but the epoxy worked great
 
Glad you're happy with it. I can't wait to get home and be able to look at the pics....danged filters.

Gregg
 
How did you go about trimming the brass? I wanted to start on mine, but I wasn't sure how to trim them to the right size because the visor isn't the same height all around... and I didn't want to waste any material.
Thanks~
 
I apoxy's the top and bottom section in place, make sure you get the groves on the inside to allign perfect, after that set and I was able to handle it, I started form the middle and measured to each side, taking the measurements down, then I took the brass rods, held them up to my ruler and on each measurement took a pair of wire cutters and scored where they needed to be cut, then took my dremel with a cut off bit and started cutting, after they were all cut sanded down the bottoms them polished again and glued em in place, thats the time consuming part of the project
 
When I do mine I use a pair of snips to cut them as close to size as possible, and then use the flat side of a fiberglass cut off wheel on my dremel to grind it to size. It's time consuming but it works.

Oh...keep some water handy to cool the brass.

Gregg
 
Any tips on gluing the plastic parts to the metal? Mine don't fit exactly (little gaps here and there) and I'm afraid if I use vice grips or clamps or something similar it will damage the plastic.
 
I'm working on three of them right now, and I've found that they all have subtle variations. When I glued them together I used E3000 which is like goop and used clamps to pull them flush to the metal. On the first one I did I still had a small gap here and there, so I went back, filled it with Bondo, cleaned it up and repainted it. It took a little more time, but was worth it to me.

Gregg
 
I got mine built too! Woohoo!

At first, I was off to a very rocky start, because of some poorly thought out painting and gluing choices. Wound up striping off all the paint and starting over. I glued one plastic piece to the faceplate with 5 min epoxy and clamped it. It held fine, so I did the second piece the same way, but only after first installing the center brass rod, to confirm that both top and bottom pieces would line up straight. Used a bit of white putty to fill some small gaps, sanded, and masked off all the aluminum. Sprayed with Tamiya primer, Gloss Aluminum, and Pearl Clear. (Tamiya sure makes nice paints!) Then the brass rods. Polished them up and started installing from the center out (easier to make a piece shorter if it's too long, than the other way around.) Measured each gap with a caliper, then cut each brass piece to that exact length with a dremel cut-off wheel. Minor adjustments made by grinding with the flat surface of the cutoff wheel. Glued each one in with CA gel. Polished it up a bit, installed the connector tabs, and that's it - one Visual Instrument and Sensory Organ Replacement (VISOR), ready to wear.

StarTrekTNGGeordiLaForgeVISOR-rkp.jpg
 
I got my very own Droidboy model VISOR kit in the mail and started working away! I am especially pleased with the precision. As you can see, I have rigged up a station for holding it in place while the E6000 sets to hold the plates in. I have toothpicks in the slots to make sure things are straight, and used zip ties to squeeze the ends together.

Because of the shape of the plates, I've had to hold one at a time. I let the first plate cure overnight and it seems to hold well, so now this second plate will set up today while I'm at work. Tonight, cutting the brass!ImageUploadedByTapatalk1392211370.846804.jpgImageUploadedByTapatalk1392211406.621329.jpgImageUploadedByTapatalk1392211442.397547.jpgImageUploadedByTapatalk1392211456.803081.jpgImageUploadedByTapatalk1392211476.847048.jpgImageUploadedByTapatalk1392211499.319165.jpg
 
Here it is folks, my finished Droidboy VISOR. ImageUploadedByTapatalk1392596987.487249.jpgImageUploadedByTapatalk1392596995.427847.jpgImageUploadedByTapatalk1392597003.339648.jpg

I used some furniture gripping pads on the inside to act as a barrier between the metal and my face. I've been wearing it for a while without discomfort.

At a point, I thought I was going to be short on brass, but it just barely worked. I would have probably had excess if I had measured and cut more precisely. I used some steel wool to polish it up and even the edges of the plates with the metal. The nose bridge may get some added padding for grip and comfort.

A note of safety. Wear eye protection! I cut the brass with a Dremel, and very little compares to molten shards of brass flying at your face. And of course, measure twice, cut once.

This is a really great model, Droidboy nailed it. If you are on the fence about getting one, his price is reasonable and he's really great with keeping in touch.

Thanks! Here's some more without my mug in them. You can see my padding and sloppy brass work (which is only visible up close). I think I did well considering my minimal prop making experience. ImageUploadedByTapatalk1392597490.147003.jpgImageUploadedByTapatalk1392597496.792706.jpgImageUploadedByTapatalk1392597504.525494.jpg
 
This thread is more than 10 years old.

Your message may be considered spam for the following reasons:

  1. This thread hasn't been active in some time. A new post in this thread might not contribute constructively to this discussion after so long.
If you wish to reply despite these issues, check the box below before replying.
Be aware that malicious compliance may result in more severe penalties.
Back
Top