First Ever Official RPF Group Build - IT HAS BEGUN...

Man Fred, you build quick! That X-15 is MOST Impressive! I'm still stuck with my Moonraker build, slogging away at it. There is light at the end of the tunnel though, so hopefully I'll be getting to my GB entry soon.

As for the Revell kit being done in orange, at the time they were trying to strike a happy medium between selling kits to adults and kids (when more kids built models anyway). That is the reason for the day glo orange as their thinking was a kid wouldn't have to paint much if they still wanted an orange ship (adults with more skills could paint away of course). The kit is not bad either as I picked one up recently to give me ideas for my Pegasus 1/18 model.

So Fred, I take it you are starting a 1/144 shuttle here pretty soon? ;)
 
Well I finally got some work done on mine yesterday...

IMG_0181.jpg


I do see what you mean about refrence vs. kit directions though...

1) Where does Revell get the idea that the engine of this thing should be Gunmetal? I'll probably just stick a coat of Al on there...

2) So for the fuel tanks (of which its really hard to find pictures), it says to paint the front part a Bright Al, and the rest a Flat Al. But when I was in class today, flipping though one of my textbooks, I came across a pic of the 66671 with fuel tanks (!), and the shiny parts are in back with the sandblasted parts in front. What the deuce!?

3) This kit comes with 2 sets of accessories, one to do the Black version, and one to do a later White version. This includes decals and a SCRAMJET, but it also means the canopy is set up for the White version (with the Port window sealed). Yeah, I could cut it out, but there is no extra clear window piece, and I can't find proof either way if the Black 66671 ever had that window sealed. Gyyah...

So basically what I've figured out is that I need to do 3 of these... One in Flight mode in Black, one in White and one Ground Black (without fuel tanks). Though I don't know about the fuel tanks now... I was going to do them, but most of the pics I'm finding are without them, plus when I filled the seam, my sanding tore apart the panel lines. (I need to pick up some 500-600 grit sandpaper... oops)
 
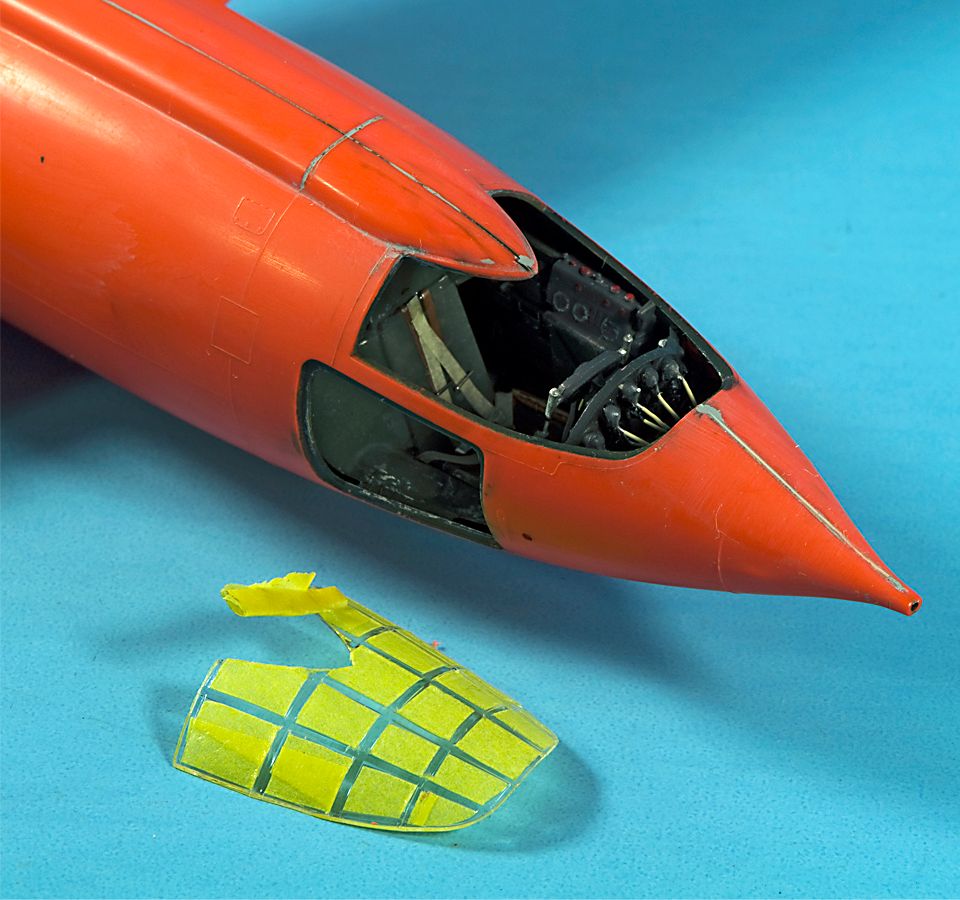
Rob, on the pegasus kits, are the canopy frames raised? They're raised on the revel kit and what I did, ever so slowly, was to take a 1/2" wide strip of tamiya masking tape and burnish it down overa section of the canopy. Then used a new #11 blade and beveled it into the corner between the frame and the glass and ran it along the edge. The hardest part is making sure your corners meet, so that when you pull the tape off the frame, the tape stays on the window. Otherwise, you end up remasking individual panes of glass - go ahead and ask me how I know :angry :lol. I had to do that 3 times to get full coverage. Even using 3/4" tape would have taken 2 passes and it probably wouldn't have turned out as well (and "turned out as well" is a very relative term, :lol). I'll post a pic tomorrow of the masked canopy before painting. And of the new details in the pit.


Thank you, Jay. I can't fathom why I'm building as quickly as I am for this GB. I usually go a lot slower. But I'm definitely looking forward to the lifting body collection.

I can see placating kids with the already orange finish, but any adult modeler is going to have to repaint the exterior anyway, once they're done cleaning up all the seams. Just wish the orange wasn't so hard to cover. I lost a lot of detail just trying to hide that dang orange color in the pit. One orange sprue and one neutral grey sprue would improve this kit 10 fold.

And yes, you guessed it, there will be a full 1/144 stack to finish off this group build. A bottle of international ornage is all that stands between me and the beginning of that monster.


Liz, be prepared to be confused. I do have proof that good ol' 71 did wear that eyepatch on at least one flight, possibly 2, while dressed in black. It wasn't always there, as they seemed to swap out canopies all the time. Pick up (or borrow) a copy of Supersonic: History of the X-15. I don't know if libraries would stock a book like this, but it's definitely worth checking out. The biggest problem is that the 15 was reconfigured for almost every flight, so you never know what's correct. Personally, I like the int. orange/white tank color. If the Special Hobby kit had come with them, that's the color I'd have gone with. But then again, I would have liked the option to add the scramjet or even the parking dolly :lol.

In your pic, what's that assembly above the external tank (to the right of the pilot)? I don't recognize the structure. And having built the one I did, I'm surprised, because, thanks to all the tech diagrams I've scoured over, I can almost build a working, full scale X-15, now :lol.

-Fred
 
The silver thing is the dolly w/o wheels. While I haven't decided for sure yet, I'm leaning toward building this this as flying condition (so landing gear up, no dolly), but I figured I'd paint up the parts and put them together anyways as practice.

I have a 1/72 X-1 Cutaway at home (that I've been wanting to do forever, but do it well). Its cast in orange too, but only the fuse (and then there is a second set in clear for the cutaway), the rest of the pieces are in gray.
 
One thing you can do for the X-15A-2 if you want to represent it with two cockpit windows is to grind open the window on the eyelet part and then use some Micro Krystal Klear to make a new window. It is a white glue type mixture that you can use to stretch over the opening like a soap bubble. When it dries, it looks like a nice plastic window. In fact, use it over the normal window opening and it probably will look better then the thick plastic part.
 
The silver thing is the dolly w/o wheels. While I haven't decided for sure yet, I'm leaning toward building this this as flying condition (so landing gear up, no dolly), but I figured I'd paint up the parts and put them together anyways as practice.

I have a 1/72 X-1 Cutaway at home (that I've been wanting to do forever, but do it well). Its cast in orange too, but only the fuse (and then there is a second set in clear for the cutaway), the rest of the pieces are in gray.

Ahh, no wonder I didn't recognize that assembly. SH didn't bother to include it in the kit I built. They have another kit that's like one number different (I think I built 32022 and the kit with the dolly is 32021).

So that 1/72 cutaway is a commercially available kit, then? I saw a build up of one on another site and thought it was a custom job. I was all impressed with the engine detail and the ability to vacform a clear side. Guess I shouldn't be all that impressed :lol


One thing you can do for the X-15A-2 if you want to represent it with two cockpit windows is to grind open the window on the eyelet part and then use some Micro Krystal Klear to make a new window. It is a white glue type mixture that you can use to stretch over the opening like a soap bubble. When it dries, it looks like a nice plastic window. In fact, use it over the normal window opening and it probably will look better then the thick plastic part.


Does that Krystal stuff really work? I've read of hit and miss experiences. Some people love it and some people can't get it to work at all. How large of an opening can it be used on?

Another option is to use a piece of plastic, like the bubble from an action figure. Dip it in Future to improve the clarity and then trim it to size. Should work quite well.

-Fred
 
I think my Cutaway is a Tamiya kit. Got it at Smithsonian when I went there in 8th grade, so I dunno how available they are now.

Vaccing in clear isn't that hard though, provided you have a good mold.
 
It works, I've used it. Admittedly it tends to work best on smaller windows, but I've been able to get it to work on a window almost 1/4" long with a couple tries.

As for the Tamiya X-1, I think they are discontinued now, but they were available up until about 18 months ago. The current versions are just molded in gray plastic with the clear side though, not orange. Hobbycraft Canada also copied the kit and issued it themselves, albeit without the clear side piece.
 
A few days later than promised, but here it is, nonetheless

WIP4.jpg


I've added wiring to the backside of the IP, made new seatbelts from masking tape and masked the canopy. I wish there were still readily available masks for this kit. But, it is 23 years old, so I guess I shouldn't expect too much.

-Fred
 
Ouch that looks painful! I'm definitely going with one direction first, then the other! And did I answer? Yes - I believe the frame is raised on the 1:18.

I have not done wiring behind the IP, but it looks great. I may have to add that!
 
Well, the decals were so old that they shattered. I've got no other resources since the only AM company that made decals went out of business and nobody has any NOS. Nothing on ebay, either.

If anyone has any suggestions, I'm all ears.

-Fred
 
That would be great, Jock.

If you could scan them at the highest res your scanner can handle, that would be greatly appreciated.

I'll PM you with my email address.

Now, I just need to find where to get white decal paper.

Thanks,
Fred
 
I'll scan the 1/32 as well as the 1/18. Looks like the 1/32 is 4 gigs at 9600 res. I can send unlimited, can you accept unlimited size emails?
 
Shoot, I have white decal paper... but I wont be able to get to it 'till im home, otherwise I'd send you a sheet.

I appreciate the offer, Liz :cool. I found a Testors' decal system at Towerhobbies.com for $8. It has the software, the bonder spray and a few sheets of clear and white.


I'll scan the 1/32 as well as the 1/18. Looks like the 1/32 is 4 gigs at 9600 res. I can send unlimited, can you accept unlimited size emails?

Thanks, Jock. My hotmail account should be able to accept it. I know I can send a max of 20gb.

I really appreciate it.


When the decal shattered, it ended up goofing up the paint, so I had to strip part of that back as well. So I can finish painting while waiting for the decal paper to show up. And I was really hoping to have this finished by today :cry.

-Fred
 
Ok, so she's been repainted and thanks to Jock, I have new decals (mostly). I'll post pics of the new paint job, tonight or tomorrow.

I took Jock's hi-res scan of the 1/18 decals and my scan of the remaining decals from my sheet and made sure they sized up correctly. Then, in photoshop CS3, I cleaned and sharpened the decals (stupid decals are always out of register) added the missing red line from the national insignia and fixed all the colors. The hi-res scan made it a breeze to rebuild the old BELL Aircraft logo that was faded on my sheet. If anyone needs, I seperated the decals to be printed on both white background and clear background decal sheets. These will work directly for 1/32 and can be scaled down for 1/48 and 1/72 (though you'll need to figure out the ratios for scaling, 'cause I'm all :confused when it comes to that :lol)

Now I'm just waiting for towerhobbies to ship the decal paper.

-Fred
 
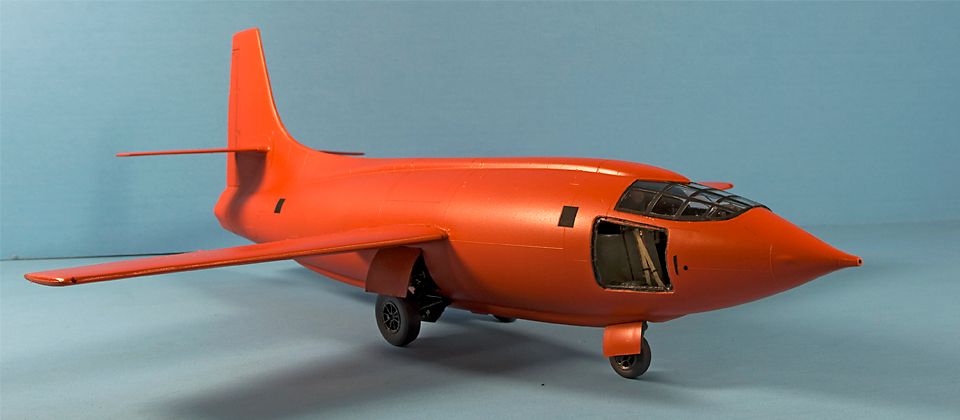
Ok, now that my PC has stopped being a jerk, here are the photos I've been trying to post since last night

painted.jpg


painted2.jpg


It's Model Master International Orange acrylic. The black squares, even though they give you decals for them, are painted on, using Tamiya XF-1 black.


Tonight, I attempt to make the decals. My next post will either be very happy or very angry :lol

-Fred
 
This thread is more than 7 years old.

Your message may be considered spam for the following reasons:

  1. This thread hasn't been active in some time. A new post in this thread might not contribute constructively to this discussion after so long.
If you wish to reply despite these issues, check the box below before replying.
Be aware that malicious compliance may result in more severe penalties.
Back
Top