Two-Thirds Scale 33 inch TOS Enterprise

Shaw

Well-Known Member
This is my second attempt at a two-thirds scale version of the 33 inch Enterprise. As such it is most likely best to start out with a brief history of the first attempt before going over the second attempt.

First Attempt
I had always loved the 33 inch model of the Enterprise, even before I was aware that it differed greatly from the 11 foot model, I had always wanted my finished models of the Enterprise to look (feel) like the model we saw sitting on the table in Requiem for Methuselah. While both of my last two models of the Enterprise (both AMT kits, a 1992 rebuild and 1994 build) were quite nice, they fell short on that feel that I had wanted.

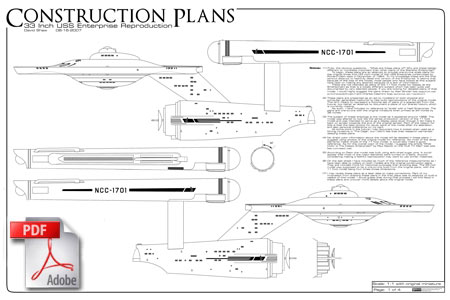
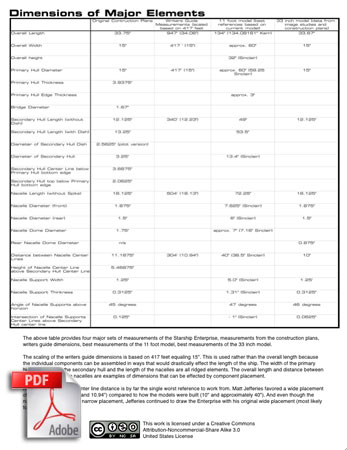
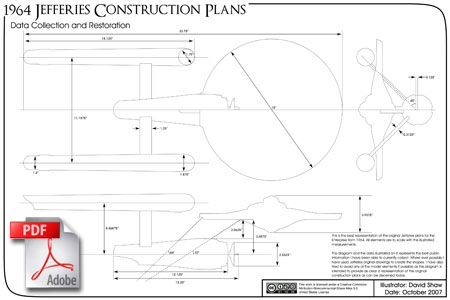
Fast forward to 2007 when a number of people were inquiring about aspects of the 33 inch model for their own attempts. People were collecting data but it was generally thought that a set of plans wouldn't be possible without access to the original model (which had been lost), and there seemed to be very few photos of it remaining. Between the photos and some key dimensions of the model I realized that I could reverse engineer plans and had finished a set by the end of that summer.

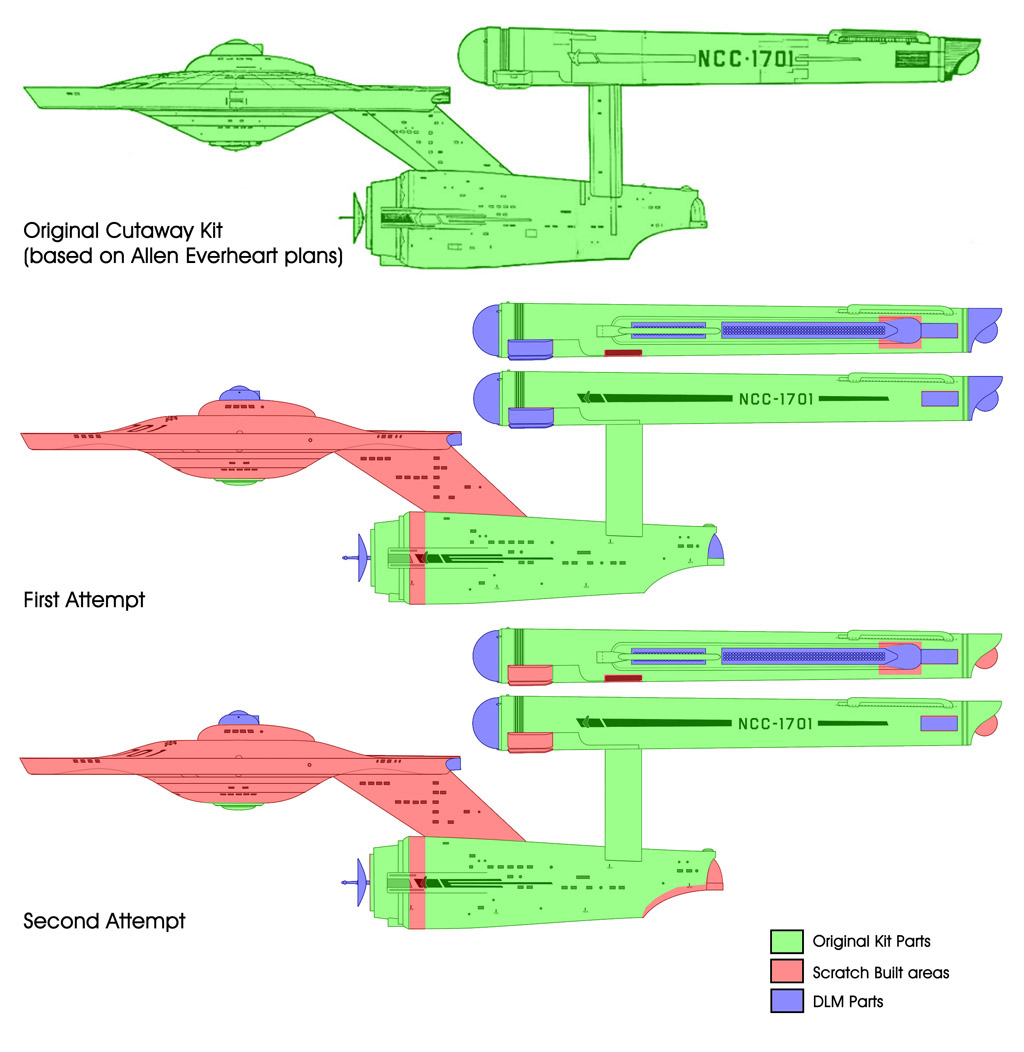
Honestly, I didn't believe I had the skills to do the build myself and hoped that someone with more talent than I would use the plans for an attempt. On an off chance I printed out a copy of those plans at 66.6% and compared them with a cutaway Enterprise kit that I had sitting around. There was enough resemblance between the overall shape of the secondary hull and nacelles that I figured it my be a good starting point for a modest attempt.

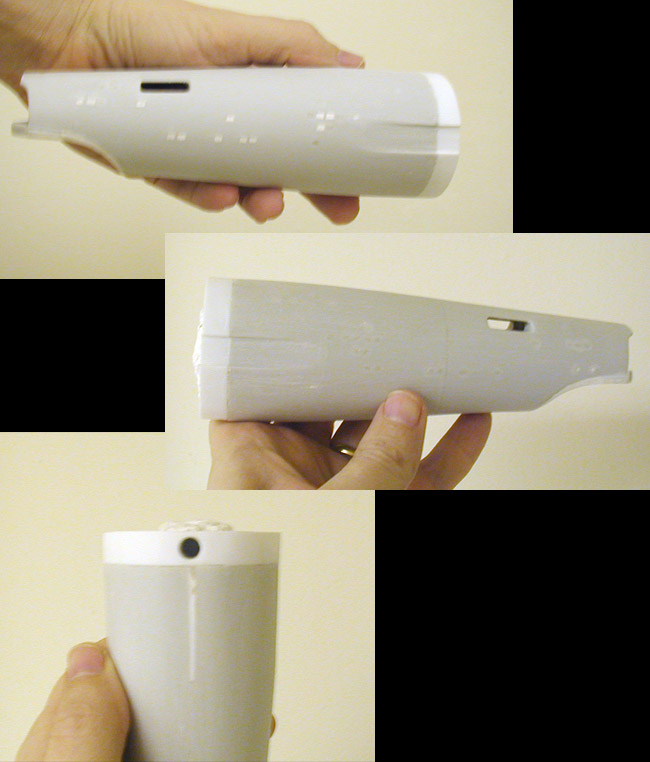
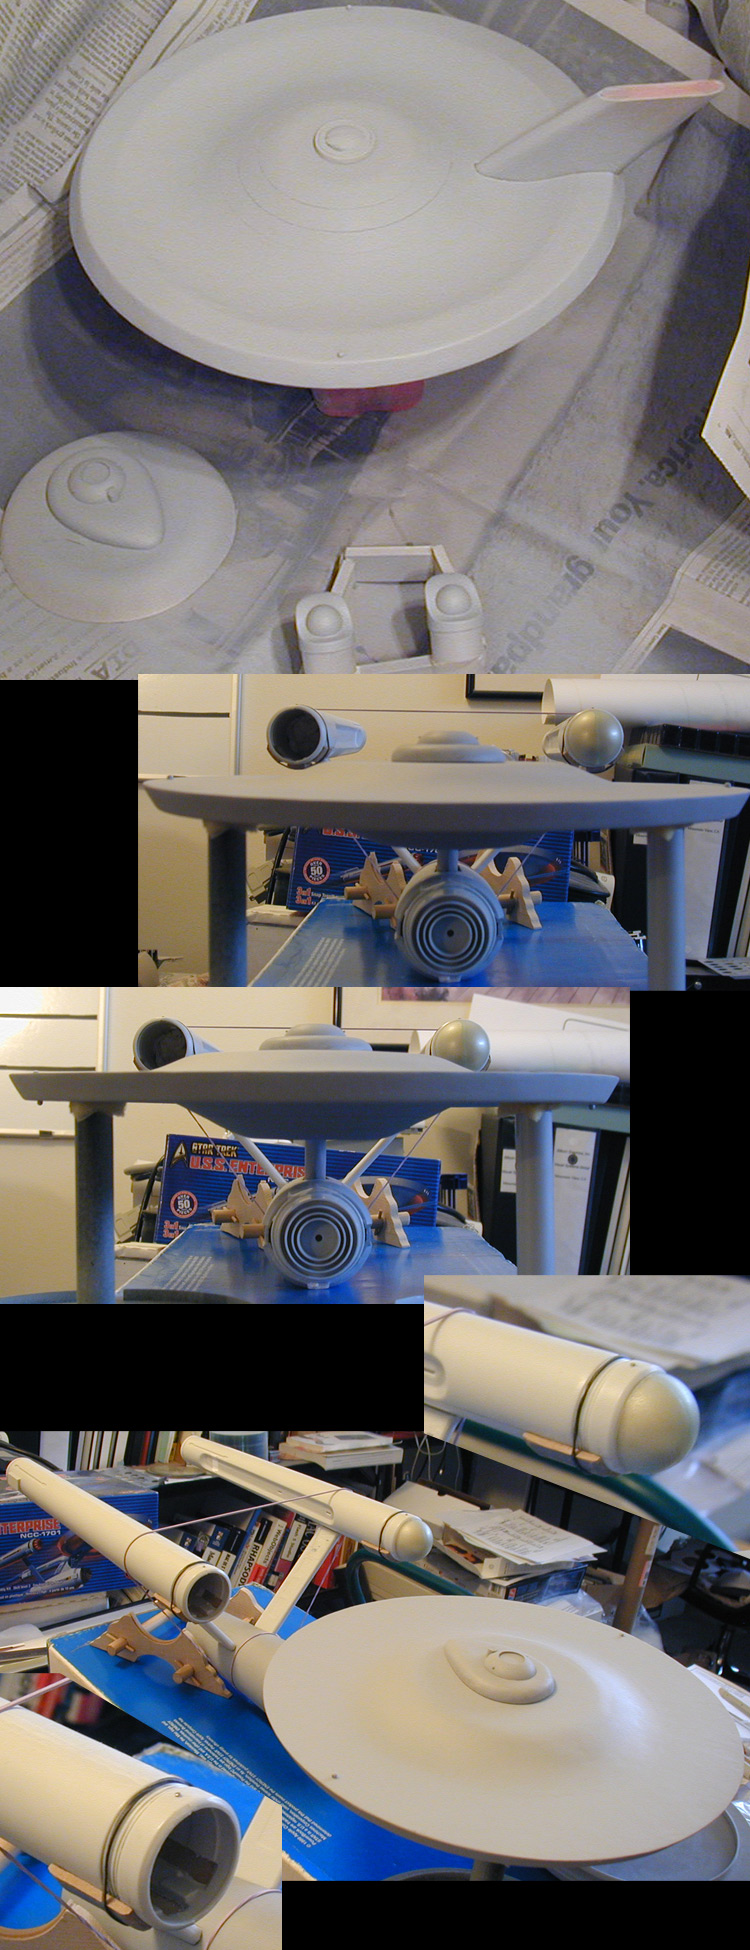
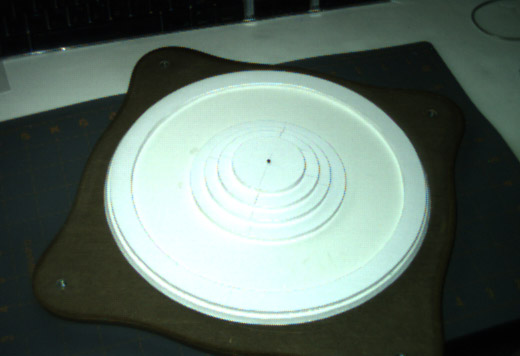
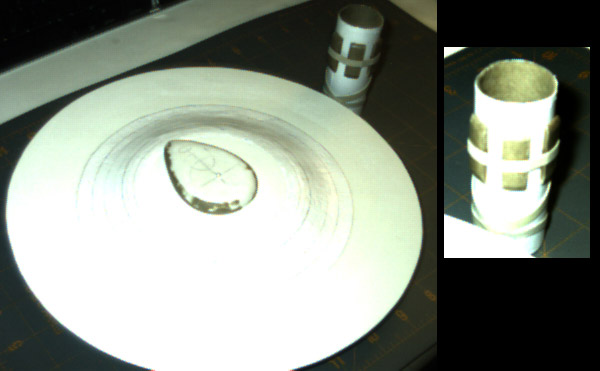
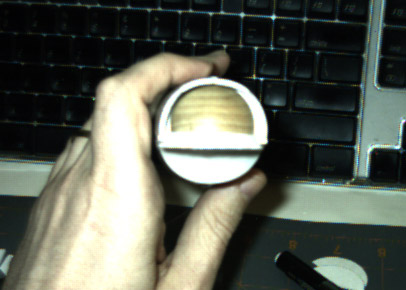
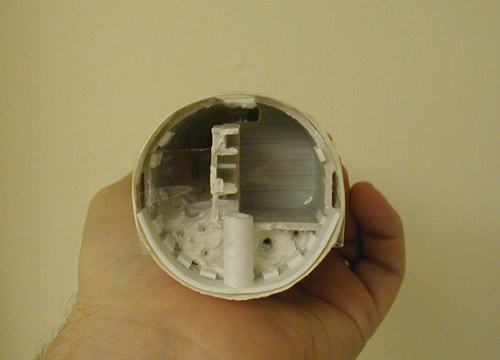
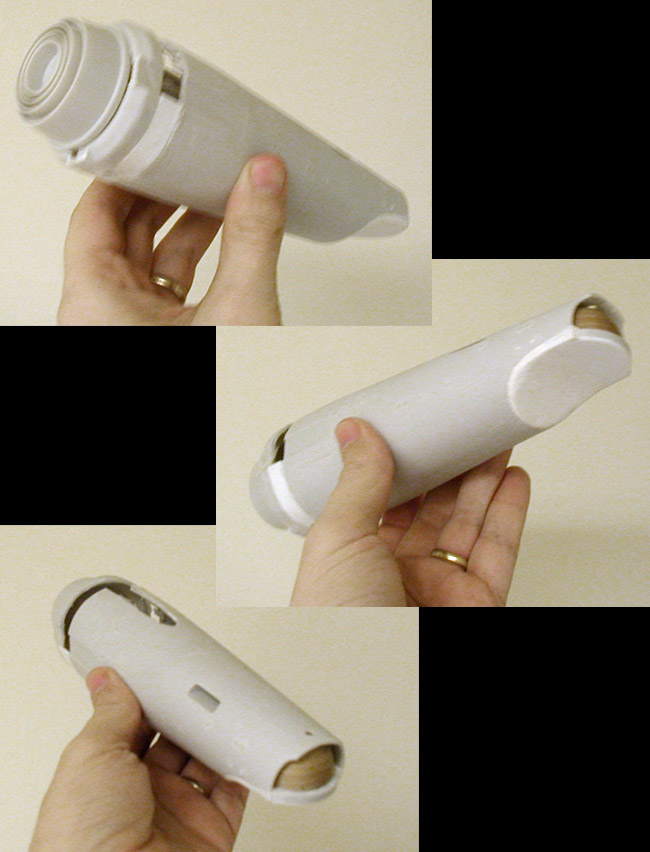
Worried about my lack of recent experience I bought a second kit for backup parts before I started disassembling the parts I needed from the first one (just in case I really screwed up). But throughout all that I had no idea how I was going to fabricate the dorsal and primary hull (both of which I would need to scratch build). As the kit parts started coming together I still needed to do test assemblies to see if I was on the right track, so I built foamcore board stand-ins for the dorsal and primary hull. After I finished what I could at the time, I set aside everything until I could figure out how I was going to make the most important aspects of the model.

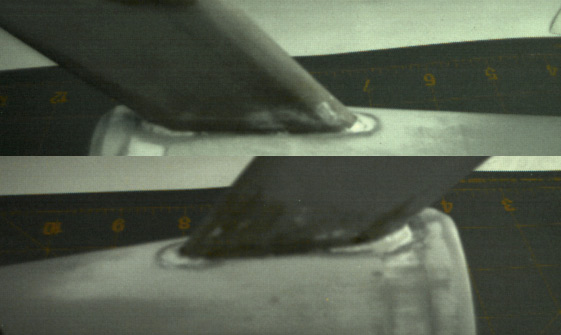
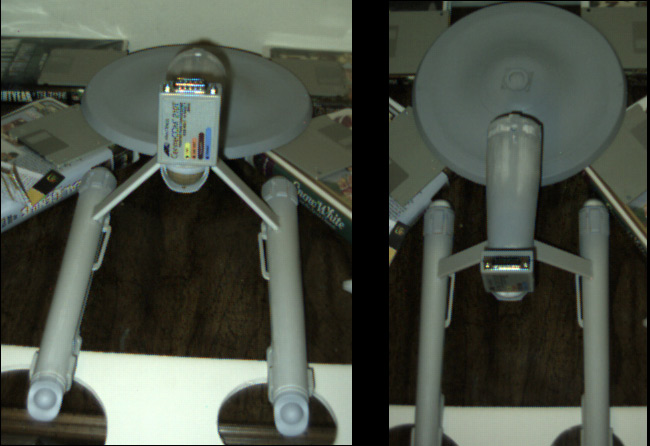
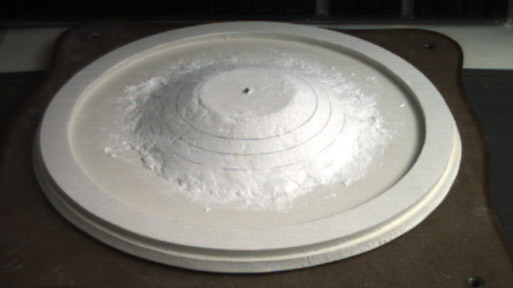
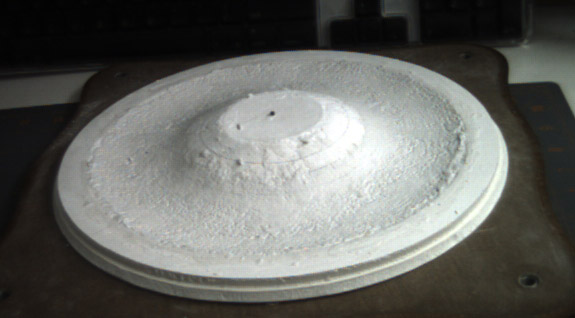
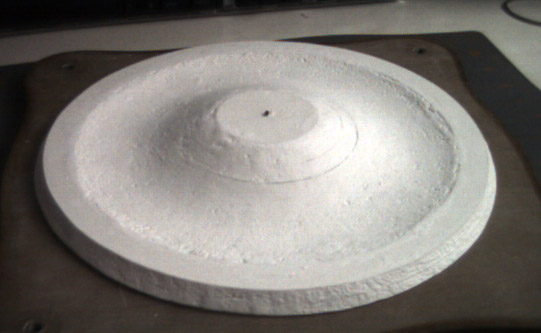
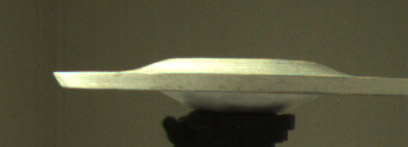
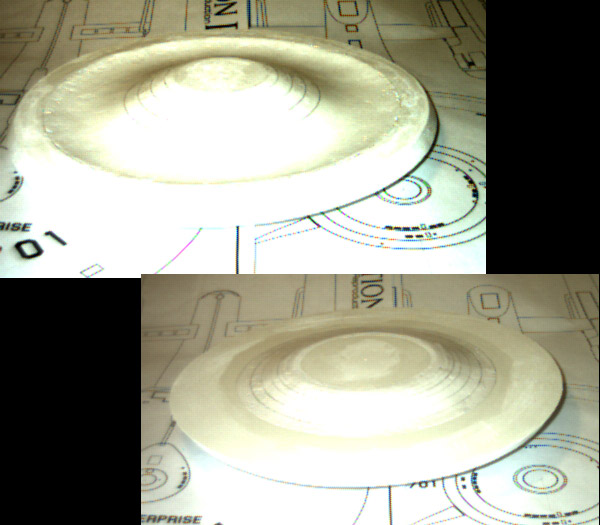
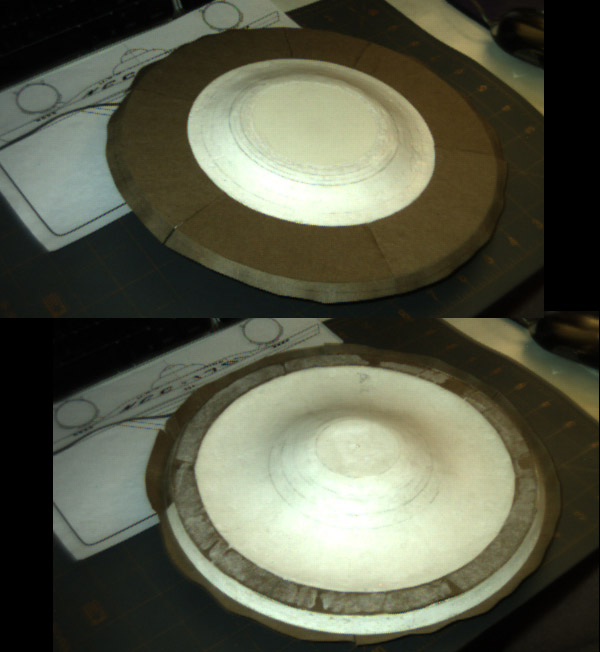
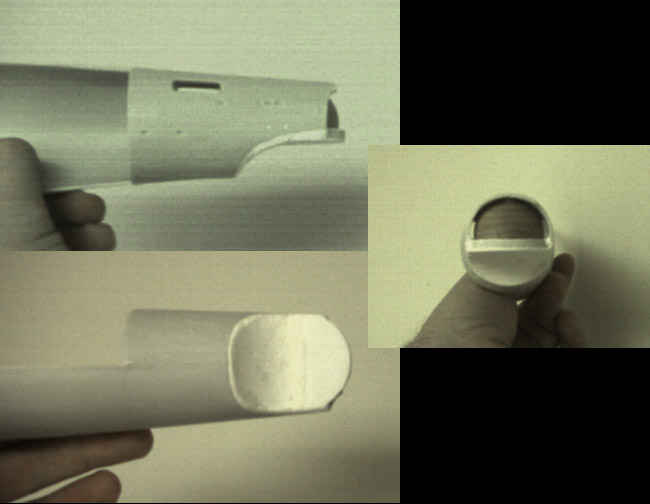
After more than a year, I couldn't come up with a cost effective way (I have no disposable income) to make those parts. So I decided to try hand sculpting them starting with the stand-in pieces I had made. I filled the stair steps of them with AMACO Sculptamold (a cellulose-based paper maché) and molded them to the approximate shapes.

This was a learning experience for me and one of the things I had learned was that over time the Sculptamold becomes harder. I had originally believe that I would be able to easily reduce the material to the final shape (even if I walked away from it for a period of time). It took months of fighting the Sculptamold to get the shapes to a reasonable copy of the original model. The top turned out pretty good, the bottom wasn't as good as I had hoped.

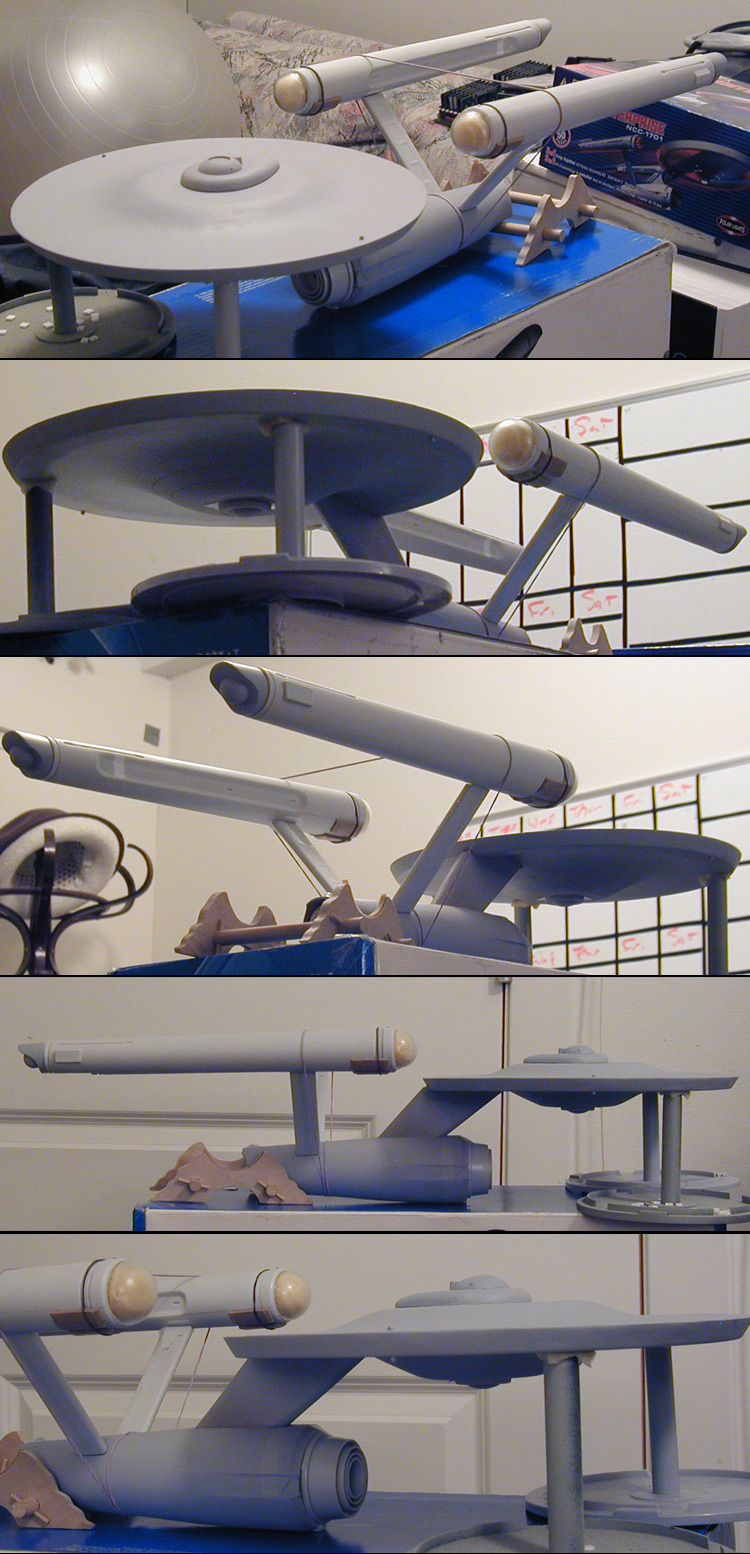
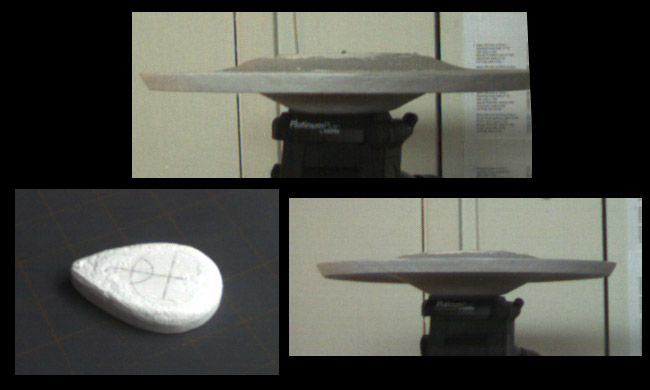
Still, even unfinished during test assemblies, I could see that this was far closer in over all feel than any of my previous models. So I was inspired to forge ahead even with those set backs.

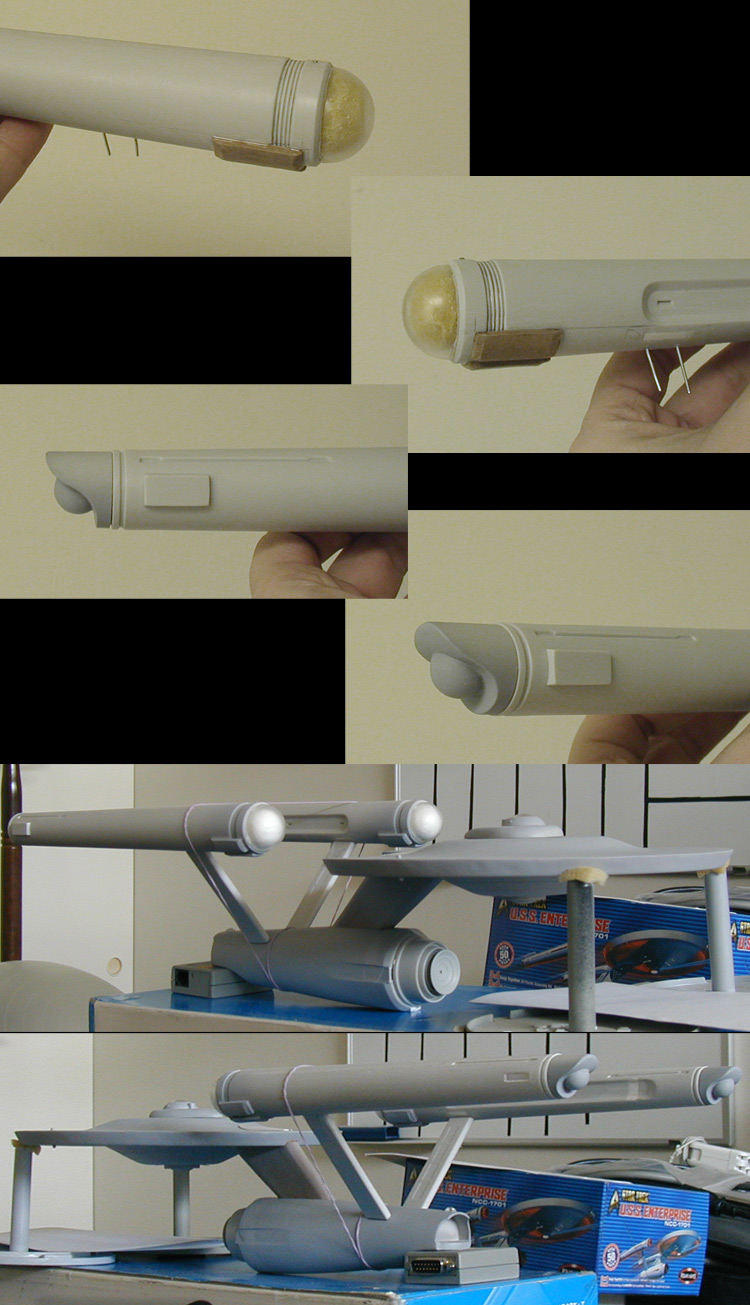
Because this model was more than I had previously attempted and hadn't done anything in nearly 15 years, I decided to reduce the load on myself by using third party parts from Don's Light & Magic. I knew these were intended for a replica of the 11 foot model and wouldn't be a perfect match for the 33 inch model, but back when I started I was worried about even finishing and was looking for anything that would make the task less daunting.

In the end I was quite happy with the results (specially given my inexperience), and I find the model to be... a surprise each time it catches my eye (which is more than I could have asked for).

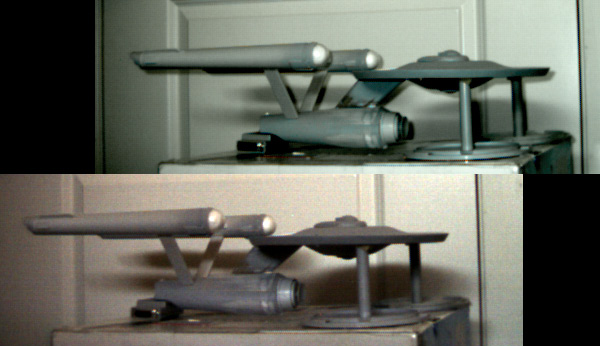
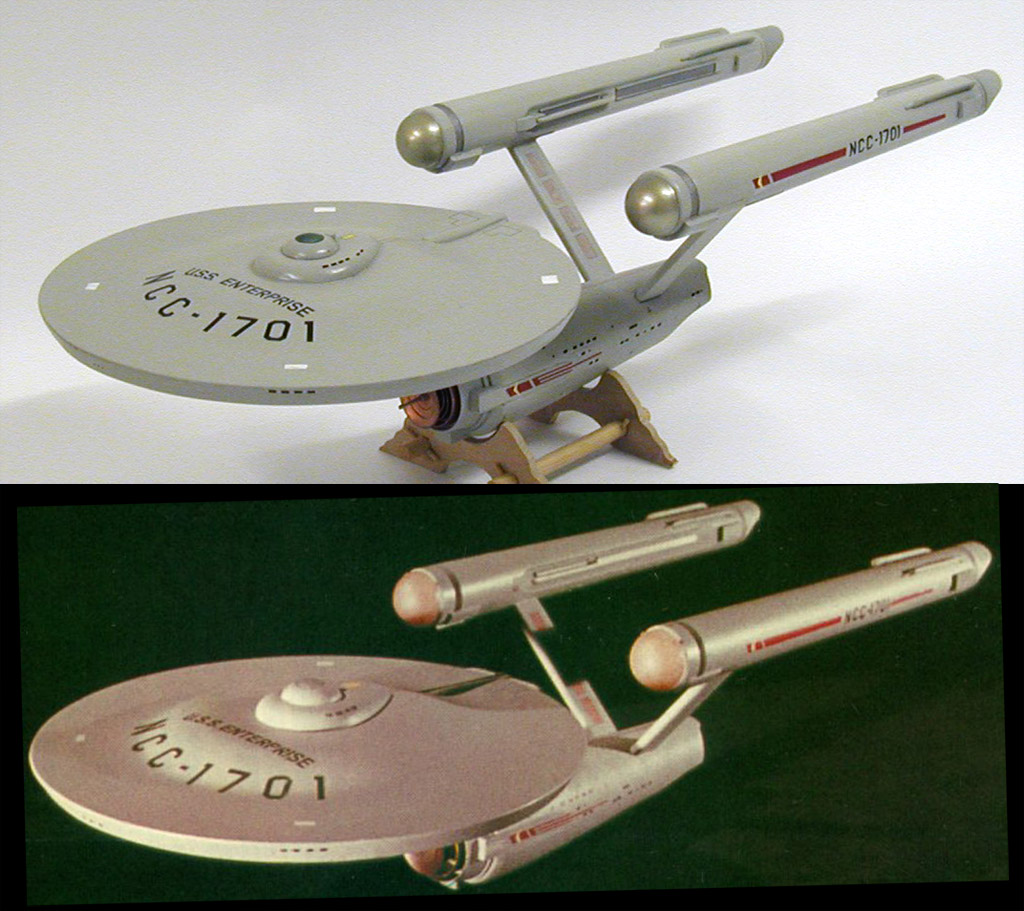
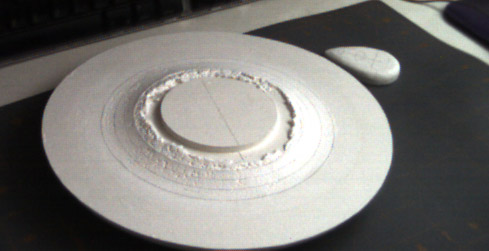
As I hadn't used the parts from the other kit I built it up as a practice model of the Constellation (a mostly stock build of the kit) while working on the Enterprise. It still isn't finished, but here is a comparison between it and my first Enterprise shortly before I finished the Enterprise.

1701_model_progress-044.jpg

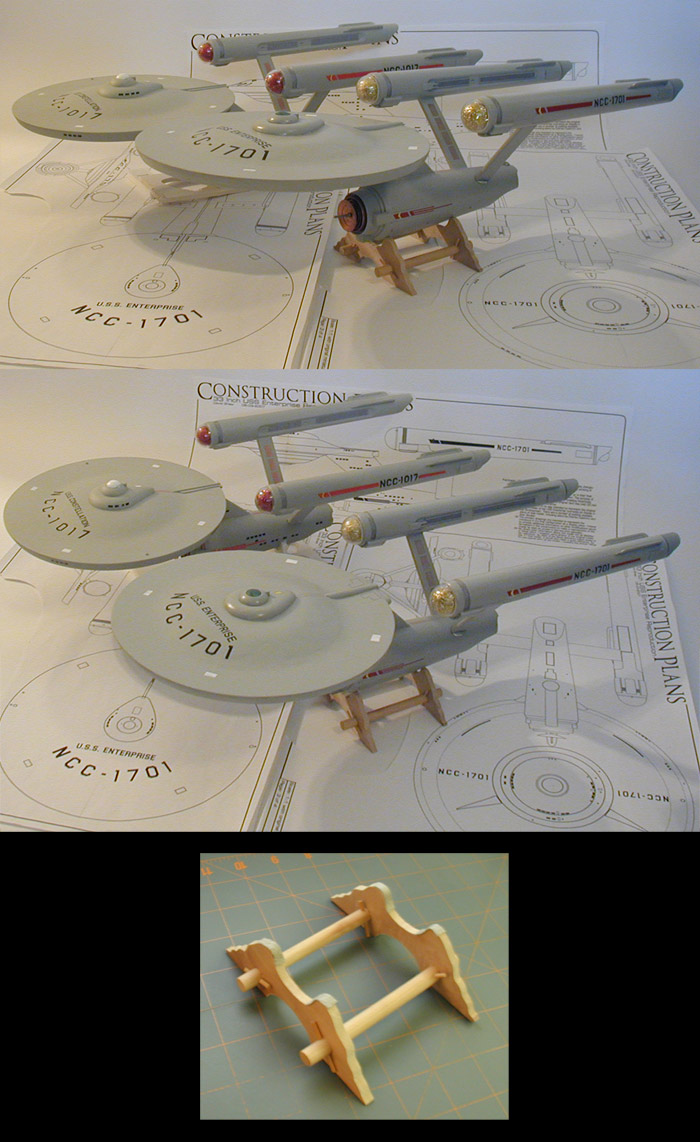
And a couple shots of the finished Enterprise...


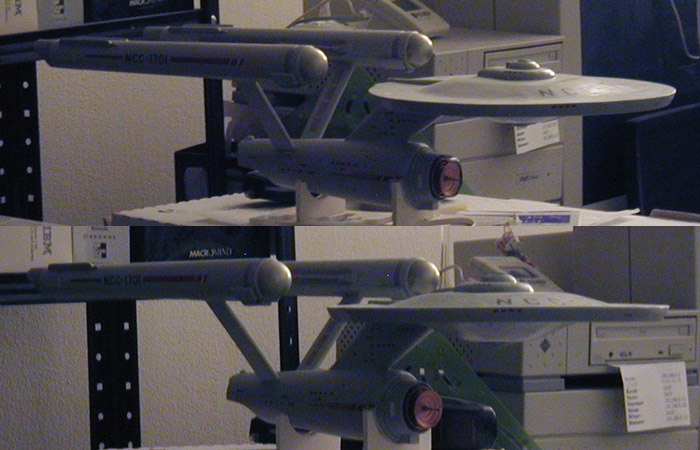
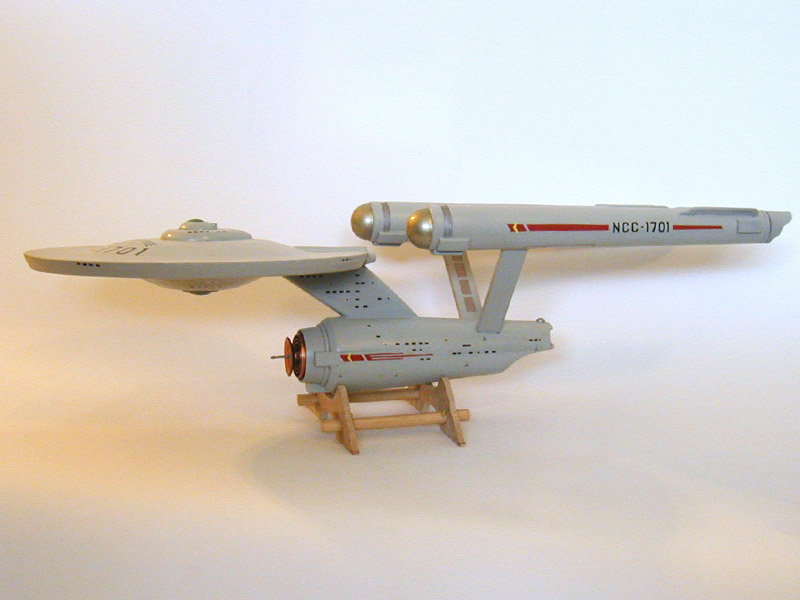
And the model as it sits today being used as a reference for my second attempt...

1701_model_progress-050.jpg
 
Second Attempt
The first attempt was quite successful (overall) and more importantly I had learned a lot during it. So I wanted to make another attempt building on my newly acquired experiences.

My first thought was to make a one-to-one scale build. That, after all, was the goal of all this... to one day have an actual replica of the original. But that idea was short lived when I realized I didn't have any place in my apartment where I could roll the plans out flat. If I have no space for the plans, I have no space for a build. So I decided to stay with the scale of the first attempt.

The first time around I had started work on the kit parts because I didn't know how I was going to build the scratch built sections. This time I had a good idea of how to build them, so I was in no hurry to get a kit.

I started in on the primary hull by cutting out the levels of foamcore board I would need and gluing them together. The main difference this time being that I knew these pieces would end up in the final model, where as in the first attempt when I cut them out I thought they would eventually be thrown away. This is what these early pieces looked like after gluing them...

1701-II_progress-001.jpg

Having learned from my experiences with the first attempt, I decided to slowly build up the bottom in stages, working to make sure I kept the symmetry.

1701-II_progress-002.jpg


1701-II_progress-003.jpg

The under cut was another issue on the first model (which had taken weeks to fix). This time I wanted to get the curve right early on before the Sculptamold had harden too much. To get the shape right while sculpting I used the top curved surface of a 2 litre Coke bottle to help make the shape and then used a baseball with sandpaper around it to finish it off as it cured.

1701-II_progress-004.jpg


1701-II_progress-005.jpg


1701-II_progress-006.jpg

Once happy with the shape of the bottom of the primary hull, I started in on the top (also in stages) and building the B/C deck structure.

1701-II_progress-007.jpg


1701-II_progress-008.jpg

With the foundational shapes finished I started looking at surfacing the hull and starting in on pieces I would need for the nacelles later on...

1701-II_progress-011.jpg


1701-II_progress-009.jpg


1701-II_progress-010.jpg


1701-II_progress-012.jpg
 
Time for the Kit
When I had started in on the dorsal (which isn't that interesting a piece) I felt that I had reached a stage where I should get a kit to start in on those parts. I found one on ebay and when it arrived I started in on the disassembly. Unlike the first attempt, this time I wasn't too worried about making mistakes so I didn't invest in a back up kit.

One of the nice aspects of the 22 inch cutaway kit is that it was based on a set of plans by Allen Everheart (which are available). That makes planning out strategies a lot easier. Below is how I mapped out the first and second attempts... with the second attempt addressing short comings of the first.


I had noted that the hangar/fantail/undercut on the first model wasn't a good match, but because I had removed the dorsal and extended the hull by 3/8 of an inch, I wasn't comfortable gambling on more alterations of those parts. This time, armed with more confidence in my abilities, I decided to attempt to fix that issue.

I started by cutting off the trailing edge and used that piece as a starting point for a replacement. And I cut a wooden sphere to the shape I would need for the doors. This is a test assembly of those parts...

1701-II_progress-014.jpg

I then glued the new edge piece in place and started sculpting the undercut.

1701-II_progress-015.jpg

I then added a wall just forward of the doors that matched this feature on the original 33 inch model. This wall is visible on the model after the second season when the doors had been lost. The best reference I have for the doors after the model had been modified for the series is a shot of it with the actors where it looks as though lines had been drawn lightly on the doors, which I'll attempt to match when I paint the model.

1701-II_progress-016.jpg

A significant issue with the first model was a stand. I had not built anything into the model for holding it up, and as a result the model had taken a pretty bad fall just before it was finished. This time around I decided to address that issue early on.

I cut a small hole in the styrene piece I had made for the extension of the secondary hull and glued a section of a pen to the hole. Once I glued those pieces in place I continued the packing I had done to the bottom of the secondary hull around the piece which should hold it solidly in place. I can then use that as an anchor point for the model on a stand when she is finished.

1701-II_progress-017.jpg

And here is the secondary hull with the front pieces taped on for a test assembly.

1701-II_progress-018.jpg

And that is pretty much where I'm at with this build currently. So far all the things that worked well in the first attempt are working as well or better in this one, and the things that are new about this build have worked out nicely too.
 
Excellent start of course. I've got a half built cutaway in my stash, so I'll be watching this one of course. I love how you did the saucer.
 
Thanks guys!

Yeah, the 22 inch model makes for a great starting point for some nice versions of the Enterprise. This is obviously an extreme modification, but some really nice versions of the 11 foot model can be made with more of the model intact (and I've seen some builds by some talented people that are really amazing).
 
Thanks! :)


A little more progress on the secondary hull...

1701-II_progress-019.jpg

Even though this is a modification of the kit's secondary hull, I've put nearly as much effort into it as I have the primary hull at this point. Still, there are advantages to using the kit's parts rather than attempting to build it from scratch (including not worrying about how the nacelle supports will attach).


I forgot to include elements of my research in the posts above, so I'll add them on here.

The plans I'm using are the ones I made back in 2007. You can find them here:


They are an early draft and I hope to have a corrected version sometime soon.

Those were based on reverse engineering from photos of the 33 inch model using the dimensions of the original plans as a lose starting point for determining measurements. The dimensions I used are collected together in this document...


And since I had those dimensions and a number of scanned elements of the original plans, I took a little time to reverse engineer the original plans of the Enterprise as well...


In doing all that research on the technical details I also ended up with a fair amount of history of the model itself. This is a quick time line of major events mostly relating to the 33 inch model...

33 inch Model History

  • August 1964: A final overall configuration was picked, a color illustration was done and a study model was made by Matt Jefferies. The next few months would be spent working out the details of the ship. Here are some of his sketches during the intervening period and his accounting of events.
    Matt Jefferies: "By the third time around he had two sheets of eight or ten drawings, plus a half dozen good-size renderings. One of them was the beginning of the design finally chosen and one that I liked very much... an upper, saucer-shaped hull, a cigar-shaped lower hull, and two engine pods. Before calling everyone in again, I did a little fast model building. I went down to the mill [woodworking shop], grabbed a couple of chunks of wood, and had the men turn out the saucer shape on a lathe. In about thirty-five to forty minutes I had a model. We hung it up on a piece of thread and called everyone in. Oddly enough, the original model was hung upside down as opposed to the way we use it now."

    "Based on that model and the color renderings I had prepared for it, Roddenberry felt we were on the right track. We wound up shortening the main pylon strut and made a few other little changes and then sat down to to some scale drawings."
  • Nov. 4, 1964 (Wednesday): Richard Datin agrees to build an approximate three foot long model based on an early set of plans which give a real world scale of 1:192 (if this had been the final drawings, this would have been the 540' version, but the proportions of this early drawing are actually different from the final plans... including the length of the model on the page) and for the final large scale model (the plans on the page would have most likely been 1:48).
  • Nov. 7, 1964 (Saturday): The final construction plans are finished. These plans include the scale reference of FULL SIZE & 3" = 1'-0" TO LARGE MINIATURE. As the one feature linking the scale of the model to the live action sets is the bridge, the overall size seems to have already been determined by this point. In fact because Jefferies didn't want windows or the like on the surface of the ship, the bridge was the primary feature that would be used to sell the size of the ship in the pilot. No attempt was made at matching to a nice scale factor as the ship wasn't ever going to be seen with any other miniature with real world elements. It seems that the final size on the page was intended to get the most out of the sheet (24"x36").
  • Nov. 8, 1964 (Sunday): Datin receives the plans and starts building the full size 33 inch model out of kiln-dried sugar pine. This date needs to be double checked with Datin. The drawings are labeled November 7th and I'm assuming he got the drawings within 24 hours of their completion.
  • Nov. 15, 1964 (Sunday): A little more than a week later the 33 inch model is presented to Roddenberry for approval. I'd guess this is where the request for the addition of exterior windows takes place (which were not part of the original design). The windows seen on the few elements of the original drawings were added after the original completion date of them. My understanding is that Roddenberry was constantly asking for more details.
  • Nov. 27, 1964: Live action shooting is scheduled for the Transporter Room, Enterprise Passageway and Pike's Quarters.
  • Nov. 30, 1964: Live action shooting is scheduled for the Bridge (which means construction of it might have been started by around the 15th). This day's schedule includes the crane shot of the bridge that will eventually be composited with the (as yet) unstarted 11 foot model.
  • Dec. 1, 1964: Live action shooting is scheduled for the Bridge and Orion Courtyard. These schedules dates seem to have been delayed by a few days by construction issues.
  • Dec. 8, 1964 (Tuesday): Construction is started on the 11 foot model.
  • Dec. 14, 1964 (Monday): The 33 inch model is delivered to Roddenberry while The Cage was being filmed in Culver City at the 40 Acres backlot (images of the delivery). This model is used for all effects shots in The Cage except the most important one (the zoom in on the bridge). Images of the model being delivered are on the Rigel Fortress set, but filming was originally scheduled for December 8th for those shoots. December of 1964 was rainier than normal for most parts of California, so the Rigel Fortress shoots might have been delayed by this. There was also an incident with Susan Oliver becoming ill which delayed production by a few days.
  • Dec. 24, 1964 (Thursday): Shooting of The Cage wraps, only one effects shot still outstanding.
  • Dec. 29, 1964 (Tuesday): The 11 foot model (built by Datin, Mel Keys and Vern Sion) was delivered to the Howard A. Anderson studio (images from just before the delivery). This version is unpowered and the windows are painted on the surface of the model... and even then the model was designed to be shot from the right side only. This was most likely done due to the time that would have been needed to match features on the inboard starboard nacelle and port side of the secondary hull.
  • Jan. 23, 1965 (Saturday): After The Cage is already in the can and waiting for network approval of the new series, additional test shots of the 11 foot model are taken in it's original configuration.
  • Jan. 30, 1965 (Saturday): Aspects of the ship's size (like it being 190,000 tons) were being distributed to the media in the descriptions of the new show.
  • Feb. 1965: NBC rejects The Cage, but agrees to a second pilot.
  • August-September 1965: Additional funds are secured for the second pilot and the 11 foot model is modified to include inner lighting and more surface detail. It doesn't appear that the 33 inch model was modified at this time, but the only noticeable detail that would have been different between the two models was the rear of the nacelles, and the only (new) shot of the 33 inch model in Where No Man Has Gone Before was of it exiting the energy barrier.
  • April 1966: The 11 foot model is further altered for the now approved new series. Some of the previous changes needed to be unmade... the bridge had a large "window" cut into it and to remove it the bridge was cut in two along the top edge of the window. The top half was returned to the model and the bottom half discarded. The 33 inch model was also modified around this time to match the features of the 11 foot model.
  • 1966 (First Season): The 33 inch model is mainly used as a display piece and is photographed with the actors in publicity stills. The model would make it back to the screen (aside from stock footage from The Cage and Where No Man Has Gone Before) in the episode Tomorrow Is Yesterday.
  • 1967/68 (Second Season): The 33 inch model has generally been retired, having been replaced by an 18 inch AMT model modified with interior lights (used in The Doomsday Machine and The Trouble With Tribbles). The 33 inch model does make it before cameras once again (along side the AMT model) for the View-Master versions of The Omega Glory.
  • 1968 (between Second and Third Seasons): The 33 inch model is damaged. The hangar doors were lost, the alignment of the port nacelle is damaged and the rear "intercoolers" on the starboard nacelle were knocked off (the outboard one was reattached backwards). The damage is visible in publicity stills taken of the model during the third season and during the third season episode Requiem for Methuselah.
  • 1969 (post Third Season): The 33 inch model is put into storage.
  • 1975: Gene Roddenberry returns to Paramount to start development of a second Star Trek series and is given the 33 inch model (which is photographed with Roddenberry a number of times, including in his office).
  • 1980s: Gene Roddenberry loans out the 33 inch model. It is not returned and Roddenberry doesn't recall who it was that he loaned the model to. The model has been missing ever since.
  • July 10, 1997: Majel Barrett-Roddenberry (on the 33 inch model, as told to William McCullars) had said this: "That particular ship was a real model and it was Gene's - he loaned it to someone and Gene forgot to get it back and it was never returned. It's a shame because it's a piece of stolen property and since it has historical value - it is quite priceless."
 
Progress has been a little slow, but I have a series of recent images (mostly test fits of the major pieces to make sure everything is working as planned).

1701-II_progress-028.jpg


1701-II_progress-029.jpg


1701-II_progress-030.jpg

It'll be a while before I start gluing stuff together. I want to finish up on the nacelles first, and then start in on gluing the primary hull, dorsal and secondary hull together.
 
Thanks for the encouragement guys! It helps out a lot.


I'm slowly plugging away at this, but I thought it would be interesting to do a side by side comparison of the first model with the second (even though none of the major pieces of the second have been glued together yet).

1701-II_progress-031.jpg
 
Sadly, no.

It is pretty much in the same position as in the last image. I've been swamped with work projects so I haven't been able to devote any time to it.

That and the next step is such a large one (connecting the dorsal to the secondary hull) that I've been putting it off. I'll most likely do that sometime this week.
 
Earlier last week I anchored the dorsal to the secondary hull.

I started by marking off how much of the dorsal would rest below the edge, and then put three small pins into each side below that line. I put the major pieces together, made sure they lined up nicely, and started gluing. I glued two spots with super glue, then went around (where it was close enough) with model glue. About three hours later I started packing in both sides of the dorsal inside the secondary hull. When that had cured enough, I started sanding down the elements that had pressed out through the gaps. I then went around one more time with model glue.

The packing is done with the same cellulose-based paper maché I've used else where on the model. The pins were intended to make sure that a solid connection is made, and the stuff eventually cure super solid, so the dorsal isn't going anywhere.

Here is a quick look at it as it stands right now...

1701-II_progress-032.jpg

And then late last week I started gluing the nacelles to the supports. The supports aren't glued to the secondary hull yet (actually, the supports on my first attempt still aren't glued to the secondary hull either), but I needed to arrange everything to see that stuff was lining up the way I wanted as I did the gluing.

1701-II_progress-033.jpg

As of yesterday I started to let the model stand on it's own for short periods... and it is doing so quite nicely. Everything seems to be aligned correctly. So now I'm letting the nacelles/supports rest by themselves for a while (with the supports standing straight up in the air).

By next weekend I'll most likely be comfortable enough in the glue having cured to have the nacelles attached to the model supporting their own weight for extended periods.

This is how all the parts look assembled together (the primary hull isn't glued to the dorsal, and the nacelle supports aren't glued to the secondary hull).

1701-II_progress-034.jpg
 
This thread is more than 9 years old.

Your message may be considered spam for the following reasons:

  1. This thread hasn't been active in some time. A new post in this thread might not contribute constructively to this discussion after so long.
If you wish to reply despite these issues, check the box below before replying.
Be aware that malicious compliance may result in more severe penalties.
Back
Top