TIME BANDITS MAP WEATHERING TUTORIAL
by Jay Pennington (Treadwell)
note:
Some aspects of this tutorial apply specifically to v1 and v2 kapow maps, as they were printed on a heavy canvas stock. The v3 kapow map, and subsequent runs by others, were printed on different material and thus some of the following instructions might not apply.
Materials:
scissors
hobby or carpet knife
yardstick
sandpaper (both fine and medium/heavy grade)
dirt (must be dry)
charcoal (anything from art supply grade on down to BBQ briquettes)
fireplace/BBQ grill ash or any similar material at hand
rubber bands
First, trim the white border, using a hobby or carpet knife and a yardstick to keep the cuts straight. Be sure to lay the map on a flat, hard surface, and take precautions if you don't want that surface scratched by the blade. If you have a steady hand, a pair of sharp scissors would do as well. Either way, take your time.
Next, decide on which version of the map you want to emulate. Not surprisingly, several different props were used during the course of the film, and each has its differences. I've noted three:
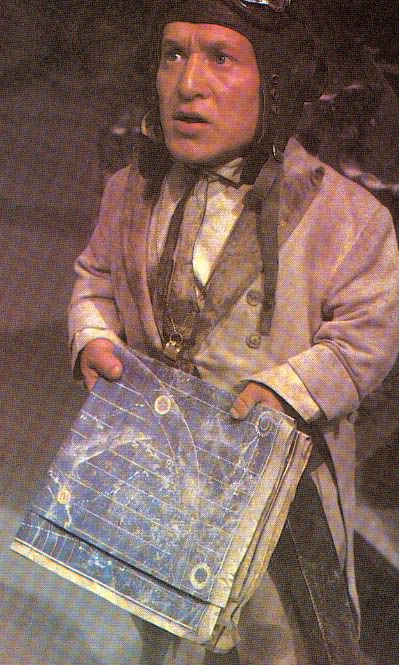
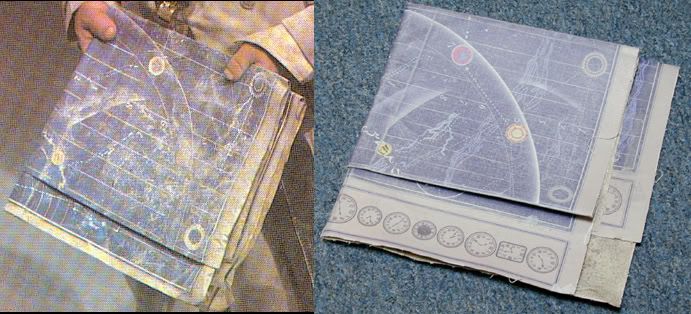
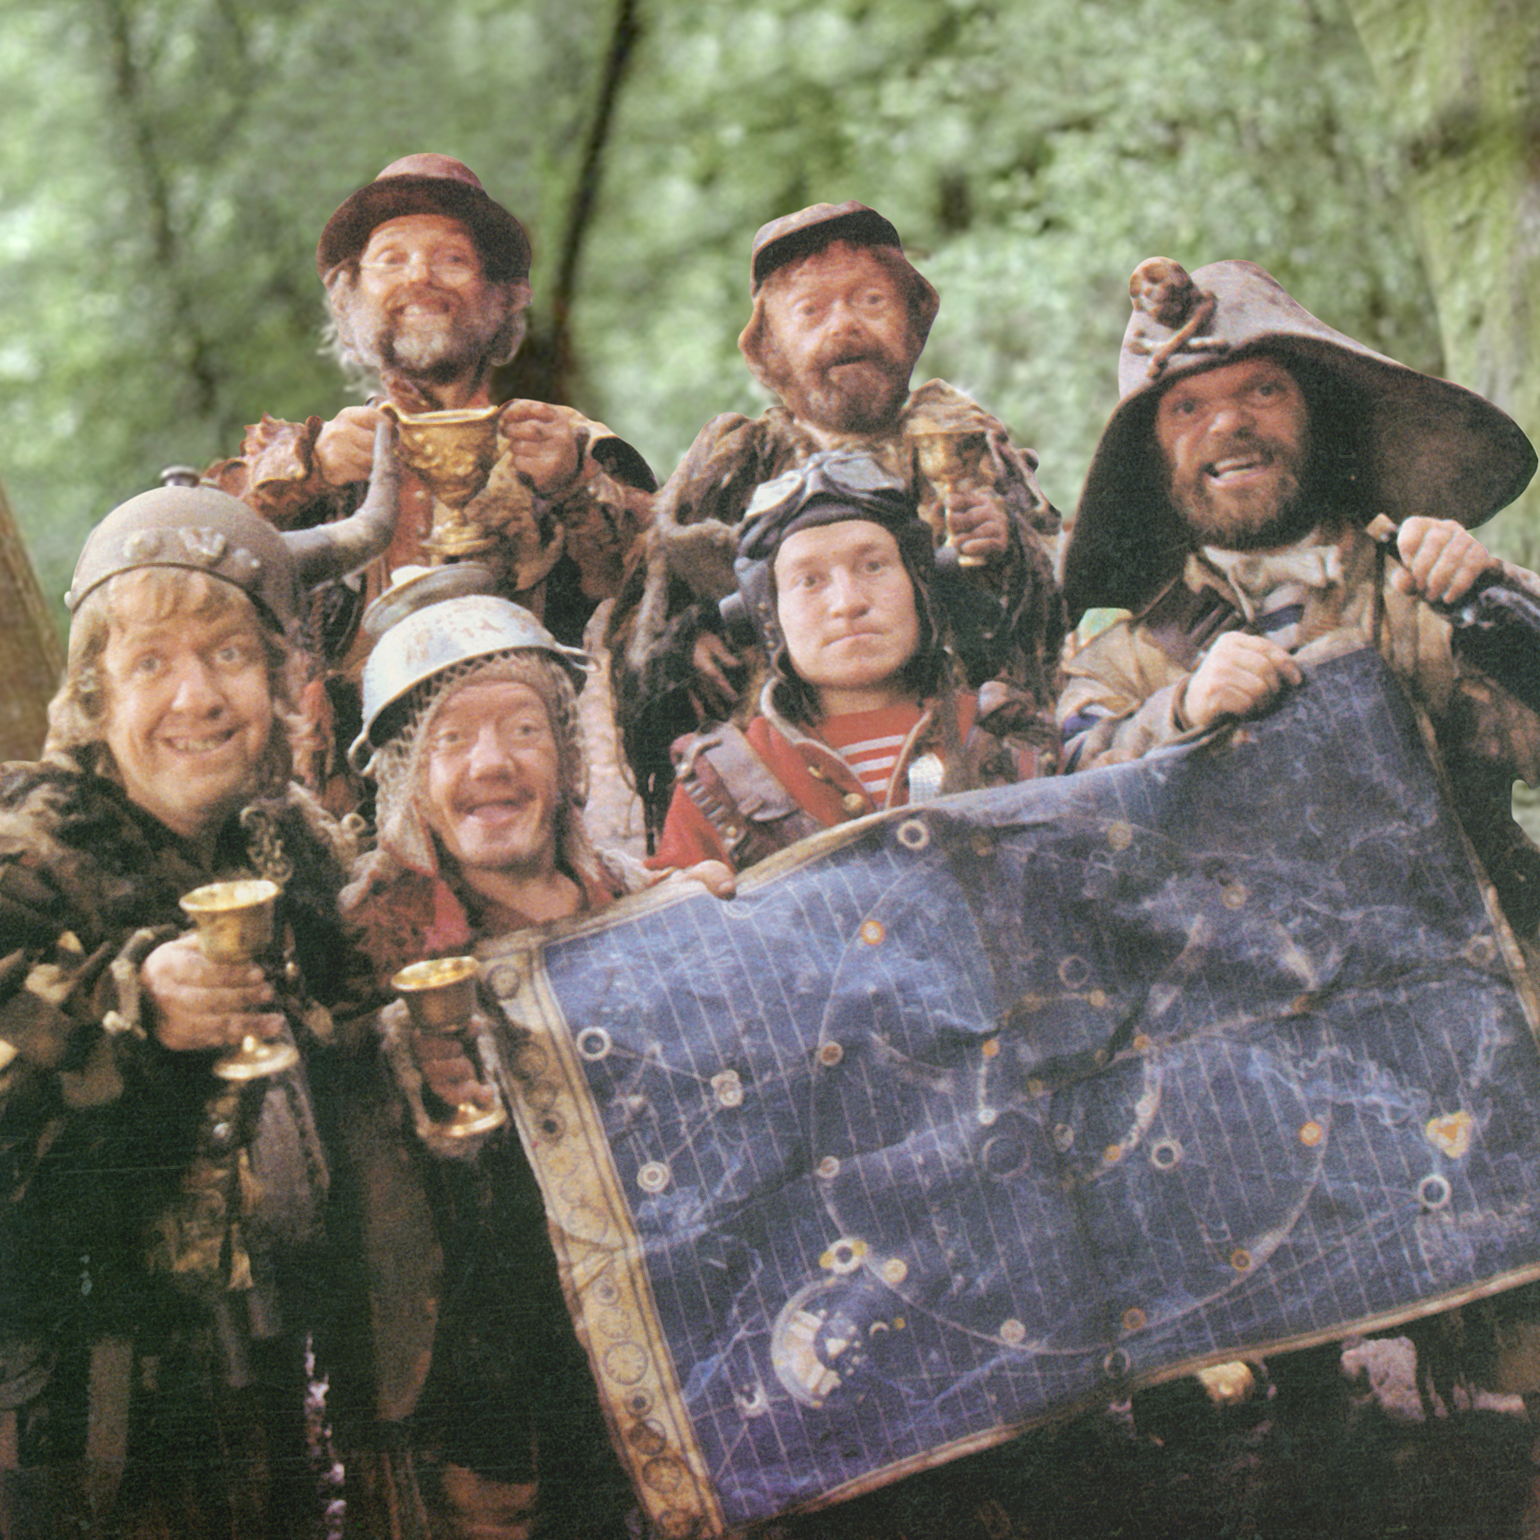
Version 1: the righthand border with the clockfaces is missing, as seen in this famous pic:
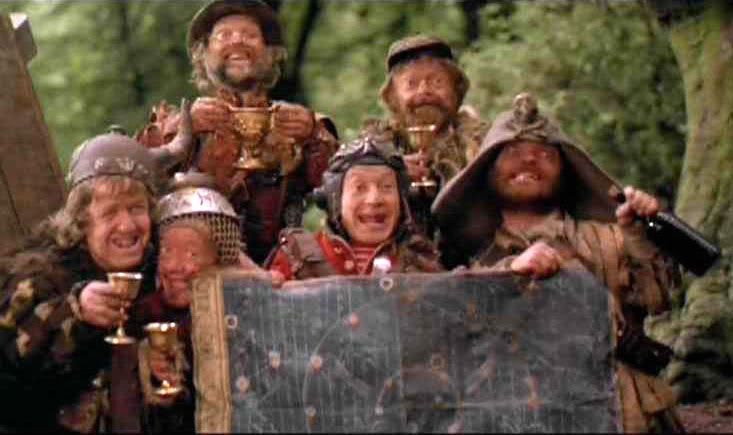
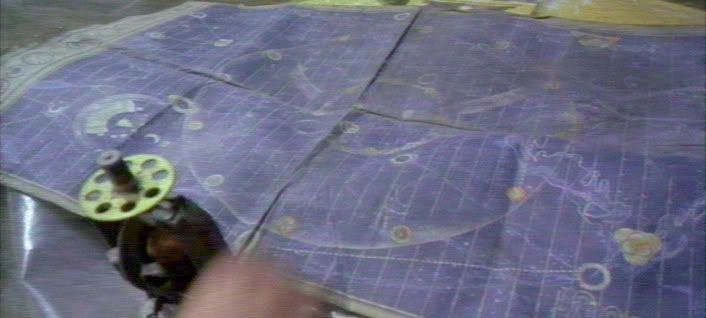
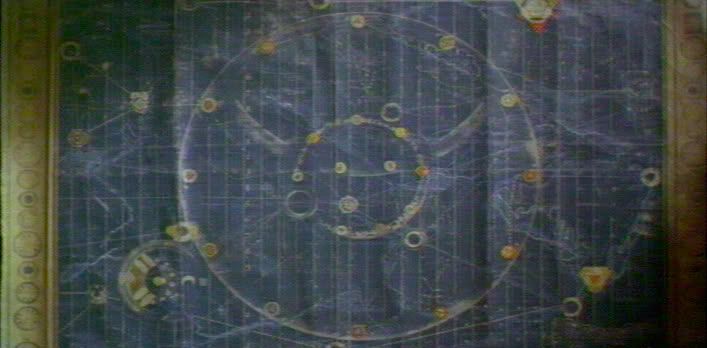
This is the version also seen spread out on the table in the evil fortress:
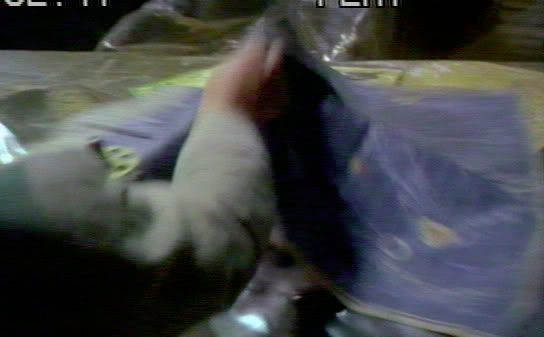
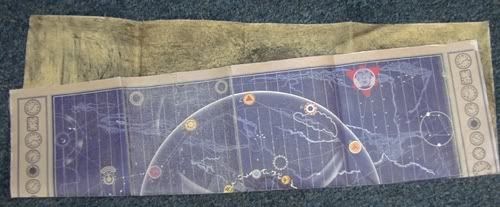
Version 2: the border is missing here as well, but there's an extra crease running horizontally (but skewed) across the map, as if it had been folded once at an odd angle, as seen in this pic after it had been refolded properly (look along the lefthand edge, starting at his right thumb):
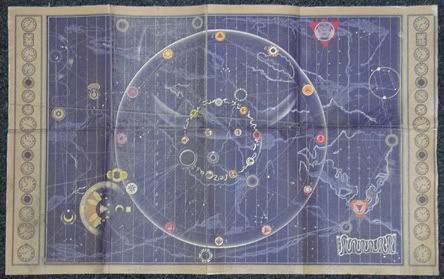
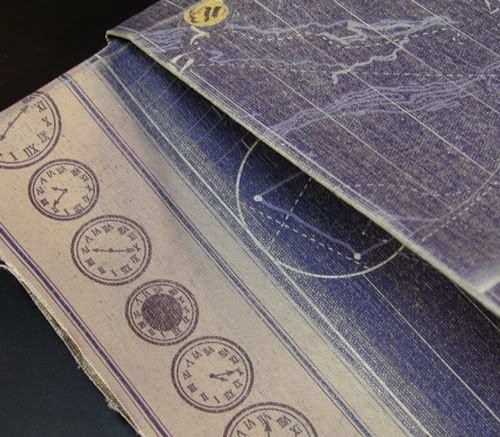
Version 3: the extra crease is gone again on this version but the righthand border finally makes its appearance just before the end credits as the map is rolled up by the Supreme Being:
micdavis wanted to retain the border (v.3) in the map I weathered for him but I included v.2's extra crease anyway. Obviously, you can mix and match as well.
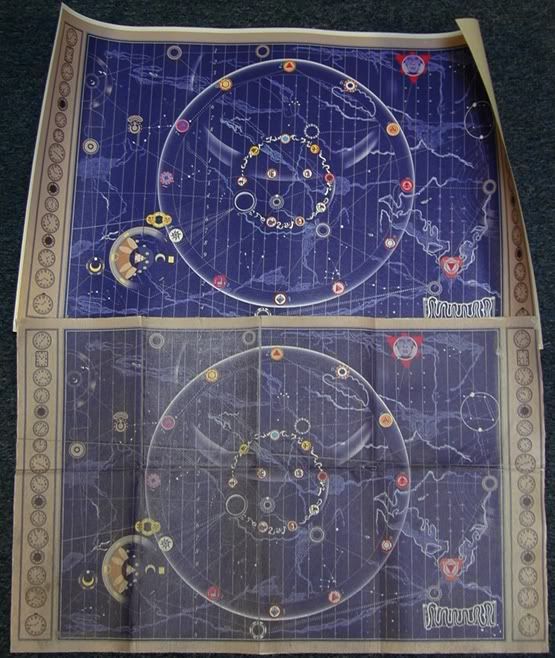
Here's a diagram of the creases and cut (if you so choose) you'll be making:
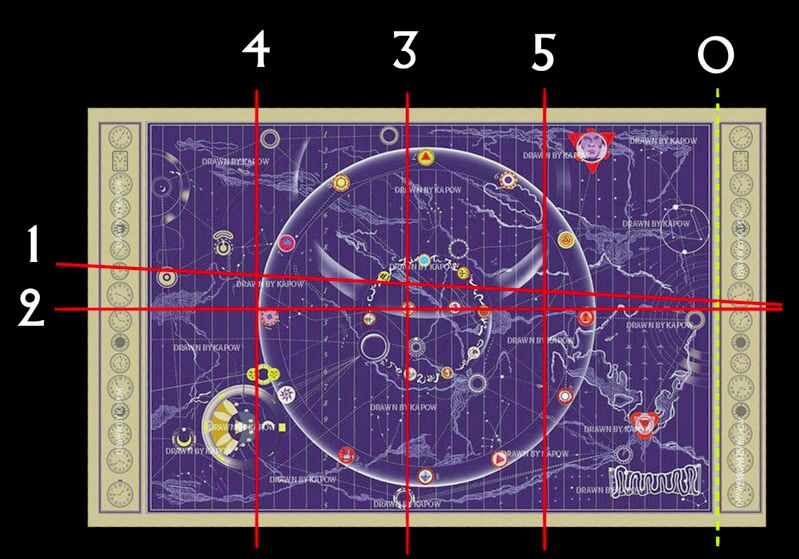
It helps to practice first on a smaller scale using a printout of this image.
Step 0: the yellow dotted line is where you should trim the map if you want to emulate this (lack of) detail for v.1 or v.2.
Crease 1: For v.2 only, although I highly recommend this additional, wacky fold. It really adds character. Lay the map flat on the floor, line up your yardstick right along the imaginary line, and press firmly with one hand so it won't move. Reach beneath the map with the other hand and push up against the corner of the yardstick, where it rests on the surface. You're not flipping the map over on itself yet, you're just sorta making an 'L' shape. If you flipped the top half over at this point, it'll just make a U-shaped curve around the yardstick and you won't be able to control the location of the crease within that curve. Instead, continue along the bottom corner of the yardstick until you have a faint crease--it's subtle but it's enough to guide the next step.
Now to break that crease in. Put aside the yardstick. Now you can flip the map over upon itself. The faint crease already there will allow you to make the fold precisely. Pinch it, press it, lean on it, make that crease yell for mercy.
But the fold is backwards! The side with the printing on it is in the inside! That's okay, open it back up and fold it the other way now it'll fold in the right place with ease. At this point you can use sandpaper to scuff away the printing along the fold, but more on that later.
The fold now looks like this:
(mind you, these pics were taken after I'd already finshed with all the folds and weathering)
Flatten the map out again for the next crease.
Crease 2: Now for the straight horizontal fold. Use the yardstick and wrong-way-first procedure again. Note that you should not simply line up the corners and make the fold in the natural halfway point. To match the prop you need to follow the indicated line and let the outer edges fall where they may.
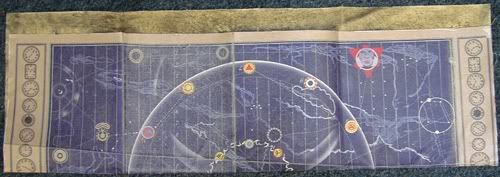
Note that in the film, the first fold one makes when folding up the pre-creased map is not this horizontal one. This step was simply to establish the crease. So flatten the puppy out again!
Crease 3: Now we start making the folds in their proper order. This time we're making a vertical crease. You know the drill by now. However, pay attention to the location--again, it is not a symmetrical fold. In fact, none of them are!
Here's what you end up with:
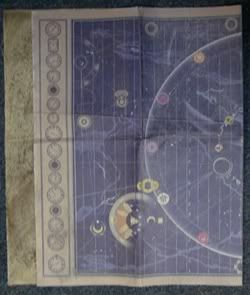
Note that if the righthand border had been removed, this fold actually would be fairly symmetrical.
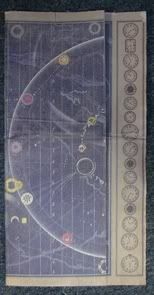
This time, do not flatten the map back out. Proceed:
Crease 4: Since you're folding two layers now, it might help to just fold the top layer around the edge of the yardstick. Once that crease is established, it's easy to make the second layer follow suit.
You now have this:
Crease 5: This one's easy because you've already established the crease. Granted, part of it is used to folding the other way but you'll soon fix that. Just fold it over until it looks like this:
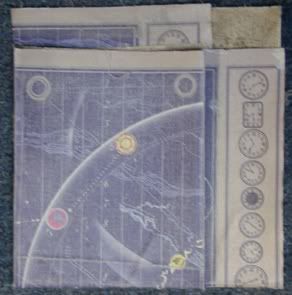
It's impossible to get everything lined up like in the movie because the locations of some of the details of this spectacular replica do not correspond 100% to the film prop, and, as kapow pointed out, all the filmused props had discrepancies of their own. But it took figuring out the creases for me to even notice. It's that close.
Weathering:
Now the fun part! There are a number of ways one can go about this, but I'm just going to describe what I did. But whatever you do, do NOT let liquid or even moisture anywhere near it!! A fixative was applied to the ink but it isn't enough to protect it from a coffee/tea solution or the like. Even sweaty fingers will lift the ink right off. Beware! (The liquid caution applies to kapow v1 and v2 maps in particular.)
Further, baking isn't the answer either. For one thing, that's an 'ancient parchment' browning technique, and the map isn't really meant to look ancient, just worn. Baking will just make it brittle and add a sickly yellow-brown tint that isn't accurate. My baked scrap sample simply looked...baked. Not old or worn. Just cooked all to hell. Like you have an oven that big anyhow! Pastel chalk was mentioned, and might be worth trying, although I wonder if that would rub off too easily. But I didn't try that so I dunno.
What I did:
If you haven't already, fold the map back and forth along every crease line so that they're nice and broken in. Each fold should be fairly sharp, not a bend. The canvas is durable, so you won't break your map.
Now you'll need sandpaper, a rougher grade. Fold the map along each crease in turn and sand off the ink along the folds. You might want to use the hobby knife to make small cuts in some of the creases as well, where they reach an edge or where crossing creases create a point.
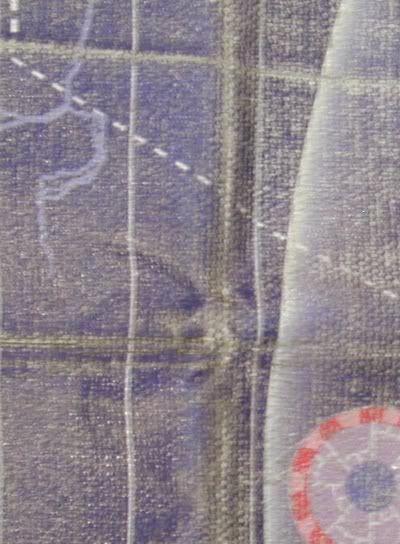
Flatten the map again. With fine-grade sandpaper, start rubbing the map down. You want to lose the sheen off the coating, and to remove the ink itself from the high points of the canvas' weave. The sandpaper mustn't be so rough you can see chunks of abrasives on it. That will scratch the map. It's gotta be the kind of stuff you'd use on, say, a resin kit. Go easy until you get a feel for the pressure needed for the desired results. Keep going over the map until it's nice and dull.
When you've gotten the desired overall look, fold up the map back up. Give the exposed areas some extra sanding. If this is how the map was most often carried, then these two squares would suffer more wear. You don't want to destroy the image but you do want the square seen in the pic to look more worn than the others when the map is unfolded.
Take care to weather the other bits of map exposed by the edge of the folds, so that they also exhibit the 'weathered when folded' look when unfolded.
You don't want to apply this extra bit of sanding under that flap, for instance, but you do want to do so beyond where the flap ends.
The next step is easiest if you have a fireplace or barbeque grill that's been used recently. If you don't, it might be a good excuse to grill up some burgers! (Beware of the grease residue, though...you don't want that on the map). However you get it, you'll need some charcoal (fire/grill leftovers, art supply store grade, or even BBQ briquettes). Crumple some into a powdery pile. It doesn't have to be super fine, chunky is okay. Pick some up with your fingers (make sure they're dry!) and start rubbing it into the surface of the map. If you find you're overdoing it, you can remove excess with the palm of your hand.
Next you want ash, again from the fireplace or grill. Barring that, perhaps here is where those pastels could come into play. Rub it in using the same technique.
With both applications, what you're doing is getting it into the nooks and crannies, and especially the bits of canvas exposed by the sanding. If you think you're covering the artwork too much, just wipe it off with your hand or a dry rag--the stuff will remain behind in the spots you want it to.
Remember to fold it up and apply extra material to the exposed areas like you did in the last step of the sanding.
As a final touch, I took the map to my outdoor garage that has a dirt floor. It was very dry, so I buried the map. That's right! I shook off all excess, of course, but nothin' says 'dirty' like real dirt.
Depending on how you plan to display your map, you might want to weather the back of it. Parts of the back do show when it's folded, for instance. This is one thing I don't think I did that well, but what I did was rather uneven, which I suppose could result from it being plopped down on various unsavory surfaces in the movie. I actually did use moisture here, being careful not to let it splatter on the other side. I spritzed on my coffee/tea/soot mixture I used on my Grail diary and smeared it around with a cloth. I did this before the burial, so I got some nice patterns of stuck-on dirt. However, next time I think I'll sand the back down just like the front and then just go over it with a medium-brown stick of chalk.
Now to weather the edges. Using the knife, make a few tiny cuts, only as deep as the thickness of one strand of the canvas. Carefully pull at one end of each cut strand and rip them partway off, so that you have a few thin fringes. You might want to add some small thum-sized dings and dents and similar creases along the edges as well.
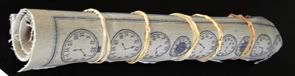
Final, but optional step: the map is rolled up at various points in the film. If you plan on having the weathered map framed or mounted, you probably want to skip this step as it'll just make things difficult for you. But if you want, fold up the map as before and then from the end with the fold (not the end with exposed map edges), roll the sucker up as tight as you can so that the map edges are on the outside. Keep it tight with rubber bands for as long as it takes to make it stay that way on its own. But consider the difficulty in flattening it out again. The canvas is thicker than the screenused fabric seems to be so it's going to have more of a memory.
There are many more screencaps and pics of the map I weathered here:
http://www.printroom.com/ViewAlbum.asp?userid=treadwell&album_id=124870
And that's how you muck up a work of art! (Sorry, kapow!)
by Jay Pennington (Treadwell)
note:
Some aspects of this tutorial apply specifically to v1 and v2 kapow maps, as they were printed on a heavy canvas stock. The v3 kapow map, and subsequent runs by others, were printed on different material and thus some of the following instructions might not apply.
Materials:
scissors
hobby or carpet knife
yardstick
sandpaper (both fine and medium/heavy grade)
dirt (must be dry)
charcoal (anything from art supply grade on down to BBQ briquettes)
fireplace/BBQ grill ash or any similar material at hand
rubber bands
First, trim the white border, using a hobby or carpet knife and a yardstick to keep the cuts straight. Be sure to lay the map on a flat, hard surface, and take precautions if you don't want that surface scratched by the blade. If you have a steady hand, a pair of sharp scissors would do as well. Either way, take your time.
Next, decide on which version of the map you want to emulate. Not surprisingly, several different props were used during the course of the film, and each has its differences. I've noted three:
Version 1: the righthand border with the clockfaces is missing, as seen in this famous pic:
This is the version also seen spread out on the table in the evil fortress:
Version 2: the border is missing here as well, but there's an extra crease running horizontally (but skewed) across the map, as if it had been folded once at an odd angle, as seen in this pic after it had been refolded properly (look along the lefthand edge, starting at his right thumb):
Version 3: the extra crease is gone again on this version but the righthand border finally makes its appearance just before the end credits as the map is rolled up by the Supreme Being:
micdavis wanted to retain the border (v.3) in the map I weathered for him but I included v.2's extra crease anyway. Obviously, you can mix and match as well.
Here's a diagram of the creases and cut (if you so choose) you'll be making:
It helps to practice first on a smaller scale using a printout of this image.
Step 0: the yellow dotted line is where you should trim the map if you want to emulate this (lack of) detail for v.1 or v.2.
Crease 1: For v.2 only, although I highly recommend this additional, wacky fold. It really adds character. Lay the map flat on the floor, line up your yardstick right along the imaginary line, and press firmly with one hand so it won't move. Reach beneath the map with the other hand and push up against the corner of the yardstick, where it rests on the surface. You're not flipping the map over on itself yet, you're just sorta making an 'L' shape. If you flipped the top half over at this point, it'll just make a U-shaped curve around the yardstick and you won't be able to control the location of the crease within that curve. Instead, continue along the bottom corner of the yardstick until you have a faint crease--it's subtle but it's enough to guide the next step.
Now to break that crease in. Put aside the yardstick. Now you can flip the map over upon itself. The faint crease already there will allow you to make the fold precisely. Pinch it, press it, lean on it, make that crease yell for mercy.
But the fold is backwards! The side with the printing on it is in the inside! That's okay, open it back up and fold it the other way now it'll fold in the right place with ease. At this point you can use sandpaper to scuff away the printing along the fold, but more on that later.
The fold now looks like this:
(mind you, these pics were taken after I'd already finshed with all the folds and weathering)
Flatten the map out again for the next crease.
Crease 2: Now for the straight horizontal fold. Use the yardstick and wrong-way-first procedure again. Note that you should not simply line up the corners and make the fold in the natural halfway point. To match the prop you need to follow the indicated line and let the outer edges fall where they may.
Note that in the film, the first fold one makes when folding up the pre-creased map is not this horizontal one. This step was simply to establish the crease. So flatten the puppy out again!
Crease 3: Now we start making the folds in their proper order. This time we're making a vertical crease. You know the drill by now. However, pay attention to the location--again, it is not a symmetrical fold. In fact, none of them are!
Here's what you end up with:
Note that if the righthand border had been removed, this fold actually would be fairly symmetrical.
This time, do not flatten the map back out. Proceed:
Crease 4: Since you're folding two layers now, it might help to just fold the top layer around the edge of the yardstick. Once that crease is established, it's easy to make the second layer follow suit.
You now have this:
Crease 5: This one's easy because you've already established the crease. Granted, part of it is used to folding the other way but you'll soon fix that. Just fold it over until it looks like this:
It's impossible to get everything lined up like in the movie because the locations of some of the details of this spectacular replica do not correspond 100% to the film prop, and, as kapow pointed out, all the filmused props had discrepancies of their own. But it took figuring out the creases for me to even notice. It's that close.
Weathering:
Now the fun part! There are a number of ways one can go about this, but I'm just going to describe what I did. But whatever you do, do NOT let liquid or even moisture anywhere near it!! A fixative was applied to the ink but it isn't enough to protect it from a coffee/tea solution or the like. Even sweaty fingers will lift the ink right off. Beware! (The liquid caution applies to kapow v1 and v2 maps in particular.)
Further, baking isn't the answer either. For one thing, that's an 'ancient parchment' browning technique, and the map isn't really meant to look ancient, just worn. Baking will just make it brittle and add a sickly yellow-brown tint that isn't accurate. My baked scrap sample simply looked...baked. Not old or worn. Just cooked all to hell. Like you have an oven that big anyhow! Pastel chalk was mentioned, and might be worth trying, although I wonder if that would rub off too easily. But I didn't try that so I dunno.
What I did:
If you haven't already, fold the map back and forth along every crease line so that they're nice and broken in. Each fold should be fairly sharp, not a bend. The canvas is durable, so you won't break your map.
Now you'll need sandpaper, a rougher grade. Fold the map along each crease in turn and sand off the ink along the folds. You might want to use the hobby knife to make small cuts in some of the creases as well, where they reach an edge or where crossing creases create a point.
Flatten the map again. With fine-grade sandpaper, start rubbing the map down. You want to lose the sheen off the coating, and to remove the ink itself from the high points of the canvas' weave. The sandpaper mustn't be so rough you can see chunks of abrasives on it. That will scratch the map. It's gotta be the kind of stuff you'd use on, say, a resin kit. Go easy until you get a feel for the pressure needed for the desired results. Keep going over the map until it's nice and dull.
When you've gotten the desired overall look, fold up the map back up. Give the exposed areas some extra sanding. If this is how the map was most often carried, then these two squares would suffer more wear. You don't want to destroy the image but you do want the square seen in the pic to look more worn than the others when the map is unfolded.
Take care to weather the other bits of map exposed by the edge of the folds, so that they also exhibit the 'weathered when folded' look when unfolded.
You don't want to apply this extra bit of sanding under that flap, for instance, but you do want to do so beyond where the flap ends.
The next step is easiest if you have a fireplace or barbeque grill that's been used recently. If you don't, it might be a good excuse to grill up some burgers! (Beware of the grease residue, though...you don't want that on the map). However you get it, you'll need some charcoal (fire/grill leftovers, art supply store grade, or even BBQ briquettes). Crumple some into a powdery pile. It doesn't have to be super fine, chunky is okay. Pick some up with your fingers (make sure they're dry!) and start rubbing it into the surface of the map. If you find you're overdoing it, you can remove excess with the palm of your hand.
Next you want ash, again from the fireplace or grill. Barring that, perhaps here is where those pastels could come into play. Rub it in using the same technique.
With both applications, what you're doing is getting it into the nooks and crannies, and especially the bits of canvas exposed by the sanding. If you think you're covering the artwork too much, just wipe it off with your hand or a dry rag--the stuff will remain behind in the spots you want it to.
Remember to fold it up and apply extra material to the exposed areas like you did in the last step of the sanding.
As a final touch, I took the map to my outdoor garage that has a dirt floor. It was very dry, so I buried the map. That's right! I shook off all excess, of course, but nothin' says 'dirty' like real dirt.
Depending on how you plan to display your map, you might want to weather the back of it. Parts of the back do show when it's folded, for instance. This is one thing I don't think I did that well, but what I did was rather uneven, which I suppose could result from it being plopped down on various unsavory surfaces in the movie. I actually did use moisture here, being careful not to let it splatter on the other side. I spritzed on my coffee/tea/soot mixture I used on my Grail diary and smeared it around with a cloth. I did this before the burial, so I got some nice patterns of stuck-on dirt. However, next time I think I'll sand the back down just like the front and then just go over it with a medium-brown stick of chalk.
Now to weather the edges. Using the knife, make a few tiny cuts, only as deep as the thickness of one strand of the canvas. Carefully pull at one end of each cut strand and rip them partway off, so that you have a few thin fringes. You might want to add some small thum-sized dings and dents and similar creases along the edges as well.
Final, but optional step: the map is rolled up at various points in the film. If you plan on having the weathered map framed or mounted, you probably want to skip this step as it'll just make things difficult for you. But if you want, fold up the map as before and then from the end with the fold (not the end with exposed map edges), roll the sucker up as tight as you can so that the map edges are on the outside. Keep it tight with rubber bands for as long as it takes to make it stay that way on its own. But consider the difficulty in flattening it out again. The canvas is thicker than the screenused fabric seems to be so it's going to have more of a memory.
There are many more screencaps and pics of the map I weathered here:
http://www.printroom.com/ViewAlbum.asp?userid=treadwell&album_id=124870
And that's how you muck up a work of art! (Sorry, kapow!)
")


