You are using an out of date browser. It may not display this or other websites correctly.
You should upgrade or use an alternative browser.
You should upgrade or use an alternative browser.
ED-209 rebuild (FINISHED PICS PAGE 6)
- Thread starter Keith
- Start date
nick-a-tron
Well-Known Member
Re: ED-209 rebuild
really enjoying watching this project take shape. Can't wait to see shots of the new parts.
Keith your work is inspirational.
really enjoying watching this project take shape. Can't wait to see shots of the new parts.
Keith your work is inspirational.
JLinNY
Sr Member
Re: ED-209 rebuild
Mines got several large splits over the surface. Very disappointing. I would be interested in a resin canopy too.
Are you going to replace the moulded rubber "canopy" - mine is starting to distintegrate at the corners
Mines got several large splits over the surface. Very disappointing. I would be interested in a resin canopy too.
Too Much Garlic
Master Member
Re: ED-209 rebuild
Any progress?
Don't wish to high-jack, but got my HT ED-209 today, the paint looks pretty smoothly applied except for a few minor smears. Wondering if it's necessary to even strip it before repainting and working up the smears as battle damage. Hmm... but the rubber parts and canopy are really bothering me.
Will the jbot.ca 1:6 scale decals fit the HT?
Last edited:
Keith
Sr Member
Re: ED-209 rebuild
Here is the new arm casting:
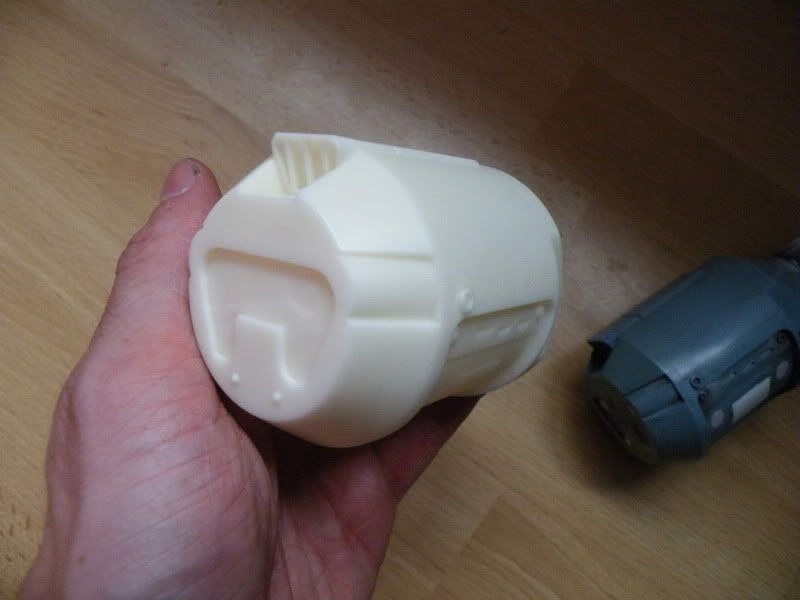
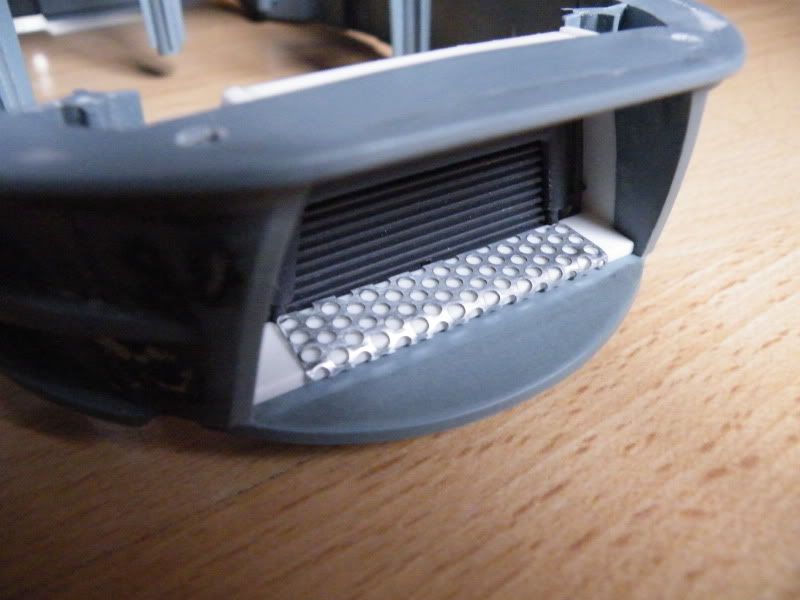
Here is the head with the rubber removed and the plastic under the rubber cut away:
I've cut the mouth out and i'm working on making it deeper:
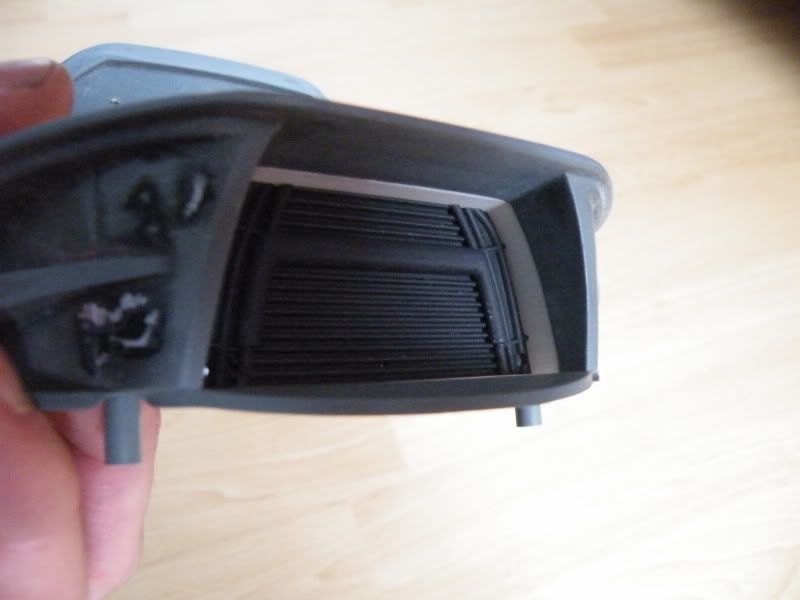
Some detail started to be added to the deeper mouth:
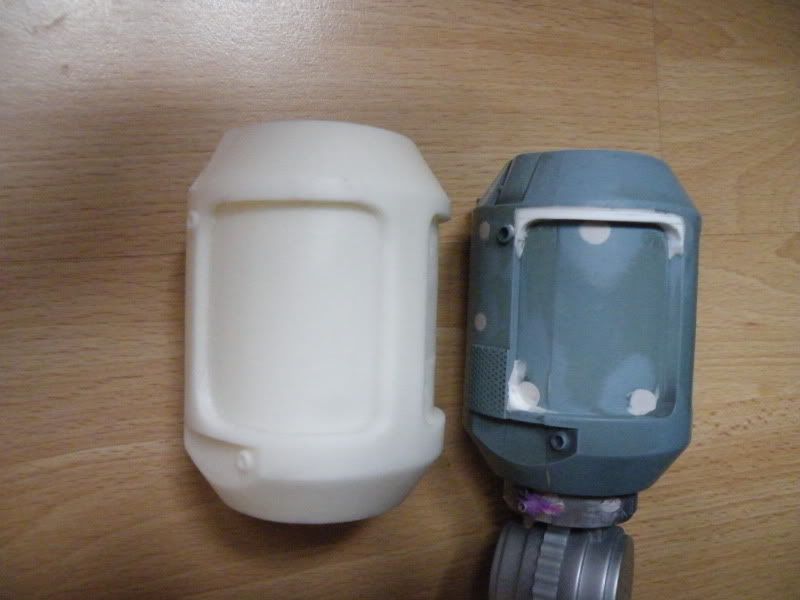
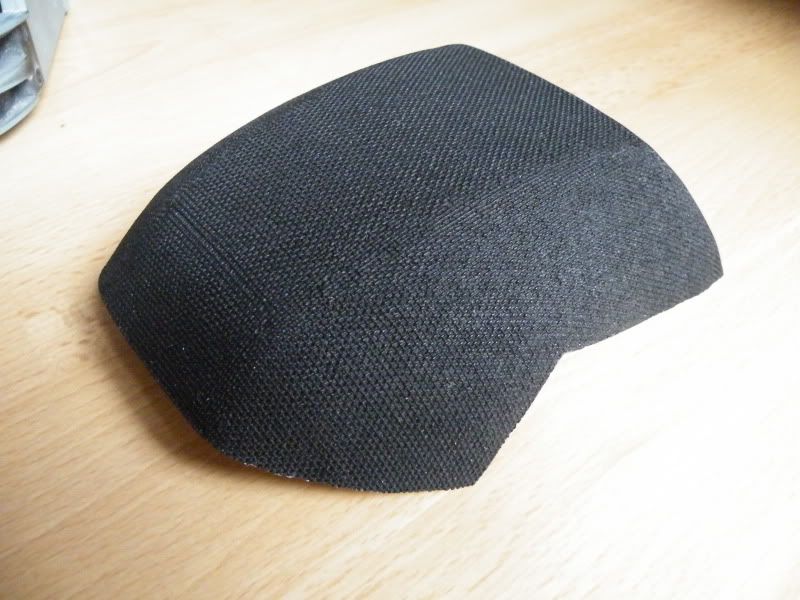
Here is the casting of the canopy with a quick coat of matt black paint on it. I will probably paint it satin black:
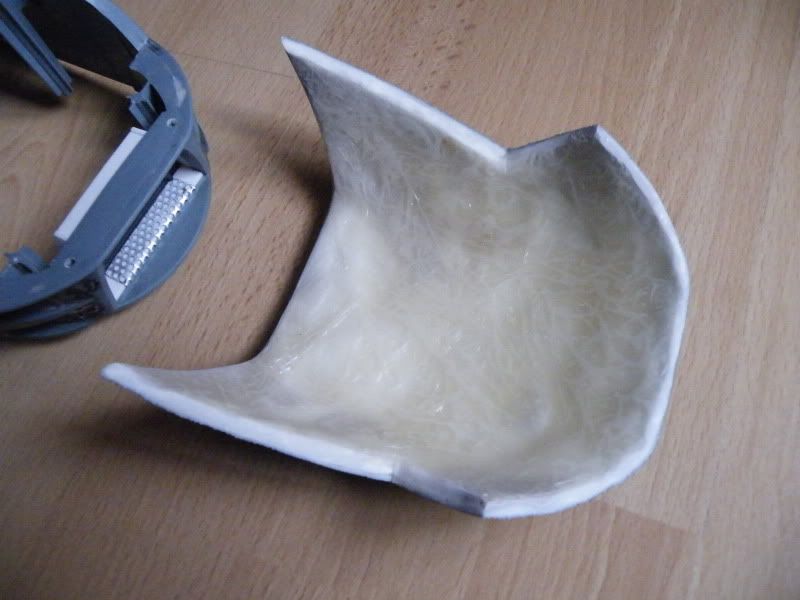
Here is the new canopy fitted:
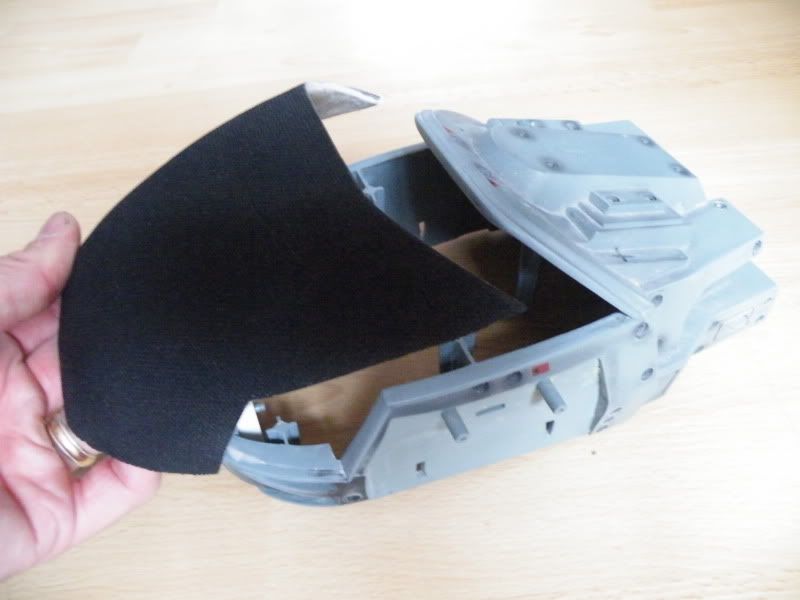
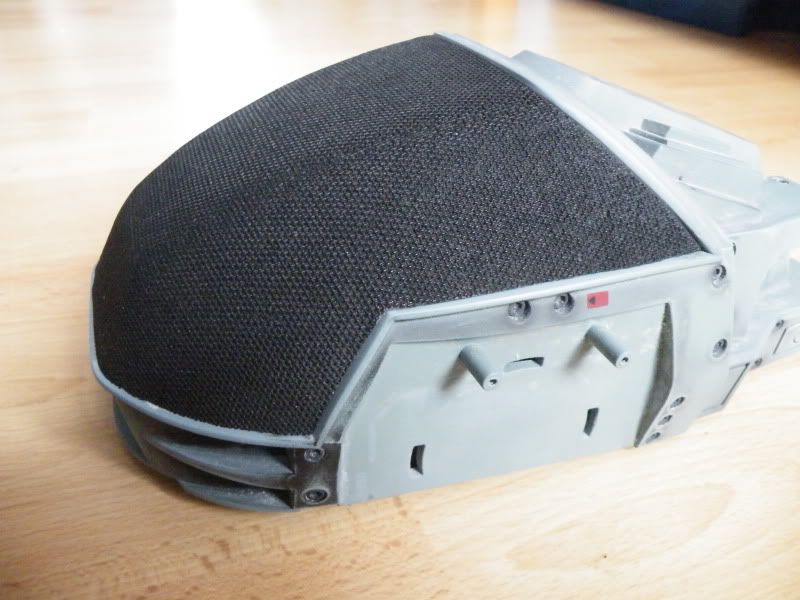

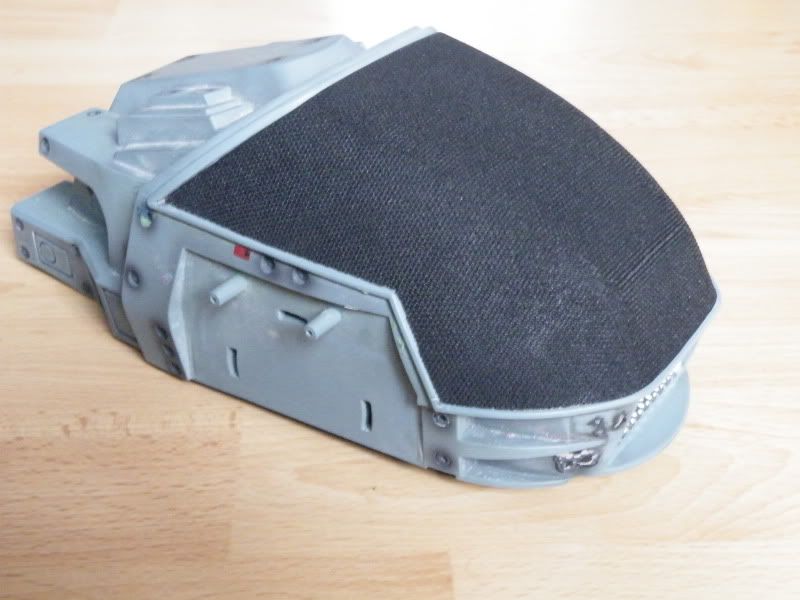
The rim which runs around the canopy on the head will be painted black also. Hot toys didn't paint that black for some reason.
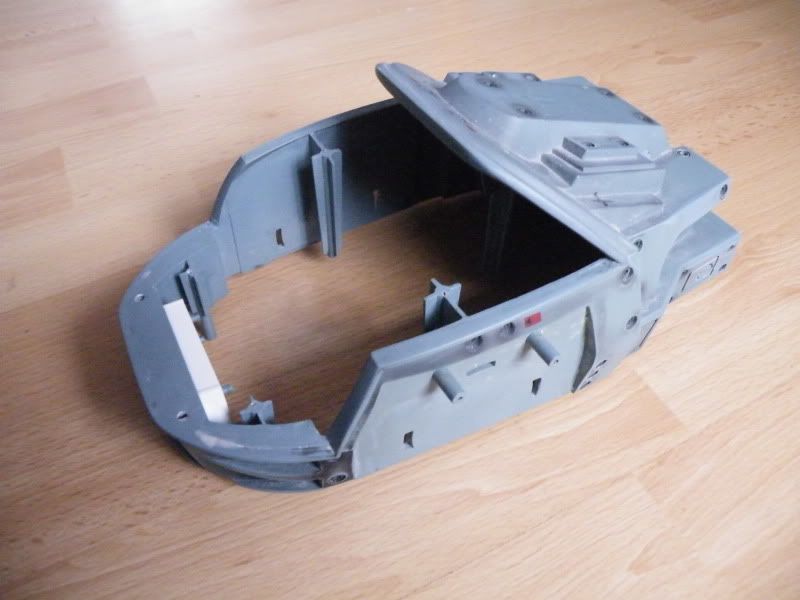
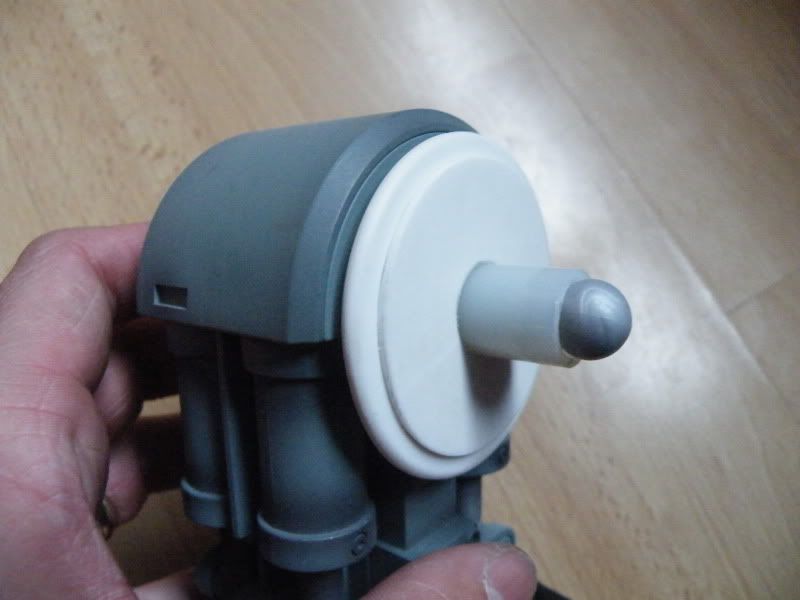
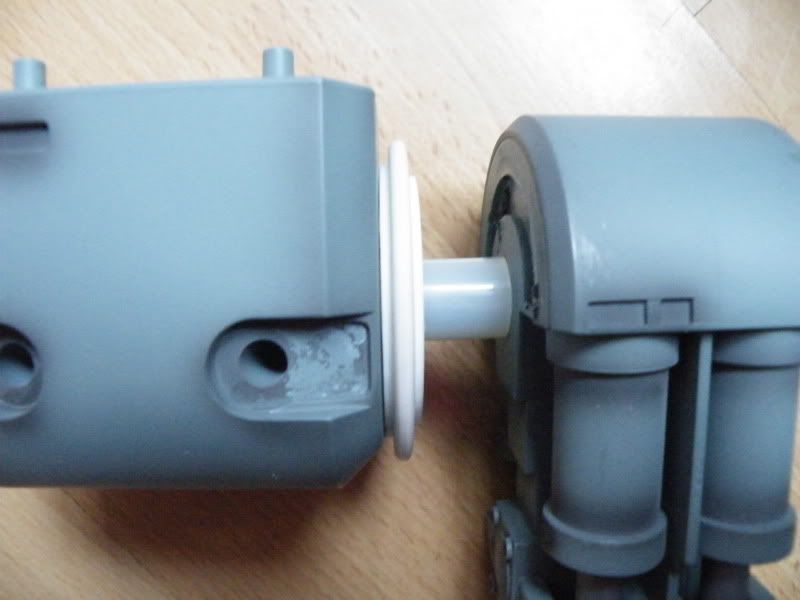
The piece of plastic tube fits over the hip joint and makes sure the legs are set in a perfectly symmetrical position and stay there:
This white styrene piece i've made will be molded and 4 casts will be glued together and replace the old rubber hip joint:
Keith.
Here is the new arm casting:
Here is the head with the rubber removed and the plastic under the rubber cut away:
I've cut the mouth out and i'm working on making it deeper:
Some detail started to be added to the deeper mouth:
Here is the casting of the canopy with a quick coat of matt black paint on it. I will probably paint it satin black:
Here is the new canopy fitted:
The rim which runs around the canopy on the head will be painted black also. Hot toys didn't paint that black for some reason.
The piece of plastic tube fits over the hip joint and makes sure the legs are set in a perfectly symmetrical position and stay there:
This white styrene piece i've made will be molded and 4 casts will be glued together and replace the old rubber hip joint:
Keith.
nick-a-tron
Well-Known Member
Re: ED-209 rebuild
WOW! fantastic work! everything looks so neat and clean. One of my favourite WIP's right now
WOW! fantastic work! everything looks so neat and clean. One of my favourite WIP's right now
Too Much Garlic
Master Member
Re: ED-209 rebuild
Looking at my kit I'm still wondering how you were able to cut the mouth area...
In fact... how in the heck did you manage to disassemble to whole thing? :eek :confused
Looking at my kit I'm still wondering how you were able to cut the mouth area...
In fact... how in the heck did you manage to disassemble to whole thing? :eek :confused
Last edited:
ROBOSTEVE 0671
Sr Member
Re: ED-209 rebuild
Keith,
Great work as always! Not seen you in a while mate.
Keith,
Great work as always! Not seen you in a while mate.
Keith
Sr Member
Re: ED-209 rebuild
Thanks guys!
Hi Steve, long time no see.
To cut the mouth out, pull off the grey mouth section, then drill some holes in the plastic, cut from one hole to another, then use a file to tidy it all up. The plastic is VERY thick though, so it will take you a few hours.
It was quite easy to disassemble. Just pull off the glued on parts, not much glue was used on mine and unscrew the screws.
Anyway, I've finished the mouth now. I added the pipes and stuff to match the real one.
Keith.
joewhite
Sr Member
Re: ED-209 rebuild
Damn, looking good! I passed on this toy but realize now that I shouldn't after seeing your upgrades! I've built the Horizon kit and have another that I plan on incorporating movable joints into some time in the future....this would have just been easier. The toyish look turned me off but you're making it look awesome.
Joe
nick-a-tron
Well-Known Member
Re: ED-209 rebuild
any updates keith?
any updates keith?
Re: ED-209 rebuild
amazing patience keith, i couldn't bring myself to do all that work on...well anything really.
please take my advice, STAY CLEAR of CFS!
now run by cowboys with a terrible attitude and customer service, every time i placed an order there was something wrong with it
im never going back, i use tomps now. the 2 part resin is pretty good and about half the price of tirantis.
looking forward to seeing this bad boy completed, keep up the good work.
-chris
Keith
Sr Member
Re: ED-209 rebuild
Hi Chris, i would stay clear of CFS, but Tomps don't seem to offer any resin in white.
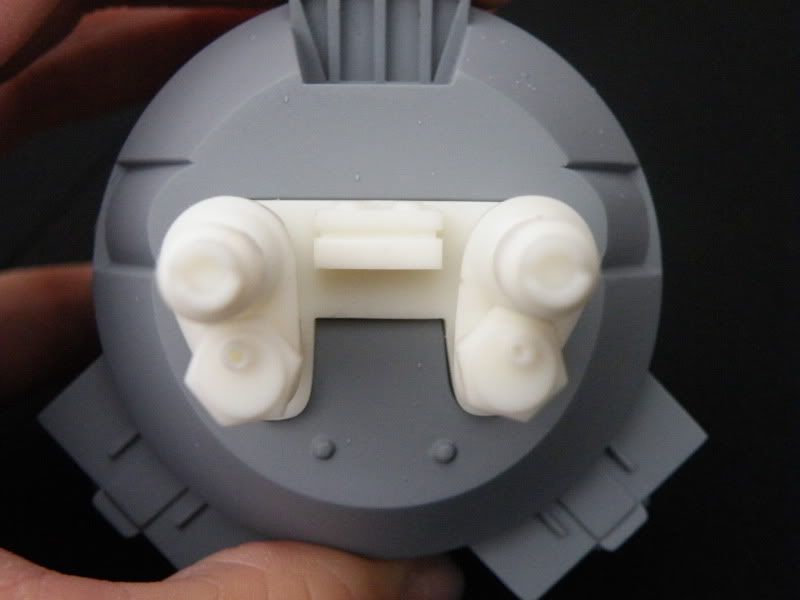
Here is a finished hip joint, made from resin to replace the original rubber ones. This part has been the most time consuming part to make believe it or not:
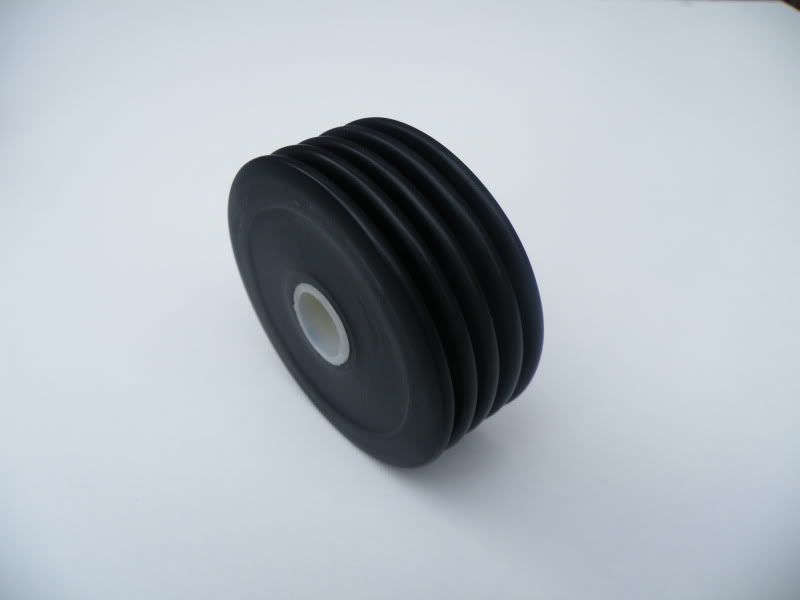
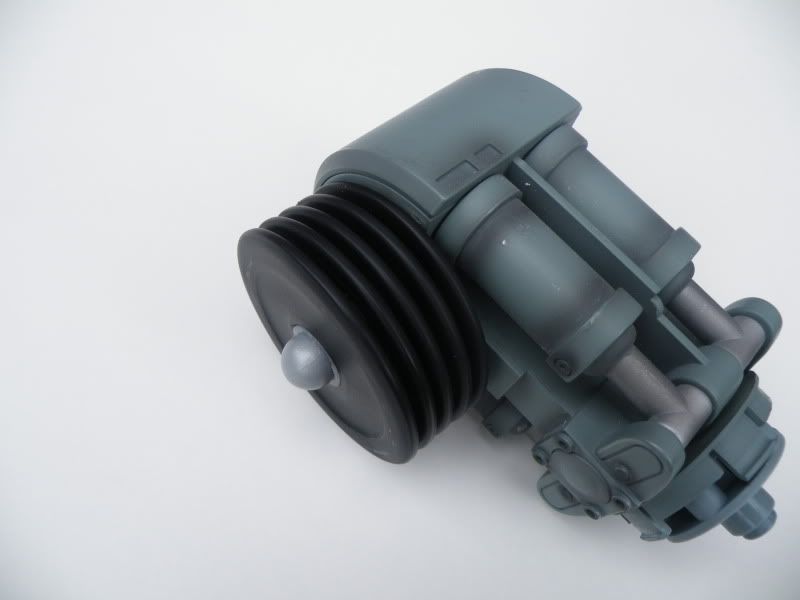
No more rubber!!! Did i say i hate rubber?:
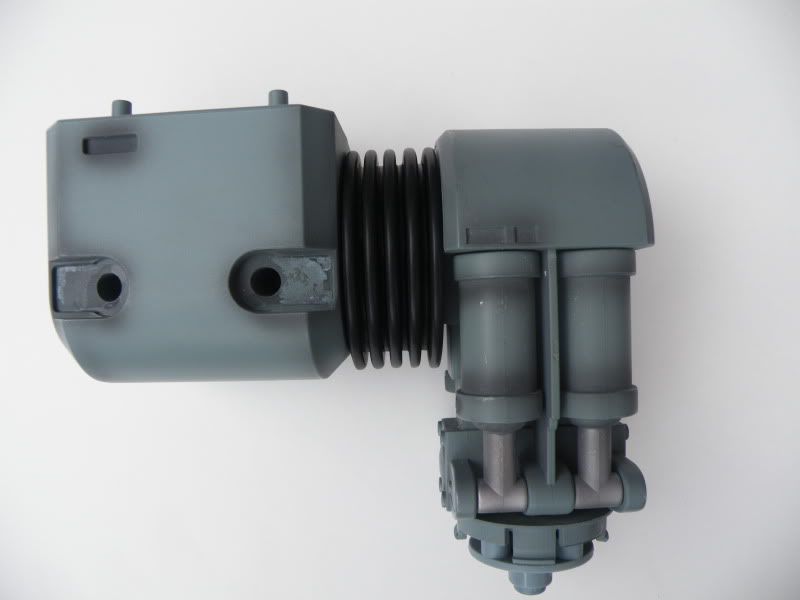
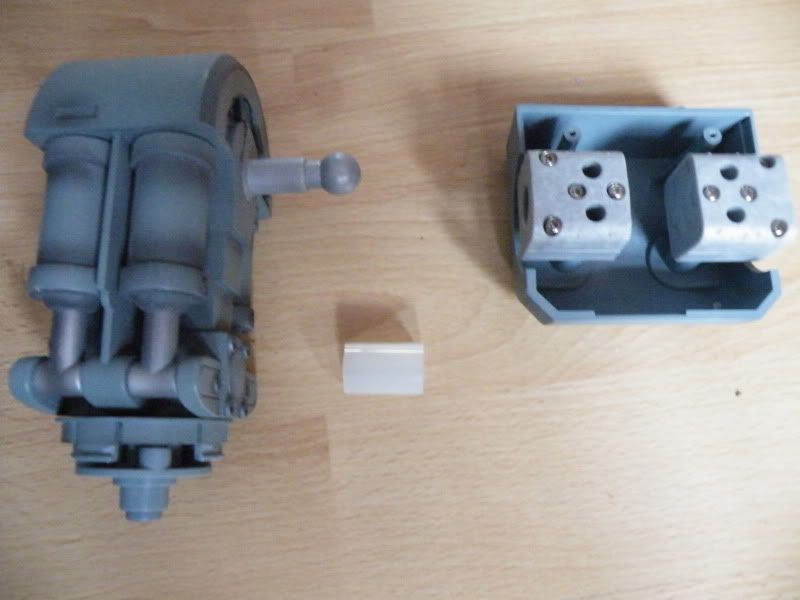
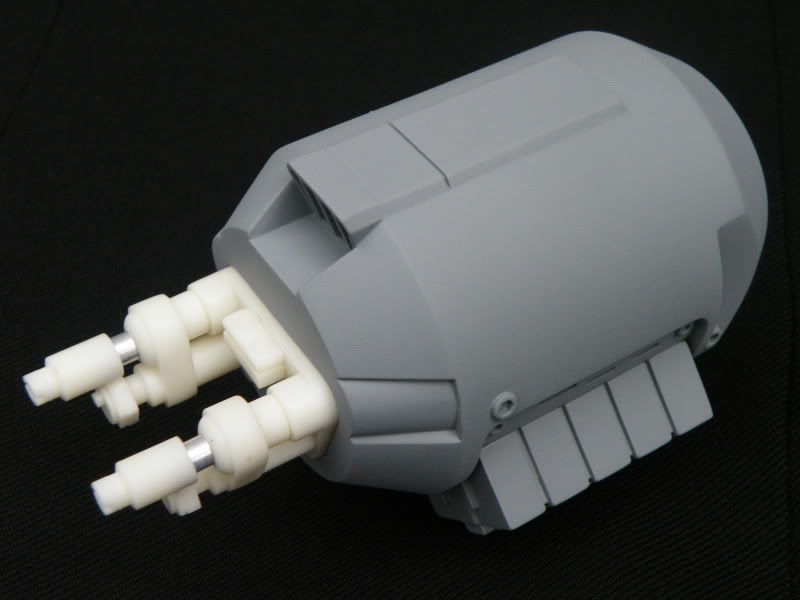
Here is the gun pod and ammo boxes. I have bolts sticking out of the pod and magnets built into the amo boxes to hold them on:
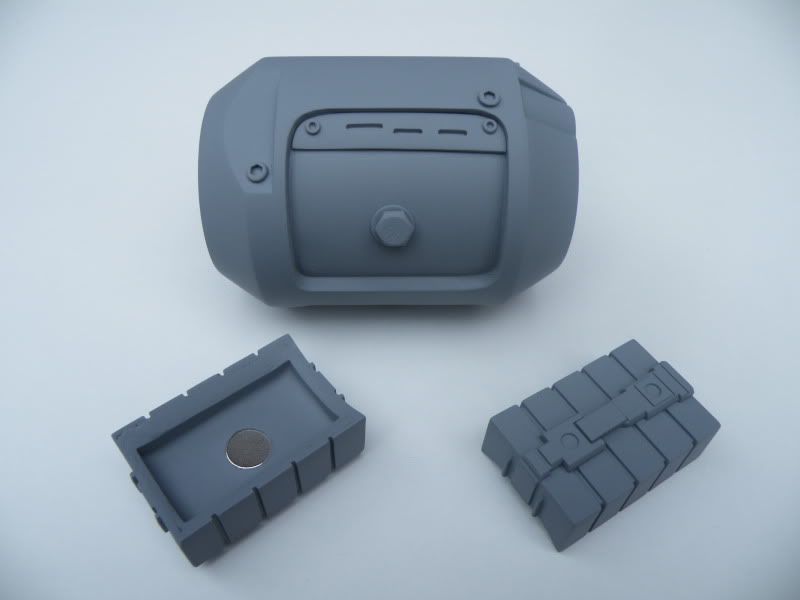
The detail with the three slots above the bolt head on the pod in the above photo had to be added on this side, as this side was where the rocket launcher was on the pod i molded. I made a partial casting of the pod and cut this section out and glued it on this side.
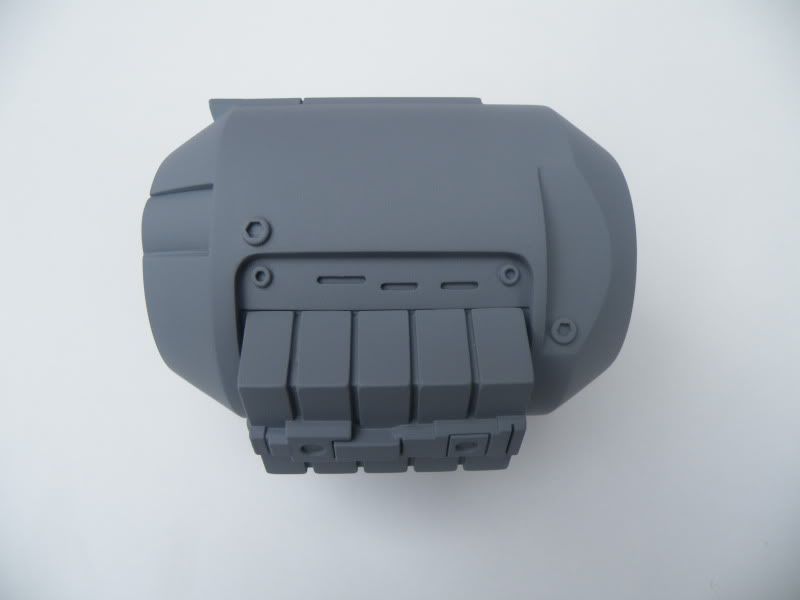
Ammo boxes fitted:
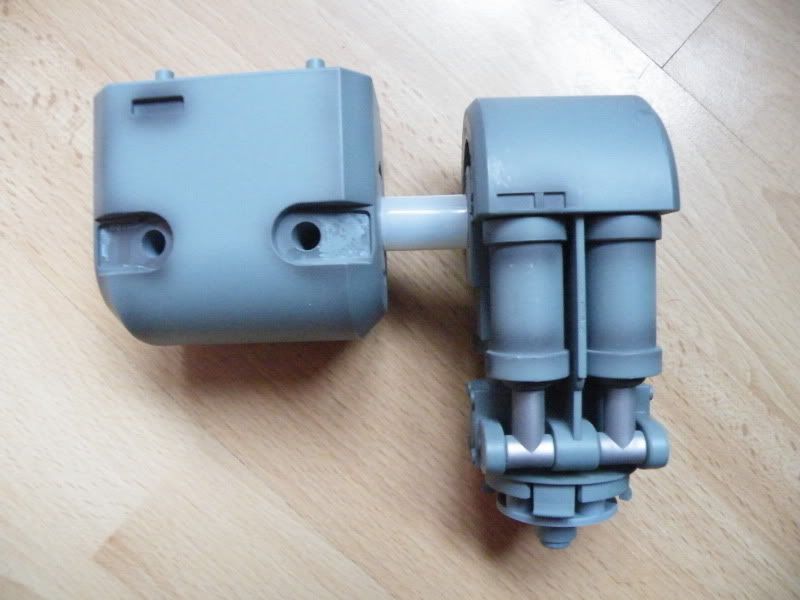
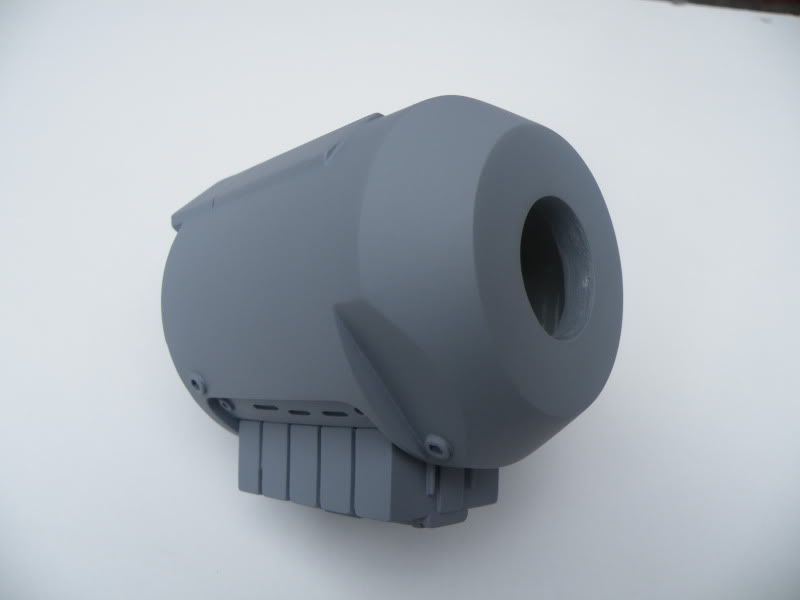
The hole at the back takes a plastic tube through it which is how its going to be mounted to the arm. You can see how thick the cast pod is by looking at the hole:
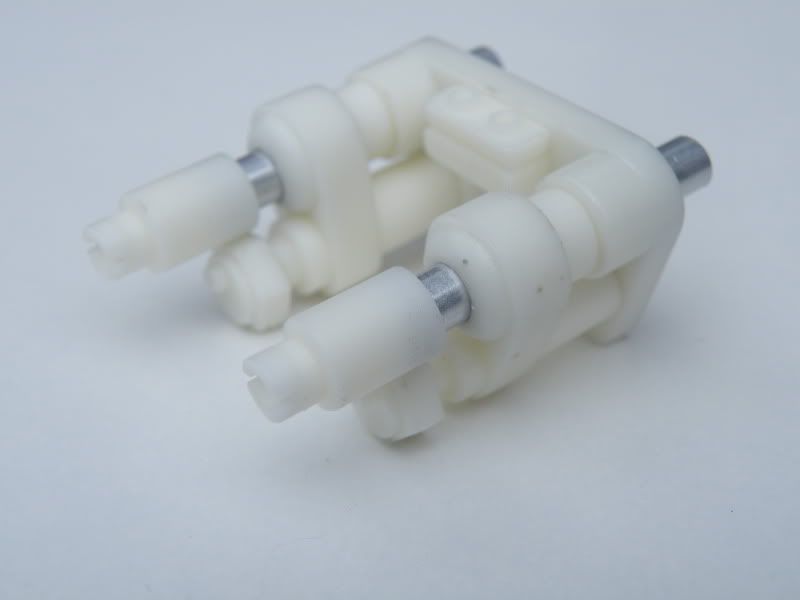
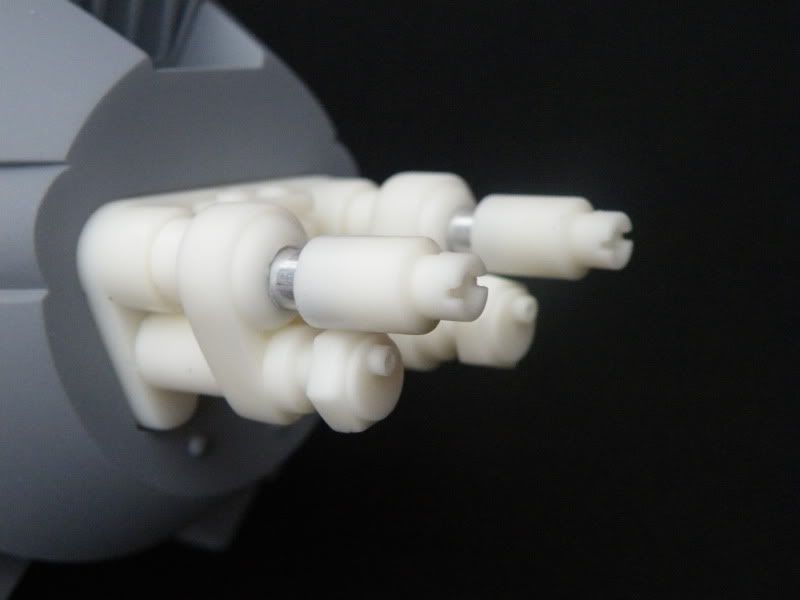
Here are the new guns for the left pod. They will have a few wires fitted to them after i've painted them:
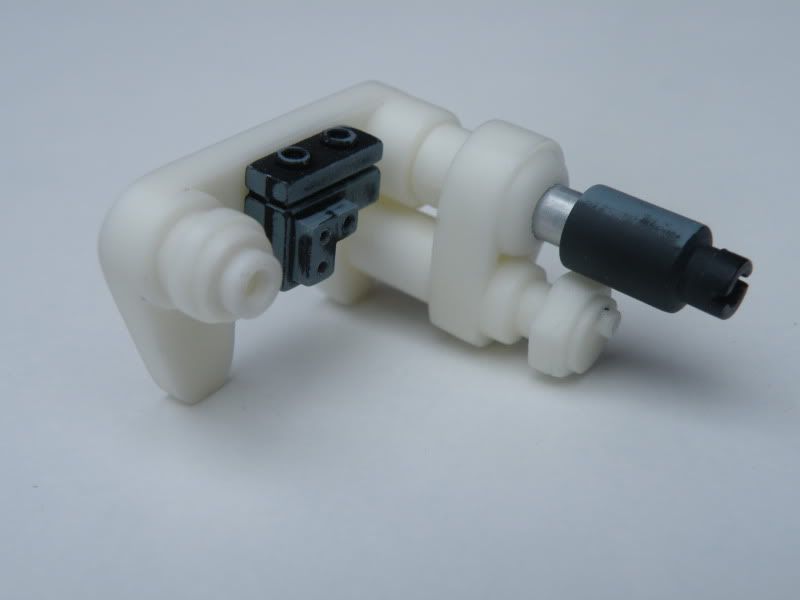
Here is the new gun for the left pod. As you can see, i've used two original parts. I still need to add a few bits to this to attach the wires to:
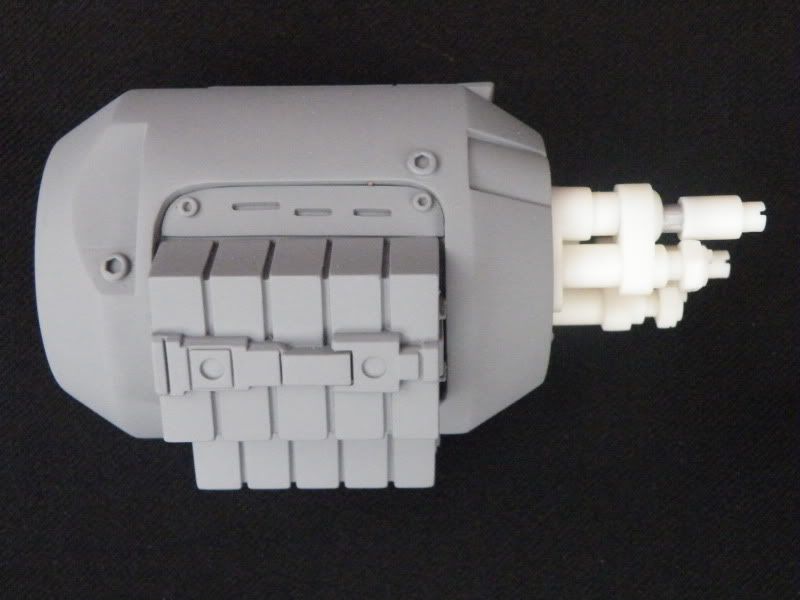
Some more photos of the new left pod, ammo boxes and guns. Everything here has been reproduced/scratch built:
As always when i take photos outside, it started to rain, so ignore the rain drops
I forgot to get some pics of the finished mouth, so thats all for now.
Keith.
Hi Chris, i would stay clear of CFS, but Tomps don't seem to offer any resin in white.
Here is a finished hip joint, made from resin to replace the original rubber ones. This part has been the most time consuming part to make believe it or not:
No more rubber!!! Did i say i hate rubber?:
Here is the gun pod and ammo boxes. I have bolts sticking out of the pod and magnets built into the amo boxes to hold them on:
The detail with the three slots above the bolt head on the pod in the above photo had to be added on this side, as this side was where the rocket launcher was on the pod i molded. I made a partial casting of the pod and cut this section out and glued it on this side.
Ammo boxes fitted:
The hole at the back takes a plastic tube through it which is how its going to be mounted to the arm. You can see how thick the cast pod is by looking at the hole:
Here are the new guns for the left pod. They will have a few wires fitted to them after i've painted them:
Here is the new gun for the left pod. As you can see, i've used two original parts. I still need to add a few bits to this to attach the wires to:
Some more photos of the new left pod, ammo boxes and guns. Everything here has been reproduced/scratch built:
As always when i take photos outside, it started to rain, so ignore the rain drops
I forgot to get some pics of the finished mouth, so thats all for now.
Keith.
nick-a-tron
Well-Known Member
Re: ED-209 rebuild
so so good! Each update makes my jaw drop lower
I can't wait to see you start the painting stages.
so so good! Each update makes my jaw drop lower
I can't wait to see you start the painting stages.
Keith
Sr Member
Re: ED-209 rebuild
No new photos yet, but i have made the canopy attach to the head with magnets and its really cool. I keep taking it on and off. I have finished the other hip joint too.
But best of all, i have found a fantastic base paint for the main grey colour. Its the smoothest toughest paint i've ever used with a very nice sheen to it. I think the sheen is just because is so smooth with no texture to the finish at all.
Keith.
Similar threads
- Replies
- 27
- Views
- 2,025
- Replies
- 68
- Views
- 4,115