Rankin-Bass Rudolph puppets - re-creations?

we have a place here in florida called Skycraft, they have everything electronic you could possibly imagine, especially bulbs, micro and otherwise. Perhaps give them a ring and see if they might have what you need... 1-407-628-5634 can't hurt to try...

http://skycraftsurplus.com/

Will
 
I might try and make a custom bulb. Find the shape...mold it...then cast it with CLEAR dyed red..and set and LED inside it.

It should work!

I have my head and body made, starting the legs.

I cant decide how to do the eyes. They looked cut out through the felt, then carved out. They have a recessed look to them.
 
That is an eye shaped depression on the skull itself under the felt.......then the felt goes down (glued to that) then the eye attached on that. makes it look like it's below the felt. :)
 
You could even say it glows!!!!!!

001-11.jpg


004-7.jpg
 
Last edited:
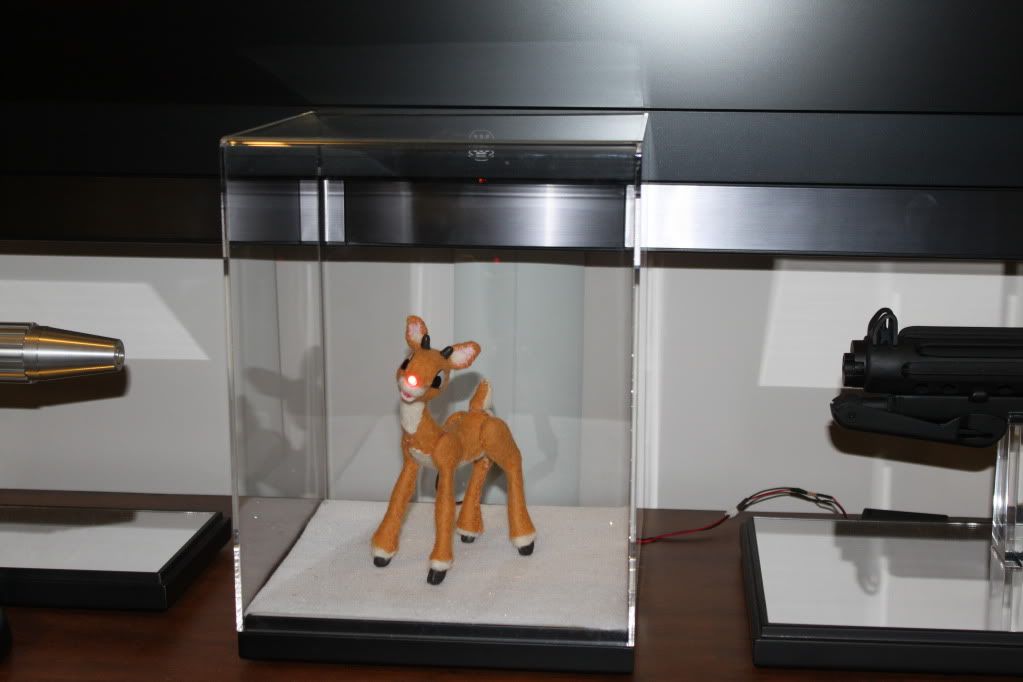
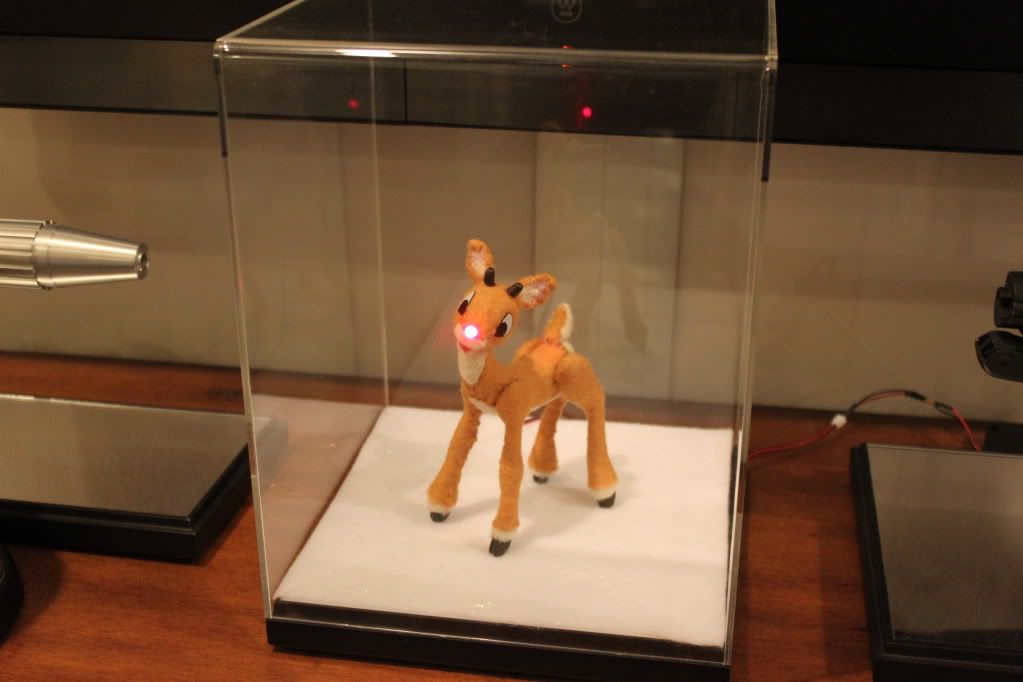
If anyone finds 12V bulbs in the right shape and size for the nose, post it. I haven't found anything appropriate so far. Do a search for wool felt and look for the color butterscotch for the rudolph brown color. Natural for the neck trim etc.... Also use a pink for the inside of the ear and mouth, with the natural for the "hair" coming out of the ear interior. I used epoxy putty for the hooves and antlers as well as the head and torso bases. Use sharp "small curved" scissors to trim your polyfoam for the neck section and for the shoulders/hips of the legs. Use batting for the tail stuffing. The original eye pupil was a very thinly shaved leather stuck on the white of the eye. My leather was just too thick and I abandoned that and just used a black sharpie marker instead as I have no desire to change the pupil position on my Rudolph. For the ears, you want to cut a piece of felt in the shape of a cathedral window. Cut cut a smaller piece of pink in the same shape and sew them together. Cut tiny strip of natural "fuzzy" felt and sew on the bottom facing of the pink down at the base of the ear. I inserted a single piece of wire inside between the two pieces of ear material... lastly, at the bottom, bring the two corners of the ear together and sew in the front and this gives the ear it's correct shape. :) The tail is mostly natural with a tiny sliver of the butterscotch on the front. Everything was hand sewn on my replica. I did use a tiny bead of hot glue to hold the felt in position so that it couldn't slide about once it was sewn which worked perfectly.....just make sure to mash the hot glue flat immediately so it doesn't alter the contour of your replicas. My hooves and antlers are painted with an acrylic burnt umber "dark brown" paint. I may paint my LED for the nost with a more translucent red paint to make it look more like the original. The LED will illuminate it regardless of the paint. The original was painted over a clear bulb anyhow.

Dave :)


Well, heck if it's THAT easy!! :lol
These look amazing. I am so jealous because I have never been very good at creating something this small and having the finished product look so clean. Maybe Yukon or a Bumble might be more for me!! Nicely done!!
 
hand sewing using a curved needle is easy going with felt. It's very forgiving. I used hot glue under the felt where I absolutely didn't want any warping/wrinkles etc. It's an amazingly fun project. Looking forward to santa. :)
 
I used some WHITE GLUE. It dries pretty quickly.

The eye trick...wish I had know that before I made my head.

Oh well...techniques for ATTEMPT TWO.

Im sure Ill be making a couple of attempts. I also have to make a CLARICE.

;-)
 
I should have mentioned the eye depressions Frank, sorry bout that!!! I'm gonna do another as well. I want to improve the legs just a bit. I'm pretty happy with the rest except the snout which I'd like to make skinnier as well.

Dave :)
 
Oh no worries mate!
I think I can still do it..as..my head and body are BALSA!

Ill depress it in with force...then make eyes.

I sewed with this COOL clear thread I found..
Worked GREAT!
 
Ok..I finally got off my butt...after watching the awesome job VADERDARTH did!

I have a TON of pics, might make a tutorial. VADERDARTH, or any other builder feel free to contribute!

My Start, Wood, Binder full of reference, and a butt load of leather and felt!

binder.jpg


My Basic shape based on drawings. Note: You have to compensate for the thickness of the felt and photographic distortion. Pics from multiple angles helps.

bodyshape2.jpg


bodyshape.jpg


start.jpg


Sewing the Head to the neck was NOT easy. And...I do NOT enjoy covering this thing with felt!
Talk about LEARNING CURVE!!

neck.jpg


Here is where I am right now. Im currently making a casting for a BULP SHAPE. Then will cast the red LED in the red tinted resin.

His Snout is real leather and his Mouth even has a .7mm wire in it as per the book.

Antler nubs, Legs, tail and ears will follow.

I will also replace the EYE Leather with something thinner when I find it.

basic.jpg
 
Last edited:

Your message may be considered spam for the following reasons:

If you wish to reply despite these issues, check the box below before replying.
Be aware that malicious compliance may result in more severe penalties.
Back
Top