NS Davros Chair - in cardboard!

Jeddie

Well-Known Member
Hello everyone!,

Especially after hearing that Davros was coming back in the new series of Doctor Who, I wanted to make his grand chariot :) After some persuading to be allowed to keep it in the front room, I proceeded to make plans. I couldn't work with wood, so I decided to make my chair from double wall corrugated card, and make it as strong as possible.

So, here's what I've managed so far! The main skirt section.

Card Arrives!
box.jpg


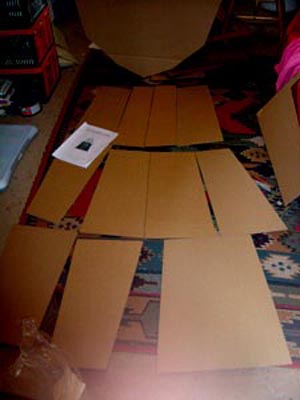
Panels cut from 50x60cm card pads
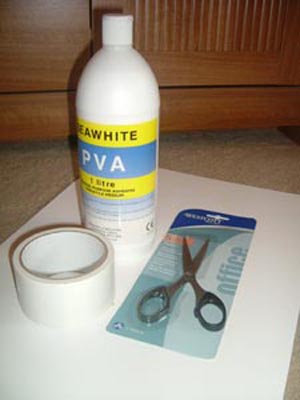
panels.jpg


Tools of the trade
tools.jpg


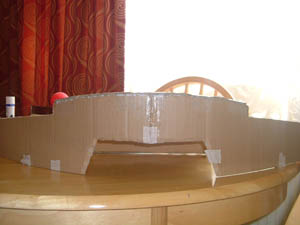
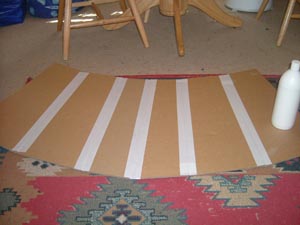
Taping half the panels together
taping.jpg


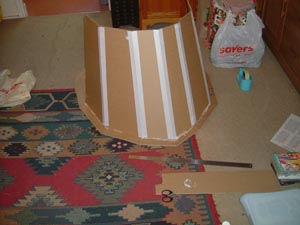
Gluing half onto base.
gluing.jpg


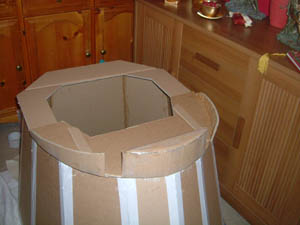
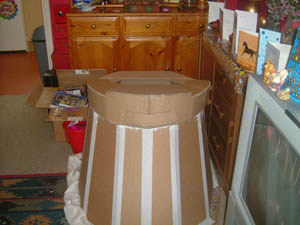
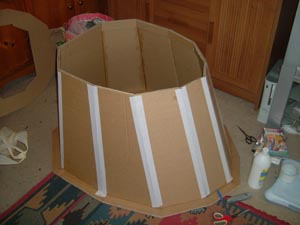
Skirt complete, I strengthened the top of the walls with more strips of card.
strength.jpg


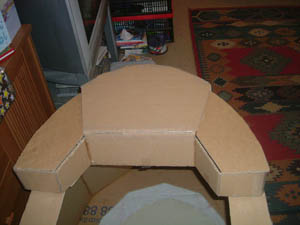
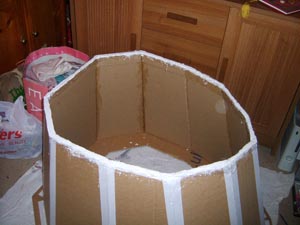
Leveling the wonky top with filler.

leveling.jpg


More to come soon :D.

Jeddie
 
Great idea! Must ask my wife if I can build a big cardboard Dalek in our living room :lol "No" I imagine will be the answer :lol

Looking good so far. Keep us updated :)
 
Last edited:
Thanks Glim999! I certainly will keep you updated! Space restrictions are VERY annoying when you want to make props... Maybe they should start making houses dimensionally transcendental like the TARDIS? :lol

I've also started on a Davros hand this week, so I have only got the control panel done. Heres my progress:

cp1.jpg

Bare bones....

cp2.jpg

Front panel (In two pieces)

cp3.jpg

Gluing the top on.....

cp4.jpg

Coming together....

cpfront.jpg

Test fitting....

cptop.jpg

Strangely bare....

More to come when I've done it! :)

Jeddie
 
MotiveAlloy - not sure why you can't see the pictures - hopefully you can now, and thank you WombatOfFury! :D

It's been a while - but heres what I've done so far. Not much more on the chair, but a lot on the hand!

Firstly - a replicas of the control panel widget -
ufo1.jpg
ufo2.jpg

ufo3.jpg
ufo4.jpg


Plus - Davros' hand!

phand.jpg
phand2.jpg

Cutting rubber glove off cast. / Finished cast.
phand3.jpg
lebeau.jpg

Carved into shape, and painted with a dry layer of PVA to make chavant stick.

and finally - The Sculpt!
shand1.jpg

shand2.jpg

shand3.jpg

shand4.jpg


BUT - there is a problem. I put this in a block of plaster to make a mould - put a generous layer of petroleum jelly at the split, but I now can't get it open despite using a screwdriver (not sonic :)) and hammer! Any advice much appreciated!

Jeddie
 
Last edited:
BUT - there is a problem. I put this in a block of plaster to make a mould - put a generous layer of petroleum jelly at the split, but I now can't get it open despite using a screwdriver (not sonic :)) and hammer! Any advice much appreciated!

Jeddie

Nice work with the cardboard - amazing what people like you can do with that stuff!!!

Also the sculpt of the hand is looking good too!

The mold is sticking eh?!.....Hmmm... Can you post a pic of the mold you've made?

What I would suggest doing is warming the mold up a bit - this should help release the clay that is clinging onto the plaster and also help make the oil in the petrolium jelly runnier.

Just a hairdryer would do.

I notice that you said you've lubed the split line - did you not lubricate the sculpt? As I can see bare plaster on the sculpt itself, which will have adhered to the mold case.

Draven
 
Thanks for all your help Draven! I hope I covered all the plaster, but I didn't the Chavant... :redface I hope that doesn't stop it coming out...

Here is the mold:

mold1.jpg

mold2.jpg


Note- the bumps on top is not the sculpt peeking through, its just the way the plaster went on top.

I will try the warming idea tomorrow... I hope I can get it out...

Jeddie
 
Thanks for all your help Draven! I hope I covered all the plaster, but I didn't the Chavant... :redface I hope that doesn't stop it coming out...

Here is the mold:


Note- the bumps on top is not the sculpt peeking through, its just the way the plaster went on top.

I will try the warming idea tomorrow... I hope I can get it out...

Jeddie

The chavant itself will not be enough to stop it opening - you will get it open eventually! But it will be "grabby" without any lubrication (wax sprays are good for this brands such as macwax or techwax)

Molds can sometimes just be a bugger to get open - even when you lube the case, the sculpt and everything! It's just a case of giving yourself the best chance with all of the preparation.

What I would suggest is to stop using screwdrivers - the tip is too narrow and the amount of force needed is located in too small an area.

Try using two wallpaper scrapers - one at each end of the box to apply even pressure along the seam line.

Screwdrivers are ok for smaller molds and also have that nice slope, but I'm guessing that the mold seamline is about 30-35cm right? Therefore put one in one side, one in the other, wiggle them into the crack (you can even try sliding them along the seam at this point unless you put plugs into the seam faces?), then turn the handles on both scrapers to begin a levering motion.

Double that up with a warm mold and you should be good to go!

Draven
 
Back
Top