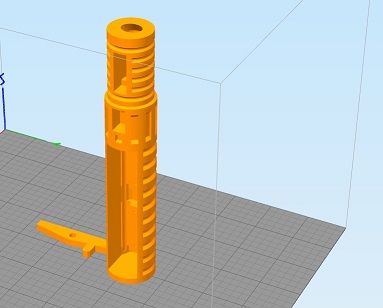
Spirit of Ob1- Luke V3 Run, Mods- Paint apps-Electrical-Ideas-Questions thread!.

Thanks Rudy!! What a beautiful saber!!

IMG_4986.JPG
 
For me, personally, I do 3 things prior to applying aluminum black.

1. Clean the saber with a good metal cleaner.

2. I scuff up the surface very slightly with either a 3M pad or steel wool to give the aluminum black a surface to "bite into"

3. I apply heat via a torch.

Followed by:

4. Multiple passes / applications of the aluminum black.

A good explanation for aluminum black, and the role of heat in the process, may be found here by Solo's Hold:

https://youtu.be/Z2_pb7OYgNw


How are you guys darkening the pommel section? i tried using aluminum black but it wipes right off??
 
Last edited:
Alley, do u use a brush to brush the aluminum
Black on the booster?


Sent from my iPhone using Tapatalk
 
Alley, do u use a brush to brush the aluminum
Black on the booster?


Sent from my iPhone using Tapatalk


Yes, for progressive darkening on pieces in which only some of the prop is darkened (and I want to control what get's colored darker), I clean the piece, scuff up the surface to be darkened, apply some heat, and brush on the blackener. This allows me to control where the blackener goes and the progressive shading. I also mask off the areas not to be darkened.

For larger pieces in which I am aging the entire piece, I will spray the piece with blackener, dip it, or use the technique of putting the piece in a bag with blackener and swirling it around.

Afterwards, it's all about cleaning up the piece with steel wool, or 3M pad, using rasps to weather and soften hard edges, using gravity and a concrete floor, and multiple passes with the aluminum blackener and going through the process again.

I am by no means an expert, but the key, I have found, is knowing where to say "stop" with any weathering project.
 
Last edited:
Finally got mine wrapped up...

V3 001.jpg

V3 002.jpg

V3 003.jpg

Since this was an idealized version of the V3, I figured I'd give it an idealized finish. Rather than use aluminum tape, I polished those areas with Mothers Mag & Aluminum Polish.

V3 004.jpg V3 005.jpg

For the copper neck, I buffed it with #0000 steel wool, gave it a quick ammonia fuming (only for about 30 minutes) to give it a bit of color in the crevices, and buffed it again.

I also skipped the foil tape on the Graflex clamp, and used a Roman's no logo clamp instead. The finish was already pretty shiny (especially the side bars) but I also polished it a bit with Simichrome Polish. I buffed the clamp rails and the lever with a green Scotchbrite pad to knock the finish down on those. The card is a slothfurnace version 2.0

V3 006.jpg

For the black paint I used Krylon flat black and sanded the paint off the ribs with 240 and then 320 grit sanding blocks. I dropped a 5/16" x 3" long bolt down through the neck hole from the inside, tightened it down with a washer and nut on the outside, and chucked it up in a cordless drill. Presto! Poor man's (lazy man's?) lathe. Definitely helped give a nice even finish with the sanding blocks.

IMAG0073.jpg IMAG0074.jpg

For the remainder of the aluminum I went over all of it with the Scotchbrite pad followed by the steel wool. The face of the emitter got the usual Easy-Off oven cleaner treatment, then a quick wipe with diluted Birchwood Casey aluminum black to dirty it down a bit, followed by some buffing with steel wool. I darkened the interior of the emitter socket with full-strength aluminum black and painted the socket of the copper neck with Krylon flat black.

I had a heck of a time trying to age/darken the clamp/booster section and the pommel cubes. I thought I'd try the dishwasher trick first. No effect. :unsure I washed them a second time. Still nothing. :angry So I started in with the oven cleaner treatment... it went pretty well at first - I was getting them to look kinda' grey , but the tone was uneven. I kept going but it reached a point where it seemed like each application that I put on appeared to be cleaning off the grey finish that I had built up - it was weird. :confused On a whim I thought I'd try the dishwasher again. Disaster! The uneven oxidation from the oven cleaner treatment darkened into big blotches - it was like some sort of strange camouflage. So I stripped them back down to bare aluminum with the Scotchbrite and steel wool.

I saw in another thread that someone had used drain cleaner on a V2, so I thought I'd give that a try. I did the pommel first, soaking it in a shallow dish, and it worked rather well (and quickly). But as I was rinsing it off I started rubbing it and the oxidation layer came right off. Poop. :( Back to the oven cleaner...

As I was doing the oven cleaner treatment again I kept thinking about the drain cleaner. I tried the drain cleaner again, but when I rinsed the part off I didn't touch it. I let it dry overnight and that was the trick. :thumbsup I gave the pommel another quick soak and then did the clamp/booster section, but I got them both way too dark. Stripped 'em back down to bare aluminum and tried again. Again too dark, so after a couple more tries I got them to where they are now, which I'm OK with. The drain cleaner works fast - a minute and a half to two minutes is all it took.

V3 007.jpg

Overall I'm pretty happy with it. Thanks for the fun project Rudy!
 
My install became just a momentary switch Laser. I couldn't power the picocrumble with enough mah, the speaker placement was muted (it should almost always be towards the bottom in my builds). So, if I can't have both, at least I've got one:
Below is the build:


The Lever in the background goes between the card graflex clamp. The card gets glued down to the lever.


This build has a kill switch and a momentary switch. The momentary is a double momentary because I was going to use it for dual install on this rig but had to abandon the initial plan.


I actually got a D-ring instead of the Tri-ring. The build remained shiny.


This build is done for now. Only thing left for me to do is build a beam expander. Enjoy.
 
Finally got mine wrapped up...

View attachment 731459

View attachment 731461

View attachment 731462

Since this was an idealized version of the V3, I figured I'd give it an idealized finish. Rather than use aluminum tape, I polished those areas with Mothers Mag & Aluminum Polish.

View attachment 731464 View attachment 731465

For the copper neck, I buffed it with #0000 steel wool, gave it a quick ammonia fuming (only for about 30 minutes) to give it a bit of color in the crevices, and buffed it again.

I also skipped the foil tape on the Graflex clamp, and used a Roman's no logo clamp instead. The finish was already pretty shiny (especially the side bars) but I also polished it a bit with Simichrome Polish. I buffed the clamp rails and the lever with a green Scotchbrite pad to knock the finish down on those. The card is a slothfurnace version 2.0

View attachment 731466

For the black paint I used Krylon flat black and sanded the paint off the ribs with 240 and then 320 grit sanding blocks. I dropped a 5/16" x 3" long bolt down through the neck hole from the inside, tightened it down with a washer and nut on the outside, and chucked it up in a cordless drill. Presto! Poor man's (lazy man's?) lathe. Definitely helped give a nice even finish with the sanding blocks.

View attachment 731467 View attachment 731468

For the remainder of the aluminum I went over all of it with the Scotchbrite pad followed by the steel wool. The face of the emitter got the usual Easy-Off oven cleaner treatment, then a quick wipe with diluted Birchwood Casey aluminum black to dirty it down a bit, followed by some buffing with steel wool. I darkened the interior of the emitter socket with full-strength aluminum black and painted the socket of the copper neck with Krylon flat black.

I had a heck of a time trying to age/darken the clamp/booster section and the pommel cubes. I thought I'd try the dishwasher trick first. No effect. :unsure I washed them a second time. Still nothing. :angry So I started in with the oven cleaner treatment... it went pretty well at first - I was getting them to look kinda' grey , but the tone was uneven. I kept going but it reached a point where it seemed like each application that I put on appeared to be cleaning off the grey finish that I had built up - it was weird. :confused On a whim I thought I'd try the dishwasher again. Disaster! The uneven oxidation from the oven cleaner treatment darkened into big blotches - it was like some sort of strange camouflage. So I stripped them back down to bare aluminum with the Scotchbrite and steel wool.

I saw in another thread that someone had used drain cleaner on a V2, so I thought I'd give that a try. I did the pommel first, soaking it in a shallow dish, and it worked rather well (and quickly). But as I was rinsing it off I started rubbing it and the oxidation layer came right off. Poop. :( Back to the oven cleaner...

As I was doing the oven cleaner treatment again I kept thinking about the drain cleaner. I tried the drain cleaner again, but when I rinsed the part off I didn't touch it. I let it dry overnight and that was the trick. :thumbsup I gave the pommel another quick soak and then did the clamp/booster section, but I got them both way too dark. Stripped 'em back down to bare aluminum and tried again. Again too dark, so after a couple more tries I got them to where they are now, which I'm OK with. The drain cleaner works fast - a minute and a half to two minutes is all it took.

View attachment 731469

Overall I'm pretty happy with it. Thanks for the fun project Rudy!


Solid, man. Inventive too. Great ideas and really innovative techiques. Especially using the drill for turning the saber.
 
I got some tape! I am also experimenting with a Wannawanga's clamp cover with matching punched holes, but I'm having trouble mounting it on the clamp....
IMG_5928.JPG
 
I got some tape! I am also experimenting with a Wannawanga's clamp cover with matching punched holes, but I'm having trouble mounting it on the clamp....
View attachment 733860

What trouble are you having with the clamp cover?

Mine went on like a glove but I did use a vice to bend the tabs at the points were the cover goes under the clamp bars.
 
Last edited:
What trouble are you having with the clamp cover?

Mine went on like a glove but I did use a vice to bend the tabs at the points were the cover goes under the clamp bars.
Mine does not fit that well on the clamp. It's too long, so I had to shorten it ....
IMG_5957.JPG
 
Now working on aging only parts of the saber. I diluted the aluminum black with water, and hopefully that helps control the reaction. Maybe even make it more even?? I masked with blue tape the parts that I don't want aged. It might need another go... and to do parts individually....
IMG_5936.JPG
IMG_5937.JPG
IMG_5938.JPG
 
This thread is more than 6 years old.

Your message may be considered spam for the following reasons:

  1. This thread hasn't been active in some time. A new post in this thread might not contribute constructively to this discussion after so long.
If you wish to reply despite these issues, check the box below before replying.
Be aware that malicious compliance may result in more severe penalties.
Back
Top