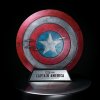
Captain America Shield - 3d Modeling/Printing/Painting

robpauza

New Member
Hi guys,

I just started on this tonight. I'm modeling it in two main pieces for 3d Printing. So far, I just have the outside modeled, but the inside will print separately and will glue inside the outer shell. I'm doing it that way to hide the rough surface that the support material will leave. The first half is printing now and will be done in about 40 hours. :sleep

For now, I'm just making a 10" diameter shield. I may do a full scale later if it turns out well. Anyway, here's a few wires and renders.

awire1.pngawire2.pngrender1.jpgrender2.jpg

Thanks for looking,

-Rob
 
I got a little progress done this weekend. The way I printed left me with a lot of support material that was a pain to get off:
photo1.jpg

Printed the inside part:
photo2.jpg

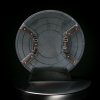
Here's how the raw print turned out:
photo5.jpg

And after I got rid of the support material on the inside piece, I glued the two together and used some 3d printed clamps (clamps found on Thingiverse):
photo4.jpg
photo3.jpg

That's it for now. Next up is some sanding/filling/priming. And I need to model and print the stand also.

EDIT: Not sure why my photos uploaded upside-down. Sorry.

-Rob
 
This is Amazing. What printer do you have that can print the shield diameter. Wow, love the matching stand.

Sent from my SAMSUNG-SM-G920A using Tapatalk
 
What modeling software are you using? Everything looks great so far

Thanks. I use Lightwave. The renders are done in Keyshot.

This is Amazing. What printer do you have that can print the shield diameter. Wow, love the matching stand.

Sent from my SAMSUNG-SM-G920A using Tapatalk

Thanks a bunch. Hopefully it will all come together. This is just a mini shield... 10" diameter. I have a Raise3D N2 capable of 12"x12"x12"

Thanks again for the comments.
-Rob
 
Well... after a long time of doing nothing, I decided to paint this thing today... so I guess I'll call it done. I shot video of the build, but I sort of forgot to shoot photos. :( Anyway, I'll post a link to the build video once I edit/upload it.

_C7A3053.jpg

_C7A3054.jpg

_C7A3055.jpg

Thanks for looking.
-Rob
 
Amazing to watch. Thank you for sharing the "behind the scenes". Love it!

Curious how much you estimate it cost to print in materials. Looks priceless.

Sent from my SAMSUNG-SM-G920A using Tapatalk

It's hard to say for sure, but it probably took about 1/2 to 2/3 of a 1kg roll of filament... so maybe $20 for this 10" diameter version. I did buy the leather, plastic buckle things and rivots specifically for this, so that's maybe another $25. The filler/primer/paint was maybe another $15.... so crap.... I kind of wish you didn't ask now. :)

Anyway... it was fun to build, so I guess it was worth it. Thanks again for all your comments.

-Rob
Worth every penny. I wish I had access to a 3d printer - too expensive at the moment to purchase but they builds seem reasonable.

Sent from my SAMSUNG-SM-G920A using Tapatalk
 
This thread is more than 6 years old.

Your message may be considered spam for the following reasons:

  1. This thread hasn't been active in some time. A new post in this thread might not contribute constructively to this discussion after so long.
If you wish to reply despite these issues, check the box below before replying.
Be aware that malicious compliance may result in more severe penalties.
Back
Top