WIP - BSG S-01 Blaster (1st Prop) and Scratch-built Holster!!!

darkev2

Well-Known Member
Hello Folks

I've finally dug one of my BSG S01 Blaster kits out of the stash to finally put it together. My holster is based on pictures I found on the Instructables site. Attached are some pictures of the progress I have made so far. I've only got the rear of the holster done as well as clean up work on the blaster. Note, instead of using foam as done with other bsg holsters I have seen, I wanted to try the pieces of sheet styrene I had in a pile next to the workbench.

photo 2.JPGphoto 1.JPG

Mine you, I forgot how hard it is to cut the stuff. Thank the Stars I have a good set of Dremel Cutting Tools and Sanding Bits. The "initial"Razor Knife work was getting to be a bit tedious and I'm just getting started.

Any Tips and Hints as I progress further into both the Weapon and the Holster would be GREATLY Appreciated.

Thank You!!!
 
Last edited:
Re: Getting Started: BSG S-01 Blaster and Scratch-built Holster!!!

Do you mean Actiprops build? He sells the holsters as well if you are interested Darkev, save you a ton of plastic shavings. ;)
 
Re: Getting Started: BSG S-01 Blaster and Scratch-built Holster!!!

Probably but with three (3) S-01 Blasters (different versions including a Matsuo) in the stash I couldn't afford to get three of those holsters even though they are rather "NICE" to look at and probably own. Besides to make one in plastic is one heck of a challenge and right now I think it's a mountain worth climbing. I say that because the pistols I have were purchased which is from what I can see on this board places me Far FAR down the creative skills ladder as compared to "most" people "here". So a ton of plastic shavings in my mind will be worth it. Oh one last thing for those who might be thinking such, I will NEVER SELL the things so I hope this doesn't make me a "recaster" in your eyes, was not my intention never has been, never will be!!!

Do you mean Actiprops build? He sells the holsters as well if you are interested Darkev, save you a ton of plastic shavings. ;)
 
Last edited:
Re: Getting Started: BSG S-01 Blaster and Scratch-built Holster!!!

Probably but with three (3) S-01 Blasters (different versions including a Matsuo) in the stash I couldn't afford to get three of those holsters even though they are rather "NICE" to look at and probably own. Besides to make one in plastic is one heck of a challenge and right now I think it's a mountain worth climbing. I say that because the pistols I have were purchased which is from what I can see on this board places me Far FAR down the creative skills ladder as compared to "most" people "here". So a ton of plastic shavings in my mind will be worth it. Oh one last thing for those who might be thinking such, I will NEVER SELL the things so I hope this doesn't make me a "recaster" in your eyes, was not my intention never has been, never will be!!!

Darkev2,

I can certainly understand your point and taking on the challenge can be very satisfying, damned fine feeling knowing you made it yourself. As to the creative skills ladder, one cannot climb it without trying new things so kudos to you. As for being a 'recaster', you are creating you very own holster. Everyone on this forum has used images of someone elses work as a base for their work. To be a recaster, you'd have to literally recast one of Actiprop's holsters. You are creating one of your very own.

Please keep sharing your work here. I, for one, look forward to watching this project progress.

Cheers,
Don
 
Re: Getting Started: BSG S-01 Blaster and Scratch-built Holster!!!

Hello 19narvik40

Thanks for the words of encouragement. Since I had to stay in today from work (had a minor kitchen fire and the cleaners are on their 2nd day) I got some work done on both the kit and the holster. First a word of warning Actiprops makes a GREAT BSG S-01 Blaster in four different version; complete with sound, complete, hollow (split right down the middle) and of course solid. The hollow kit is the one I have and to those who want one to add a light source and sound know that the split/hollow kit "may" result in the need for a lot of Putty or Bondo to bridge the obvious alignment issues.

Proceeding to the Holster I have both sides cut and about 90% sanded as seen in the picture below.

photo 2 (1).JPG

I didn't cut out the "Retainer Flap" on one of the sides yet because I'm still unsure how I was going to proceed with the buildup of the top, bottom and front of the holster. I know I need to pay attention to how the front of the weapon is shaped and I've prepared a picture of the front of the piece to use as a guide to make the nose block of the holster. Given the nose shape I may have to angle the flat sides I have already made vertically (to match the angles represented on the front of the weapon) This picture along with my guide for work on the retainer flap is below;

photo 1 (1).JPG

If anyone has any comments or suggestions for the shape of the nose (I have yet to find a shot of this view of the holster) please consider sharing. More to come as the process continues.

Thank You!!
 
Last edited:
Re: Getting Started: BSG S-01 Blaster and Scratch-built Holster!!!

A minor update for the moment.

I just had an email exchange with Actiprops in regards to their Hollow Blaster. If you notice the gap between the two halves seen in my 2nd picture above I asked what could I use to fix the issue given that I have the Cold Cast Metal version of the Blaster. I was told that it is supposed to look like that given that the "prop" was a "shell" surrounding the blank firing weapon. They did indicate that if one wants to fill the gap they suggest metal infused epoxy putty (for the cold cast version). If it was just a minor seam line I could almost see doing "NOTHING" but as you can see the edges in my picture are just too far apart and so I'm going to get that putty!!!

More to Come!!!

darkev2,

I did a search of images for the S1 pistol and I couldn't see much of a gap at all. What is it like on your other two pistols, especially the Matsuo, Matty has a thing for accuracy. If you are going to attempt to fill the gap, may I humbly suggest using sheet styrene. If yours is still able to be separated, use paperclips to make short pins and drill holes in the two halves and the stryrene filler. Epoxy glue the filler to one side and reassemble the pistol. Then it just putty and paint to worry about. I think that would be easier than trying to fi=ond a compound that will bond to the cold cast.
600px-BSGS1E212_02.jpg140283121.jpg
 
Re: Getting Started: BSG S-01 Blaster and Scratch-built Holster!!!

19narvik40

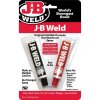
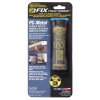
The matsuo is smooth except for what I believe are minor raised mold lines that could be sanded down (not filled in) in seconds. The other pistol (one piece solid) is basically the same with some raised mold lines where the mold was split. Actiprops didn't mention any problems with his puttying "his" Cold Cast Props is there really an issue doing such??? I was going to go buy something like this stuff;

b8f372e2-5a81-4845-a706-fe5781e7b983_1000.jpgor 054983025550.jpg

this afternoon but got tied up with other errands. Bad idea?????
 
Re: Getting Started: BSG S-01 Blaster and Scratch-built Holster!!!

19narvik40

The matsuo is smooth except for what I believe are minor raised mold lines that could be sanded down (not filled in) in seconds. The other pistol (one piece solid) is basically the same with some raised mold lines where the mold was split. Actiprops didn't mention any problems with his puttying "his" Cold Cast Props is there really an issue doing such??? I was going to go buy something like this stuff;

View attachment 716628or View attachment 716632

this afternoon but got tied up with other errands. Bad idea?????

I have no experience with cold cast unfortunately. I don't know what the properties are like for that type of resin. All of my experience with resin tend to be fill ins and surface repair. Hopefully one of the more sagacious members will chime in with some answers.
 
Re: Getting Started: BSG S-01 Blaster and Scratch-built Holster!!!

Just checked with a couple of casting gurus on another board I'm a member of they indicated that any epoxy putty will do the job; metal infused or otherwise. So when I'm ready to address those gaps I'm good to go.

The next issue on the agenda is the interior of the gun. I got the hollow kit because I wanted to add a sound effect of some type and now I have to figure out if I still want to go through with it. If I abandon the "sound" option I think I will at least try to get a working trigger in there somehow. I've already began work on cutting a slot for such in the upper part of the trigger guard. Mine you if I find a halfway decent blaster like sound in a toy gun at least the trigger slot will be ready as I try to shoehorn the electronics into this prop.

More to come!!!
 
Last edited:
Re: Getting Started: BSG S-01 Blaster and Scratch-built Holster!!!

I should have spotted this a LONG time ago but after all the sanding and talk about filling the gaps I should have realized that it wasn't only the mating surfaces causing the gaps but something else. The real reason the piece has gaps is because it was was bent/crooked/ and/or deformed when it was taken out of the mold and sold to me. Attached are some pictures I took just a few minutes that illustrates this discovery;
photo 2 (2) rotate.jpg
photo 3.JPGphoto 4.JPGphoto 1 (2).JPG

I tried to set up the front of the piece straight in my vise and well you see that the handle is at an angle relative to that. The angle is why there is the severe gap in the bottom of the piece in the fourth picture. Now I have to figure out how to resolve this, if at all possible without totally messing up. I am not a happy camper right now.

If anyone has "ANY" suggestions I would REALLY APPRECIATE the Help!!!!
 
Last edited:
Re: Getting Started: BSG S-01 Blaster and Scratch-built Holster!!!

I should have spotted this a LONG time ago but after all the sanding and talk about filling the gaps I should have realized that it wasn't only the mating surfaces causing the gaps but something else. The real reason the piece has gaps is because it was was bent/crooked/ and/or deformed when it was taken out of the mold and sold to me. Attached are some pictures I took just a few minutes that illustrates this discovery;
View attachment 716975
View attachment 716970View attachment 716969View attachment 716972

I tried to set up the front of the piece straight in my vise and well you see that the handle is at an angle relative to that. The angle is why there is the severe gap in the bottom of the piece in the fourth picture. Now I have to figure out how to resolve this, if at all possible without totally messing up. I am not a happy camper right now.

If anyone has "ANY" suggestions I would REALLY APPRECIATE the Help!!!!

How long ago did you get the kit? I'd send these pictures to Actiprops if I were you my friend. They should have been checked for fit before they were sent out.
 
Re: Getting Started: BSG S-01 Blaster and Scratch-built Holster!!!

I've had it too long !! The thing has been on the FAR BACK burner since it arrived way back around the 1st of March 2015!! Long story short, it pays to REALLY look over kits (Garage or Otherwise) when you first open the box and not give it a quick superficial scan. I will send the pictures to him for a quick FYI, before he ships one like that out to someone else. Like I said I've waited far too long to ask for anything now.

Sorry to hear that. I'd still send Actiprops a note to show them the issue, keep it from happening in the future.

I know that with most resins, heat can be carefully applied to reshape parts. I have used the boiling water and the hair dryer method to good effect. I chose the hair dryer over a heat gun because the heat gun is so much more powerful I didn't want to make more problems than I solved. I would think a rig of some sort would be needed to hold the part halves from bending more than you want. You might be able to use a small bowl of boiling water to reshape the barrel end bend.
 
Re: Getting Started: BSG S-01 Blaster and Scratch-built Holster!!!

I'm going to try the hair dryer to see if I can straighten things out a bit either tonight or tomorrow.

In the mean time I have continued working towards some movable features. I've cut a trigger slot into the upper part of the trigger guard and reshaped the Trigger included with the kit into something that rotates enough to simulate a working trigger. Now I just have to find an appropriate spring (probably from a pen or somesuch) attach it to the trigger and the interior of the prop and I am good to go. Below is an image of what I have roughed out (notice the toothpick axle). Now I just have to see where I put that small styrene tubing I had on the bench a while back and solidify the trigger mount (in essence I'm going to stop the trigger from wiggling around).

photo (15).JPG

I'm forgoing the sound effects to put more effort into the blaster's exterior as well as the holster. After I get the trigger work done and have a go at straightening the grip core, I'm going to seal this thing and start applying putty to the seams so that I can move on to the next steps on the holster which has been delayed a bit because of the work with the Blaster.

More to come!!!

Sorry to hear that. I'd still send Actiprops a note to show them the issue, keep it from happening in the future.

I know that with most resins, heat can be carefully applied to reshape parts. I have used the boiling water and the hair dryer method to good effect. I chose the hair dryer over a heat gun because the heat gun is so much more powerful I didn't want to make more problems than I solved. I would think a rig of some sort would be needed to hold the part halves from bending more than you want. You might be able to use a small bowl of boiling water to reshape the barrel end bend.
 
Re: Getting Started: BSG S-01 Blaster and Scratch-built Holster!!!

Alright !!! The hairdryer seems to have helped alleviate "some" of the problems I had with seam gaps. I don't know whether I'm going to try this again but for the moment I'm rather pleased with the result. Attached pictures show what the piece looks like now.

photo 2 (3).JPGphoto 1 (3).JPGphoto (16).JPG

More to come!!!
 
Last edited:
Re: Getting Started: BSG S-01 Blaster and Scratch-built Holster!!!

Minor update tonight, no real pictures. I found my trigger pivot pin by using plastic spruce from one of my Gundam model kits. I just placed it in the Demel for a few seconds and rubbed it against some sand paper to get it perfectly round and smooth. Mind you there is still a bit of a wiggle since I cut away a bit too much of the trigger (in relation to the slot I cut in the upper part of the Trigger Guard) while I was sanding it to shape. I shimmed this a bit with a thin piece of sheet plastic and a big dab of super glue. I just have to sand the excess down, check for functional movement and the trigger should be ready to attach to the spring.

I really wanted to add some sound to this piece but I've been looking long and hard at the simple toy pistol I brought ($5.00 at Walmart) and I just can't seem to work out a plan in my head to work the electronics and switches into the piece. Oh well let me think about it once again, you never know. In any event the blaster will soon be ready for sealing, putty work and a whole lot of sanding.

More to come!!!
 
Re: WIP - BSG S-01 Blaster and Scratch-built Holster!!!

I had a chance to get some work done after I put my son on the bus this morning. So I now have the trigger movement the way I want it and as soon as the Spring is Attached I have another item off the checklist.

I was watching "Colony" on USA last night and during the commercials I once again considered using that toy pistol with its action sounds. Below is a picture of the guts of the thing as well as the box art.

photo 1.JPG81Ynp5A5W9L._SL1500_.jpg

As I might have mentioned before it's only $5.00 at Walmart and comes in two styles with three (3) somewhat decent sounds. If I go ahead and use the thing I have to cut a few "sound slots" in the rear of the piece between the little cooling fin details (???) . Besides the speaker I have to work out how the sound switches (simple pressure) will be mounted and activated. There are three but one is not really working. I think I might have pulled a wire as I was tearing the toy apart.

Oh one last thing, the toy takes two AA Batteries and well its a bit tight in there especially if I want to change them out over time. Can anyone suggest a power option and way to get those batteries in there without hacking things up too much. One idea I had was to try to use the lower Grenade Launcher Barrel as a Battery Box of sorts and then using a simple push connector to get the power to the circuit in place of the toy's wiring. Once again, if anyone has a suggestion, PLEASE TELL ME!!!

Oh well that's it for now, more to come since I need to get the Blaster together so I can go back to working on the Holster!!!
 
Last edited:
Re: WIP - BSG S-01 Blaster and Scratch-built Holster!!!

Okay Folks I need some suggestions and/or referrals!!!

I'm looking for a "SIMPLE" and "SMALL" Rotary DC/Small Voltage Switch for this project; specifically for the Blaster's Safety/Charging Toggles which on this kit are "movable"). The toy I have referenced above has two other sound options besides the trigger and what the heck I want to use all of them. The switch should only have two (or perhaps three) power options "On" and "OFF". If a switch with three positions is the only type available and it still is "small" (about the size of a quarter or smaller and hopefully only a 1/2 inch or so tall (not including the post for the handle) it will work. I need two of them; one on each side of the piece mounted internally so space is at a premium.

Any help I could get on this will be GREATLY Appreciated!!!

Thank You!!!
 
Last edited by a moderator:
Re: WIP - BSG S-01 Blaster and Scratch-built Holster!!!

Minor Update

I now have a working trigger. Picture below;

photo 1 (4).JPG

If you notice to the right of the Trigger Spring there is a pre-drilled/formed hole for the exterior toggle switch for the right side of the piece. A picture of the exterior is below;

photo 2 (4).JPG

This toggle switch and its partner are the ones I'm trying to find a Sub-Miniature Rotational Multi-Position DC Switch for. So far no joy!

photo 1 (4).JPG


photo 2 (4).JPG
 
This thread is more than 6 years old.

Your message may be considered spam for the following reasons:

  1. This thread hasn't been active in some time. A new post in this thread might not contribute constructively to this discussion after so long.
If you wish to reply despite these issues, check the box below before replying.
Be aware that malicious compliance may result in more severe penalties.
Back
Top