Best primer for 3D printed models

davidJurassic

Well-Known Member
Hi all,

Wonder if you can help me. I am going to paint a 3D print from Shapeways in their native strong white flexible (smoothed version). Its a fairly organic shape so Id like to achieve a smooth finish in the paintjob.

So Im looking at a light primer & sand with fine grit, then repeat. Ive tested the strong white flexible smoothed and it comes out quite smooth with not too porous a surface.

Question is - what's the recommended primer, and does anyone have experience getting a smooth or polished finish on this type of material?

Was looking at Tamiya model primer, but wanted to check in here.

Thanks
 
DJ - You don't say what country you are in and the type and brands of primers vary greatly from place to place, so I can only give you recommendations based on what I've used in the United States.

To get a smooth surface on the White Strong and Flexible material you're going to need to use a "Filler Primer". That's a primer with a high solids content designed to fill surface texture. You will also have to do a bunch of sanding. With a little bit of careful work you should be able to get a perfectly smooth, texture free surface.

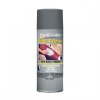
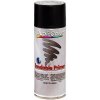
Tamiya Primer is good but is a low solids primer really intended for use on smooth plastic or metal surfaces. There are a lot of brands of spray can primer out there but my current favorite for this exact job is Rustoleum Grey Filler Primer which is pretty widely available at Home Centers. An important thing is that the primer be able to be sanded without gumming up, and not all are, even ones that say "Sandable" on their label. The Rustoleum primer sands beautifully, as long as you let it dry sufficiently. More on that in a bit.

You'll need to use Wet-n-Dry type sandpaper with plenty of water. The regular tan or light grey sandpapers are fine for wood but not for sanding primers and plastic. Before priming sand the entire surface with 220 grit paper and lots of water. The water helps to prevent the paper from clogging and gives a better result. You don't need to try to get the surface really smooth with this first pass, just sort of leveled out, get rid of build lines, etc. The white nylon material doesn't sand all that well anyway.

Rinse all residue off the surface and allow to dry thoroughly. It's best to set the part aside for several hours. White Strong and Flexible is actually microscopically porous and will absorb a tiny bit of water. This can ruin the primer finish. Once you're sure the part is dry apply a light coat of primer. Get an even grey coat but don't apply too thick. Let the primer dry for an hour or so, they apply a second coat. Now this is the important part... the instructions on the can stat the primer can be sanded after 4 hours... not true! It will still gum up the sandpaper at this point, even with water. You need to let the primer dry for 24 hours before it will sand nicely. Sorry, getting a good finish will require patience.

Once the primer is thoroughly dry wet sand it with fresh 220 grit sandpaper. The goal here is to knock down the high spots. You'll end up exposing white plastic but you should see little specs of grey paint filling in the texture. Dry completely as before, then repeat the two coats of primer followed by a 24 hour dry again. Continue this process, sanding with 220 grit and reprime until the surface is smooth an uniformly grey. This can take 3 or four cycles. Then go with a single coat or primer, followed by a gentle sanding with 320 grit paper, the objective here is to remove sanding scratches from the 220. Then dry, single coat of primer, dry and wet sand with 400 grit to remove the 320 scratches. At this point you should have a pretty smooth surface good for final paint, if you're using a flat finish paint. If you are using gloss paint, then continue the prime and sanding cycle going to 600 and possible 1000 grit sand paper. Darker gloss paints can benefit from the finest sanding.

Good luck and be patient!
 
Thanks so much for this DaveG. Exactly the kind of reply I needed. I have a test part so I can give this a go. Im based in the UK but will look at sourcing your favourite as it seems quite unique in its properties. Id rather get it right and have it cost a bit more.

Thanks from over the pond!

Sent from my SM-G920F using Tapatalk
 
Very useful information, DaveG!

Rustoleum do market products in the UK, but the automotive "filler" primer does not appear to be one of them.

On a related subject, does anyone have any opinions on leaving primer as a final coat? If the colour is OK, and it's obviously not going to be subjected to the elements, is there any reason why it needs to be painted over top? (eg: might it get dirty more quickly if it's more absorbent)
 
nkg - primer is just a type of grey paint. if you like the color, stick with it!

I'm sure there are lots of filler primers in the UK. Buy a can and try it out. The biggest thing is to find on that sands nicely without gumming up. Look for "Automitive" or "Lacquer" primers. Stay away from enamels and anything that Krylon makes!
 
As an aside - with this rustoleum primer and sand process - how do the details stand up? DaveG, with your approach are the details compromised or do you just sand those areas a bit less? I realise it's fine grit, but do you lose detail?

Scarecrow Joe - that is gorgeous. Great work

Thanks

DJ
 
Last edited:
Also, here in the UK - we have Rustoleum 'Mode', which is designer spray paint. They have a primer filler. Can anyone verify that this is the same in it's properties? If so I think I'll give this a go

Thanks
 
Halfords do a filler primer that I always used to use...I haven't used it for a while, but it was always good, hopefully they haven't changed the formula...
 
As an aside - with this rustoleum primer and sand process - how do the details stand up? DaveG, with your approach are the details compromised or do you just sand those areas a bit less? I realise it's fine grit, but do you lose detail?
DJ

Yes, this process will fill in detail so you have to adjust. Shapeways' WSF really isn't the best material if you are needing fine detail, for that you need to go with one of the acrylic or detail plastics. More expensive, but that's the trade off.
 
One technique I've found helpful for removing print lines from smaller areas, while preserving nearby details, is to use the flat edge of a knife blade and very gently and carefully scrape off the offending area. #16 X-Acto blades work well for me. Sandpaper it's so easy to remove something you don't mean to, since the material isn't transparent. Knives aren't either, but are thinner. :)
 
I know a lot of people who use Rustoleum paint but when I tried it I got several defective cans that "spit" all over my finished model and nearly ruined my projects. I'm also not a fan of enamel paints, either, as they tend to take a long time to fully dry or cure.

I've had nothing but excellent results using Dupli-Color lacquer-based primers. With that said, in recent years environmental regulations have forced manufacturers to re-formulate many different lacquers so people may not get the same results they've been used to in the past. Still, in my experience the quality of Dupli-Color paints has been most excellent as they are made for automotive use.

They make two distinctly different primers. I have found that their "Sandable" line is just like Tamiya fine primer. It lays down beautifully and doesn't "hide" detail. But, despite the name, once cured it forms a rock-hard finish that will quickly wear down your sandpaper (and wear out your hands) if you try to sand it. So, best to do the sanding sooner rather than later. Their Sandable primers are available in several different colors.

Dupli-Color also makes an excellent Filler primer but this is not available in as many colors. It is my primer of choice when I want to smooth out a surface. Just keep in mind that you should NOT use this when spraying over finely detailed parts such as "greeblies" as it will build up quickly and obscure fine detail.
 

Attachments

  • Duplicolor Filler Primer.jpg
    Duplicolor Filler Primer.jpg
    20.6 KB · Views: 392
  • Duplicolor Sandable.jpg
    Duplicolor Sandable.jpg
    17.1 KB · Views: 396
Thanks for all the input guys.

So although my print is an organic shape it does have some detail I'd like to retain. The detail isn't intricate, its like a vac-formed shape with bumps and ridges, most of the ridges are 1/3 inch across.

The smoothed option on Shapeways seems to eliminate 90% of the print artefacts on my test piece, it looks pretty smooth. So do you think a filler primer is still necessary given this information? Should I use less coats?

DaveG I'm aware of the way you described the micro porous properties of Shapeways SWF, and would only Filler Primer seal this?

Sent from my SM-G920F using Tapatalk
 
So for those in the UK, I've ended up going with Halfords own brand grey primer and also their filler primer. The filler is a sandy yellow so you can differentiate when sanding. They also have a deal on in store at the moment, four 500ml cans for price of three. They are an acrylic base which is compatible with Shapeways strong white and flexible. The chap at the till explained they are all acrylic base there now, even the lacquers. So I picked up a clear lacquer too to test. Waiting on parts from Shapeways but will evaluate how I get on with the Halfords cans.

Sent from my SM-G920F using Tapatalk
 
No experience with 3d prints but having used Halfords for literally decades on resin kits, I now use HyCote brand which can be found in The Range amongst other places. Just as good as Halfords but about 2/3 the price. They do regular primer, plastic primer and filler.
 
No experience with 3d prints but having used Halfords for literally decades on resin kits, I now use HyCote brand which can be found in The Range amongst other places. Just as good as Halfords but about 2/3 the price. They do regular primer, plastic primer and filler.
Brill thanks for the tip

Sent from my SM-G920F using Tapatalk
 
So I did my first coat of Halfords filler primer and sanded back 24 hours later. The finish is already smoother but I can see it will need multiple coats as described.

Halfords didn't gum up my wet sandpaper, but I did find each piece of paper broke up and left grit behind as it reached the end of its lifespan. So at the end I gave the piece a wash and scrub to get out any grit left behind. I was also wiping away the filler primer residue with paper towels as I went.

Good result overall

Sent from my SM-G920F using Tapatalk
 
So Im on my third coat, sanded back twice now. I'm finding a porous area at the base of my SWF print is not taking the filler coats like the rest has. It retains it's porousity. Is this normal DaveG? Im assuming this is why it takes so many coats?

Sent from my SM-G920F using Tapatalk
 
This thread is more than 6 years old.

Your message may be considered spam for the following reasons:

  1. This thread hasn't been active in some time. A new post in this thread might not contribute constructively to this discussion after so long.
If you wish to reply despite these issues, check the box below before replying.
Be aware that malicious compliance may result in more severe penalties.
Back
Top