Scopey's Buzz Lightyear Build (NOW COMPLETE)

Re: Scopey's Buzz Lightyear Build

There were still a few accessories to complete the costume - namely the gloves, abdomen and the head.

For the gloves, I happened across some white decorators gloves in a DIY shop which looked appropriate:

DSC_3752.JPG

The finger tips were just painted, while some foam detailing was quickly cut out of low-density foam, painted and glued on. The photo above was taken after two wears so the gloves did get a lot of wear, but held up reasonably.


For the head, I ordered a purple balaclava type thing off Amazon from China. The one I got is now no longer up there so I can't link unfortunately. However, I thought that this on its own was lacking a little bit:
DSC_3737.JPG

To be a bit more Buzz-like, I made some very quick foam rings to go around my ears underneath the balaclava, to give that round look around the ears.

DSC_3738.JPGDSC_3732.JPG


For the abdomen, a black t-shirt was cut up and stitched to a grey long sleeved t-shirt. Pipe insulation was stitched into this, between the black and grey t-shirts:

17321403_1593984937286046_2022165024_n.jpg 17357728_1598490756835464_1755097197_o_1.jpg
 
Re: Scopey's Buzz Lightyear Build

When I started this build, I had a pretty extensive wish list and set out a project plan accordingly. Unfortunately items along the way had to be compromised.

First of all, with my design of the chest piece, I needed a 500mm diameter hemisphere for the visor. Despite playing with the idea, I absolutely did not have time to try and build and troubleshoot a suitable vacuum former.
I didn't manage to source a suitable hemisphere locally. I did find some in the UK but shipping was considerably more expensive than the thing itself so I couldn't justify it. I briefly considered some non-rigid options but thought it would take away from the costume rather than add to it. I reluctantly scrapped the visor.

I also wanted to make buzz glow in the dark and even got some neon powder. However, I took the gamble that I could apply a clear coat mixed with the powder after painting. When I tried this on a section, it really dulled the green and so I decided it wasn't worth it. The idea could still potentially work with paint applied with a spray gun (I ended up using spray cans).

The main item that I reluctantly scrapped was the wings. I had allowed a significant chunk of time to get these right and a lot of time and thinking did go into these. With the benefit of hindsight, they were simply too ambitious. I wanted to have spring loaded wings which would release when I pressed the big red button and a safety button simultaneously.
I had also wanted to put blinking lights in the wing tips!
If I had gone more low-tech to begin with I would have had some sort of working wings, however again with the benefit of hindsight, I'm glad I wasn't carrying around the extra weight.

Anyway, I did some figuring out in cardboard using elastic and bits of meccanno. This allowed me to play with some ideas quickly. The set-up below wasn't something that worked but it's all I can find:

DSC_3383.JPG

I ended up not going for an intricate mechanism for moving the wings in and out. I opted for pivots and elastic instead. The wings were separated by different boards with spacers between them.
DSC_3510.JPG DSC_3512.JPGDSC_3747.JPG

RPF member Cormac had a lot of input on this and the latch mechanism we prototyped was his baby:

IMG-20161018-WA0003.jpeg DSC_3748.JPG

This set-up was painfully close to working properly and even fired nicely, although not consistently enough. It got to the point where I unfortunately just ran out of time, so had to scrap the wings.

Despite the compromises, I was still very happy overall with the outcome of my build. Photos of the final costume to come in my next post :)

Until then...

DSC_3516.JPG
 
Re: Scopey's Buzz Lightyear Build

Hi everyone, sorry for the delay in getting these photos up. Enjoy!

Without further ado, this was me fully suited up as Buzz for Halloween:

14895485_10210421758287580_722360981_o.jpg


I did promise a video with working chest buttons:


This snap was taken during the suiting up and gives a view of the backpack:

17270301_1593986830619190_1821276987_n_1.jpg


The suit got two wears - the first one was for Halloween with our Pixar theme.

14937001_10210421764247729_1196014032_n_1.jpg

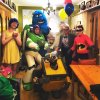
We had a Joy (Inside Out), Sully (MU), Wall-E, Pixar Lamp, Carl (Up), Mr(s) Incredible and Buzz.

14872653_10210421762647689_1655656236_n_1.jpg14872436_10210421767207803_683414102_n.jpg14937125_10210421758087575_665656526_n_1.jpg

The above is the core group of us who have been doing this for years, including RPF member Cormac and yours truly.

Next photo isn't great quality but all I can find with the laser on! You can also see a 'memory' from Inside Out.

14910574_10211276306609890_3424870645289599101_n_1_1.jpg

I had one last trick up my sleeve. With the sound effect module, I had a bluetooth speaker around my neck which was a lot of fun. Below you can see our march to the next pub.


Full halloween compilation here:


The second wear the costume got was during a visit to one of the national children's hospitals. This required some repairs but was awesome to do. Below are some snaps:

WhatsApp Image 2017-03-19 at 15.32.01 (1)_1.jpgWhatsApp Image 2017-03-19 at 15.31.58_1.jpgWhatsApp Image 2017-03-19 at 15.32.02_1_1.jpg

We also found Nemo (all though you can't really make him out in the tank:

WhatsApp Image 2017-03-20 at 11.05.38_1.jpg
 
Last edited by a moderator:
This thread is more than 7 years old.

Your message may be considered spam for the following reasons:

  1. This thread hasn't been active in some time. A new post in this thread might not contribute constructively to this discussion after so long.
If you wish to reply despite these issues, check the box below before replying.
Be aware that malicious compliance may result in more severe penalties.
Back
Top