You are using an out of date browser. It may not display this or other websites correctly.
You should upgrade or use an alternative browser.
You should upgrade or use an alternative browser.
Star Destroyer by Zvezda: in my workbench
- Thread starter Scarecrow Joe
- Start date
Scarecrow Joe
Sr Member
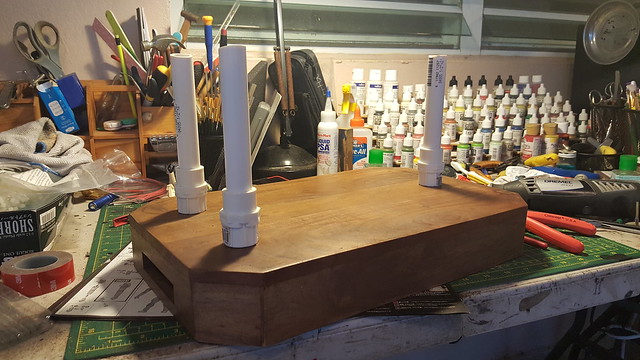
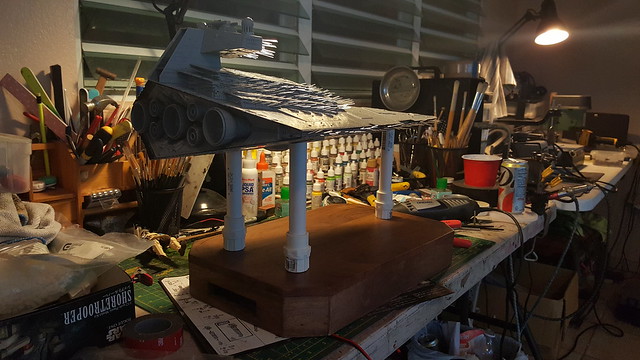
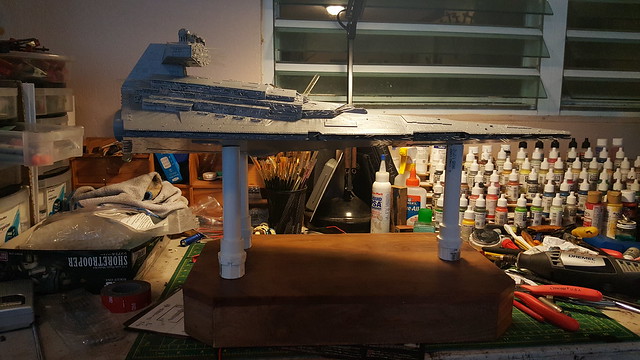
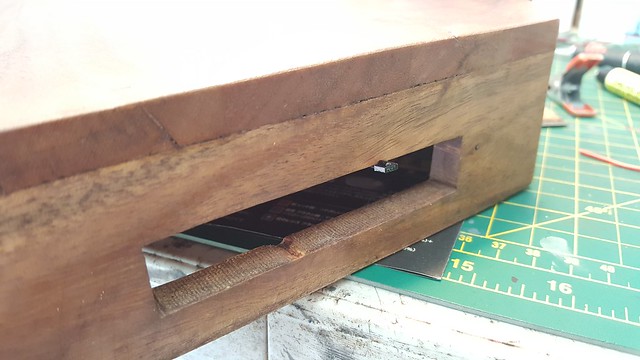
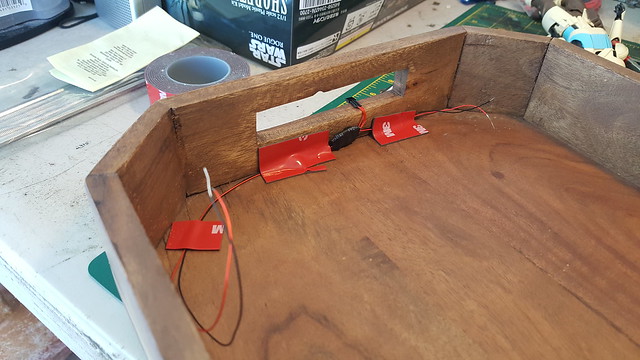
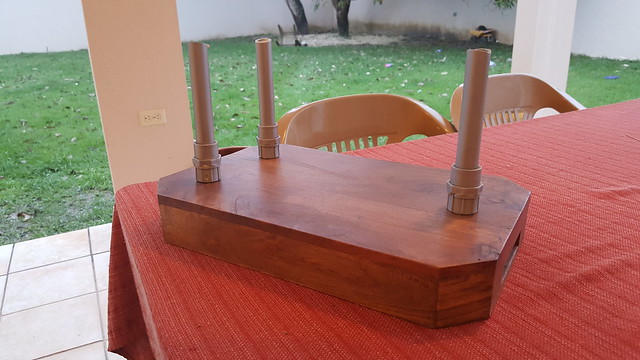
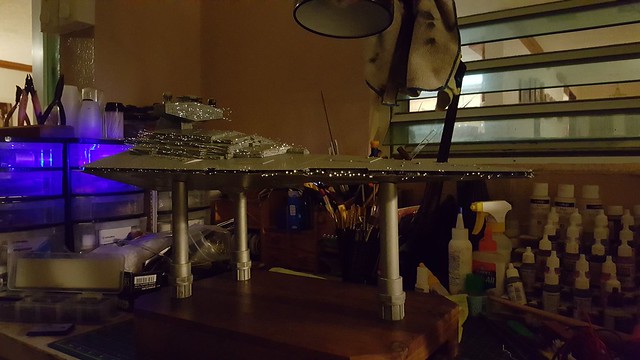
Base is basically finished and cables routed trough one of the back pillars.
 20170319_183455 by Oscar Baez Soria, on Flickr
 20170319_183130 by Oscar Baez Soria, on Flickr
 20170319_183035 by Oscar Baez Soria, on Flickr
 20170319_182747 by Oscar Baez Soria, on Flickr
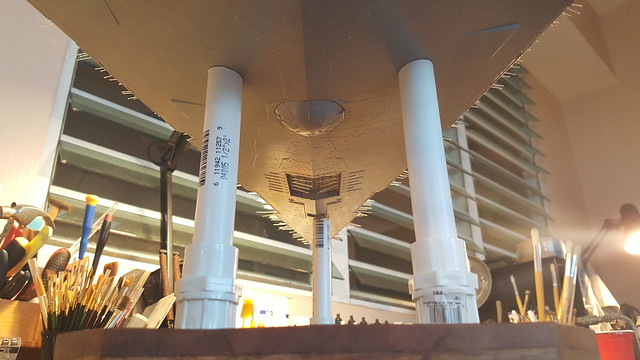
Sensor for the wireless dimmer function hidden at the base.
 20170319_122002 by Oscar Baez Soria, on Flickr
 20170319_121928 by Oscar Baez Soria, on Flickr
20170319_183455 by Oscar Baez Soria, on Flickr20170319_183130 by Oscar Baez Soria, on Flickr20170319_183035 by Oscar Baez Soria, on Flickr20170319_182747 by Oscar Baez Soria, on FlickrSensor for the wireless dimmer function hidden at the base.
20170319_122002 by Oscar Baez Soria, on Flickr20170319_121928 by Oscar Baez Soria, on FlickrToadmeister
Sr Member
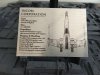
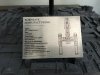
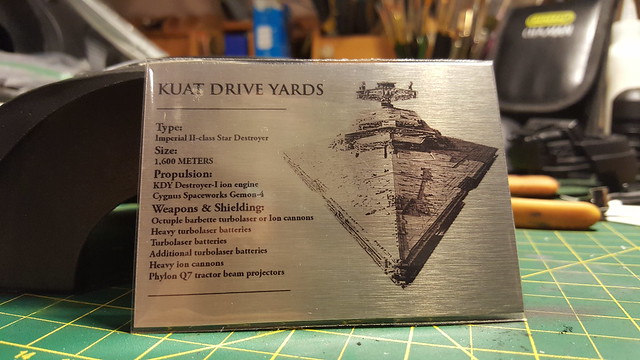
Nice!I also used Customplaques2014.
They will happily make you a custom plaque with whatever information you need. I wanted an Avenger one for my Zvezda with the 20th century fox and Lucasfilm logos and it came out great.
https://uploads.tapatalk-cdn.com/20170319/c2fdbc65704c82310fdb28e6faa34881.jpg
Sent from my iPhone using Tapatalk Pro
Side question: what's the difference between an Imperial Class Star Destroyer I and an Imperial Class SD II?
I've done some research and about the best I can find (memory might be wrong) is that ICSD1 is found in ANH and ICSD2 is the Avenger from ESB?
But what are the major differences?
soulsaman
Active Member
Nice!
Side question: what's the difference between an Imperial Class Star Destroyer I and an Imperial Class SD II?
I've done some research and about the best I can find (memory might be wrong) is that ICSD1 is found in ANH and ICSD2 is the Avenger from ESB?
But what are the major differences?
I just got the info from here:
http://starwars.wikia.com/wiki/Avenger
Sent from my iPad using Tapatalk
I also used Customplaques2014.
They will happily make you a custom plaque with whatever information you need. I wanted an Avenger one for my Zvezda with the 20th century fox and Lucasfilm logos and it came out great.
https://uploads.tapatalk-cdn.com/20170319/c2fdbc65704c82310fdb28e6faa34881.jpg
Sent from my iPhone using Tapatalk Pro
Here are the X and Y wing plaques he made for me. Nice work!
He makes a couple of Star Destroyer variations too.
Attachments
Scarecrow Joe
Sr Member
I put an order for the plaque. Guy will be out this week but said that could make them this next Monday. I still have some work to do....a LOT actually.
Scarecrow Joe
Sr Member
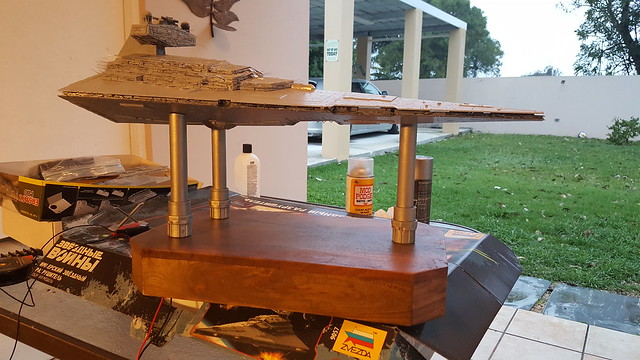
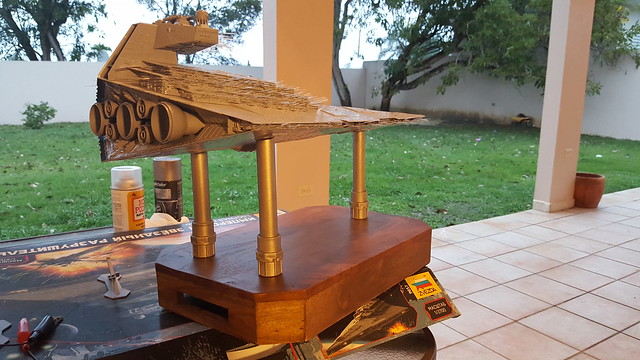
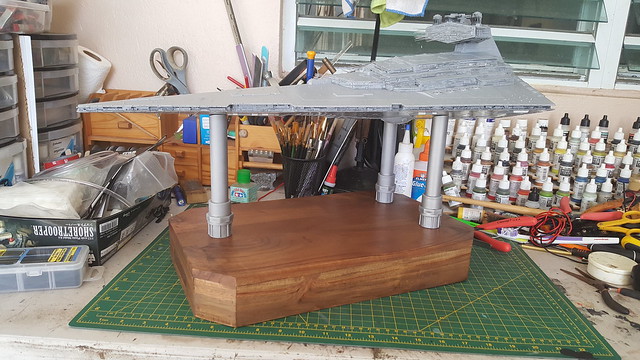
Base is done. Painted the PVC pillars a nice Duplicolor stainless steel color. It really looks like raw metal. It has a nice contrast with the wood finish.
 20170323_182318 by Oscar Baez Soria, on Flickr
 20170323_182538 by Oscar Baez Soria, on Flickr
 20170323_182550 by Oscar Baez Soria, on Flickr
20170323_182318 by Oscar Baez Soria, on Flickr20170323_182538 by Oscar Baez Soria, on Flickr20170323_182550 by Oscar Baez Soria, on FlickrScarecrow Joe
Sr Member
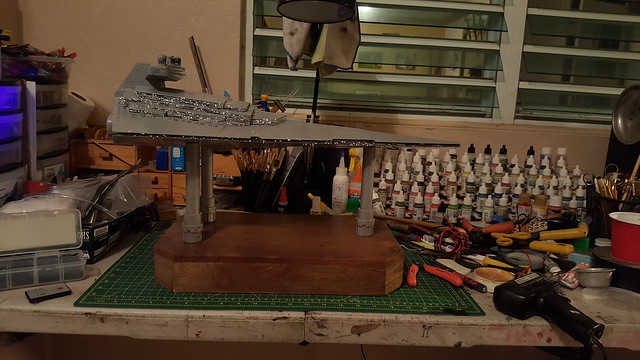
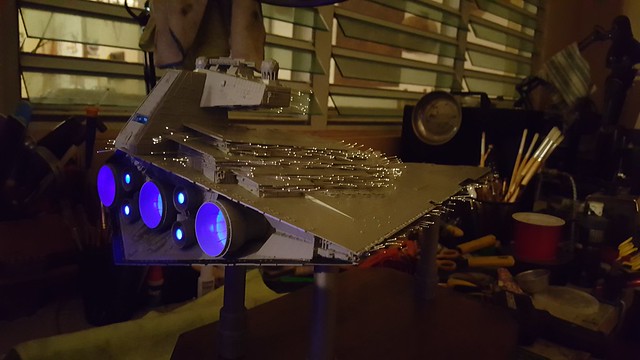
Electronics and upper hull and lower hull FO and LEDs are connected and routed through the base bottom. Remote dimmer also connected and functional. All that is left is gluing the ship together, paint, trim FO and weathered slightly.
Short video of the dimmer effect on the engines. It dims and brighten the whole ship's lights. Since there is ambient light the effect is hardly seen at the FO's.
 20170324_210807 by Oscar Baez Soria, on Flickr
A few more images
 20170324_210202 by Oscar Baez Soria, on Flickr
 20170324_210235 by Oscar Baez Soria, on Flickr
 20170324_210359 by Oscar Baez Soria, on Flickr
Just a few steps for completion! Opinions and comments welcomed!
Short video of the dimmer effect on the engines. It dims and brighten the whole ship's lights. Since there is ambient light the effect is hardly seen at the FO's.
20170324_210807 by Oscar Baez Soria, on FlickrA few more images
20170324_210202 by Oscar Baez Soria, on Flickr20170324_210235 by Oscar Baez Soria, on Flickr20170324_210359 by Oscar Baez Soria, on FlickrJust a few steps for completion! Opinions and comments welcomed!
Looking good! That little $10 remote is pretty cool isn't it? I'll be using more of those in the future, no more clumsy on/off switches!
So what glue are going to use to glue the upper and lower hulls? I used Testors Model Master liquid with the metal tube. I found that after I had run a bead all the way around a lot had evaporated by the time I got the hulls together. I had to do some spot gluing to secure it. On my second build, I'm going to use good 'ole Testors tube glue And lots of clamps.
So what glue are going to use to glue the upper and lower hulls? I used Testors Model Master liquid with the metal tube. I found that after I had run a bead all the way around a lot had evaporated by the time I got the hulls together. I had to do some spot gluing to secure it. On my second build, I'm going to use good 'ole Testors tube glue And lots of clamps.
Scarecrow Joe
Sr Member
Im thinking Tamiya thin cement. It was the one I used to glue my MPC Falcon. Worked great even more knowing how badly that model's fitment was.
JediMichael
Master Member
Like the base and pillars. Nice touch.
Scarecrow Joe
Sr Member
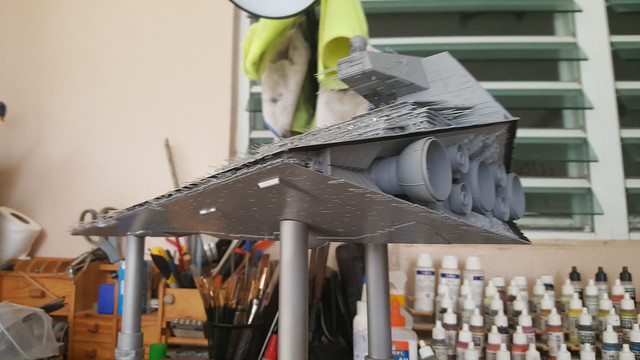
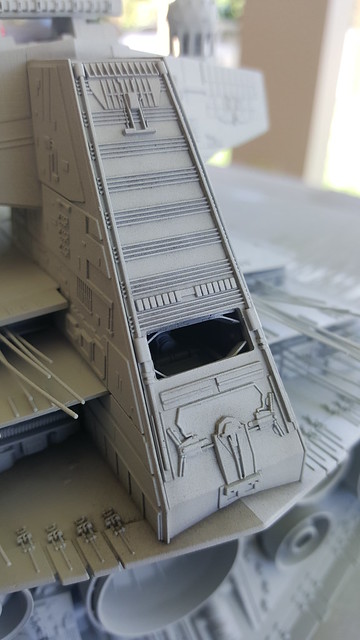
I happy to inform that Tamiya cement worked wonderfully! The beast is no longer in two parts....it has become one with the Force....of the adhesion.
 20170325_135953 by Oscar Baez Soria, on Flickr
 20170325_140013 by Oscar Baez Soria, on Flickr
No messy glue clumps either. Love this stuff! Now....paint! I hope to finish it this week if time permits. Im still on the fence about the mirror, though. I will try to get a square one to see if I like it better. The thing is that the wood looks so classy that it would be a shame to hide it under a mirror.
20170325_135953 by Oscar Baez Soria, on Flickr20170325_140013 by Oscar Baez Soria, on FlickrNo messy glue clumps either. Love this stuff! Now....paint! I hope to finish it this week if time permits. Im still on the fence about the mirror, though. I will try to get a square one to see if I like it better. The thing is that the wood looks so classy that it would be a shame to hide it under a mirror.
Scarecrow Joe
Sr Member
Scarecrow Joe
Sr Member
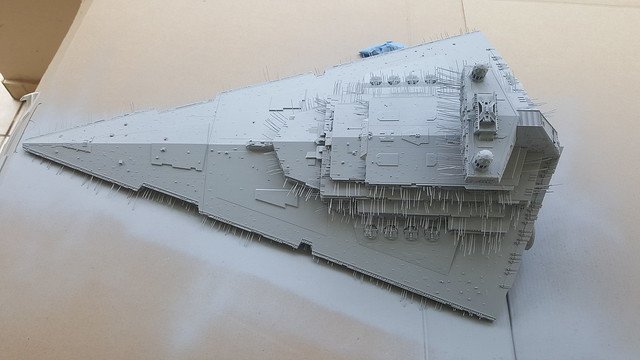
Painting started.....
Gray primer
 20170401_142113 by Oscar Baez Soria, on Flickr
 20170401_142100 by Oscar Baez Soria, on Flickr
Gray primer
20170401_142113 by Oscar Baez Soria, on Flickr20170401_142100 by Oscar Baez Soria, on FlickrScarecrow Joe
Sr Member
Duplicolor Gray Primer....its the bomb! Thin, easy to use and dries FAST!
Scarecrow Joe
Sr Member
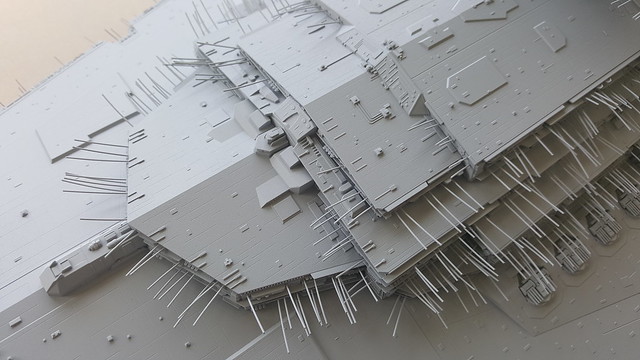
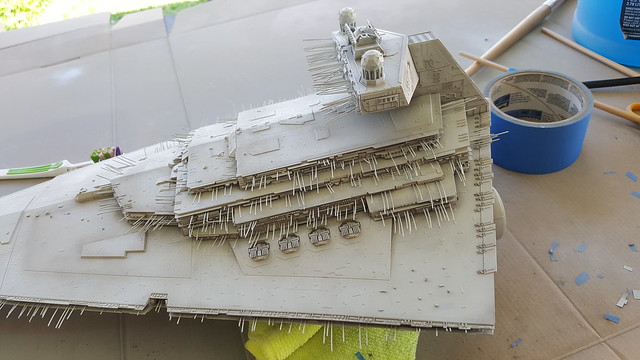
Started some detailing and mild weathering. Also decided to accent the panel lines with an art pencil. The downside is that there is aprox 50,000 miles of lines!!! Oh well, Im almost there what a few months more, right?
 20170402_125601 by Oscar Baez Soria, on Flickr
 20170402_143845 by Oscar Baez Soria, on Flickr
 20170402_184608 by Oscar Baez Soria, on Flickr
 20170402_193125 by Oscar Baez Soria, on Flickr
Any opinions welcomed! :thumbsup
20170402_125601 by Oscar Baez Soria, on Flickr20170402_143845 by Oscar Baez Soria, on Flickr20170402_184608 by Oscar Baez Soria, on Flickr20170402_193125 by Oscar Baez Soria, on FlickrAny opinions welcomed! :thumbsup
Similar threads
- Replies
- 14
- Views
- 2,417
- Replies
- 6
- Views
- 632