ALIENS M41A Pulse Rifle Scratch-Build Project - Early Stages and WIP...

Udermeister

Active Member
Hey all,

In an attempt to expand both my fabrication skills and my prop collection, I'm looking at making an M41A Pulse Rifle. I know there are kits/airsoft/etc out there, and I'm aware of Quest's Nerf-based model - In fact I attempted to build that one but I wasn't pleased with how it was going.

I've decided to make one using EVA as a base and scratch-building it. I seem to have come across a bit of an issue locating certain reference photos though, and thought maybe I could throw some feelers out to you folks for help. I'm taking a complete "from the ground up" view at this, and following the same process Bill Doran of Punished Props did when he made his hand cannon from Destiny; finding reference photos, drawing up a blueprint to scale, etc. The only thing is I can't seem to find any photos of this particular space gun other than the standard side-view and 3/4 view.

My question to you all is this: Can anyone help me locate a couple specific photos, or take some and share them, of the views I need? I'm looking specifically for a full front view - basically looking down the business-end of the gun straight on, and a top-down view where I can see the full length and detail from above.

These two views just don't seem to exist, at least according to my limited Google-fu, and I need them in order to get some dimensions and proper scaling.

Thanks in advance!

EDIT: I do plan on using this thread as a build thread as I go, and I'll probably offer up the blueprint I do for anyone else that wants to have it. Just so I'm not misleading anyone ;)
 
Last edited:
For the length, just use this picture. The shroud is off, but that doesn't change anything

bapty1.jpg


This is the best I could find in a cursory google for front photo:

gl_front_sm.jpg


There's actually a lot of documentation for these, most of it very well consolidated at the Alien Legacy boards. :thumbsup
 
OP, I have 4 PR's. One is a live fire in .45 all metal and made from original parts, one is an out of the box airsoft, one is another airsoft and parts sourced from years of collecting with accurate shrouds and the final one is leftover parts in a box.

Do yourself a favor and buy the Thompson Airsoft, preferably one in metal. This will give you a good base to build on dimension wise.. If you want a wall hangar, feel free to scratch build to your hearts content. But if you want something that feels more accurate......there are parts out there (metal stocks, metal forward barrel shrouds etc.)

One of the more difficult aspects of this build is making sure everything lines up on their respective X and Y axis.
 
@Veektohr - Cheers, man! In all my searches I've not once seen that front view photo. It's closer to what I'm looking for, thanks! Also I've had a cursory look at the alien legacy forums, but I should dig there a bit deeper.

@Lear60man - Trust me dude, if I had the $400 to drop I'd just go buy the airsoft version or whatever, but that's not why this is my hobby. I'm more of a builder than a collector, though I collect the things I build. I've only bought a very small handful of the props I have, the others I've built and I've gotta say I tend to appreciate the ones I've built more than the ones I've bought. I don't care about "screen accurate" most of the time, I just like the way things look and I want them, so I build them to what I feel would be "ideal" specs. Obviously something like this has a very specific design and feel, and I'm going for that with my build, but I don't care if it fires or if it has the heft or any of that stuff - typically at least.

Not trying to sound rude, just sharing my opinion.

All that said, would you be willing to take a few photos in the angles I need of one of your PRs and share? If not it's cool, I'll keep looking around.
 
No offense taken. Its your build and you will tackle it how you see fit.


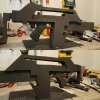
Ok....the one on the left is off the shelf airsoft PR. The one on the right is a mix-mash of SD Studios, First Gen Monsters In Motion kit, HCG built on a metal airsoft thompson. Sorry for the dust in the pics.
PRtop_zpsde1i3lh2.png


Left side is the off the shelf airsoft PR. Right side is the mix-mash. Camera angle makes them look a little wonky.
PRfront_zpspnoc7lky.png


Hope this helps.
 
So I drew up a blueprint and called it good enough for me to start, though I plan on finishing it and offering it for free for anyone else who might want it. That'll come in a later update. For now, here's where I'm at!

I printed my blueprint to the scale I worked out using a photo of my own hand holding a gun against a ruler and went to work. Here's a photo of where I am now:
20170126_070304.jpg

I hope to have all the foam cut out and glued together, ready for sanding and detail work, by the end of the weekend. More updates to come!
 
Update! I managed to get what I wanted done, and here it is:

c9cd17a7e7794f1d160bcdfa24eee350.jpg


The main bulk of the rifle is cut and glued together, ready for sanding. My EVA tiles weren't big enough to fit the whole shape on so I had to cut it basically in half for each layer, but I'm making progress!

Next up is sanding its edges smooth and shaping the grip, then on to cutting the shroud pieces from sintra and more detailing.

Sent from my SM-G920T using Tapatalk
 
Holy crap it's coming together! Got the two main shroud pieces cut and glued tonight, as well as shaping the grip and cutting the lines into it. The end of the road is near!
16602558_1727373770910695_736223444801008943_o.jpg

I decided to do the shroud from foam as well to add more bulk. The main shape was a bit too thin to just use sintra. The details of the Spas cage and whatnot will be sintra, and the shotgun pump will be some foam and I sculpt the crap out of. I found a scrap of PVC from a previous build that seems to be the correct diameter for the bottom grenade launcher barrel, so all I need to get is a length of PVC pipe for the top barrel and then I'm in business!

16602558_1727373770910695_736223444801008943_o.jpg
 
Last edited by a moderator:
I gotta admit, as I was scrolling through and saw the pics of your initial silhouette cut outs I wasn't so sure how this was gonna turn out, but then in the space of two posts you blew my mind! I haven't done a lot with EVA, but lately I've been seeing a lot of guns built out of it. It's amazing what you can do with that stuff, a Dremel and some glue... well done, sir!
 
I gotta admit, as I was scrolling through and saw the pics of your initial silhouette cut outs I wasn't so sure how this was gonna turn out, but then in the space of two posts you blew my mind! I haven't done a lot with EVA, but lately I've been seeing a lot of guns built out of it. It's amazing what you can do with that stuff, a Dremel and some glue... well done, sir!

Hey thanks man! I actually felt the same way during the early stages, it just didn't look right and I was almost ready to scrap it. I worked for around 10 hours yesterday and got it to where it is now and I feel WAY better about it.


I'm still quite a beginner and scratch building so it's easy to get discouraged, but once I got done working yesterday I'm feeling a lot less bad about it!


Now a question for everyone: In my initial fabrication steps, I forgot there needs to be a channel on the carry handle. It's a bit late to take it all apart and fix it now, so I'm kinda stuck. Being foam it's easy to cut, but how would y'all cut it in now? I don't want to go too far with it, and I want to make it as smooth as possible since it's going to be really awkward to sand if it's all fuzzy...

I also decided this weekend that once it's done, I'm going to do my best to write out a full build log. I haven't taken many photos, but I think I've got enough to get the basics down. If anyone's interested of course! :)

Couldn't you just slice it down the middle legthwise, peel the foam back and take a 90 degree chunk out of each side, then glue the two sides back together to form a "180" degree channel?

Or maybe you get some of those long, bendable "Persona" razor blades and bend one into the channel shape you're trying to get and just run it down the middle...
 
Couldn't you just slice it down the middle legthwise, peel the foam back and take a 90 degree chunk out of each side, then glue the two sides back together to form a "180" degree channel?

Holy butts, I didn't even think of that! Been staring at this thing for so long that my eyes are crossed lol. I'm totally gonna do that when I get back to work on it!

I'm also going to revisit the upper receiver portion because after looking at my reference photos again, I got it a little wrong when I drew out my blueprints and I've gotten a better idea of how it's supposed to look and how I can make it happen. More sintra fabrication!
 
Well, I'm calling the fabrication stage of this beast done! I'm sure there's a few fiddly things I could do to make it a little cleaner and stuff, but I'm afraid of screwing it up and losing like 80 hours of work time.

I added some sintra on the buttstock to reinforce it a little bit; make it less wobbly, and then pulled a couple tactical rails off an airsoft gun I had laying around to use as the shoulder pad of the stock. I was going to use more sintra to build up the upper receiver area with the charging handle and ejection port, but I decided to just score in the details and hit the foam with a heat gun to open it up a bit. The actual charging handle was some sort of plastic bushing I had leftover from another project and I just glued it into place after sinking it into the foam a bit. Oh, and I took BadAtNames' advice and chopped the carry handle off and in half to cut the channel in, then glued it all back together. A little sanding and it was as good as it was gonna get!

PulseRifle.jpg

Overall, I'm happy with how this has turned out!

Now to wait for warmer weather here in Washington and paint it up! A few coats of plastidip, some satin black, a little OD green and weathering and it'll be done!

What do you guys think?
 
Holy Necro-Post, Batman!

That's right folks, after over a month of waiting I've finally gotten the ol' girl finished up! Only thing I have left to do is put a static ammo counter in place. She's not much to look at, but I'd say she's a good first attempt at scratch-building a space gun!

PICS!!

Pulse-Right.jpg
Pulse-Left.jpg
 
I've only bought a very small handful of the props I have, the others I've built and I've gotta say I tend to appreciate the ones I've built more than the ones I've bought.

I have to agree 100% with this. Sure, I have thrown a few grand at my collection over the years, yet some scrap MDF that became The Fifth Element Stones are probably some of my favorite things.

That PR is looking SWEET!
 
This thread is more than 6 years old.

Your message may be considered spam for the following reasons:

  1. This thread hasn't been active in some time. A new post in this thread might not contribute constructively to this discussion after so long.
If you wish to reply despite these issues, check the box below before replying.
Be aware that malicious compliance may result in more severe penalties.
Back
Top