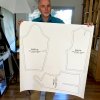
"2001: A Space Odyssey" Hostess Costume

JCalhoun

Active Member
When my daughter told me she was interested in cosplay, I was surprised at how excited I got about the idea of re-creating the hostess costume from "2001: A Space Odyssey". Now, just to be clear, this wasn't my daughter's idea at all — she wanted to do something from this decade ... from a video game or something. But I wanted to create the hostess costume.

(To be clear, the costume would be for her, I'm a fat old man :D, but I wanted to make her a costume.)

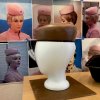
For a refresher, in case you are not that familiar with the costume I am talking about, this is a publicity still from the film:

2001 Hostess.jpg

Another publicity still:
2001 Hostess.jpg

So, the research began.

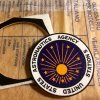
There are perhaps a good dozen or so photos that I have found. Enough that I was able to begin to break down the costume into parts: hat, jacket, skirt, hose, shoes. There is a patch on both the hat and jacket left breast — the one on the hat is smaller.

The original costumes for "2001" were designed by Hardy Aimes, fashion designer for Queen Elizabeth II. The hat itself probably created by Frederick Fox, a milliner whose handiwork also adorned the Queen (yes, I had to look up that word, "milliner").

I have no idea what materials were used. The hat could be felt since this is a common enough material in hat-making — although I don't know what high-end hats are made of.

The jacket and skirt look, to my eye, to be made of perhaps a pink wool. Wool is certainly an elegant material and my expectations are that Stanley Kubrick would have insisted on the finest quality in every regard.

I am new to sewing, new to costume creation, new to cosplay. With that in mind, I decided from the outset that this would be an iterative exercise. I expect my first attempt will be crap, but I hope to learn enough from the attempt that a follow-on version would be closer to the goal.

2001 Hostess.jpg


2001 Hostess.jpg
 
Last edited by a moderator:
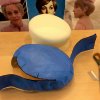
So let's begin with the hat.

The hat is round but somewhat wedge-like as well — sloping down a bit in the front. It has a small brim. Two very small pink, cloth balls, like spherical buttons, adorn points left and right above the nape of the neck.

Close inspection suggests a pattern for the hat. Two seams, one on the left, one on the right, come up from the two buttons near the nape of the neck. The seams rise straight up the back of the hat separated by perhaps 3 to 4 inches. Near the top of the wedge, the seams suddenly turn away from one another and arc around the sides of the hat — ending perhaps 5 or 6 inches apart near the front of the hat.

After doing a little (admittedly limited) research on hat making, my first thought was to try and locate a wooden hat form that I hoped would be close to the shape of the hat from the film. I gather that somehow the fabric is stretched on a hat form to get the basic shape.

As luck would have it, there was a wooden hat form on eBay that, although not precisely like the "2001" hat, looked like it was at least heading in the right direction. I recall it was rather pricey though — maybe $50 or so. To hit $50 when I had only just begun the costume ... and I didn't even know if this path I was on was going to bear fruit.

In fact shortly after the wooden form arrived, I decided to take a slighty different tack — I decided to sculpt my own hat form. I knew carving it from wood was not going to be easy for me so I decided to instead sculpt a hat form in an oil-based clay and then make a mold and cast the finished piece in resin.

And so I did.

I began with a styrofoam wig-form and print-outs of the reference photos. I traced a line in Sharpie where I expected the hat to perch on the head.

IMG_0656.jpg

And then used Monster Clay to sculpt the hat.

IMG_0657.jpg

Roughing in the shape:

IMG_0661.jpg

Smoothing. One way I smoothed it involved rolling a piece of masonite (the dark brown wood that is also the base of the wig form) around on the sculpt.

IMG_0667.jpg

Next, the hat form mold....

IMG_0686.jpg


IMG_0667.jpg


IMG_0661.jpg


IMG_0657.jpg


IMG_0656.jpg
 
Last edited by a moderator:
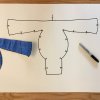
To make a mold from the hat form, I decided to make a left and right half using old-fashioned Plaster of Paris — a material I have used a few times when I was younger. It's heavy and doesn't capture minute detail, but for this project it would be fine (and it's cheap and easy to work with).

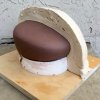
I started by making a clay dam (sort of like a dorsal fin) between the left and right hemispheres of the hat. You can see that at this point, I have also cut the lower half of the styrofoam wig form away since the piece was getting top-heavy (and the rest of the wig form was not necessary).

IMG_0686.jpg

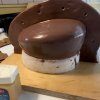
With plenty of Vaseline applied, I threw Plaster of Paris over the left half of the form.

IMG_0690.jpg

When it set up, I removed the clay dam, applied liberal amounts of Vaseline and threw Plaster on the right half as well. When separated, I had a plaster mold.

IMG_0694.jpg

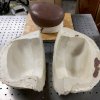
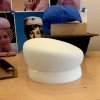
I somehow missed getting photos of the resin pouring/casting process. It amounted to spraying a mold-release into the two halves of the plaster mold and pouring in a two-part resin. I believe I used bungee cords to hold the two halves of the mold together while the resin was being cast.

Here though is the result:

IMG_0699.jpg
Next, hat pattern-making....
 
I knew I now needed a piece of cloth to form around the hat-form. But just any shaped piece was not going to work — it had to at least approximate the hat shape. And as I described earlier, I could see in reference photos where the seams to the hat were — how it went together.

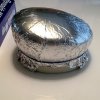
To arrive at this pattern, I decided to first cover the resin hat form with aluminum foil...

IMG_0730.jpg

... and then blue masking tape. I then marked where I believed the seams to be.

IMG_0732.jpg

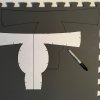
Carefully I cut along the black-marked seams through the tape and foil to get the pattern removed from the form.

IMG_0734.jpg

I laid it out flat and traced it.

IMG_0736.jpg

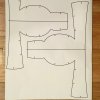
I like having patterns in a digital format, so I scanned in the hand-drawn pattern and overlaid vectors. As I tell my daughters, vectors don't lie. I printed the vector file at my local Kinko's on their large format (B&W) printer (below you see I was able to fit two patterns on a single print-out).

IMG_0739.jpg

But a funny thing happened about the same time I was finishing up the pattern you see above....

Next, making the hat with foam...
 
Last edited:
I suppose I was visiting the Tested.com web site and watched how a helmet, suit of armor can be made from floor-mat foam pieces. I decided it was worth another detour to see if I could arrive at something convincing using foam as my hat form rather than trying to stretch cloth.

And of course the pattern I would need for the hat shape to be made from foam was the very pattern I had just created for the cloth/felt material. In short order I had picked up some floor mats and ordered some glue for the foam. I traced out my pattern onto the grey foam and cut it with a hobby knife.

IMG_0740 (1).jpg

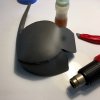
I attempted to glue the pattern together. I used a heat gun to soften the foam (and hit it a little too hard in one spot — leaving a small burn).

IMG_0741 (1).jpg

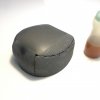
I was surprised to see more or less the hat shape I was expecting come together. I was able to use a rasp to knock off the edges a bit for a little more of a finished look.

IMG_0754 (1).jpg

All in all, it was not bad. The foam sort of dictated some contours I was not expecting, but it looked like, with some tweaks on the pattern, I might be able to work around those. I'll remind you that this was admittedly a learning experience where I didn't expect perfect results on the first go-around.

Next, covering the hat...
 
I was ready at this stage to cover the foam hat I had just made. But I had not been able to, at this point, find pink wool.

I wasn't too worried about it though since, again, this was only a test. Instead I picked up some pink fleece that had a kind of wool-look. Fleece is extremely inexpensive too. I think if I had had some wool at that point, I probably would have used the fleece anyway. I think I need practice at this before I start hacking up whole bolts of expensive wool.

Again, the paper pattern came out — traced on a swatch of fleece to make the piece to cover the foam form. The only thing I did different was to add an extra margin (hem) to the pattern so I would have extra material to sew along.

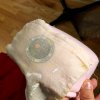
Sewn together it looked rather odd (inside out here):

IMG_0759 (1).jpg

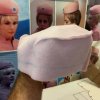
Nonetheless, flipped right-side-out and stretched over the foam hat was giving promising results.

IMG_0763.jpg

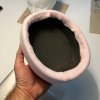
Here is the hat from the underside.

IMG_0764 (1).jpg

It need a brim, the patch on the front ... perhaps this little button/balls above the nape of the neck. The fleece I found too was not opaque enough and the gray of the foam could be seen through. I ameliorated that somewhat on a follow-on hat by painting the foam with white gesso (paint).

I decided to tackle the patch.

They sell "2001" patches on eBay and the like, so I ordered a few.

The more I looked at the patch in the reference photos though, the more convinced I was it wasn't a patch at all — let's call it an appliqué. It simply didn't look as thick and ... thready ... as a patch. I decided not to use the eBay patch I had ordered. The idea I came up with was to create my own artwork and send it off to be printed "on canvas" by one of those print houses.

The bad news is that I replicated the (crappy) art from the patch I got on eBay and only later determined it was not film-accurate. (I should have spent more time here on theRPF — I have since found a guy that has really nailed the patch logo here).

The good news is that the canvas print worked out very well.

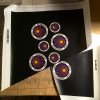
When the print arrived it had several patches of two differing sizes on the single canvas sheet. I began by rough-cutting them out.

IMG_0841.jpg

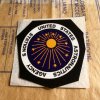
The white square beneath the patch (below) is a double-sided "Heat 'n Bond" material used in sewing. It appears to be cloth that is impregnated with tiny drops of "hot glue" that is activated hot steam. By ironing this on the back of the appliqué, I had an iron-on patch.

IMG_0844.jpg

I trimmed it to the final round after the backing was ironed on.

IMG_0845.jpg

It was then a simple matter of removing the protective paper from the backing and ironing the appliqué to the hat. You cover the patch with a damp cloth because I believe the adhesive material is steam activated.

IMG_0847.jpg

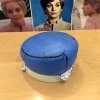
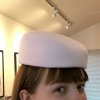
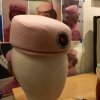
Here is the first iteration of the hat (with from added).

IMG_0853.jpg

Next: The Jacket!
 
Wow that's a lot of work for a hat....but well worth it, the results speak for themselves. The film 2001 is a treasure trove of possible costume ideas, I can't wait to see the rest of your costume come together, great start.
 
Lovely work and the hat rocks for sure. Not a very popular costume to make (difficult to say the least) I'm sure that the rest of the costume will be as great as the hat.
Eager to see it all coming together:cool
 
I had only dabbled in sewing before trying to create a "2001: A Space Odyssey" costume. What I have done a good deal more of in the past was wood-working. So the first thing I did was to build a sewing table.

IMG_0114.jpg

With no idea how to even begin a pattern for the jacket and skirt of the costume, I decided to try to find the closest thing I could among existing patterns. I went to a fabric store and went through their pattern catalogs. A few looked interesting, none were perfect. I think I may have used the Vogue 9093 as the basis for my exploration of this costume.

IMG_0499.jpg

Using the inexpensive pink fleece I had used on the hat, I dove into the pattern. I made a lot of mistakes. For example, I ended up cutting out these long football shapes out of the top only to learn later that I was not supposed to remove them — merely sew them up. Something called a "dart" it turns out...

IMG_0501.jpg

I modified the pattern to the degree I could — didn't sew on pockets for example (since there are no pockets for the space station hostess apparently). I knew the collar was wrong but for this first iteration I was okay with that. It was enough to be learning how to follow a pattern and how to sew.

I ended up with a top that looked like you could wear it.

IMG_0654.jpg

I took in the bottom (you can see the marks above where I intended to hem it).

You might also notice where I had to improvise a zig-zag stitch right across the front panels of the top in order to bridge the darts I had cut out.

I tried to sew on a zipper. The appliqué had not yet arrived so, for purposes of the photo below, I just taped in place a patch I had picked up on eBay.

It looked ... serviceable.

IMG_0697.jpg

Next: skirt and a trial run....
 
Lets just jump to the finished "beta" of the costume:

IMG_0923.jpg

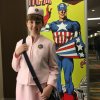
And below, my daughter at San Francisco Comic Con 2016:

IMG_0930.jpg

IMG_0934.jpg

For all my effort, I learned a lot and think I came up with a good first pass.

Where to go next....
 
I happened to be in Tokyo over the summer, and there is a street in Tokyo that is often called "Fabric Street" or "Fabric Town". With my new interest in sewing I had to head there and look for that elusive pink wool. I had a former foreign-exchange student with me so asked her how to say "wool" in Japanese. It turns out it's the same word. But the Japanese don't have the "w" at the beginning so it would sound more like "uhl". And the Japanese don't like a word to end in a consonant (except for the letter "n" for some reason) so an little vowel is added making the word closer to "uhl-eh".

Yes, I found my pink wool in Tokyo, but it was not cheap. I picked up maybe 5 meters.

IMG_0265.jpg

I also decided for future iterations of the costume that I wanted to come closer to the pattern that appears in the film. To that end, I began to very closely study the reference photos — looking for where the seams are, etc. I came up with this sketch that I believe displays where the various darts and seams are:

IMG_0916.jpg

It turns out the pattern I began with was actually in the ballpark: darts coming up from waist one left and right beneath each breast; seam straight down the center of the back; small darts for the shoulders; small dart under each sleeve just forward the elbow.

Places where I would have to innovate: zipper on each forearm, and that mandarin collar! (I learned from a female co-worker that this is what that style collar is called.)

If you look closely you'll see that the collar is quite complicated. In an effort to make it appear as "seamless" as possible, the collar is an extension of the front panel of the top. Only when it crosses from the front over the shoulder is a seam revealed where it attaches to the back panel of the top.

So for the second iteration of the costume I was going to try to evolve my own pattern with the original pattern as my basis, the sketch above my end-goal.

Now, I was certainly not going to use the nice wool while I was still exploring the pattern. In fact, even rather than the fleece I tried felt this time. I again cut out the original basis pattern and sewed it together as before. But this time I just "kitbashed" chunks of cloth here and there where the mandarin collar should be. I cut it and made it look "right'. Then I went in with a Sharpie and marked where the seams "should" be.

IMG_1015.jpg

Now it was a matter of cutting along the black lines....

Next: a new pattern....
 
Last edited:
With the pieces of "costume #2" cut up, I used Super-77 to lay them out on large sheets of matte board:

P9230019.jpg

Not having a scanner large enough to scan these in to the computer (recall, I like patterns to be digital), I instead took a photo of the pattern-board with a camera. If you look at the above photo you'll see a number of 12" reference lines/marks I drew on the matte board. After bringing the digital photo into a vector-based drawing program, I was able to scale it closely to actual size and lay my vectors on the pink shapes.

Here it is digitized and printed at my local Kinko's (again, B&W, large format printer).

IMG_1062.jpg

Now I have a digital basis from which I can sew, evaluate, modify the vectors, print, sew again, repeat....

I have cut out and sewn together the pattern from above, but there is plenty of finishing work I need to do (lining, zippers, etc.) in order to see how close I am getting to a more screen-like costume.

I have also created a new appliqué that is more screen accurate. Follow-on iterations of the costume will get the newer patches.

Anyway, I'll post again when I get time to go back to this project. But I wanted to at least document where I've been.

Thanks for looking.
 
Last edited:
I'm having a hard time getting the images to stay showing up ad images — often they just shows as Attachment.

I'll try editing the posts later and see if the images stick this time.
 
WOW for someone who has only previously "dabbled" in sewing I would say your results are a Home Run!
 
This thread is more than 7 years old.

Your message may be considered spam for the following reasons:

  1. This thread hasn't been active in some time. A new post in this thread might not contribute constructively to this discussion after so long.
If you wish to reply despite these issues, check the box below before replying.
Be aware that malicious compliance may result in more severe penalties.
Back
Top