You are using an out of date browser. It may not display this or other websites correctly.
You should upgrade or use an alternative browser.
You should upgrade or use an alternative browser.
Part Cast Exchange for the Green Leader Project!
- Thread starter WINGNIT
- Start date
I have a couple of these Kettenkrad track parts left from a previous attempt if someone wants to borrow them to make some molds/casts? I can't get a good mold from them for the life of me.
View attachment 665799
I got a pretty decent one part mold by adding some little bits of styrene that get trimmed away from the casting. Maybe not a 100% perfect copy but certainly good enough (IMHO) once installed. I'll shoot some picture of the modification over the weekend and post. It's also a part that really needs to be pressure cast.
Yes, a two part mold would work best but they are a PITA and I try to avoid them unless absolutely necessary.
WINGNIT
Active Member
Lee- Now you're talkin'!. I think I saw some Harrier parts in 3phase's collection, but I could be wrong. I didn't catch the Centurion or Hummel in there and those are tough ones to grab. I thought that there are 2 or 3 separate parts from both, but we may all want to sweep the Part ID threads to make sure we don't miss one!If someone can confirm the parts needed from these, I can make a mold:
1/15 Hummel
1/25 Centurion
1/24 Harrier
I'm about to cast up a bunch of Bandai 1/48th pieces for various projects.
Like everyone, I'm having a tough time keeping track of everything
L
I got a pretty decent one part mold by adding some little bits of styrene that get trimmed away from the casting. Maybe not a 100% perfect copy but certainly good enough (IMHO) once installed. I'll shoot some picture of the modification over the weekend and post. It's also a part that really needs to be pressure cast.
Yes, a two part mold would work best but they are a PITA and I try to avoid them unless absolutely necessary.
Dave- Based on your casting tutorial, I imagine you could cast just about anything! The pressure casting is where I am at a loss and can't help...
Yes, I've tried a two part mold with this little guy and agree that they need to be pressure cast. That is where I'm failing.
Right there with you....
I may have some Bandai and Nichimo parts soon, and I just snagged a 1.24 Mustang for $30....the first purchase I have made where I didn't feel like I needed to be cuddled afterwards. I will update the parts list in the first post.
I will be making some molds this weekend assuming the bulk of my stuff comes in, so if anyone has any interest in the kits I have listed, pm me and I will get them in some silicone if there already isn't a mold.
Big Dog
Active Member
If someone can confirm the parts needed from these, I can make a mold:
1/15 Hummel
1/25 Centurion
1/24 Harrier
I'm about to cast up a bunch of Bandai 1/48th pieces for various projects.
Like everyone, I'm having a tough time keeping track of everything
L
Right now I just have time for the Hummel ones. I put together this image of them. The bottom right one is the modified piece being used on the rear engine of the Y and was confirmed to be from the Hummel. But mentioned to be heavily modified. I can't tell from scans which piece it's from. Would you be able to look for it maybe?

Jamie M
New Member
Anybody in the UK building this ? Once Daves Y wing arrives here I've got some extra kits I'd like to do swops with ie extra Apollo and 8Rads pieces etc. And has anybody printed the body out in the UK? Looking for a source for that, anyone do business with Shapeway in the UK?
I'm in the uk and building this. I can print you a set of body parts if you like.
Vacformedhero
Sr Member
QUOTE=Hammer3246;4079607]Here ya go.If someone can confirm the parts needed from these, I can make a mold:
1/15 Hummel
1/25 Centurion
1/24 Harrier
I'm about to cast up a bunch of Bandai 1/48th pieces for various projects.
Like everyone, I'm having a tough time keeping track of everything
L
View attachment 664579[/QUOTE]hummel part from two y-wings near astromech ,
the harrier piece is ironically kind of H shaped , pink in this image

Attachments
Hammer3246
Sr Member
No problemo!Hammer has sent me the Morgan parts. Many thanks!
I've got the Sealab, but there are so many people saying they are going to offer castings. I don't want to step on any toes or create unnecessary competition. Especially when I can't really commit to a time frame either.
I've got the 1/24th Harrier, Mustang and Messerschmidt, all MPC but I think they are a repop of the Airfix.
I have never been able to get any of the 1/15 Bandai. Even when I have thrown serious bids at them somebody has always wanted them more. Same with the Kettenkrad.
Hopefully soon I will be able to actually offer Holgate and Reynolds HO brick. I am currently trying to build inventory. I need to make more molds of it so I am not doing one piece at a time.
What is keeping you from pressure casting? Money? Space? Fear? I have a Harbor Freight pot and it is pretty easy to do...it does scare me a bit though. I like to think of it as a healthy fear.
I have a Harbor Freight pot and it is pretty easy to do...it does scare me a bit though. I like to think of it as a healthy fear.
Set the regulator so that the max pressure in the tank is about 60psi. Don't pressurize to full compressor capacity which is around 100 to 120 psi. You should be safe there.
I've got a pressure tank I can take up to 120psi but it's made out of 1/4" thick steel! To tell the truth, I don't really see any difference between parts done at 40psi and parts done at 120psi.
Speaking of Sealab castings... if someone is interested in doing a run of the control vanes which incorporate the Sealab crane I have a idea for an easy way to 3D print pattern masters for making molds. Casting would still be tricky, they're thin parts and getting resin to flow through might require injecting, certainly would require a pressure pot. PM me.
Hammer3246
Sr Member
As far as the Sealab parts for that area. I dropped 1/2 under the print bed, printed twice then glued them together. Worked out great.Set the regulator so that the max pressure in the tank is about 60psi. Don't pressurize to full compressor capacity which is around 100 to 120 psi. You should be safe there.
I've got a pressure tank I can take up to 120psi but it's made out of 1/4" thick steel! To tell the truth, I don't really see any difference between parts done at 40psi and parts done at 120psi.
Speaking of Sealab castings... if someone is interested in doing a run of the control vanes which incorporate the Sealab crane I have a idea for an easy way to 3D print pattern masters for making molds. Casting would still be tricky, they're thin parts and getting resin to flow through might require injecting, certainly would require a pressure pot. PM me.
Set the regulator so that the max pressure in the tank is about 60psi. Don't pressurize to full compressor capacity which is around 100 to 120 psi. You should be safe there.
I have my regulator set to 50psi. I also have a pressure gauge hooked up to the pot. Typically the gauge hits 50psi and the air stops flowing. I shut the intake valve and disconnect the hose.
I normally leave the compressor turned off because I hate being startled by the noise when it trips on. I always wear eye protection and prop a piece of mdf between the pot and my body. It may be unnecessary and even futile if the pot fails but it makes me feel better.
In the beginning I tried to let my molds cure under pressure but I had a heck of a time with the Harbor Freight pot leaking. I know the theory is to leave the regulated compressor hooked up to refill the pot but I do not trust the equipment enough to do that in my garage. I asked Smooth-On tech support and they advised that if you vac degas the RTV you really don't need to let the mold cure under pressure. Dozens of molds later and it works great.
jedimaster
Sr Member
If someone posts pix of the sealab parts required I can do those. I have molds for the parts required for the y I think. Most were cast for the turbo laser so I think I have them covered. I'll get back to everyone who pm'd me later.
jedimaster
Sr Member
Pulled these to clean out the mold. Will cast in Grey resin.

Count me in!
Need Sealab and Kett parts for sure")
L
Need Sealab and Kett parts for sure
L
Pulled these to clean out the mold. Will cast in Grey resin.
View attachment 666365View attachment 666365View attachment 666365
Vacformedhero
Sr Member
There is no stepping on toes as everyone is recasting kits ,I've got the Sealab, but there are so many people saying they are going to offer castings. I don't want to step on any toes or create unnecessary competition. Especially when I can't really commit to a time frame either.
also selling a batch of parts for a specific Y-wing or and Star Wars studio kit is unrealistic as everyone has different stashes and it becomes too expensive with shipping to buy everything , I'd prefer to see individuals offering one kit parts , Panther G , sealab 3 than specific Tie Killer , Alan Ladd , they will make their money back for the original kit if they can sell multiple kits rather than only offering something one person can afford .
this only makes sense if the generic items common to all types were offered , but again there will be part overlap.
Vacformedhero
Sr Member
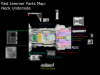
I have not seen this part identified on any of the three parts maps
square piece used to cover Y-Wing engine nacelle mounting point
Very clear in these prop store pictures, one looks like it's not even painted , you can see screw head used to hold it on


square piece used to cover Y-Wing engine nacelle mounting point
Very clear in these prop store pictures, one looks like it's not even painted , you can see screw head used to hold it on
There is actually no reason to put silicone under pressure while curing, and it can even be detrimental. If there are any bubbles in the rubber the pressure will compress them down considerably in size, but unlike doing the same with a resin casting, since silicone is flexible, when you release the pressure the bubbles will expand again, the amount depending on the shore hardness of the rubber. If the bubble is near a surface in the mold, and that's where bubbles tend to accumulate, it can cause a little bump. Yes, if you put the mold back in the pressure pot when casting the bubble can be compressed down again but it's just a big back and forth. If you use a vacuum chamber to de-gas the rubber when making the mold you shouldn't have any bubbles anyway. If you don't have a vacuum chamber you're better off using a low viscosity rubber that's designed to not need de-gassing.
The trick to using the Harbor Freight pressure pot is not to crank down on the lid screws too much. Over tightening warps the lid slightly and makes getting a good seal difficult. When you use only moderate tightening, then the rubber gasket can expand and seal the pot as intended. I also found it beneficial to rotate the lid around into different positions until I found one that sealed the best, then marked the lid and pot to align to that point each time. The Harbor Freight pot is a good bargain but it's not very precisely made and you get what you pay for. Even with the lid well sealed like I described it'll loose pressure if not kept hooked up to the compressor.
The trick to using the Harbor Freight pressure pot is not to crank down on the lid screws too much. Over tightening warps the lid slightly and makes getting a good seal difficult. When you use only moderate tightening, then the rubber gasket can expand and seal the pot as intended. I also found it beneficial to rotate the lid around into different positions until I found one that sealed the best, then marked the lid and pot to align to that point each time. The Harbor Freight pot is a good bargain but it's not very precisely made and you get what you pay for. Even with the lid well sealed like I described it'll loose pressure if not kept hooked up to the compressor.
Similar threads
- Replies
- 0
- Views
- 389
- Replies
- 10
- Views
- 699