What a fantastic project! Very well done. Can you share any tips and tricks you have picked up regarding riveting? I am contemplating a project that will require a similar effort (mine is a travel trunk) and I am not sure what type of rivets to use or how they actually are installed.
You are using an out of date browser. It may not display this or other websites correctly.
You should upgrade or use an alternative browser.
You should upgrade or use an alternative browser.
The suitcase from Fantastic Beasts and how to recognize it
- Thread starter ATL Kenobi
- Start date
-
- Tags
- harry potter
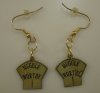
 I really did need to make earrings:
BTW - I used a black paint marker from McMaster-Carr to fill in the letters.
I cut out the lever from 0.032" brass and soldered a small handle (1mm brass) to it.
I'll file most of the solder blob off to finish it.
ATL
Attachments
What a fantastic project! Very well done. Can you share any tips and tricks you have picked up regarding riveting? I am contemplating a project that will require a similar effort (mine is a travel trunk) and I am not sure what type of rivets to use or how they actually are installed.
JamesM242
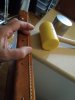
For this project most of the leather related parts came from Tandy. For the sides, I used 1/2" #9 copper rivets and burs and the associate video at this link is what I went by. One difference though is the setting tool does have a domed area so the second tool used in the video, I didn't feel was necessary. I used many different sizes of rapid rivets, and once again I pretty much follow the video at the link. I bought one of there tool sets because of the many sizes of rivets I used.
The domed copper rivets came from McMaster-Carr. I got 1/2" ones but wish now I'd gotten 1/4".
ATL
edit - Since rivets are cheap, I would recommend practicing setting each different size and type of rivet through a couple of pieces of scrap leather before using them on the final project. For the rapid rivets, the shank should protrude at least a little when pushed through the leather to be joined, but no more than an 1/8". The shank also has a small indention on the end for which the cap will snap on to which kind of holds it in place until you can whack it with a mallet. Also, as recommended, a granite or similar surface for setting against makes a big difference. I used a piece of stone that was cut out for my kitchen sink. Hope this helps...
Last edited by a moderator:
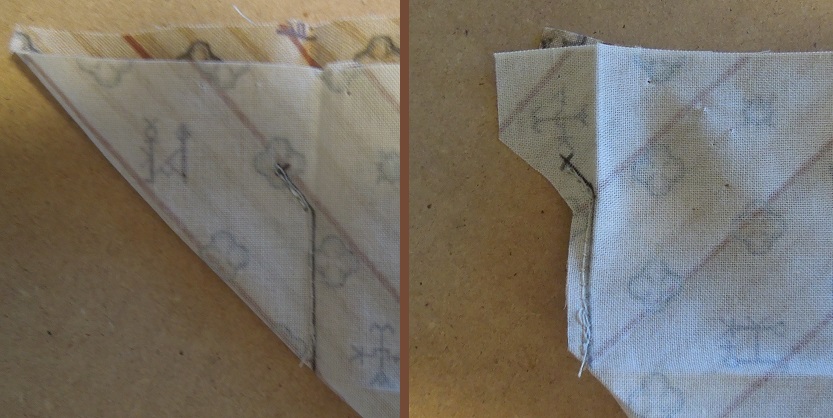
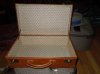
I got my lining (a discussion for another day) and found that I had incorrectly copied the runes. There should not be 3 of the same type line in succession. I was not happy :angry about this, but decided to use the fabric anyway.

I fitted the fabric for the lid frame, and had it seamed. The little angle allows the fabric to mold around the frame corner
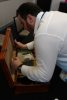
I got help from my own magical creature...

I used stencil adhesive to hold the fabric to the frame. It allows you to re-position the fabric if it gets crooked.
At this point I added rivets which otherwise become inaccessible once the frame/lining is in place.

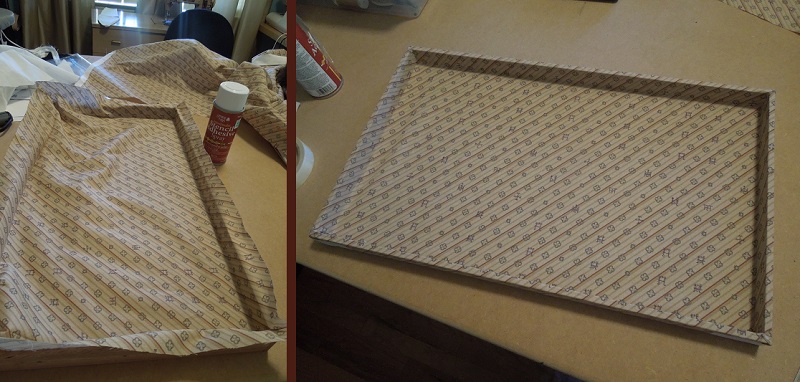
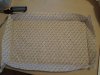
Likewise, the lining for the case was seamed and glued to the case. I used a small steel ruler as a tool to help get the fabric into the corners.

Once the fabric was in place, it was trimmed, the leather edging was glued down, and stitched.
The leather straps that hold up the lid were then riveted to the lid.
The copper rivets that hold the lid and frame together were then tapped in place.

Should be done with the case soon!!!
ATL
I fitted the fabric for the lid frame, and had it seamed. The little angle allows the fabric to mold around the frame corner
I got help from my own magical creature...
I used stencil adhesive to hold the fabric to the frame. It allows you to re-position the fabric if it gets crooked.
At this point I added rivets which otherwise become inaccessible once the frame/lining is in place.
Likewise, the lining for the case was seamed and glued to the case. I used a small steel ruler as a tool to help get the fabric into the corners.
Once the fabric was in place, it was trimmed, the leather edging was glued down, and stitched.
The leather straps that hold up the lid were then riveted to the lid.
The copper rivets that hold the lid and frame together were then tapped in place.
Should be done with the case soon!!!
ATL
Attachments
-
 63 Copper rivets.jpg255.1 KB · Views: 1,765
 -
 62 Lid Straps.jpg119 KB · Views: 1,712
 -
 61 case linig and stiching.jpg240.8 KB · Views: 1,781
 -
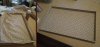
 60 lining the top.jpg115.3 KB · Views: 1,760
 -
 59 various rivets.jpg112.4 KB · Views: 1,721
 -
 58 Stencil adhesive.jpg153.1 KB · Views: 1,761
 -
 57 sleeping on the job.jpg155.6 KB · Views: 1,729
 -
 56 hemming the top.jpg128.5 KB · Views: 1,800
 -
 55 lining the top 1.jpg212.7 KB · Views: 1,795
No one looking at the pattern would ever realize it wasn't EXACTLY right.
Jintosh
My wife also said if I didn't mention it, no one would ever notice, but there are some very observant folks here on the RPF...Except for the "Muggle Worthy" mechanism, it's done. YEA! :cool
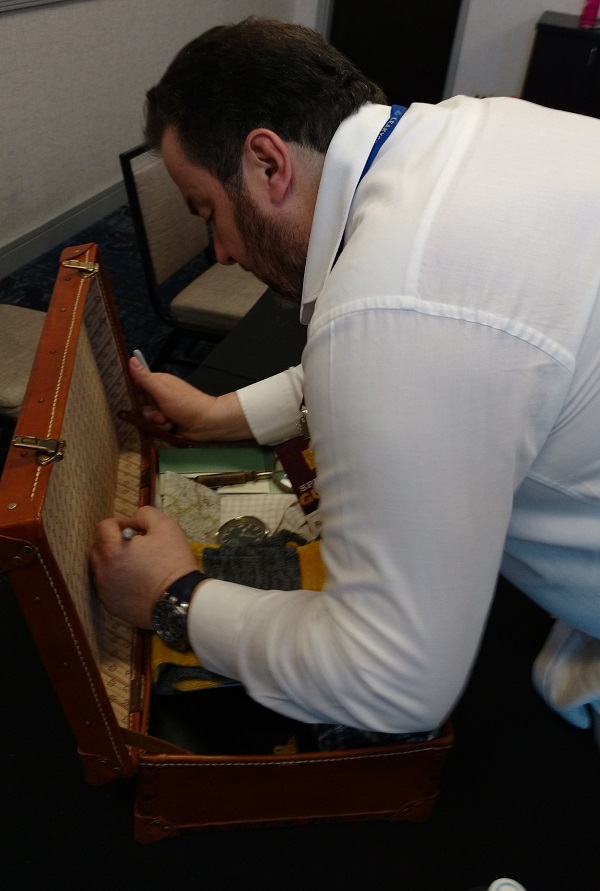
I'm actually going to be using the suitcase as a carry-on this morning. Hopefully it holds up! The other suitcases contain 7 Harry Potter related costumes!
ATL
Attachments
Last edited by a moderator:
PotionMistress
Sr Member
:eek :love I'm flabberghasted at what a beautiful job you've done on this! It looks better made than the one in the movie. You're a real pro.
It's a FANTASTIC piece for FANTASTIC creatures. (Your beautiful 'Kneazle' seems to love it also)
This is what the RPF is all about. Amazing!
It's a FANTASTIC piece for FANTASTIC creatures. (Your beautiful 'Kneazle' seems to love it also)
This is what the RPF is all about. Amazing!
Last edited by a moderator:
sonicfreak04
Sr Member
awesome!! where would i get the fabric?
Friendly flyer
Well-Known Member
This is an absolutely marvellously beautiful prop! The fact that you can bring other props in it also makes it a useful prop, which is even better!
KevinBGoode
Well-Known Member
This is just a fantastic prop for a fantastic movie! Who knows maybe you'll be making them for the next movie!
Here is a cool interview from the creator of the original suitcases
http://redirect.viglink.com/?format...translate.google.com/transla...asticbeasts%2F
Here is a cool interview from the creator of the original suitcases
http://redirect.viglink.com/?format...translate.google.com/transla...asticbeasts%2F
sonicfreak04
Sr Member
@ALT-kenobi I was wondering whats the clock and magnifying glass called? Id like to look for my own as well
PotionMistress, ecl, Friendly flyer, and KevinBGoode thanks very much for the kind words :$
Just back from LeakyCon LA (Los Angeles), where I had the good fortune to meet and talk with Pierre Bohanna:

He told me that many of the actual suitcase props are cardboard, and the ones that are carried around a lot are carbon fiber to reduce weight. The "muggle worthy" mechanism movement is actually accomplished with a servo which resides inside a special case! I told him he cheated :rolleyes, and he thought that was funny. He did mention that, just eyeing it, my case needed to be about 20% taller - about an inch I guess. So if anyone else wants to replicate a suitcase, please keep that in mind. He did not bring any props to the convention.
Regarding the lining fabric, it took hours and hours of work to generate the PNG file, but I will share it with anyone who builds a suitcase from scratch (not an eBay find). Just post several detail shots of leather working to this thread (cutting, shaping, staining, stitching, riveting, and so forth), and I'll email it to you. It's 7 megs.
If there's general interest - I will show how I generated the file for the fabric.
Also visited Universal Hollywood and met this young lady!

ATL
Just back from LeakyCon LA (Los Angeles), where I had the good fortune to meet and talk with Pierre Bohanna:
He told me that many of the actual suitcase props are cardboard, and the ones that are carried around a lot are carbon fiber to reduce weight. The "muggle worthy" mechanism movement is actually accomplished with a servo which resides inside a special case! I told him he cheated :rolleyes, and he thought that was funny. He did mention that, just eyeing it, my case needed to be about 20% taller - about an inch I guess. So if anyone else wants to replicate a suitcase, please keep that in mind. He did not bring any props to the convention.
Regarding the lining fabric, it took hours and hours of work to generate the PNG file, but I will share it with anyone who builds a suitcase from scratch (not an eBay find). Just post several detail shots of leather working to this thread (cutting, shaping, staining, stitching, riveting, and so forth), and I'll email it to you. It's 7 megs.
If there's general interest - I will show how I generated the file for the fabric.
Also visited Universal Hollywood and met this young lady!
ATL
Attachments

Egon Spengler
Master Member
The lid appears to have a frame around the inside of it. After scaling and drawing the suitcase in AutoCad, I figured it's about a 1/4" (6mm) thick.
http://www.therpf.com/attachment.php?attachmentid=651543&d=1470395852
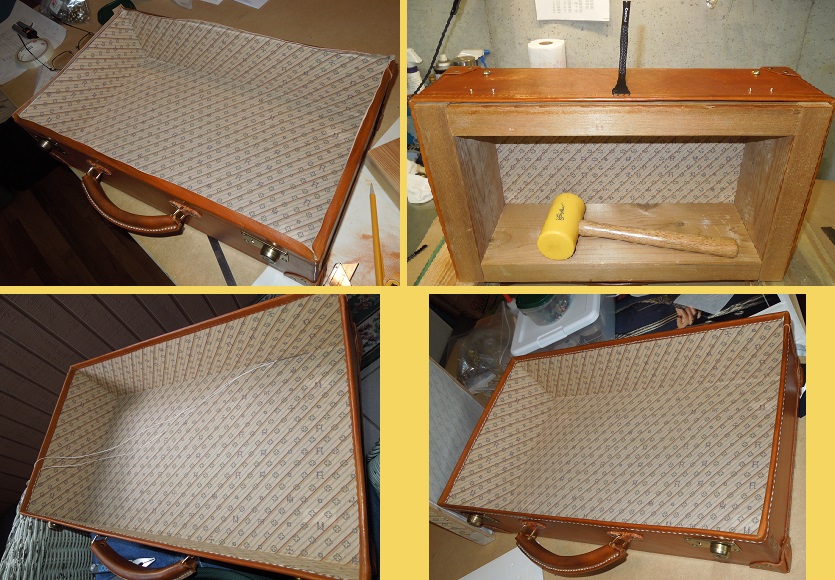
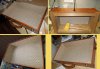
I made a frame from some oak stock from The Home Depot.
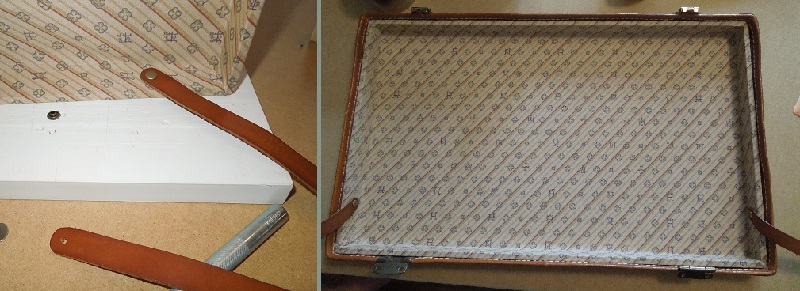
As for the substrate for the case, I found that Tandy sells what they refer to as a bag stiffener (Item #9072-00). It's shown in this picture under the copper rivets on the sides. Eventually it will be on the inside of the front and back as well.
http://www.therpf.com/attachment.php?attachmentid=651544&d=1470395852
I also applied applied spirit-based dye to the inside of the case which stiffens the leather considerably. I used oil stain for the outsides of the case.
Is there a wooden base inside the main area of the case or is it all leather??
Egon Spengler
I did not put a wood frame or base in the main area of the case. After looking at all the reference pictures of the prop and dozens of similar cases, I didn't see any evidence of a wood frame. Riveting the sides on gives a lot of mechanical structure plus the bag stiffener helps too. I've since learned at a leather working panel at DragonCon that applying shellac to the inside of the leather will stiffen the leather significantly (masks are made this way). Live and learn...
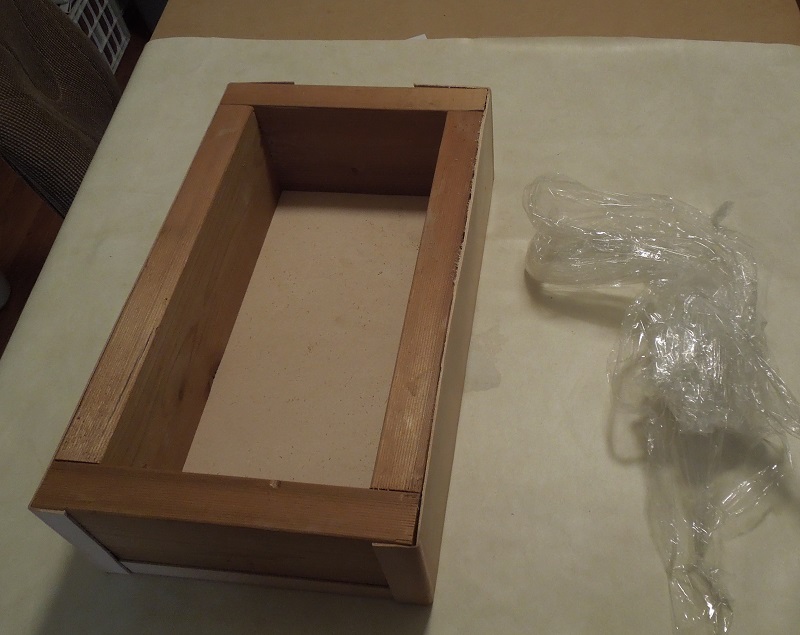
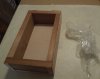
I did make a wood box to help mold the case, and to ease punching.
ATL
I did not put a wood frame or base in the main area of the case. After looking at all the reference pictures of the prop and dozens of similar cases, I didn't see any evidence of a wood frame. Riveting the sides on gives a lot of mechanical structure plus the bag stiffener helps too. I've since learned at a leather working panel at DragonCon that applying shellac to the inside of the leather will stiffen the leather significantly (masks are made this way). Live and learn...
I did make a wood box to help mold the case, and to ease punching.
ATL
Attachments
Last edited by a moderator:
Egon Spengler
Master Member
Awesome, thank you!
Similar threads
- Replies
- 5
- Views
- 748
- Replies
- 8
- Views
- 1,078