You are using an out of date browser. It may not display this or other websites correctly.
You should upgrade or use an alternative browser.
You should upgrade or use an alternative browser.
Budget Mercury suit
- Thread starter N3rdyboy
- Start date
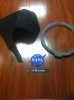
The tags on the Mercury suits were printed text on leather, not embroidered. I was going to silk screen them, but I found it was easier just to make a vinyl stencil with my plot cutter, then spray paint the names on black leather with white "leather spray dye" (sold in rattle cans to refinish shoes). Here's some tags I made, including the one on Adam's suit:

N3rdyboy
Active Member
Thanks! That will be easier for me to replicate or substitute!
The tags on the Mercury suits were printed text on leather, not embroidered. I was going to silk screen them, but I found it was easier just to make a vinyl stencil with my plot cutter, then spray paint the names on black leather with white "leather spray dye" (sold in rattle cans to refinish shoes). Here's some tags I made, including the one on Adam's suit:
http://www.ryannagata.com/files/gimgs/52_savagetag2.jpg
N3rdyboy
Active Member
Ok, quick update, I have sewn the main body of the suit. I don't have a NASA patch yet, I'll order that soon, then I can use that for getting a proper size on the tag. The neck ring is a work in progress. There are also a few things I need to fix on my leg portions too (that happened with the mock-up I just forgot to fix it on the pattern, ugh!) I also need to begin to add Bias tape for the strapping on arms and knees, I'll also need to get webbing. (Phew! That's quite a bit.) B
 ack to crafting!
ack to crafting!N3rdyboy
Active Member
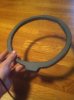
Ok, NASA patch ordered, it should be here sometime this week, but, in other news, I have completed my neck ring. It's made of EVA foam. I'll plastic dip it once I have the helmet vaccuformed and fitted. I've also re sized the waist piece, so now I can fix the legs.
Stay tuned!
Stay tuned!
Attachments


cdr6
New Member
N3rdyboy,
Looks good thus far! Looks like your about to start the straps an stuff. (I'm working up a S-1030A build, the first suit flown by NASA on the shuttle. Lots of research time...) Your stuff here has given me some ideas to try on my own build, so thank yous are in order. Anyway, in my hunting around the internet, I found these guys "strapworks.com", they have a bunch of webbing, velcro and general buckles. (good suit looking stuff.) Good price wise, for those of us on budgets...and quick delivery. Hope that helps! Following your build with great interest.
Regards,
Chuck
N3rdyboy
Active Member
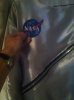
My NASA patch arrived! I know that the real ones had a white border, but, it's a budget suit, so I'm fine with the slight inacuracy. Now I can finally continue with the name tag, y estamate was pretty close.) I'm currently working on fixing up the legs, and I'll start working on the neck part once I attach the legs and patch.
Stay tuned!
Stay tuned!
Attachments

cdr6
New Member
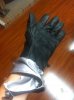
Interesting work on the gloves! How did you add the silvered fabric back to the gloves? I have a pair for my suit that need detailing and I'm sort of nervous about splitting them open.
Regards,
Chuck
- - - Updated - - -
Interesting work on the gloves! How did you add the silvered fabric back to the gloves? I have a pair for my suit that need detailing and I sort of nervous about splitting them open.
Regards,
Chuck
Regards,
Chuck
- - - Updated - - -
Interesting work on the gloves! How did you add the silvered fabric back to the gloves? I have a pair for my suit that need detailing and I sort of nervous about splitting them open.
Regards,
Chuck
N3rdyboy
Active Member
Interesting work on the gloves! How did you add the silvered fabric back to the gloves? I have a pair for my suit that need detailing and I'm sort of nervous about splitting them open.
Regards,
Chuck
- - - Updated - - -
Interesting work on the gloves! How did you add the silvered fabric back to the gloves? I have a pair for my suit that need detailing and I sort of nervous about splitting them open.
Regards,
Chuck
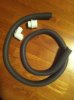
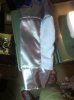
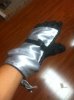
The silver fabric was hot glued to the gloves, I had initially patterned out more accurate gloves with the mock up,but that didn't work so I bought some leather work gloves that looked pretty close. I didn't sew it on because I didn't want to break my machine, so hot glue was the most convienent material to attach it with. Next time I do something like this though, I'll probably re-pattern the glove until I get it right.
N3rdyboy
Active Member
Glad I could help, good luck!
Good stuff... I didn't think about hot glue (Doh!) My gloves being fabric, I've been fixated on sewing things.
Regards,
Chuck
N3rdyboy
Active Member
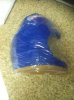
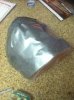
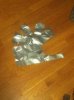
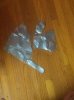
Ok, I want to vaccuform the helmet, but I'm going to try this first scence I don't have a vaccuformer. What I've done is I've put Saran Wrap on my helmet form, teen covered that in ducttape, and cut that off making a pattern. The helmet didn't lay flat so I cut relif lines on it. I'm going to now cut it out of foam, glue and heat form it until it's right
- - - Updated - - -
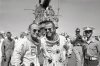
Sorry about the Gemini 5 photo in there. My mistake! Clicked too many pictures.
- - - Updated - - -
Sorry about the Gemini 5 photo in there. My mistake! Clicked too many pictures.
Attachments
N3rdyboy
Active Member
Quick update, I've fixed the leg problem, and I'll attach them soon, I've started working on the foam helmet, I've put Velcro on the neck ring so when I'm ready to do the neck part I can attach and detach it. I've also finished the name tag, it's not perfect but fairly close. I painted a pair of old converse grey for the boots, and I think that's it, for now. I'll purchase the straps once everything else is attached.
Happy building!
Happy building!
Attachments
Similar threads
- Replies
- 8
- Views
- 765
- Replies
- 0
- Views
- 137
- Replies
- 0
- Views
- 260