"Skywalker Ranch" Lightsaber Build

Captain Dunsel

Legendary Member
RPF PREMIUM MEMBER
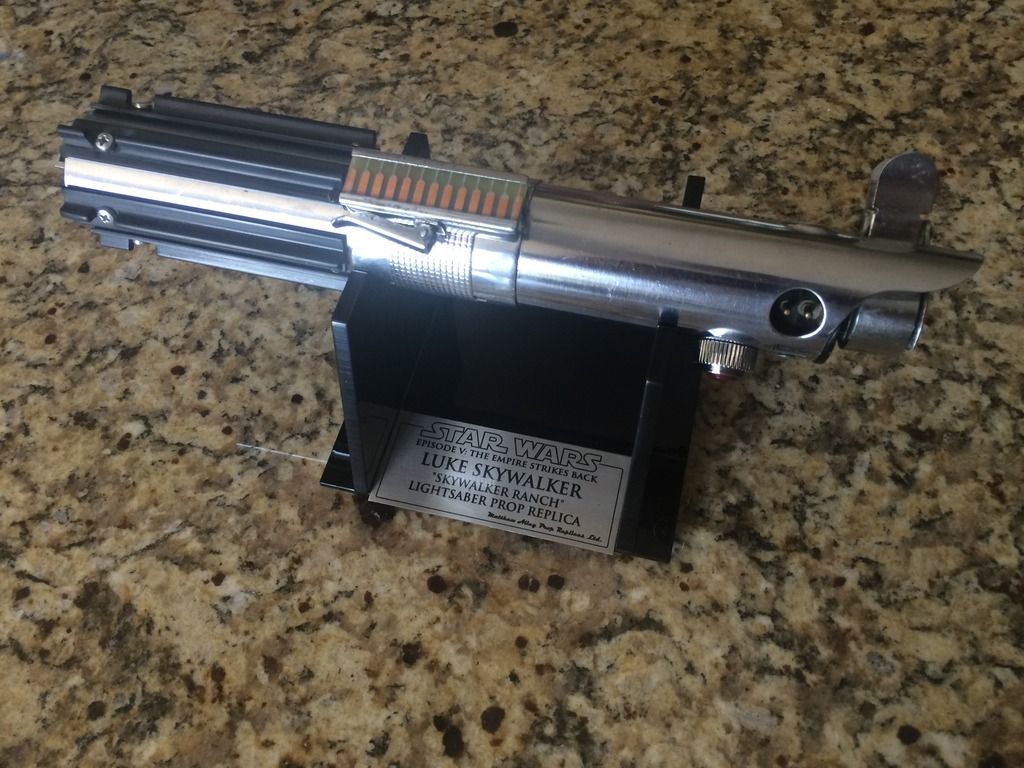
This weekend I decided to try to wrap up a project I've been working on, off and on, for the past few weeks: the "Skywalker Ranch" Luke Skywalker Lightsaber.

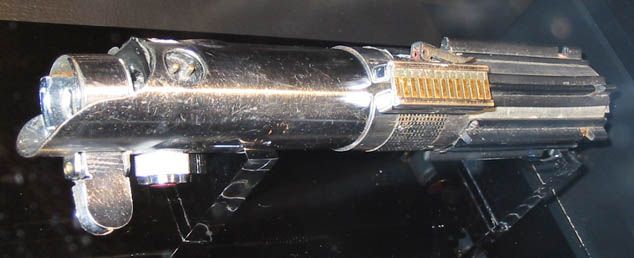
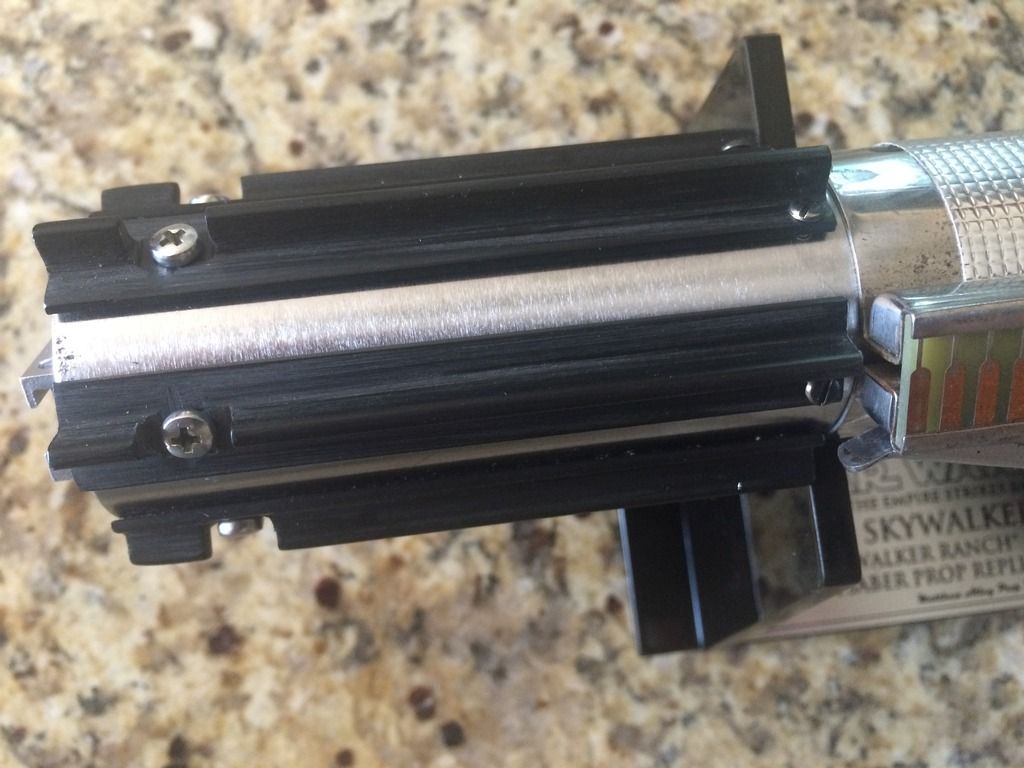
The base is a genuine GRAFLEX that has one of the shinier finishes with only mild pitting / wear that I thought would be perfect for this build.

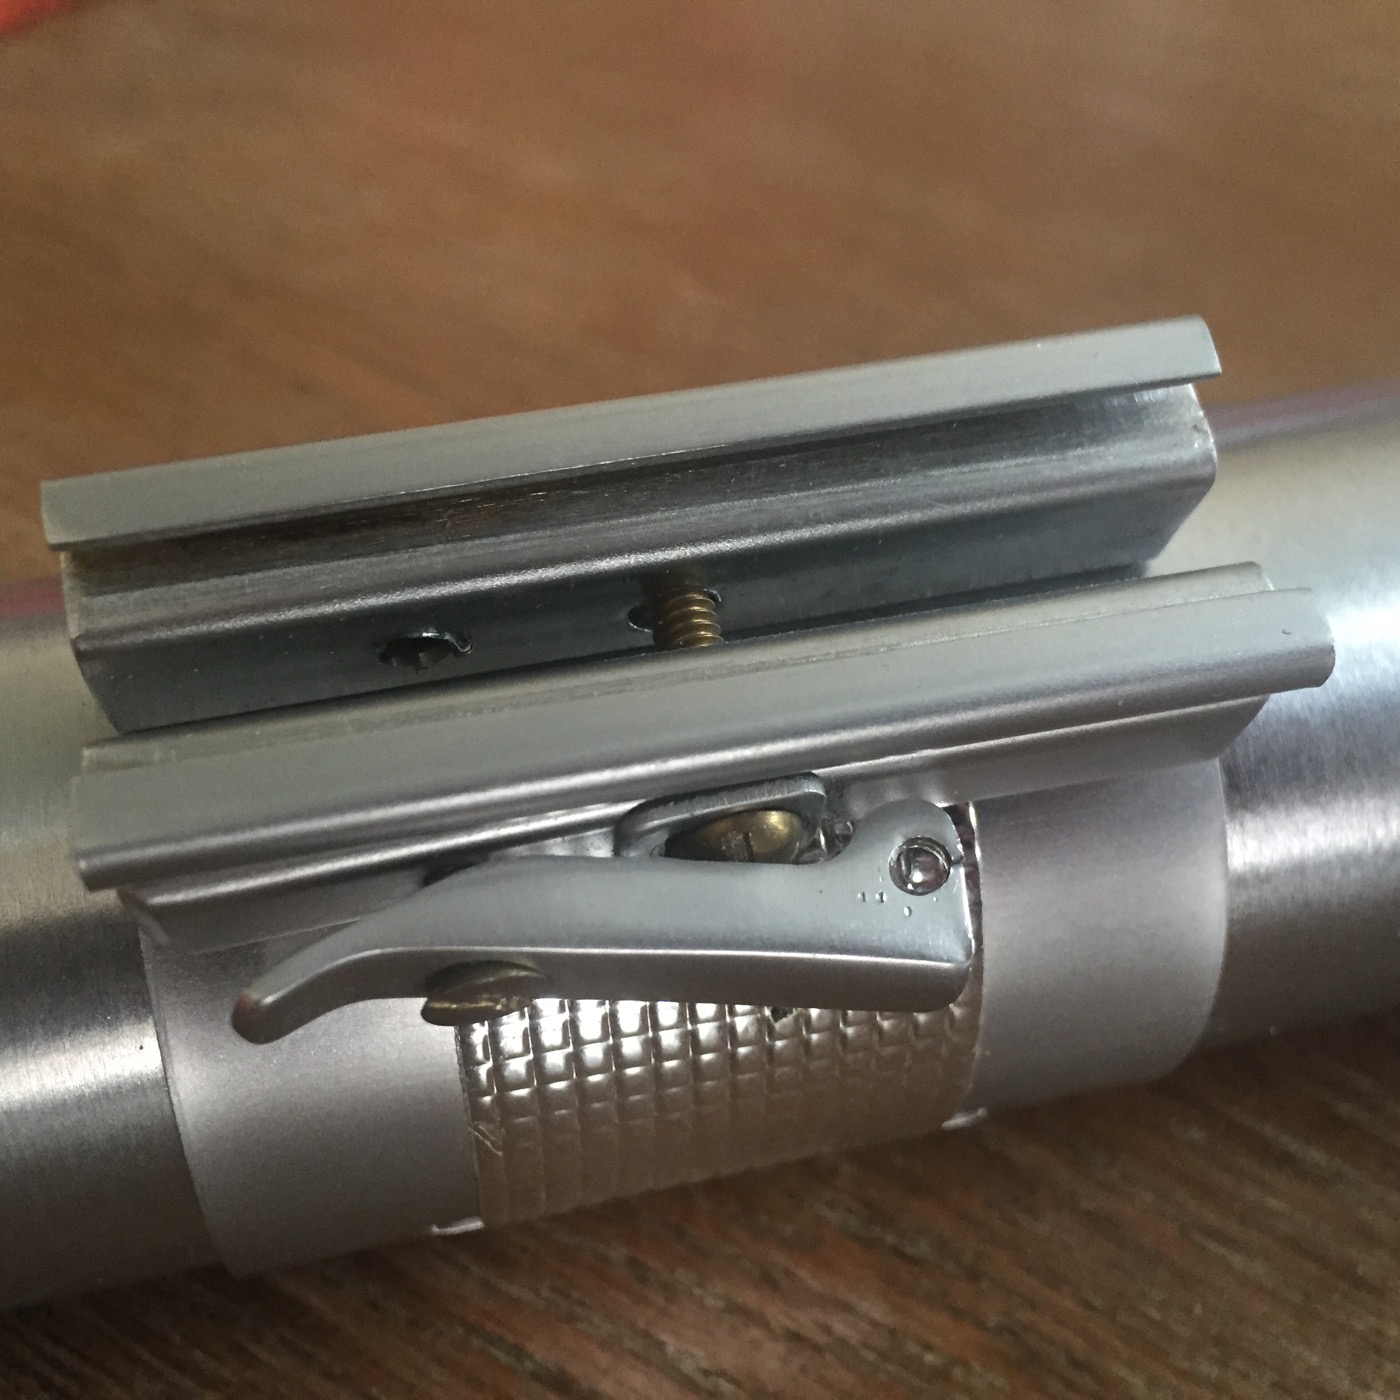
I've pulled the beer tab, applied the textured Mylar to the clamp (old stock from Blast-tech),drilled and tapped the grips from Die Wanna Wanga (love his grips) chemically aged and beat up the D-Ring and brass screws holding the Kobold hardware in place.

I started aging the grips this morning. I'll be looking into aging some of the base screws to give them the "rusty" appearance of the original.

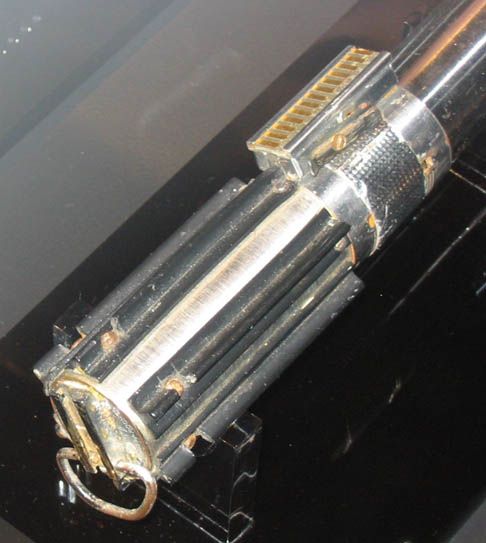
My question is, can anyone tell me what is going on with the clamp lever of the original piece? I can clearly see the lever is screwed to the side of the clamp sidebar with a brass 4-40 screw that is countersunk, but what else is going on there?

Any help would be greatly appreciated, as well as opinions on how I can improve this build.

Thanks!


Last edited:
However you removed the beer tab, would it be possible to attach to a Graflex without one? Or is it broken. Asking because mine is missing the tab and red button.
 
However you removed the beer tab, would it be possible to attach to a Graflex without one? Or is it broken. Asking because mine is missing the tab and red button.

I know of no method of reattaching a beer tab, once you removed it; however, I will almost guarantee that there is some amazing soul around here who has done it.
 
I don't have the link because I'm on the crapper, but click on my name, click on my latest threads and find my skywalker ranch saber. James Kenobi helped me replicate the clamp. It's a pan head brass screw and the square washer holding the clamp together. The lever is screwed to the sidebar right beneath it, with a second brass screw like the ones in the kobold, counter sunk. I may have one still.
 
I don't have the link because I'm on the crapper, but click on my name, click on my latest threads and find my skywalker ranch saber. James Kenobi helped me replicate the clamp. It's a pan head brass screw and the square washer holding the clamp together. The lever is screwed to the sidebar right beneath it, with a second brass screw like the ones in the kobold, counter sunk. I may have one still.

Perfect!

Thanks.

GREAT job on your build BTW!
 
The clamp is held closed with a slotted screw. Then the lever (without the threaded rod) is screws into one of the sidebars
I'd seen the screw that holds the lever on but I didn't realize that the clamp was held together with a screw and that the threaded rod was missing. The more you know!
 
very nice saber, still way too clean ;) Looking forward to the pictures of the finished, beaten to hell saber :cool
 
Aha!

Any pics that show this out there?

Here are a few I found via google...

Ranch_002-vi.jpg

LukeESB-04_zps7509d7ae.jpg~original

Ranch_007-vi_zpsceb150bc.jpg
 
Last edited:
The screws that hold the T-tracks would either be slot-heads or possible blind rivets. The rust indicate iron screws though, blind rivets are aluminium.
 
Re: "Skywalker Ranch" Lightsaber Build

very nice saber, still way too clean ;) Looking forward to the pictures of the finished, beaten to hell saber :cool

I know :) I'm still working on continuing to weather the saber.

Have they been storing this thing in a bucket of water? Where do you get corrosion on the screws like when you keep the hilt in a climate controlled storage facility?

I suppose this could be the outcome when you expose a prop like this to severe winter conditions in Norway or continuously dip it in the "bog" on the Dagobah set at Elstree studios.

The Empire Skywalker sabers definitely saw the most abuse of all the sabers in the entire Star Wars saga and the "Skywalker Ranch" saber definitely shows that history--which is why I love this poor old beat up saber.

- - - Updated - - -

Brass 5/40 slotted round head screw in the clamp.

brass 4/40 slotted flat head screw in the lever, be sure to counter sink the screw head.

http://media.fotki.com/1_p,rtwwwfbw...brfgwk/9/976173/4001324/32486334292156-vi.jpg

Perfect! That explains it all. Thanks for sharing!
 
Last edited:
I also used a 4/40 nut inside the sidebar so the screw can go in diagonally, flush with the surface of the lever.
 
I did a little more work in the weathering this afternoon.

I aged the d-ring much more heavily, and took my first pass at chemically aging the lower grip screws:

 
Last edited:
I pretty much wrapped this one up yesterday afternoon.

I have a more accurate clamp screw on the way but used a temporary screw I found in a bag of vintage screws I picked up from an antique shop locally.

I countersunk the lever screw using my drill press and JB Welded a square nut inside the clamp side bar to give the screw something to grab onto. I didn't age the brass lever screw as the current screw on the original appears to be fairly new in appearance.

In order to give the grips their mashed and somewhat misshapen appearance seen in the area of the grips closest to the clamp area in the original, I hit each of the ends of the grips with a heat gun and lightly pressed down on the ends while wearing soft cotton gloves. This really gave the slightly misshapen effect at the ends of the grips that I was looking for. It's funny,I worked so hard on making sure that the grips were cut and smoothed at nice, right angles, and now I was working to distort all that work :)

I also took the bottom part of the 3 cell (where the grips are attached) and rolled it across my basement floor a few times and subjected it to hits and scrapes with a rasp, heavy steel wool, and sandpaper stocks. I tend to go for a more natural "worn-in" look as opposed to breaking out the hammer and pliers for a more traumatic aging of these types of pieces. Half of the "super beaten" appearance of the original comes from the flash photography used which brings out, in an exaggerated fashion, very minor scratch in the GRAFLEX, etc., every grip ding, . Overall, the original 3 Cell of the "Ranch Saber" looks to be about an average condition GRAFLEX with a broken lever (see my post below). It's certainly been abused, but the flash photography makes it look even worse.

Opinions?


Last edited:
Here's an example of the level of seemingly "heavy" weathering that becomes apparent under flash photography conditions.

It reveals a level of wear and tear that is not perceptible under normal lighting conditions; which is the lighting level the original prop seems to have been, by and large, photographed under.

Here is my hilt, under flash photography vs. natural lighting:


Compared to the flash photography of the original:


Last edited:
This thread is more than 7 years old.

Your message may be considered spam for the following reasons:

  1. This thread hasn't been active in some time. A new post in this thread might not contribute constructively to this discussion after so long.
If you wish to reply despite these issues, check the box below before replying.
Be aware that malicious compliance may result in more severe penalties.
Back
Top