Walking Dead - Daryl Dixon's New Bike Replica Build

Yeah I'm not sure I'd look at it as theft really, most of these parts are readily manufacturer and available it's just a matter of finding a vendor with them on the shelf... I know my next bike will be the same sort of Frankenstein as far as components go will be easier build as it'll be a creation vice a re-creation and can build to my taste. People have asked me if it'll be for sale and that is probably a negative unless that one guy can't do without it, then it'll be a maybe!

Have metalsupermarkets.com sending samples of their brass screen/mesh in sizes 18-80 next week to get the right stuff for the tailpipe and side covering!

i should have bike almost complete or down to just finishing the seat in a week or so, happy about that!
 
Last edited:
Yeah I'm not sure I'd look at it as theft really, most of these parts are readily manufacturer and available it's just a matter of finding a vendor with them on the shelf... I know my next bike will be the same sort of Frankenstein as far as components go will be easier build as it'll be a creation vice a re-creation and can build to my taste. People have asked me if it'll be for sale and that is probably a negative unless that one guy can't do without it, then it'll be a maybe!

Have metalsupermarkets.com sending samples of their brass screen/mesh in sizes 18-80 next week to get the right stuff for the tailpipe and side covering!

i should have bike almost complete or down to just finishing the seat in a week or so, happy about that!

Metalsupermarkets is very handy sometimes. I don't think there's many in the states so you must be somewhat close to me...

Dope
 
In bandera outside of San Antonio at the moment dealing with some family emergencies, this store is too new to have material on hand so the manager is having the Dallas store send me the samples.. Those guys were as pumped as the powder coaters when I told them what I was doing.. I'm excited to be on the backside of the build!
 
this thread is wicked! one of my favorites, this is coming together great. didnt know about 3 bikes being made for the show, really cool
 
Finally back to work.

Got some more welding done this weekend. I ended up having to cut off the original rear tank bracket and mount it so that it will sit below the frame line. This way the seat pan will sit flush with the rails.

20160625_193322.jpg


I also got the CDI bracket made and welded on.

20160625_193351.jpg


20160625_193355.jpg


Rear hoop is finally welded on, those grid overlays you posted Ragtop helped with that and the tank leveling.

20160625_193329.jpg


Front tank brackets welded in place....getting the tank to sit just right was a BIG PITA.

20160626_174303.jpg


Also made up the rear taillight bracket. It looks like it sticks out a little further than it should, but that is because the stock suspension is on it. I fabricated it with the Progressive's on and its a little more snug.

20160626_174328.jpg


One thing to look out for is for the clearance issue with the handlebars. With the front suspension configured the same as in the reference shots, the rebound adjuster hits the bottom of the handlebars. Cory showed me a pic of his and he ended up using washers as spacers.

1466965384492.jpg
 
Finally got back from Tejas and was able to get my neighbor to pick up my frame, still kinda po'd that
i had to cut and use some random chain peices I had in the garage vice the thinner elongated ones for
the suspended bag but think what I have will be fine.. Powder coaters kinda messed up some stuff
but their intentions were good, should be able to rattle can what they didn't coat okay.. Pleased with it so far!

I screwed up and forgot to order swing arm bearings (get them tomorrow) or I'd be assembling a roller today!
image.jpegimage.jpegimage.jpegimage.jpeg
 
Last edited:
I think after looking more into the metal its the stuff used in modeling.. not actually woven mess but laser cut from brass sheeting that can be found in modeling stores.. I've contacted a few peeps awaiting a response in regards to size limitations but once I can see it in my hands I'll have a better idea... Noticed laser cut metal in a hobby lobby and was like hey that could be it!
modeling mesh.JPG
 
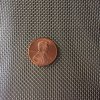
Ordered some brass mesh in 20x20 for the engine casing and 80x80 for the tailpipe sections from McMaster Carr.. will post pics when I get it but this looks close for size comparison!
Also picked up some 1/4" stainless for the guards on the engine and the headlamp.. couldn't really tell if it was 3/16" or 1/4" so went with 1/4"
metal.JPG
Here is the 20x20 with .016 wire diameter:
20 x 20 metal.jpg
 
Last edited:
Got the front end out together to start doing metal screen and such, still waiting on parts to get rear end together but nice to see it looking like a motorcycle again!
image.jpegimage.jpegimage.jpegimage.jpeg
 
Got some progress done this weekend but not enough, didn't get in the new bearings for the swingarm yet but should have them by Tuesday!
Got the rear wheel put together with new everything and started on the engine detailing, hopefully will get the engine done by tomorrow and start the patina on the frame...
image.jpegimage.jpegimage.jpegimage.jpeg
 
FINALLY got back to work. Got some more welding done.

Bent, cut, and welded on the bag loops

20160710_133345.jpg


1468176731365.jpg


The existing steering stops didn't work with the R6 front end. They slipped right over. So I cut up some new beefy ones and welded them on.

20160710_122020.jpg


20160710_122016.jpg


20160710_122013.jpg


Also cut out the kick start mount, and welded in a 1" ID tube for the shaft. I still need to grind down the upper right side of the mound to even it out.

20160710_171628.jpg


20160710_182211.jpg


Aside from that, the welding is almost done. After this, I only have to weld in the seat pan mounts and weld up the battery box. Then I can finally paint!!
 
Good to hear it man! Txt me when you can, wanted to touch base on the front end clearance, also got in my shocks and they
dont fit so wanted to verify part numbers.. It's possible the Powdercoat on the frame is causing the issue, are these the same as yours??
image.jpegimage.jpegimage.jpeg

Got a little bit of detailing done on the swingarm and did some engine work, much more fun that cutting and grinding though!! Lol
image.jpegimage.jpegimage.jpeg
 
Powdercoat will def add a mm or two to the thickness. The part number I gave you is a tight fit to start for the unpainted frame. Takes some wiggling to get the rubber to slide over, but it will go. You may need to sand off the coating to get them to clear.

I sent you a PM about getting in touch outside of RPF.

What spray paint did you end up using on the engine covers? I was concerned about temps, so I wasn't sure yet what route to take. I found colors that looked close in regular rattle can paint for the covers, but I was thinking the engine itself needed the high heat paints.

Sent from my SM-N920P using Tapatalk
 
Last edited:
Ah cool so the part numbers on the boxes are the same?! Yeah it looked close but was late for work when they came in so didn't have time to fiddle with them, was hoping it was just the powdercoating! I should finally have my damn needle bearings for the sing arm today so should be able to get the roller together..

I did grab the high heat black paint for the engine, grabbed two cans but only really need the one.. color were somewhat limited in black so I just grabbed what I could.. cleaning the engine was the bad part, that took better part of a day buy itself! for the covers I used regular rattle cans.. I think it should be okay, when you start the patina with steel wool you end up having to do it a couple of time, especially with the red, it turns pink when you start hitting it.. one thing i'll definitely suggest is to stick to very light coats as you go along messing with the layers... My brain was telling me to do it like you'd paint something normally but man it adds a lot of sanding! Found a cool little sponge in 320 grit at wally world (and I think 120 also) that helped immensely.. light coats... good thing is if you mess it up, easy enough to do again lol

Got in metal from McMaster carr, some is right some is way off, I think I went to fine for the tailpipe metal so I'm going to return some of it and try again with something not so fine... the stainless strap looks spot on for the exhaust caps though..
 
Finally got a roller! Progress at last..
image.jpegimage.jpegimage.jpeg

Sucked to mod after powder coating but ended up using some stainless screen for bottom of battery tray to level it out in the swingarm, pleased with how it turned out!
image.jpegimage.jpegimage.jpeg
 

Your message may be considered spam for the following reasons:

If you wish to reply despite these issues, check the box below before replying.
Be aware that malicious compliance may result in more severe penalties.
Back
Top