Fallout 4: Atom Cats T-60 Power Armor

RockIt

Active Member
So I've been enjoying delving deeper and deeper into the prop making realm over the last couple years, but in 2016 I decided to challenge myself to something new: build armor. Pattern working, thermoplastics, foam forming, working on a wearable item (sans helmets), etc....I've never tried any of this. So, in my usual go big or go home mentality, I decided on a full suit of T-60 Power Armor from Fallout 4 to be completed in time for DragonCon (Labor Day weekend). Considering I've got a full-time job and a kid, time is super scarce, but I'm running with it.

I started the build a couple months back. Very, very slowly because of the steep learning curve. LOTS of trial and error. I'm finally getting to a point with slightly more consistent results, so I'll begin sharing more progress shots here soon. I'm not going for 100% accurate for my first build, I'm going for 80% accurate, functional, learning new skills, and having fun. Also, due to time constraints, I'm going to use lilykill's T-45 helmet to print for D*Con, and later go back and build the actual T-60 separately. (Just add it to the future projects list!) I'll also forego the armored gloves for now and stick w/black gloves for con (functional, one less thing to complete in the next 150 days, and better grip on my laser musket)

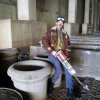
So, here's a snapshot of the actual version I'll be building from in-game with my playthrough. Photos will be posted on IG and twitter too at @ RockIt_Art.

Time for some fun. And heartache. And many, many, many curse words....

20151213_110147.jpg
 
Its been a while, sorry for the lack of updates (consistent, unforeseen work travel and +12hr days will really chew up available build time). The other part was the unforeseen near-dying of my Creator Pro 3D printer! Noooo! But I've survived that saga, am up and running again, and printing like there's no tomorrow to make up for lost time.

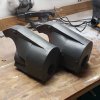
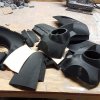
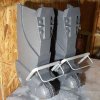
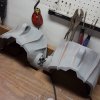
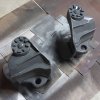
But here's some progress shots of the lower leg section and the forearm gauntlets. Attempting to keep the build accurate while not having to wear 75lbs worth of material when I'm done.....easier said than done.

Usually I build section by section, 1 project at a time. For this suit, I'm currently working four different sections simultaneously (lower legs, forearm gauntlets, the lifted shoes, and the helmet). It's nice to mix it up some, but that means hours and hours of work still make it look very rough. Oh well, c'est la vie. 4 months left to build....

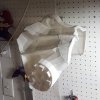
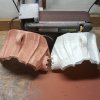
IMG_20160401_092940.jpgIMG_20160411_174739.jpg
 
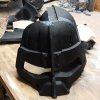
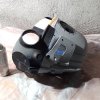
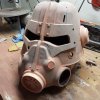
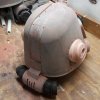
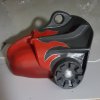
Build update. Finished the forearm gauntlets (made of sintra, EVA, and apoxie sculpt). First piece I've officially completed. Focus has shifted back to the lower legs (building more details, sanding/smoothing, and further refining), boot covers (after being displeased w/the original lofted boots due to their unstable nature, I've scrapped them and are working on boot covers instead), and now officially started the @lilykill T-45 helmet I'll be using (upscaled by 10% and slight mods made to the model to fit my build plans). Printing was delayed due to a month of being offline w/multiple printer issues - but not only are we back in business, but we've got two printers running off octoprint! 1 step back, 2 forward....

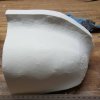
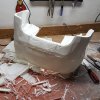
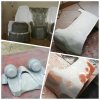
I've attached a couple of the super early assembly pictures of the helmet and one of the forearm gauntlets. I must be a masochist - why else would I do a FULL suit of power armor as my first armor build ever?

ChTYk0FVEAA1sDu.jpgChTZDIfUkAA11Vt.jpgChTZFcyUoAgtO__.jpgChTZILkU8AEwcDx.jpg
 
Sorry for the delayed response, just got back from con (Momocon 2016, successfully debuted my Fallout New Vegas Boomer!). Been working full tilt going towards DragonCon in 3 months.

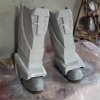
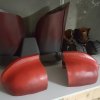
Finished the lower legs, boot covers, first piece of the torso (CAD'd and printed the two circles where the pauldrons attach to the chest), and further worked on the helmet.

13092393_991000410981753_1004898023_n.jpg13151140_1742494119367612_1081577565_n.jpg13248718_978973532199332_1596383901_n.jpg13099042_875192689277090_1894320924_n.jpg13116541_460265607503725_1878781982_n.jpg13260800_244221819268669_957376786_n.jpg
 
Sorry for the lack of updates, life's been insane. But I've been pushing along - 2 weeks til DragonCon, so we're closing in on the final build. I've learned a lot on this power armor build (esp w/it being my first armor build). I think I'm happiest building props/replicas specifically, but either way this has been a blast. There's things I love about the armor, there are things I am not a fan about. But like I said, I've learned a lot.

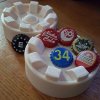
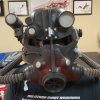
Anyways, I included a photo of my Fallout New Vegas Vault 34 Boomer outfit w/the Laser Musket I'll be sporting w/this power armor. I've completed the T-45 lilykill helmet build, given it an Atom Cats paint job, and wired it up. There are two LEDs in the primary lap and targeting light (one white, one red, respectively). I've programmed and wired them to an Arduino Uno board inside the helmet to make the LEDs dynamic - the red targeting light turns on and off sporadically while the white lamp flickers as if it's a bad bulb. I still need to install the helmet fan - that'll get done before DragonCon....

13248838_589610174548056_2096220919_n.jpg13329138_1116387335091562_783177149_n.jpg13534501_285484571805889_891982333_n.jpg13628301_1564720100499745_1599312408_n.jpg
 
After completing the helmet, I began on the major armor section - the torso.

The torso was going to be broken down into multiple subsections - the upper and lower chest piece, upper and lower pauldrons, back plate, and detailing. I begun the torso build by trying to build the pauldrons, first, out of foam. I was NOT pleased with my results (I'm an intermediate foamsmith), so I decided to take a step back and learn to rip mesh models from Bethesda games! So I delved into the software necessary to pull out in-game models and extracted some low-poly models associated w/the T-60 armor. While those models were underwhelming in terms of detail, I was able to clean them up to a printable level (granted, that still meant slicing each section into multiple sub-prints). After a couple weeks of ripping/modeling/printing, I was able to start on 3D printed pauldrons for the armor. Because I decided to print w/smoothed yet still low poly models, I knew excessive sanding/patching/finishing would be necessary (and the pauldrons would prep me for the chestpiece...even more intense!)

A couple weeks of assembly, patching, filling, sanding, priming, painting, and finishing led me to a pair of upper and lower T-60 Atom Cats pauldrons. (They're not attached together in the photo below, just sat on one another for final affect)

13649160_1709459972637680_968475902_n.jpg13714184_2044229545802785_720481235_n.jpg13707035_541656742706219_416943610_n.jpg13767492_1592664687699413_2108955400_n.jpg13767634_552499748287618_1745588145_n.jpg13736939_1103230509722502_1317314548_n.jpg13694727_579578972229711_1774464274_n.jpg
 
I moved on to the 12-printed section for the upper torso and 4-printed section for the lower torso. Assembled the printed low poly model and begun the sand-a-thon. Finally got the torso filled/sanded to a point I'm ok with, so priming has begun and handles have been added. Beginning the paint job tonight.


13694644_177392416013335_356544503_n.jpg13739497_1012694475511437_1077190392_n.jpg13687025_107569409692020_672249541_n.jpg13658805_1200494436667632_2024756817_n.jpg
 
This thread is more than 7 years old.

Your message may be considered spam for the following reasons:

  1. This thread hasn't been active in some time. A new post in this thread might not contribute constructively to this discussion after so long.
If you wish to reply despite these issues, check the box below before replying.
Be aware that malicious compliance may result in more severe penalties.
Back
Top