Hi everyone!
This is my very first build.
Take a look at my photobucket to see pics, Ok I know I'm not as good as some of you are and I'm on a tight budget.
http://s1313.photobucket.com/user/evy-74/library/Flux Capacitor?sort=3&page=1
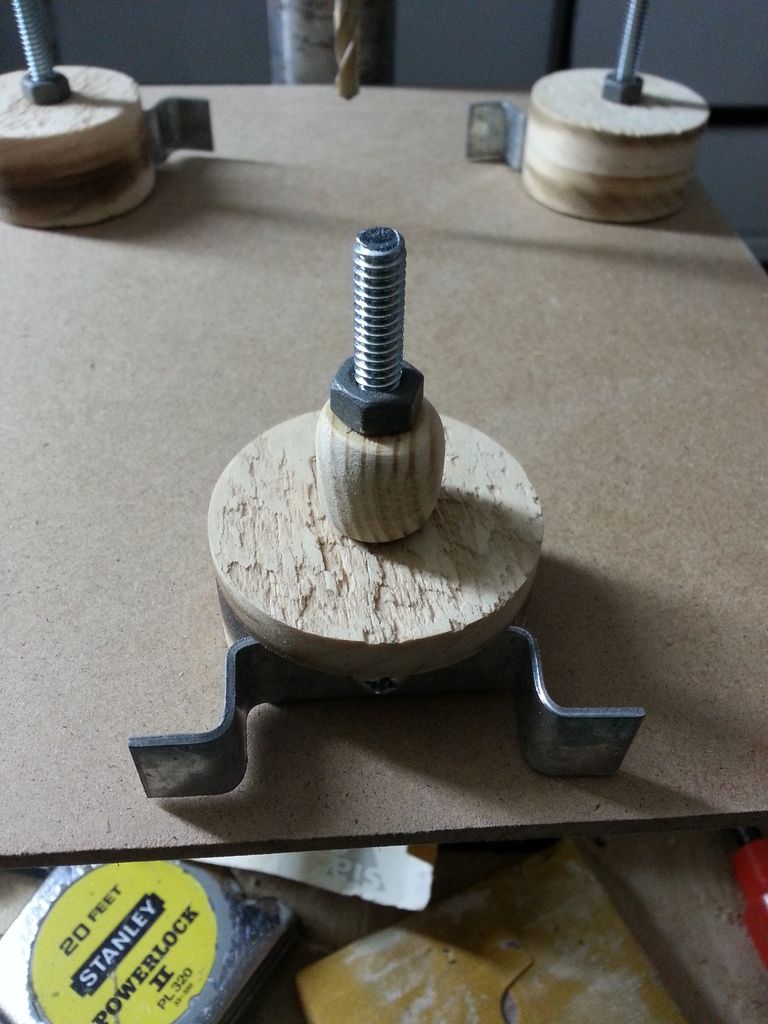
I'm used to working with wood so I used 5/8" MDF boards for the cabinet & door, 1/4" MDF boards for the backing & inside panel, 1" thick pine for the three solenoids, 3/4" thick pine for the silver balls on top of the solenoids, I also used Halogen bulbs that I slightly modified for the top clear tubes, I used "U" brackets on the solenoids, I probably won't use 1/2" thick acrylic on the LEDs, I don't have access to those materials, I have 1/8" thick acrylic pieces that I will shape kinda like the real prop.
As I'm posting this I started painting some of the finished parts but I'm stuck trying to figure out how I'll do the LED display, I haven't found a window gasket and the spark plug boots yet. Money spent = 20$
For the LED display, I would like to keep it as simple as possible since I don't know much about electronics, drilling holes in my backboard and hot gluing LEDs then soldering everything up behind it, I don't need a motion sensor, or sound effects or many special lighting patterns, I kinda just like one lighting pattern : the flashing LEDs from the outside to the inside at the same normal speed on the three branches.

For the window gasket I think this model would do the best job, keep in mind that my door is 5/8" thick MDF, although I will trim it down to 1/4" thick around the opening with a router so I can install this gasket, I just have to find one at a good price.

If you can help me out it would be greatly appreciated.
This is my very first build.
Take a look at my photobucket to see pics, Ok I know I'm not as good as some of you are and I'm on a tight budget.
http://s1313.photobucket.com/user/evy-74/library/Flux Capacitor?sort=3&page=1
I'm used to working with wood so I used 5/8" MDF boards for the cabinet & door, 1/4" MDF boards for the backing & inside panel, 1" thick pine for the three solenoids, 3/4" thick pine for the silver balls on top of the solenoids, I also used Halogen bulbs that I slightly modified for the top clear tubes, I used "U" brackets on the solenoids, I probably won't use 1/2" thick acrylic on the LEDs, I don't have access to those materials, I have 1/8" thick acrylic pieces that I will shape kinda like the real prop.
As I'm posting this I started painting some of the finished parts but I'm stuck trying to figure out how I'll do the LED display, I haven't found a window gasket and the spark plug boots yet. Money spent = 20$
For the LED display, I would like to keep it as simple as possible since I don't know much about electronics, drilling holes in my backboard and hot gluing LEDs then soldering everything up behind it, I don't need a motion sensor, or sound effects or many special lighting patterns, I kinda just like one lighting pattern : the flashing LEDs from the outside to the inside at the same normal speed on the three branches.

For the window gasket I think this model would do the best job, keep in mind that my door is 5/8" thick MDF, although I will trim it down to 1/4" thick around the opening with a router so I can install this gasket, I just have to find one at a good price.

If you can help me out it would be greatly appreciated.
Last edited:


