mung
Sr Member
I have some holidays over the Christmas period so I started a small project which I hope to largely complete
before returning to work in the second week of January 2016.
Some time ago I volunteered to make a CG spaceship and do a couple of shots for a friends sci fi short film.
Although I designed and started to build a CG model, I changed jobs and moved across the country and so
in the end was not able to contribute to the project.
Many years later, I again volunteered to resurrect the project and attempt to finish of what I had started.
5 years later finding that for me CG spaceships are really not that motivating I thought about making a
real model spaceship instead, an infinitely more appealing task...
The film requires an escape pod that leaves a dangerously disabled mothership.
I have few old spaceship models that could be pressed into service as the mothership but I need to build an
escape pod of some description.
I had a rummage around in my plastic junk boxes and pulled out an old dustbuster which I have had lying
around for years and a couple of desktop pen and pencil caddies I purchased a year or so ago.
I had started laying out the shapes, cutting the front of the dustbuster in half and spreading them apart
when my wife walked in and said " that is always going to look like what it is... a dustbuster"
I am not so easily dissuaded... to me the dustbuster always looked like part of a spaceship and never a houshold appliance.
I continued on.
This is the result so far after about 3 days of fiddling about, using the previously mentioned plastic household items
and some 1.5mm ABS sheet.


Again I am employing a 3/8 furniture leg plate as a mountng system and 12 volt led downlights for the thruster light effect.
The lights locate into a circular hole in the back of the caddie thrust tunnels and are secured with a short length of
aluminium angle with two rectangular holes cut into it which mate with the rectangular stubs of the lamps.
Ceramic downlight connectors plug into the lamps.
All this is accessible through a hatch in the top of the model.
A couple of magnetic cabinet catches at the front corners along with a styrene tab at the rear is proposed for the
hatch retaining system.


Some cheap action figures from Target which scale out to 1/16th will populate the cockpit which is accessible
through another hatch comprising the window section.
Only one figure will be required for the short film so they will be made to be removable.

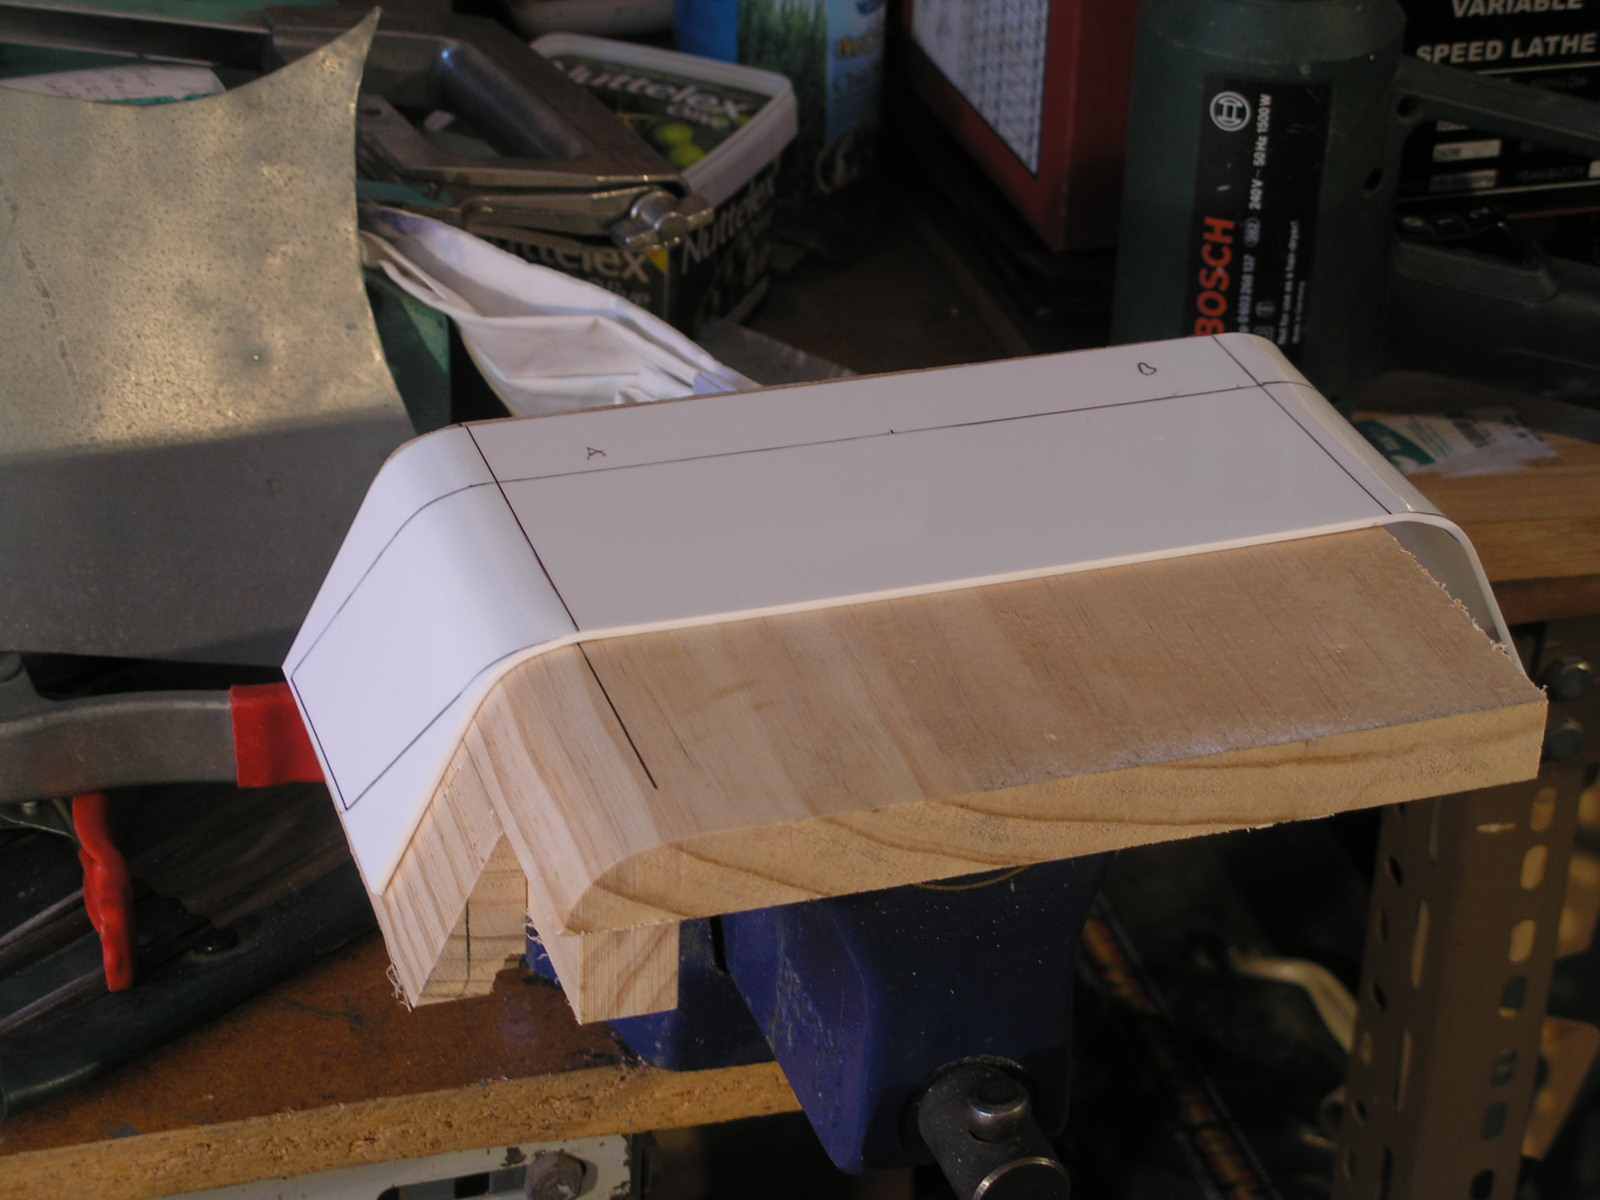
The clear acrylic sheet for the window was heated with a heat gun until slightly soft and pressed onto a wooden
form that matches the curvature of the hull shape using a cloth pad.
The window strut arrangement was drawn up in CAD using DraftSight and printed out full size with all the corner
radius centres marked for drilling with a step drill to 10mm.
The rest is then cut away with a sharp olfa knife and cleaned up with some minor sanding.
A method for securing this hatch is yet to be determined.

More soon...
before returning to work in the second week of January 2016.
Some time ago I volunteered to make a CG spaceship and do a couple of shots for a friends sci fi short film.
Although I designed and started to build a CG model, I changed jobs and moved across the country and so
in the end was not able to contribute to the project.
Many years later, I again volunteered to resurrect the project and attempt to finish of what I had started.
5 years later finding that for me CG spaceships are really not that motivating I thought about making a
real model spaceship instead, an infinitely more appealing task...
The film requires an escape pod that leaves a dangerously disabled mothership.
I have few old spaceship models that could be pressed into service as the mothership but I need to build an
escape pod of some description.
I had a rummage around in my plastic junk boxes and pulled out an old dustbuster which I have had lying
around for years and a couple of desktop pen and pencil caddies I purchased a year or so ago.
I had started laying out the shapes, cutting the front of the dustbuster in half and spreading them apart
when my wife walked in and said " that is always going to look like what it is... a dustbuster"
I am not so easily dissuaded... to me the dustbuster always looked like part of a spaceship and never a houshold appliance.
I continued on.
This is the result so far after about 3 days of fiddling about, using the previously mentioned plastic household items
and some 1.5mm ABS sheet.


Again I am employing a 3/8 furniture leg plate as a mountng system and 12 volt led downlights for the thruster light effect.
The lights locate into a circular hole in the back of the caddie thrust tunnels and are secured with a short length of
aluminium angle with two rectangular holes cut into it which mate with the rectangular stubs of the lamps.
Ceramic downlight connectors plug into the lamps.
All this is accessible through a hatch in the top of the model.
A couple of magnetic cabinet catches at the front corners along with a styrene tab at the rear is proposed for the
hatch retaining system.


Some cheap action figures from Target which scale out to 1/16th will populate the cockpit which is accessible
through another hatch comprising the window section.
Only one figure will be required for the short film so they will be made to be removable.

The clear acrylic sheet for the window was heated with a heat gun until slightly soft and pressed onto a wooden
form that matches the curvature of the hull shape using a cloth pad.
The window strut arrangement was drawn up in CAD using DraftSight and printed out full size with all the corner
radius centres marked for drilling with a step drill to 10mm.
The rest is then cut away with a sharp olfa knife and cleaned up with some minor sanding.
A method for securing this hatch is yet to be determined.

More soon...
Last edited:


")