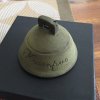
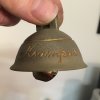
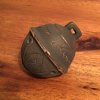
Krampus Bell - Here Goes Nothing

B Wo

Well-Known Member
RPF PREMIUM MEMBER
First, I want to say that I love looking at WIPs on here. It interests me, greatly, to watch others' processes. Right or wrong, I wanted to contribute.

There is another recent thread on Krampus bells, from the movie Krampus. I had a lull in other project work, this weekend, and got the itch to make one.

Krampus Bell - Movie.jpg

After some time spent wandering around Michael's on Saturday, and much head-scratching, I began.

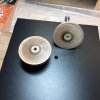
I started with a little wooden knob and some #10-24 hardware I had on hand.
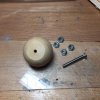
Krampus Bell - WIP 1.jpg

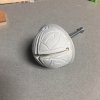
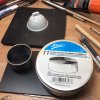
After crudely threading the bolt into the knob, I chucked it up into my handy mini lathe and used a #20 drill bit to index it into 4 partitions. Then, I parted it into a close approximation of half.
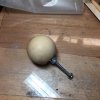
Krampus Bell - WIP 2.jpg Krampus Bell - WIP 3.jpg Krampus Bell - WIP 4.jpg

For ease of working, and, later, as a platform on which to mold, I bolted my 1/2 - knobs to expanded PVC foam sheet (generic Sintra). To get the height I'd need to countersink a bolt head into the bottom, I stacked one sheet on top of another, and glued those down to a layer of cork. The cork helped give the base more purchase on the bench top.
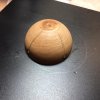
Krampus Bell - WIP 5.jpg

I put some thin brass rod into holes I'd drilled for registration once this thing was covered in Magic Sculp. I split a tongue depressor / craft stick in order to roll the putty out in an even thickness.

Krampus Bell - WIP 6.jpg

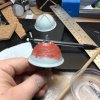
Through careful, deliberate application and a little bit of "aw, screw it," I got my knobs covered in Magic Sculp.

Krampus Bell - WIP 7.jpg

So far, it looks similar to a sleigh bell. The next things will be to drill out proper holes where my registration holes were, chuck this bad boy back up in the lathe and shape it w/ some sand paper, and then start scrawling the details into the putty.
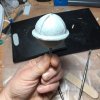
Krampus Bell - WIP 8.jpg
 
I screwed the two halves together and chucked it up in my lathe. I braced some 150 grit sandpaper against a rigid PVC foam back and started sanding. Progress was a little gummed up and slow-moving, so I decided to hit it with a strip of 80 grit sanding mesh. Think of the mesh as backless sandpaper; the material moves right through it, so it doesn't get bogged down with the material it's removing. It's very cool stuff. Unfortunately, since I no longer had a rigid form to shape the bell, i was just kind of smoothing the bumpy, out-of round surface, unbeknownst to me until later.

I wanted to score the little divot in the top 1/4 of the bell while I had the bell in the lathe. This is where the lack of concentricity got me. I was able to score about half of it quite well, but the other hemisphere wasn't getting touched. I reached for that brass ring, and made a big mess of things. Hopefully, nothing a little bondo and TLC can't fix.
Krampus Bell - WIP 9.jpg

The other half turned out nicely. I'm not worried about little nicks because I'm going to texture the whole surface when I finish it.

Krampus Bell - WIP 10.jpg

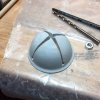
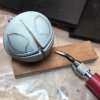
I drew the pattern onto the bottom half and started to carve it using a steel scribe. The thing was all over the place. Then I switched to a fresh, new Xacto knife, because i could rock it along the curved surface and the straight lines very straight. Once I'd more or less scored what I could with the Xacto, I used a Speedball linoleum cutter to start carving out the rest. It works really nicely. The Magic Sculpt dulls the blade pretty quickly, but my trusty DIY strop kept it sharp, and helped prevent me putting the cutter through my palm by exerting unnecessary force.

Krampus Bell - WIP 11.jpg

For now, more carving.

From the reference pictures of the props, I can see that there are runes that look like P and C on one side. I don't know what to put on the other, yet. I've seen that the Weta statues being released have runes around the bottom. I may just make an educated guess at what the others might be. I'm wide open to suggestions, if anyone has one.
 
Thank you for the kind words.

After staring down the Weta replica photo until I went cross-eyed, I noticed that you can kinda make out a reflection in the bottom corner.

Capture.JPG Capture 2.JPG

To me, it looked like the symbol on the left in this section of the Krampus figure's base:

Capture 3.JPG

So, that's what i went with. On the right, in the photo above, you've got that little pitchfork-looking symbol reminiscent of the one on the Cherub's forehead and one of the dark elf's mask, so I took some creative license, and chose that as my fourth symbol for the bell.

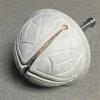
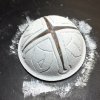
The carving is complete. I sanded it a little. I think it's where it needs to be for texturing and cleaning up before molding.

Krampus Bell - WIP 12.jpgKrampus Bell - WIP 13.jpg

Next, I'll tackle the other half. Hopefully, the bondo will repair the damage my enthusiasm and lack of foresight wrought upon the poor thing.
 
Thanks, Odin82.

Thanks, Joelmerced. My plan was just to cast a couple for myself, as gag gifts for my brother-in-law, and for some friends. Weta is selling them for $11.99, even though they're backordered until March 2016. I can't guarantee that I could get you one by Christmas. If you're still interested, send me a PM, but I wanted you to know that you have options.
 
Last edited by a moderator:
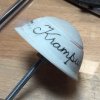
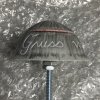
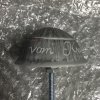
Writing "Gruss vom Krampus" on a convex surface is tricky.

Krampus Bell - WIP 14.jpg

BUT, not nearly as tricky as trying to scribe / carve it into a convex surface. Holy Hell, it's looking a little rough. I shadowed it w/ a pencil so you could see the scoring under the oppressive florescent lighting. Like I've been saying all along, there's a bit of finishing to be done that should clean that up. Also, once I've cold cast it in bronze, and dry-brushed it sepia or burnt umber, it should look better. I hope.

Krampus Bell - WIP 15.jpg Krampus Bell - WIP 16.jpg Krampus Bell - WIP 17.jpg Krampus Bell - WIP 18.jpg

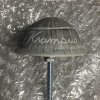
I wanted to note that I have no idea what the "Gruss vom" looks like compared to the prop. I just compared letters from "Krampus" and winged the G. I think it's fitting.
 
Thanks, Jintosh.

Quick update:

Last night I rolled out some Magic Sculpt and shaped the top of bell around some thin styrene sheet. The styrene helped support the putty as I was shaping it, and it blocks the through-hole in the top, so my casts won't be mechanically locked in my mold. Then, I superglued it on top, and used some Perfect Plastic Putty to fill in voids.

Krampus Bell - WIP 19.jpg

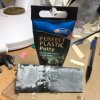
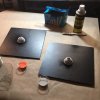
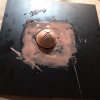
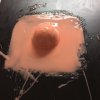
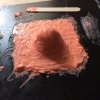
Once that all sets, I will clean up link in the top and used some diluted Perfect Plastic Putty and a sponge to stipple the texture of the bell onto the surface. I did a couple test pieces on Sintra, experimenting with different dilutions.

Krampus Bell - WIP 20.jpg
 
Last edited by a moderator:
Thanks, WireFox.

I cut little risers for the bell halves out of Sintra using my handy nesting cookie cutters as a stencil. The risers will prop up the part and create a lip for my mold to wrap around. This lip will be the surface I use to glue one side to the other.

Krampus Bell - WIP 21.jpg

On to finishing! I very, very slightly diluted so Perfect Plastic Putty with distilled water (probably didn't need to be distilled, but it's a good way to rule out funny business caused by whatever is in my tap water that makes it undrinkable). I took a foam brush and commenced the stippling. Oh, I stippled it real good. I am really pleased with how it turned out. I love it when a plan comes together.

Krampus Bell - WIP 22.jpg Krampus Bell - WIP 23.jpg

I have considered priming it, so see if everything looks uniform in one color, but that's going to tack on an entire extra day to the process. Just eyeballing it, it looks like I got even coverage. I guess my point is that I really should prime it, but this whole process has been on the quick and dirty side, so why deviate now?

Next will be hitting it w/ some mold release and brushing on some Smooth-On ReBound 25 to make my molds.

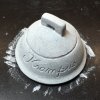
In the meantime, here is a sneak peak at an approximation of the finished product:

Krampus Bell - WIP 24.jpg
 
Last edited by a moderator:
Looking fantastic man! If you are doing a run, I'd definitely be interested!

Thanks, @Odin82. I have had some interest expressed via PMs. I'm working out some casting bugs, but I think I'm close to producing consistently good casts. If I'm confident I can deliver, I will start an INT thread and post on here, and PM back those who have PM'd me.

Good work! I really like it! It Looks awesome! Are you planning to put some kind of bell inside to simulate the sound of the bell?

I do, and I have! Stay tuned :)

Very nice job, if I had to chose between weta's or yours, you got my pick!

Wow, thanks, Broilermaker!
 
Last edited by a moderator:
Lots of progress made this weekend. Let's dive right in.

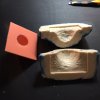
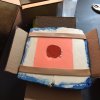
Friday night, I started molding the two bell halves. I used Smooth-On Rebound 25 and Plasti-Paste II for the shell. One of these days, I will make a brush on mold that I am really happy with and which behaves exactly how I want it to. That day was not this weekend. I snapped some pictures, but I am miserably under-qualified to give a tutorial on molding with this stuff. On the plus side, these are the best molds I've made with Rebound 25, so, that's something.

Krampus Bell - WIP 25.jpg Krampus Bell - WIP 26.jpg Krampus Bell - WIP 27.jpg Krampus Bell - WIP 28.jpg Krampus Bell - WIP 29.jpg Krampus Bell - WIP 30.jpg

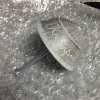
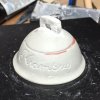
Once the molds were done, I slush cast in some Smooth-Cast 300, and slapped them together as a proof of concept. Eureka! (Queue angelic host)

Krampus Bell - WIP 31.jpg

Next, it was time to try cold casting this in brass:

Krampus Bell - WIP 32.jpg

That is just a raw cast; I haven't buffed it, so it looks very flat. I've tried cold casting the bell two ways.

First, I slush cast brass-impregnated Smooth-Cast Onyx Fast, and then backed it with another layer of just Onyx. This buffs up to a nice sheen, and has a really satisfying weight.

Secondly, I brushed brass powder into the mold and then back-filled it w/ two slush cast layers of Onyx. This had a brighter finish, initially, but it was easy to overdo it, buffing, and revealing the black layer, below. It also felt chintzy.

Originally, I planned on buffing the bell, and then dry-brushing over it to darken the bell, but allow the script to stay shiny. I didn't take into consideration that the script would be about impossible to buff. So, I have a new plan, part of which will be evident in the next photo.

In the process of casting the top half of the bell, I am embedding a ring onto which I can attach a little 1/2" sleigh bell. Once the two halves are glued together, it jingles!

Krampus Bell - WIP 33.jpg

You can see in the picture above that the brass is spotty and black. This is a prime example of one of the problems with just dusting in the brass powder. I've also decided to paint in the script using Vallejo Game Air Polished Gold.

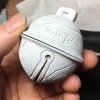
Here is my first fully realized bell:

Krampus Bell - WIP 34.jpg

You can see I'm having issues with air getting trapped in the rims., but I think I've remedied that, at present. On the production bells, I will be casting the two halves, buffing them, doing a dark ink wash, painting in the gold script, attaching bells, gluing together, and satin clear-coating.
 
Last edited:
This has been a fun project to watch come to fruition! I'm really diggin' how the finished sample turned out!Well done, my friend!-B89!
 
This thread is more than 3 years old.

Your message may be considered spam for the following reasons:

  1. This thread hasn't been active in some time. A new post in this thread might not contribute constructively to this discussion after so long.
If you wish to reply despite these issues, check the box below before replying.
Be aware that malicious compliance may result in more severe penalties.
Back
Top