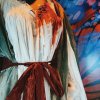
Crimson Peak - Thomas and Lucille Finale

keepcalmcostume

Active Member
MouseMeat and I both fell in deep, immediate love with this movie, so naturally the costumes made it onto our to-do list. And for once we're doing something while it's still immediately relevant instead of years after. We'll be starting with Thomas's pared down suit (basically his usual suit minus coat and tie) and Lucille's nightgown/robe that they wear in most of the finale, then later moving on to some of their other more complex costumes. I already have the materials for Lucille's ring, so I'll be working on that first sometime in the next week or so (hopefully).

12141772_1052510388101927_3731054196322987474_n.jpg crimson peak.jpg 1280x720-OWw.jpg jessica-chastain-crimson-peak.jpg Lucille3.jpg
 
A friend and I are going to make Lucille and Edith's nightgowns to start, and work our way through the film's wardrobe as well. Have you started on this yet? I just ordered a swatch of silk habotai for the nightgown.
 
A friend and I are going to make Lucille and Edith's nightgowns to start, and work our way through the film's wardrobe as well. Have you started on this yet? I just ordered a swatch of silk habotai for the nightgown.

No, we haven't started yet. At least not properly. I've made a few Sharpe rings for these costumes and some friends (which reminds me, I should update with that), and I'm getting ready to make black versions of the ring for the ghost costumes, plus I'm piecing together Lucille's keys and chatelaine. And I have tracked down some patterns to use as starting points, but aside from gobs of research, we haven't actually worked on any clothing. I'd love to see the fabric you got a swatch of, if you don't mind sharing. Finding just-right fabrics has been one of the most frustrating parts of this.
 
Absolutely! I'll try and find the swatch, but it's so perfect. I believe this is the link - https://www.dharmatrading.com/fabric/silk/silk-habotai-5mm.html?lnav=fabric_silk.html It has just the right amount of sheen and transparency imo. I'm thinking of using shirring tape for the top to get the gathering, but I'm not sure if that would be too bulky or look strange. I might just do wide elastic. Haven't decided lol

Thanks! That's really helpful. That fabric does look just about perfect (and a great price, considering all the yardage needed). I might have to get a swatch myself. Have you found anything promising for the robe yet? I've been weighing the options for the neckline too. Right now, I'm thinking about doing some very fine pleating, kind of like pencil pleats or pre-smocking pleats. It's pretty easy to do by hand, and for me probably easier than dealing with elastic thread or a tape, and I think it has the right look.
 
I'm at a complete loss for the robe :/ Nothing that I've found comes close, so I'm thinking it may be something that needs to be hand-dyed or airbrushed. I ended up ordering the silk for the nightgown, and I think you'll probably want a lining. The fabric is SUPER lightweight, but still super gorgeous. I'm debating on whether or not I want to do a lining atm...
 
Chiming in here, keepcalmcostume can feel free to correct me or add.

Looking at garments made with that particular silk, if you didn't order enough to at least double your layers, I suggest a lining. Laying against skin in a single layer, it seems pretty sheer.
 
I'm at a complete loss for the robe :/ Nothing that I've found comes close, so I'm thinking it may be something that needs to be hand-dyed or airbrushed. I ended up ordering the silk for the nightgown, and I think you'll probably want a lining. The fabric is SUPER lightweight, but still super gorgeous. I'm debating on whether or not I want to do a lining atm...

I think you're right about the robe fabric. I've been brainstorming along the same lines, maybe getting a silver or grey satin and doing some kind of greenish dye over it, like sponged on or spray dye. I just ordered some crepe back satin swatches in a few colors from a shop on Etsy, so I can let you know what comes of that. I thought crepe back satin would work well since it has either a high or low sheen to choose from and the pebbly texture might add to the color mottling.

MouseMeat got there before I could, but I definitely second what both of you said. I just got a faux silk habotai swatch elsewhere that looks similar to the one from Dharma, and it's too thin on its own. The habotai has a really great sheen and drape though, probably the closest I've seen to how the nightgown moves in the movie. If I use a habotai, I'll definitely do a lining on the body, and then just play with whether or not the sleeves need them. I layered my habotai swatch with some white cotton voile, and that seemed like it would work well for a lining. The voile is equally thin but less transparent, so it still moves well but provides a little more coverage. I don't know if you've seen this yet, but someone linked it in their review of the Dharma habotai, and it shows really well how the sheerness looks in a finished dress both in a single layer and with a lining. https://heavenlyprincess.wordpress.com/2012/11/26/the-moonlight-dress/
 
So it's been an age, but I've had the Sharpe ring done for a (long) while. I made one for myself, one for MouseMeat, and a third to give to another friend. If I'm feeling really ambitious, I might go in and add a few tiny little rhinestones here and there. The ghost version of the ring will be the same ring blank in silver painted over with black, and a black glass gem.

12987200_10156754196940058_850794627691612346_n.jpg WP_20151207_013.jpg

I also have nightgown swatches I've been staring at for a few days now, so once I organize those and my thoughts I'll be working towards deciding on some of the fabric.
 
So I've been ordering and organizing and painting and comparing swatches for days. First up, Lucille's robe.

These are all crepe satin, with labels on the right side. The paint, top to bottom, is Americana acrylic in Avocado; Americana in Hauser Dark Green; Americana in Williamsburg Blue; and Delta Ceramcoat in Aluminum. All of it was watered down to permeate the fabric lightly and play with the color washes on her robe. After agonizing over fabric paint and fabric dye and custom dye, I figured I'd just mix acrylic and water and spray it on after the robe is done. The test with a foam brush worked well, so I'm sticking with it.
IMG_5033.JPG IMG_5034.jpg

These are charmeuse satin and crepe satin. The labels are on the wrong side. Same paint and same method as on the other swatches, but I was a little messier with these and it blended a little easier anyway.
IMG_5031.jpg IMG_5030.JPG

I'm liking the silver and grey swatches best so far, and specifically the charmeuse from the second set. The silver gives the truest colors in the paint, and is the easiest way to get the lighter areas of the robe's mottled color. The lightweight fabric moves and looks a bit like silk, which I suspect is what the real robe is made from, and less weight would be a definite bonus with the huge size of the robe and nightgown (both of which might also be lined).

The silver spots in the mottling and the silky texture/sheen of the fabric are clearest here:
4c2ccfdcd541608a6372b789b3357df1 copy.jpg tumblr_nwymvpd3LG1tivrtho1_540.jpg

I have three more green swatches coming in the next week sometime, so we'll see how those compare. But for now the silver charmeuse looks like a good bet.
 
Last edited:
So the other set of green swatches was a bust. Gorgeous fabric that I definitely need to use on something else, but just not right for this. Silver or grey satin is still looking like the winner, so I got some additional swatches for a last comparison. I also got some grey and silver habotai to consider for the lining. I'm thinking - or hoping - the habotai will help keep the overall weight of the robe down, while still being more stable and easier to work with than chiffon. If that's what I go with, it'll get the same color treatment as the outer fabric, but to save time and effort, I'll probably only paint the small bit of lining that sticks out and shows on the outside.

More definitive progress: I've drafted an enormous murder sleeve! I started with the sleeve from McCall's 5213 and thought about the logistics for a LONG time. I finally did a mock-up of the pattern as-is, then slowly alternated between trying it on to test the shape and tacking on more fabric, and finally copied that back to paper. The pattern ended up like this.
IMG_5448.JPG
For a sense of how ridiculously large this thing is, that's a standard coffee mug in the bottom right corner. The left vertical edge of the brown paper is the top of the arm from shoulder to wrist, so the bottom horizontal edge is the wrist, and the white paper on the right side is all the extra hanging floof that gives her sleeves that huge length and roundness. The white paper on the left is a pending experiment. I have to add extra width at the shoulder to accommodate the pleating around the neckline, but I didn't necessarily want extra width at the wrist (it's PLENTY wide already), so I'll eventually cut the left side down along that diagonal line. Fingers crossed that it works.

What that pattern creates (minus the extra shoulder width that I haven't tested yet) is this.
IMG_5341.jpg IMG_5343.jpg IMG_5342.JPG
It's hard to photograph it on my own since it's so large and falls flat without an arm in it, but hopefully I'll be able to get some better photos soon. It's also hard to tell from this, but it's pretty much as close to perfect as I'll probably ever get, and I'm a still a little amazed it worked so well.

Next step is to do a mockup of the whole nightgown with the pleating.
 
Last edited:
Had a stroke of luck recently: the robe isn't lined (or if it is, it doesn't make any visible difference)! It's not really noticeable on screen and I only caught it going through screencaps, but the finished edge of the sleeve is visible on the inside.
CP_2380.jpg
Which means I don't have to bother with a lining. All I'll need is extra fabric for the faux lining that sticks out from under the edges, but I'll just use scraps of the same outer fabric. So the time and cost of this project (or at least this portion of it) just got cut in half. Hurrah!

After (finally) buying the movie on Blu-Ray and watching it again, I've realized that the nightgown is a lot more sheer than I had remembered. Which means the habotai I was considering before is a really good idea again. Without a lining the cost is also feasible again, and I think it'll be a really good match for movement and sheen. So I'm still thinking about options, but I'll probably go with the polyester habotai as the best for both cost and screen-match. I've also decided on a particular silver charmeuse satin for the robe.

Meanwhile, LOTS of visible progress over the past few weeks.

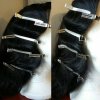
Most recently I did a mock-up of Lucille's braid. As far as I can tell - which is hard to tell, just like most details in that scene - it's not a standard braid but more knotted and twisted and wrapped.
CP_2382.jpg CP_2297.jpg CP_2268.jpg
I mostly followed this tutorial, just added an extra hair tie at the very top to keep everything secured and left a large strand of hair out of the loops, splitting that strand in two and wrapping it in opposite directions around each hair tie after the loops were done. I might play with it some more (probably add some more smaller, separate wrapped strands), but all in all it turned out close enough and looks really cool anyway.
IMG_5526.jpg

Mock-ups are where the real progress has been made.
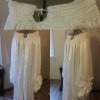
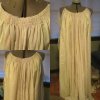
The nightgown started out as McCall's 6743, which had the gathered scooped neck, raglan sleeves (or the right shape to add them in), and a lot of fullness through the body. I used view A and extended the hem to the floor. For the pleats I planned to use a historical German hemd tutorial, which calls for two 55-56" bodice pieces and two 28" sleeves. That's where the extra width in the earlier sleeve modification came from, bringing the sleeve up from 3" to about 28-30." To add the extra width to the body I made a second center piece (the original pattern uses two sides and one center per front and back) and then extended each pattern piece about 4" so each total front and back would be about 55". I also added about an inch to the height of the neckline, intending to fold that under to finish the edge and create the slight ruffle above the pleating, but it ended up being unnecessary so I'll take that back out when I do the final. The maths on lengthening the whole thing failed me, so it ended up a few inches too long, but better that than too short. I scrapped the idea of testing the pleats themselves, so I just did a few rows of gathering to get an idea. It turned out well, so it'll be a good fallback if for any reason the pleats don't work.
CP Lucille N 5.jpg
I did another mock-up of the sleeve with the extra width. Instead of tapering that width down to the wrist like I'd planned, I left it the same width all the way down so I could easily cut it on the fold. And because, you know, there's no such thing as too much with Lucille's impractical clothes apparently, so why not make the wrist more full.
IMG_5488.jpg

The robe started as Simplicity 1551, view B. I started with the back and side back, cutting and sewing those together to make one big piece. I also adjusted the seam lines to get rid of the fitted princess seams while retaining fullness. Rather than cut the robe back with the pattern, the whole back will be draped from the full width of one piece of 60" fabric with the center being pleated by hand (similar to a robe à la française or Watteau pleats for you historical costumers) and the new pattern piece traced on the edges for the flat and unpleated sides, sleeve head, and the train. It's hard to get a good look at it in the movie, and I think there's more to it than this, but this is pretty close. Also, draping pleats is the funnest thing ever.
Lucille back crop 2.jpg Lucille Back Crop.jpg IMG_5455.JPG
Using the pattern again for the front of the robe, I followed the same process as the back, getting rid of the princess seams and turning the two pieces into one large piece. This way, each front and back is only one piece, and there's only a side seam on the final thing. I widened the shoulder and collar area so it's less of a v-neck like the pattern shows, and matched this extra width along the collar of the back piece. The sleeve heads took a lot of fiddling with, both because I had changed some seam lines and it needed to be enlarged to accommodate the size of the nightgown's armhole and sleeve bulk. As a result, the sleeve itself was a total nightmare. Which was ironically fitting, since the robe sleeve was supposed to be the one piece that was perfect as-is. I'm not even sure what all I did to it or how I finally got it to work, but basically I lowered the bottom (armpit) of the sleeve to match the new armhole shape, and widened the top (shoulder) of the sleeve to allow more pleats and give a better overlap of the edges. There's still some wonky bits along the underarm, but nothing really problematic, so I'm happy enough with it.
IMG_5541.jpg

So all together, it actually looks like a proper thing now!
CP Lucille N 6.jpg
I'm calling the mock-ups done at this point, since there are only a few little tweaks. So as soon as I make some final decisions, I'll be ordering fabric (and maybe a wig).
 
Last edited:
Not much progress on this lately. Since the mock-ups are done, I've just been waiting for a good time to order final fabric, but I've been too busy to sew much anyway so I've been holding off.

I did browse the Halloween aisles at KMart the other day and was pleasantly surprised to find this. It's a little rough, but for $5 it's a great base and some easy modifications will do wonders.
14317468_1074822109262596_9166033133031807072_n.jpg
 
Lucille's cleaver has been done for a while now, but between moving and school and getting sick a few times, I didn't have the time or energy to post anything. I only have a few photos of random parts of the process, but I basically used a Dremel to alter the cleaver's shape and smooth the surface (and added a hole in the handle to attach a ribbon for easy carrying), then resealed it with Plasti-Dip. In a strange turn of events, it was really fortuitous that red Plasti was all I had, because it's a gruesomely good color and texture match for the red ghosts. It was kind of disappointing to paint over it. Then I used alternating layers of sandable primer and Bondo to fill in the weird chips and grooves, sprayed it black as a base, did washes of acrylic for the final colors, and sealed it with a matte fixative. For being matte it still turned out kind of shiny, so I might go back and stipple on some more light paint to dull it down some.
14449809_1082027118542095_4744325256754919041_n.jpg 20170109_112428.jpg
The final colors turned out kind of weird, just because all the red seems strange, but I was following these photos and I guess it matches that well enough.
CP_2483.jpg CP_2484.jpg tumblr_inline_o6w7r2mMsn1setak0_540.png

I also just got the fabric for the nightgown, so hopefully I'll be starting on that within the week. I'm trying to get as much as possible done before classes start again at the end of the month, but we'll see. The general deadline at this point is either mid-February for the Long Beach Comic Expo or late March for WonderCon.
 
Got out the pattern pieces to refresh my memory and make some tweaks before hopefully starting to cut out the final fabric next week. I decided the nightgown's giant murder sleeves weren't giant or murderous enough, so I tacked on some more fabric to the width under the arm and the length. After trying it on they finally ended up being too long, at least in proportion to the robe's sleeves, so I cut it back down along that drawn line.
15975309_1184845601593579_2178801100495463350_o.jpg
The patterns are ready and the excessive nightgown yardage is washed, so I'll start on that while I prep the excessive robe fabric in the meantime.
 
I can't believe I haven't posted since January, and now we're a week away from finishing and debuting.

I didn't take many photos of construction, partly because I covered the mock-ups so extensively but mostly because I was trying to work steadily and just rarely stopped to document stuff. This is pretty much it for the nightgown.
15975227_1187637091314430_8246930784400155565_o.jpg 20170203_131721.jpg
IMG_20170215_170317.jpg

And of course, there's plenty to tweak on an inevitable Version 2.0. I ended up doing gathering instead of pleating around the neckline. Pleating would have been more accurate and a bit nicer looking, but I didn't want to take the time to do that. The gathering also affected the sleeve head more than I thought it would, so the armpits ended up a little tight and in theory should be opened up some. With the thinner fabric, the sleeves didn't have quite the fullness and drape I intended and that the mock-up had, so I'd change that. I also melted a hole in part of one sleeve last night, like a moron, so I kind of have to go back and tweak the sleeves someday anyway. I started on the ribbon ties at the front, but after the first row I decided I wanted to do it differently, so time permitting that's something I'll change before next weekend. And it still needs lace, but that's a last minute handsewing bit too.

As far as the robe goes, that was pretty much a quick no-photo job too, though I did take a few of stuff that didn't really go through the mock-up phase.

On the back panel, I cut out the sides and top with the pattern piece but left it the full 60" of the fabric, and all of that became the pleats. I draped the pleats on the dressform, kind of by eye and with a little measuring.
Lucille Nightgown.jpg
20170314_205153 copy.jpg

I bound the sleeves and robe front with the same fabric to create a trim and finish off the edges. It's a lot of placing and folding and flipping over, basically like this, if anyone is interested and can decipher my terrible reference photos:
Lucille Nightgown 2.jpg

And with everything sewn, it's pretty much here right now.
17310180_1248347331910072_4618373531377037970_o.jpeg 17492937_1248348821909923_6088212808428156306_o.jpeg

I'm hopefully be painting tomorrow or very early next week to give time for tweaks before WonderCon next weekend. I still have to do my ribbon sash and basically all of Thomas's vest, so we'll see how it all goes.
 
They're done!

I didn't get any photos of the dyeing process because it was messy and kind of nightmarish, but I did think to take this photo the night before the convention. It ended up being the process and colors/materials I planned on, but it also ended up being a mistake, so someday I'll wash it out and redo with something like Dye-Na-Flow or fabric paint (sacrificing a little on color accuracy for the sake of ease).
17620147_1259207294157409_5239199892047471398_o.jpeg

I didn't get any of the vest in-progress either because that was a quick rush job a few days before we were wearing them, but I'll hopefully be documenting the second vest and white ghost vest.

I did some light styling on the wig the day before, just some soft fingerwaves around the face, but they ended up kind of ineffective and disappeared.
17636998_1255825307828941_6905429420629720740_o.jpeg

We debuted everything at WonderCon, and it was kind of a mixed bag. It was awesome to finally have them done and wearable after so much planning and work, but the nightgown/robe is a bit of a hassle to wear around (all that fabric!) and very few people knew who we were (bit of a letdown). We did a little casual mini-photoshoot outside the convention center, and hopefully someday soon we'll do something more formal in a Victorian house (location scouting is ongoing).


Photos credit to the awesome Mike Longo.

IMG_7571_lucille_2.jpg IMG_7579_lucille.jpg IMG_7627_back.jpg IMG_7625_wings.jpg
IMG_7593_thomas_hand.jpg IMG_7607_lucille and thomas sharpe final.jpg IMG_7645_waltz_2 .jpg IMG_7652_waltz_1.jpg


And some shenanigans too, of course.
17758296_10210110025041710_4040751160086953979_o.jpeg 17634518_10212796497811923_7865902366654246419_n.jpeg


Also, THIS HAPPENED, which wildly redeemed at least of some of my disappointment on the day. Both really flattered and really embarrassed.
17814249_10158432558990058_2196941272293529300_o.jpeg 17835199_10158453716445058_1192698419405012969_o.jpeg

So that's pretty much it for now, at least until I start doing some tweaks. We're planning to wear these for Labyrinth of Jareth in August, so I should (*should*) be getting to it before then.
 
This thread is more than 7 years old.

Your message may be considered spam for the following reasons:

  1. This thread hasn't been active in some time. A new post in this thread might not contribute constructively to this discussion after so long.
If you wish to reply despite these issues, check the box below before replying.
Be aware that malicious compliance may result in more severe penalties.
Back
Top