Robotech: Southern Cross ATAC Armor

Shazear

New Member
https://cosplaysnobbery.wordpress.com/2015/12/05/southern-cross-officer-body-armor-plan

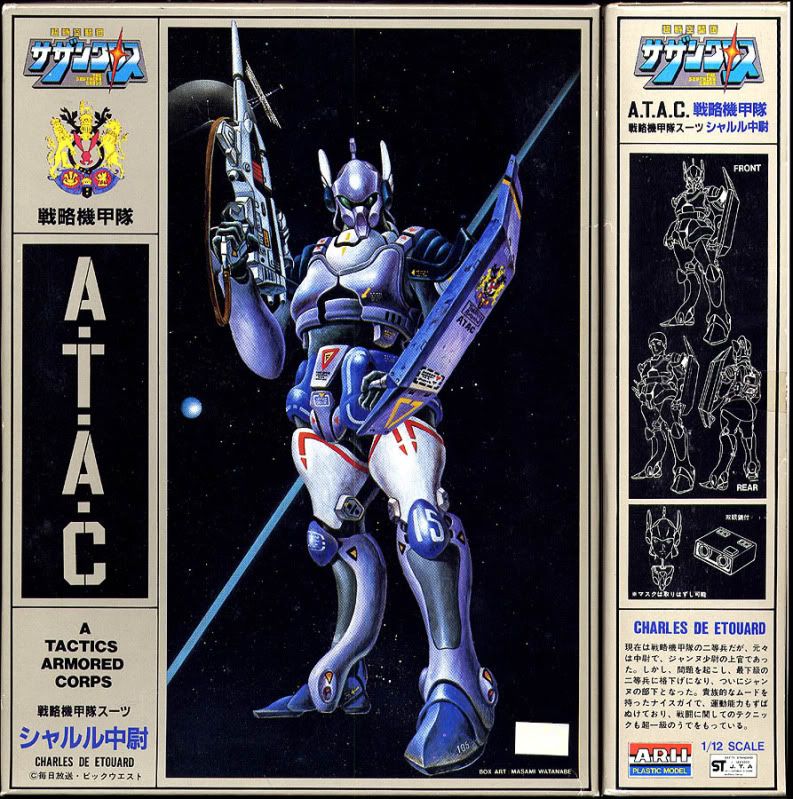
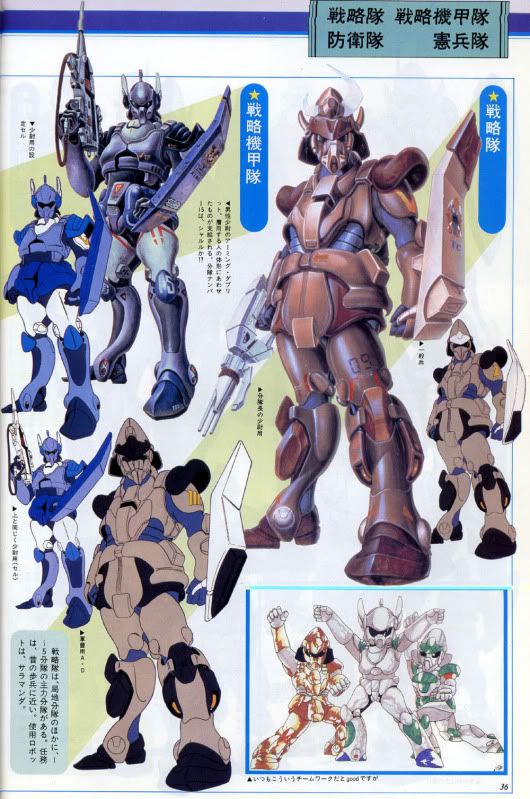
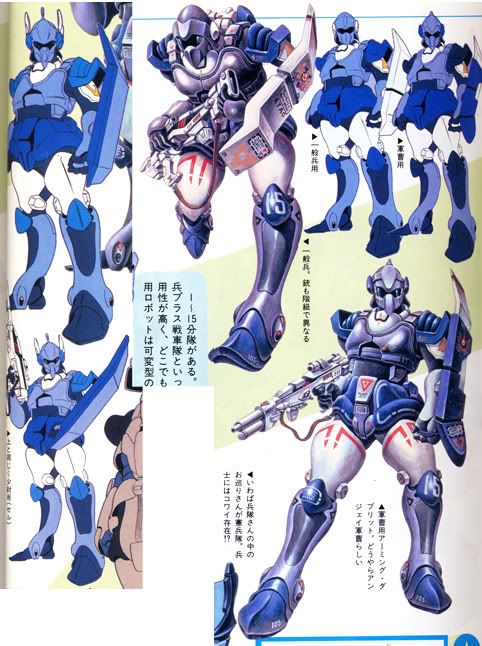
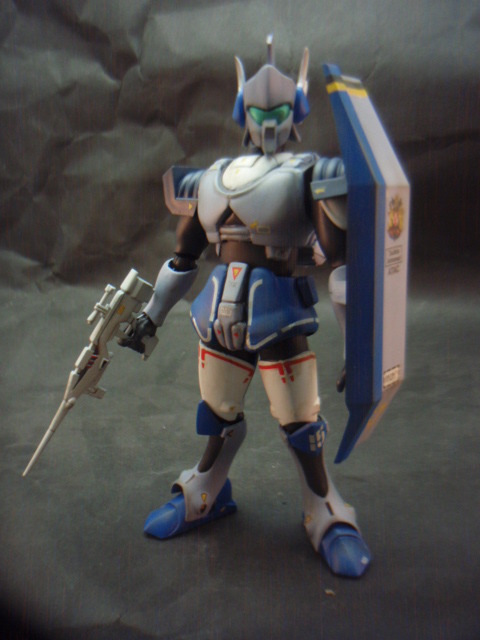
So I'm actually starting work on a long dream of mine: Male officer ATAC armor from Robotech: Southern Cross (2nd generation). See the above link for the plan. I've already started the 3D Modeling work for the helmet and visor in Blender, so expect a WIP post in a couple weeks when I have something worthwhile to show for it.

55f6d0e35d949.jpg
 
Last edited:
https://cosplaysnobbery.wordpress.com/2015/12/12/southern-cross-wip-helmet-and-visor/

Ok. Worked this week on getting the helm modeled out in a rough. So here's a preview of my post about it.

Stage - 3D model the pieces that I plan on building.Part - Helmet bucket and visor.
Functional Feature - The helmet needs to support the visor in the three states as mentioned in the plan.


I've been working with Blender for creating the patterns I will need for this armor. Luckily, this isn't my first time working with 3D modeling software, however, it has been over a decade since the last time I ventured in this space. That helps reduce the learning curve, but I'm sure that my approach is still rudimentary compared to people who are much more comfortable working with Blender and 3D modeling in general. As you can see in the images, I'm working with just one side as the full unit will be mirrored along the body's mid-line.

blender_helm_003.png

blender_helm_003.png
 
Last edited by a moderator:
https://cosplaysnobbery.wordpress.com/2015/12/19/southern-cross-wip-chest/

With a different technique to create the next piece in the puzzle, I was able to do a rough sculpt the chest part of the armor. Let me know what you think.

Stage - 3D model the pieces that I plan on building.Part - Chest/Torso (Though it will be 3 pieces: Breast, Back, Gorget)


Ok. So last week I posted what I did with the helm and visor by modeling it. Manually adjusting and creating polygons to build out the structure. That whole process was very slow and labor intensive just to get a very coarse shape. So over the last week, I did some more research about using Blender and figured I'd try to sculpt the next piece rather than hand model it. And this is the result:
blender_torso_002-2.png

See more at the link above.
 
Last edited by a moderator:
https://cosplaysnobbery.wordpress.com/2017/01/04/southern-cross-wip-update-helm-chest-and-pepakura/

We've been pretty quiet over the last year. 2016 presented us with some significant challenges that I'm not going to get into since this is not that kind of blog. We're back and once again targeting to get some great cosplay projects done.

Over the New Year's break, I was finally able to make some good progress on modeling the Robotech: Southern Cross ATAC armor in Blender. As stated in the plan post, the idea was to iterate on the model and building the pieces out using Pepakura Designer. I was lucky enough to actually give mocking out the helm a try and very quickly learned some good lessons. So here are the tips and tricks right out the gate and then I'll go into more detail about the status of the pieces involved.

The helm after duplicating, mirroring and combining the 2 sides:​

2017-01-01.png

See more at the link.
 
Last edited by a moderator:
I only checked one of the links... why not post the images here, on the forum you want to share at?
 
Good point. I think I didn't want to post pics or have TLDR type posts here on the forums. And I can see how maybe a happy medium might be the right thing. Like have a preview of the full post with a pic or 2. I'll work on editing the current posts to do that.
 
Very cool! I did a Macross flight suit a few years ago. Looking forward to watching this one progress.

Cheers!
 
https://cosplaysnobbery.wordpress.com/2017/03/13/sc-moving-on-to-production/

Over the last couple months, I’ve been working on the legs, girdle and a few other pieces in blender. The idea originally was to get everything modeled so that I could use pepakura to streamline the pattern making process. After a discussion with my wife a week or so ago, we decided to step things up a bit. The more simple pieces can be measured and patterned out by hand like I would have done for a fabric or leather piece. I have an understanding in my head how all the pieces will come together, so that’s what we’re going to focus on. Additionally, we’re going to actually target getting this done in time for CONvergence.

One of the boots WIP:
20170311_183047.jpg

See more at the link above.


20170311_183047.jpg
 
Last edited by a moderator:
https://cosplaysnobbery.wordpress.com/2017/03/20/sc-legs-wip-update-prototyping-lessons/

... Then got them all constructed and put together, but unfortunately didn't take a picture of that. With much tweaking and prodding, I realized that it was still too small to be functional. While I could just barely get my leg in and out of it, the movement and overlaps across the saddle of my foot down to the arch was not working. Additionally, it didn't allow much room to adjust or maneuver if I needed to make those changes in the future. So this is what it looked like after I took it apart again:
20170319_144402.jpg ...

See more at the link above.

20170319_144402.jpg
 
Last edited by a moderator:
https://cosplaysnobbery.wordpress.com/2017/04/17/southern-cross-wip-shield/

After a few weeks struggling with the lower legs, I needed a change of pace to get a nice solid "win." In looking through the plan, I landed on busting out the shield. With the more simple pattern, I could tackle the more simple shapes and get some visually striking anchor points as well as experiment with some of the finishing steps.
So here we have the progression so far for work done over the weekend:
20170416_162853.jpg
See more at the link above.

20170416_162853.jpg
 
Last edited by a moderator:
Looking good so far. This too has been one of my dream costumes and one that I'm always working on my head every now and again. Do you plan on sharing your plans when you're done? As I said before, this has been my dream costume for ages now and I'd love to actually try tackling it.
 
Do you plan on sharing your plans when you're done?

For sure. At this point, the only plans that are written down are the torso and helm. Everything else has been kind of winging it to make it work.
I did some work on the lower legs over the weekend and hope to have them ready for painting at the end of this weekend coming up.
 

Not to be too nitpicky or critical but you do realize that you have the wrong shield design, it's either the NCO or enlisted shield, the officer's shield is the same as the model in the first post.

One last thing, I don't know how much reference you have but if you need I have a ton here: http://smg.photobucket.com/user/Riceball/library/Anime/Southern Cross?sort=3&page=1
 
Not to be too nitpicky or critical but you do realize that you have the wrong shield design, it's either the NCO or enlisted shield, the officer's shield is the same as the model in the first post.

Yes. This is the heavy shield for NCOs that Angelo carries. I did that on purpose. I did that work based on the 1/12 scale model of Angelo that I was able to get. I wanted to experiment with construction and play with the color contrasts when I get to the point of painting. At this point, though I haven't written about it on the blog, I'm probably going to do 2 sets, one NCO (helm + shield) and one Officer. That way it can be more recognizable that I'm cosplaying as Angelo Dante when I'm in that set. The male ATAC officer is only has a few frames of screen time (in Robotech, he's not even named), so figured I could do a both/and approach. Especially since the shield was an easy win and the officer shield is even simpler than the NCO version, I could put that together pretty quick.
 
Yes. This is the heavy shield for NCOs that Angelo carries. I did that on purpose. I did that work based on the 1/12 scale model of Angelo that I was able to get. I wanted to experiment with construction and play with the color contrasts when I get to the point of painting. At this point, though I haven't written about it on the blog, I'm probably going to do 2 sets, one NCO (helm + shield) and one Officer. That way it can be more recognizable that I'm cosplaying as Angelo Dante when I'm in that set. The male ATAC officer is only has a few frames of screen time (in Robotech, he's not even named), so figured I could do a both/and approach. Especially since the shield was an easy win and the officer shield is even simpler than the NCO version, I could put that together pretty quick.

Near as I can tell, the male ATAC armor is almost exactly the same as the female version and aside from the helmet it's no different from what you see the rest of the 15th wear. Here's reference images of what the male ATAC officer armor looks like.

SCARII5BOX-1.jpg


SC3.jpg


ATACref.jpg


I have to say that I find it interesting that you feel that the NCO shield is easier than the officer's, I would think that the officer's would be easier to make given that it's all straight lines, no curves at all.

Btw, I'm curious as to how you plan on doing the pauldrons. In my head I've been going back and forth on how to make them, whether to make them soft or hard and whether to make it so that they can rotate. On the show there seems to be evidence that the pauldrons are soft but I'm not sure that if that's the animators taking liberties or that's the way they're supposed to be.
 
I have to say that I find it interesting that you feel that the NCO shield is easier than the officer's, I would think that the officer's would be easier to make given that it's all straight lines, no curves at all.


Sorry, I wasn't clear. Since this is my first EVA Foam project, and I was having troubles w/ the lower legs, I wanted something reasonably complex while also easier than the legs. So I went w/ the NCO shield. Yes. Absolutely, the officer shield is super simple and that's what I meant, I could whip it together in an afternoon, as my experience grows. So I will likely have both by the time Convergence rolls around.


Btw, I'm curious as to how you plan on doing the pauldrons. In my head I've been going back and forth on how to make them, whether to make them soft or hard and whether to make it so that they can rotate. On the show there seems to be evidence that the pauldrons are soft but I'm not sure that if that's the animators taking liberties or that's the way they're supposed to be.


Nearly everything so far is EVA Foam base. So I'm expecting to stay in EVA for everything else. I'm lucky enough to have a breast & back w/ pauldrons from my time working Ren Faire, so I expect to attach them in a similar fashion. Have a strap under the armpit as well as a connection to the gorget & shoulder straps of the main torso. Additionally the shoulder/upper arm cup will hinge to the main part of the pauldrons and will have it's own strap around the arm to keep everything moving in sync. (Hopefully that makes sense.)
 
Last edited:
I was reading your blog(?) earlier today and I read the part mentioning the backpack, btw, thanks for the shout out, and it made me remember something about my (in head) build. How do you plan on doing the backpack, if you plan on doing it. Were you planning on making it functional, as in you would be able to attach and detach as well as open it up to actually store things? In my head I was thinking of using rare earth magnets for the backpack so that I could take it on and off as well as probably making it so it could open. Reading your blog made realize something, if the pack was actually made functional and you put a lot of stuff and/or something sort of heavy it might pull at the back plate a lot and it might cause it (the backplate) to pull at the top, either that or pull at the breast plate a lot since they're attached.

Have you given this any thought yet? I'm sure that there's a way to overcome this problem but I just can't think of anything at the moment outside of making sure the cuirass is fitted fairly snugly. That or maybe add some shoulder straps or chest straps to the back plate to help support the weight of a filled pack.
 
I'm using rare earth magnets throughout, so that I don't have to take up space with mechanical connectors. I have been thinking about the backpack, and I don't think I'll get it done in time for CONvergence (July 7-9) I do want to make the complete kit. So yes, I was thinking about making it functional, either to store water like with a camel back and/or as a cooling system. Not sure exactly yet how I would want to accomplish that task.

I agree that there could be a leverage problem if it was holding any weight, so I was already planning on building an H-harness into the breast & back plate to provide additional structural support than just the EVA foam. I already have 1" and 2" nylon web strapping for it when I get to that point. I expect that it would sit much like a normal backpack would and with just a 1-2L it won't get that heavy. I would try to keep the magnets as the primary connection mechanism. I have some decent bar magnets that are about 1" x 1/4" x 1/8" that when using the default 3-4 attachment points (given the lower back one is long I could see putting 2 magnets there) should be able to handle the 2+ kgs of weight of that much water, plus the weight of the pack itself. We'll see how it goes, but that's further down the list.
 
This thread is more than 6 years old.

Your message may be considered spam for the following reasons:

  1. This thread hasn't been active in some time. A new post in this thread might not contribute constructively to this discussion after so long.
If you wish to reply despite these issues, check the box below before replying.
Be aware that malicious compliance may result in more severe penalties.
Back
Top