New Take on T-800 T2 Arm, Looking for some help

LawTac

New Member
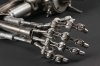
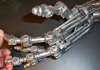
Hello all, I am new to the forum, found out about it due to the youtube “one day builds” videos. Anyway I am looking to do a replica of the T2 arm, but not the same old standard arm in the glass case at Cyberdyne (don’t get be wrong I think its an awesome piece to have) but I want to do a representation of the arm that was stuck in the gear then ripped off by the “good” Terminator at the steel mill. I am thinking of starting with a standard T2 arm resin kit and salvaging whatever parts I can use, then fabricating the rest. I know the standard arm is Right and the Gear arm is Left but I think i can use many of the parts. For the display I am thinking of a glass case just like the cyberdyne setup, just shorter, and some other mounting system as the arm will not have the elbow to use to attach to the base. Maybe holding it at the wrist like a guitar stand. It will also have a curved/bent look to it due to all the gear damage/ripping. The idea is that the arm was recovered from the steel mill and is now held/displayed at a new Cyberyne/other co., just like the T1 arm was recovered from the computer factory and held at the now blown up Cyberdyne. I am looking for any suggestions on the build, and more importantly any photos, images ect. that could be of help. Set photo, prop photos, even some quality screen shots from the film. Sorry or the long first post, but wanted put my whole idea out and see what you all think and any suggestions you have. Thanks in advance.
 
Last edited:
I don't have any info to give being a collector of Terminator...but I think your damaged arm from the Steel mill is an excellent idea , to make a prop....like this ....would love to see someone do that ....there are a lot of many resin kits to get from Ebay , this would be an awesome battle damage display piece,,,, hope you get started on construction on one like this.... I built mine complete and it was a total nightmare though ...aluminum rods , real steel pins , steel bolts , etc and mounting everything with Jb weld also... please keep us informed :D
 
terminator.jpg
Yea, based on my crappy screen shots I am thinking I can use most of a resin kit. It looks like everything but the elbow, elbow cup, 1 piston w/ 1” of rod would be used.
I am going to replace some of the 1/8 cabling used in the m4a1.com build with some small gage springs that I can pull/stretch out for the damaged look. I will probably also cut one of the 2 reming pistons in half, and bend/crush the metal forearm rods.
 
Here is the complete m4a1.com build photo I have marked with my build ideas.
RED: Parts that won’t be used. Elbow, elbow cup, 1 piston
YELLOW: Parts that I need to flip over. Thumb, pinky and index finger.
BLUE: I think i will need to fab a new wrist plate (or turn over that plate to accommodate flipping the thumb and pointer/pinky fingers depending on size)
EXTRAS: I will use some cabling, but also some springs pull/stretched. I will also do a bend/crush of the forearm rods, and maybe bend back to fit the display.
resin complete arm copy.jpg
I don’t know if I want to display it with a glove (might do a very ripped up glove to show as much as possible of the fingers) as it was crushed with glove on, but i do plan on heavy weathering.
Any and all suggestions are welcome, and I could really use some more/better/other photos of each side of the damage arm for reference.
 
Last edited:
Here is the complete m4a1.com build photo I have marked with my build ideas.
RED: Parts that won’t be used. Elbow, elbow cup, 1 piston
YELLOW: Parts that I need to flip over. Thumb, pinky and index finger.
BLUE: I think i will need to fab a new wrist plate (or turn over that plate to accommodate flipping the thumb and pointer/pinky fingers depending on size)
EXTRAS: I will use some cabling, but also some springs pull/stretched. I will also do a bend/crush of the forearm rods, and maybe bend back to fit the display.
View attachment 536578
I don’t know if I want to display it with a glove (might do a very ripped up glove to show as much as possible of the fingers) as it was crushed with glove on, but i do plan on heavy weathering.
Any and all suggestions are welcome, and I could really use some more/better/other photos of each side of the damage arm for reference.
I think your idea is well thought out.......that's my friends Tom Grays work....also known as Tommin , here on the RPF.....he really put a lot of work into his build......Tom taught me a lot on my build as well....cant wait to see yours
 
Yes, his Tutorial is amazing, I am sure it will be a major help on this project. Being in the planing stage now, the biggest issue I have it developing the look. I have a lot of freedom on it as once its ripped off it is never seen again. But I would like to make it as accurate as possible. I can’t seem to find a good image that shows what parts remain on the terminator. with that I can include any parts not on the terminator on the arm, complete is damaged. Also does anyone know the type or a matching type of gloves used by Arnold in the movie?
terminator lowering.pngphoto-26 copy.JPG
 

Attachments

  • terminator lowering.png
    terminator lowering.png
    216.6 KB · Views: 528
Last edited:
Ok, well now things get confusing, as with most props. The image in my last post of the arm pulling away from the gear (blue with a red circle) only shows 1 piston and a small section of rod remaining attached to the elbow of the Terminator. Now this image I found on iCollector.com shows all 3 pistons still attached ( 2 will full bent rods, 1 with a broken rod) and is claimed to be screen used, it sold for 4k so i guess it was real. this screen shot seems to match that prop. Now I would prefer to go the the image from the pull-away that leaves more parts on the arm in the gears as it would make my display more interesting, but would that be blasphemy?
real t2 3.jpgt2 arm screen used.jpg
 

Attachments

  • real t2 2.jpg
    real t2 2.jpg
    36.9 KB · Views: 193
I didn't know some resin kits were available.
It makes a long time since I want to make a complete STEEL T800 arm for collection, in fact, since I started working with metal.
But I have a second reason now, I would make a video (star wars universe), with me repairing a fake arm as I would partially be a cyborg, and of course I was thinking making a crossover with terminator universe would be really cool.
 
Thank you both for the photos, I will definitely be replacing many of the resin pieces with new parts, I have been reviewing many of the other T2 arm threads on the site, with things like the weld rod end replacements. I still need to decide how much of the lower arm before the elbow to keep and how much to remove. I don’t want to remove too many parts, but I also want it to be as accurate as I can. The conflicting still shots from T2 and the prop photos with more of the arm remaining on the terminator don’t help my decision. As for the main shaft of the arm (not the 3 same pistons) I think I am going to replace much of the resin section with a door piston. Once I cut it in half, add some markings and crush/bend it to simulate damage from the gear and the ripping off from the elbow I think I can get it to look good and accurate.
arm piston main.pngdoor piston.png
 
The trickiest thing with the T1 vs T2 arm is the knuckle mechanisms being different between the two.

They changed the finger joints to be a smaller design in T2 so that the degloving scene would work better visually.

T1-

attachment.php


T2-
attachment.php
 

Attachments

  • 14989_0876_3_lg.jpg
    14989_0876_3_lg.jpg
    86.8 KB · Views: 1,396
  • OriginalEndoArm3LowResVersion.jpg
    OriginalEndoArm3LowResVersion.jpg
    2.9 MB · Views: 2,030
The trickiest thing with the T1 vs T2 arm is the knuckle mechanisms being different between the two.

They changed the finger joints to be a smaller design in T2 so that the degloving scene would work better visually.

T1-
Yes thanks but let me clear up some confusion, I am not doing a T-1 recovered arm or the T-2 glass case arm, I am doing a T-2 Left arm representation of the arm that got stuck in the gears at the steel mill, then broken off so Arnold can free himself from the gears. I am doing what could have been recoved from the gears after the fact (not shown in the film and never addressed even though it was so importaint to distroy everything in the molten steel), what was left behind would be a T-2 version left arm from above the elbow and crushed/bent below the wrist and most of the hand intact. If you look at the photos I posted above they conflict as to what parts were ripped off and what parts remain attached to the terminator depending on the shot, so if anyone has good imagines or any other info it would be greatly appreciated, also any other suggestions ( such as if I am missing anything above in how I plan to change the kit from a right to left arm, or the proper type of glove) on this project are also welcome. And don't get me wrong all the photos so far will be very helpful in improving the resin kit, so again thank you everyone.
 
I wanted to show you photos of my resin kit , to show you , how good it can be used for a process , like what you are attempting , it can easily modified , for a process as you are seeking to .....kind of wish now , I would have bought another and had one made from the terminator 2 , where the skin was cut off the arm to the pistons.....you have a great idea...I don't know why no one has done these before....but looking for ward to seeing this modification with a resin kit
 
Actually thats another cool idea, do the complete arm, just after the de-gloving scene, showing part of the “real” arm as part of the display, the the robot arm sticking out of it...with the blood still on it, ect. That would be a TON of work, but very cool. And by the way your T2 arm looks great... what type of primer paint did you use?
 
Thanks , it took me a 6 months of time invested to fix a lot of bowing , defects, etc...it was summer time when I ordered it and it was a complete mess when it arrived to me from overseas...LOL...but I put the time in and engravings to give more depth in a lot of areas....but thank you sir, you are most kind....

The Primer I used was just regular automotive , O'reillys auto parts.... Duplicolor primer ...LOL...he worked so well....that all I got to do now is just airbrush it , with gloss black , and the let dry , , after that apply with an airbrush Alclad 2 chrome premixed paint , going to wait till next spring , to do it....after I get moved , everything is just about boxed up now !!!
 
I am expecting a lot of work to fix up the kit, but I am also going to let the imperfections of the kit direct the project. Major defects will be removed or damaged more to fit the theme, and I am hoping that any bowing can be incorporated or exaggerated to fit the project. I will let the kits defects be my guide as a starting point for how I will bend, cruch and replace parts on the kit. I am slowly starting to gather parts that I may replace or incorporate.
image.jpg
 
I finally got my kit. Washed and inspected all the parts. Calling this kit rough would be kind. All parts have a lot of extra material from the mold seems, a ton of warping and I broke one of the fingers what I stated cleaning it up. I expected most of the issues and with work them into the project as much as possible. The oddest thing is the metal rods that look like they were cut using beaver teeth or a dull spoon, or maybe both, luckily I never intended to use them.
arm kit 2.JPGarm kit 3.JPGArm kit.JPGBroken finger.JPG
 
This thread is more than 7 years old.

Your message may be considered spam for the following reasons:

  1. This thread hasn't been active in some time. A new post in this thread might not contribute constructively to this discussion after so long.
If you wish to reply despite these issues, check the box below before replying.
Be aware that malicious compliance may result in more severe penalties.
Back
Top