Malcolm Reynolds Pistol 3D modelling for Funzees :)

Thanks for the quick reply. I had an old diagram that showed the barrel at 1.8 cm and the 1.77 cm as a result was off to me. I've had good experience with shapeways by way of their quality (I have some Star Wars ANH and ESB Blaster Parts) and well so far the most expensive part I've looked into is your "base" frame halves. The barrel is going to be $15.36 in polished white plastic. Not a bad price given the finish. Thanks Again for the Info!!!

Yup, that is correct.

But be careful with shapeways, they charge you for the void space, most "home" printing services only charge for material and/or time.
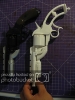
 
Thanks for the quick reply. I had an old diagram that showed the barrel at 1.8 cm and the 1.77 cm as a result was off to me. I've had good experience with shapeways by way of their quality (I have some Star Wars ANH and ESB Blaster Parts) and well so far the most expensive part I've looked into is your "base" frame halves. The barrel is going to be $15.36 in polished white plastic. Not a bad price given the finish. Thanks Again for the Info!!!

No problem, yeah, I've used shapeways plenty, I find the WSF a bit grainy but otherwise it has a very good finish.

I expected the Core pieces to cost the most, if you want, I can remake that model so it's just one piece and you won't have the seam. It was designed with home printers in mind, but shapeways printing methods mean you don't have to have it on a flat surface.
 
The base frame (trigger area and etc.) parts are the only ones I would think about joining together. Mine you the separation allows for an easier modification to a working hammer and trigger during construction if one wanted to make the attempt. Thanks Again!!!

No problem, yeah, I've used shapeways plenty, I find the WSF a bit grainy but otherwise it has a very good finish.

I expected the Core pieces to cost the most, if you want, I can remake that model so it's just one piece and you won't have the seam. It was designed with home printers in mind, but shapeways printing methods mean you don't have to have it on a flat surface.
 
Hello Monkey540!!! I just received three of your parts from Shapeways (Magazine, Barrel and Thumb Safety Switch) and I must say they look GREAT!!!!!!!!!! I had them printed in Polished White Plastic and the detail on them is just Incredible. I especially like your barrel design and I can't wait to get the rest of the parts printed. One note though. When I uploaded the FRONT RECEIVER into the system I got a warning about part thinness. It seems that the Shapeways Auto-System doesn't like your detail rivets. I get the impression that the rivets may not be of sufficient strength to survive the polishing process (which I sort of find hard to believe). So should I be worried??? Thanks for any help you can provide!!!!
 
Hello Monkey540!!! I just received three of your parts from Shapeways (Magazine, Barrel and Thumb Safety Switch) and I must say they look GREAT!!!!!!!!!! I had them printed in Polished White Plastic and the detail on them is just Incredible. I especially like your barrel design and I can't wait to get the rest of the parts printed. One note though. When I uploaded the FRONT RECEIVER into the system I got a warning about part thinness. It seems that the Shapeways Auto-System doesn't like your detail rivets. I get the impression that the rivets may not be of sufficient strength to survive the polishing process (which I sort of find hard to believe). So should I be worried??? Thanks for any help you can provide!!!!

I looked at the model in shapeways and the issue is not the rivets, It's the faux set screws. and likely what will happen is it will smoosh it a bit. By which I mean there may be a bit of fill between the hole opening, and the "set screw". You will likely be able to fix it with a very small file or knife to bring back the details. Overall, this is a common error I get from shapeways, but often, unless you are looking at the piece 2" from your face, you don't even notice. I'd print it as is, cause their automated program tends to make fills that look like weld blobs.

In WSF you should be fine, if it were a metal print we would have an issue. BTW how come you are getting Polished? I got that one, but I really didn't notice the difference much between it and regular WSF. Plus I found it dulled the features a bit, I only use polished now if I want something that is coloured. WSF feels a tad chalky at first, but I've personally found the detail to be better.
 
Hello and thanks for the quick reply. I always thought that polished was the preferable method given the finish but I didn't think of what it could do to details. So if as you seem to indicate unpolished is the better way to go I'll try that for the rest of the parts. Heck... it is "cheaper"!!!

I looked at the model in shapeways and the issue is not the rivets, It's the faux set screws. and likely what will happen is it will smoosh it a bit. By which I mean there may be a bit of fill between the hole opening, and the "set screw". You will likely be able to fix it with a very small file or knife to bring back the details. Overall, this is a common error I get from shapeways, but often, unless you are looking at the piece 2" from your face, you don't even notice. I'd print it as is, cause their automated program tends to make fills that look like weld blobs.

In WSF you should be fine, if it were a metal print we would have an issue. BTW how come you are getting Polished? I got that one, but I really didn't notice the difference much between it and regular WSF. Plus I found it dulled the features a bit, I only use polished now if I want something that is coloured. WSF feels a tad chalky at first, but I've personally found the detail to be better.
 
Last edited:
If you intend to do sanding to the part anyways, it's much better to get the Unpolished, also, I've found that polished sometimes makes the surface harder to sand if you wanted to smooth something out. The only difference I've found is that it is a bit smoother, but you can achieve it with light sanding as well.
 
Hey everyone, I know I've been quiet for a while. So I still haven't picked up a decent walkie for a price I'm comfortable with, and I don't know when I'll find one I'm looking for on my budget.


In the meantime, I did up the electronics for 1 PAL, just with a push button switch I had lying around and a small resistor and a 5 mm LED.
I soldered the circuit, and shrinkwrapped it. and made a plexiglass piece to hold the switch. Then hot glued the plexi in place, this is how it turned out.


IMG_0655_zpszv4faow9.jpg

IMG_0656_zpsr96qz1jq.jpg


I'm just waiting to find a mini battery that I can use.


Here's the look of the PAL all "finished"


IMG_0653_zpsklyrnpow.jpg

IMG_0652_zpsarulcbnd.jpg

IMG_0651_zpszzy1gzoq.jpg

IMG_0654_zpsz25no7co.jpg

IMG_0650_zpsk3f6wi0q.jpg


Now here's the giving part, I've posted my finished file on Thingiverse, enjoy:


http://www.thingiverse.com/thing:1601260


Note: The Jayne's Pistol is basically done, I just need the grips detailed.
 
Oh man! You keep draggin' me back in with this stuff. Another great set of designs. Are these printed by an outside service or your own? I do not think I ever asked, but what printer/service are you using (Im guess a home printer by the print lines that appear in pictures). My Afinia h480 recently took a dump on me and now I am in the market for something shiny. Your print quality is quite good; figured I'd ask.
 
Oh man! You keep draggin' me back in with this stuff. Another great set of designs. Are these printed by an outside service or your own? I do not think I ever asked, but what printer/service are you using (Im guess a home printer by the print lines that appear in pictures). My Afinia h480 recently took a dump on me and now I am in the market for something shiny. Your print quality is quite good; figured I'd ask.

I use 3D hubs for most my painting, the person I use has a: Custom dual head printers.
According to his 3D hubs profile, sorry I don't have more info.

Very nice! Please post photos as you assemble, paint and weather the prop.

Here's a couple of pics during the first bit of assembly:
IMG_0857_zpss5wg3xmu.jpg

IMG_0858_zpsyg9rzk3n.jpg

IMG_0859_zpsbuj9kji8.jpg

IMG_0860_zpsucwg5o4b.jpg

IMG_0861_zpsnqlm2zt9.jpg

IMG_0862_zps2hpkghei.jpg

http://i1361.photobucket.com/albums/r664/sk8r540/Jaynes%20Pistol/3D%20Printed%20Pistol/IMG_0863_zps9xlrrnfi.jpg[/mg]
[ATTACH=full]892831[/ATTACH]

And compared to my converted Denix:
[ATTACH=full]892832[/ATTACH]

Now I'm doing the base painting.
 

Attachments

  • IMG_0864_zpsodb38m8k.jpg
    IMG_0864_zpsodb38m8k.jpg
    345.4 KB · Views: 41
  • IMG_0866_zpsxckcijt6.jpg
    IMG_0866_zpsxckcijt6.jpg
    435.6 KB · Views: 34
Last edited by a moderator:
That is amazing work man! I've tried to obtain a Denix LeMat to build a Boo here in Australia and would you believe I need to obtain a firearms license to own one? Ridiculous :rolleyes
I've started to model one in Autodesk Inventor, but I'm nowhere near finished. Again, Kudos!
 
That is amazing work man! I've tried to obtain a Denix LeMat to build a Boo here in Australia and would you believe I need to obtain a firearms license to own one? Ridiculous :rolleyes
I've started to model one in Autodesk Inventor, but I'm nowhere near finished. Again, Kudos!

Thank you very much, that is crazy for a non-firing replica.

I'll save you the headache, I will release these files when I've had them printed. While is is a close facsimily of Jayne's Boo, it is not 100% accurate, I had to assume dimensions here and there, and didn't know about a couple of details when modelled. But it sure is a nice looking piece.

That would be amazing! I had collected a ton of reference photos and had to assume dimensions aswell, so that doesn't bother me :) It really is a nice looking piece - Thanks for sharing all your hard work!
 
That would be amazing! I had collected a ton of reference photos and had to assume dimensions aswell, so that doesn't bother me :) It really is a nice looking piece - Thanks for sharing all your hard work!

Since I have a denix LeMat, I had a good basis for the dimensions, but the rest came from estimating on reference photos.
 
Some more paint and assembly:


IMG_0867_zpsvr3fdp2j.jpg

IMG_0868_zpsk39wjdob.jpg

IMG_0869_zpsheso7xq8.jpg

IMG_0870_zps863gkbdh.jpg

IMG_0871_zpsagiikvkj.jpg


Added Rub N' Buff to the bracket to make it appear brass:
IMG_0872_zpsrlywxqep.jpg


IMG_0873_zps1v6w7vej.jpg

IMG_0874_zpsnu3qiz8v.jpg


Compared to my Denix:
IMG_0875_zpsxsmzack7.jpg


And I got the grips printed, they are not an exact match, but I'm super happy with the result:
IMG_0876_zps42evsr7r.jpg

IMG_0877_zpsdnbh9ot4.jpg

IMG_0878_zps0aojpc0q.jpg


Grips are being painted, almost fully assembled :D
 
This thread is more than 5 years old.

Your message may be considered spam for the following reasons:

  1. This thread hasn't been active in some time. A new post in this thread might not contribute constructively to this discussion after so long.
If you wish to reply despite these issues, check the box below before replying.
Be aware that malicious compliance may result in more severe penalties.
Back
Top