Sinned's Hatbox Ghost - 2015 Halloween Child Costume Contest Entry

Sinned

Well-Known Member
RPF PREMIUM MEMBER
My 8-year-old has decided he wants to be the Hatbox Ghost this year, so it's off to the races, trying to put a costume together in time. We're going for the modern rendition of the character, and recent add to the Haunted Mansion itself.

00-HatboxGhost-Source_zps4r5uihbj.jpg

For his face, I've started sculpting a mask, but not far enough along to be recognizable yet. I'll be posting that progress in the Sculpture forum, at some point. The goal here will be to cast two copies of it: one to be worn, and the other to place in the hatbox.

All the other pieces need to be either purchased, or fabricated as well:


  • Gloves -- planning to buy some glow-in-the-dark bone gloves
  • Trench Coat -- hope to find one that can be used
  • Pants -- probably won't do anything special here... skinny, black pants
  • Cape -- will sew
  • Cane -- sculpted
  • Hat -- foam
  • Hatbox -- foam and PETG
  • Shoes -- foam

I'm doing a lot of this for the first time, so hopefully some folks can jump in with pointers along the way!
 
Last edited:
Re: Hatbox Ghost - Haunted Mansion - WIP

Progress will be a bit manic, as I'm trying to work on a lot of things in parallel.

First thing to start is the cane. It's a little hard to make out the shape of the thing from the available source images, so I guessed a bit. The original design looks like the cane is bent at the top, to form a handle, but the modern design looks more straight, with a knobby bit at the top, so I went with that.

Started with a dowel, cut to cane length, for an 8-year-old. I tapered the bottom a bit on the belt sander, but it probably wasn't all that necessary.

HatboxGhost-Cane-01_zpsv3xmndhg.jpg

This was covered with Free-Form Air, from Smooth-On. That stuff is really light, so makes it perfect for a kid (or anyone else, really) to carry around. It's a little hard to work with for sculpting anything but basic forms, and is really sticky. But smooths well, using just water. I just slapped a bunch on the cane, and squished it around until I was happy with the look, also trying to keep the lower portion thinner, and more plain, and then getting thicker and crazier towards the top.

After letting it cure for a day, it was sanded extensively with both 220 paper, and abrasive mesh wheels on the Dremel. That took a bit of patience, but turned out well. Hockey puck, for scale.

HatboxGhost-Cane-02_zps4jeay0cy.jpg

An eyelet was put in the top, so it could be hung to dry, after painting. First was several coats of black primer. (3M Bondo Hotrod Black Filler Primer)

HatboxGhost-Cane-03_zpsewpnumn0.jpg HatboxGhost-Cane-04_zpsalprlbeb.jpg

Next a base coat of dark brown. I chose to use some camouflage paint... for no particular reason, other than it was a dark brown. The rest of the paint will be done by hand, using acrylics.

HatboxGhost-Cane-05_zpstjnijhqm.jpg
 
Last edited:
Re: Hatbox Ghost - Haunted Mansion - WIP

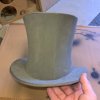
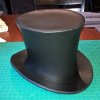
Looking around for a good top hat pattern was fairly unsuccessful, but I did find a great Flared Top Hat, by Chris Huebert. The pattern is sized for adults, so I printed it, then copied it at 90% on the copy machine.

To help with weight, I made the hat with 1/4" foam. The pattern calls for 8mm (7/16"), but my local supplier doesn't stock that thickness, and 1/2" looked like too much. Honestly, I think 1/4" is better anyway.

Pieces were traced on the foam, and then cut out with a scalpel.

HatboxGhost-Hat-01_zpsztrz1pxv.jpg HatboxGhost-Hat-02_zpsuonygc5v.jpg

I thought the scalpel would hold an edge longer than X-Acto, but that didn't turn out to be the case. Foam is murder on both. However, using the scalpel, I thought it was a little easier to keep a good vertical edge to my cuts.

Assembly of the hat was really simple, and I didn't take any progress pictures. Chris explains the process pretty well, in his YouTube video: https://www.youtube.com/watch?v=RBD3s2o1X7A

I used contact cement, rather than hot glue, because, well, I have a respirator, and it does a much better job. In my case, Duall #88. No easier to come by than Barge, but the can comes with an integrated brush, so I like it better.

Once everything had dried for a little while, I went over all the seams, and edges, with 220 sandpaper. This removed any cut marks, hard edges, and evened out spots where the edges didn't quite match up. I could have taken it a bit further, but just fixed the worst spots. The lower half of the hat will be wrapped in a cloth band, so I didn't focus on that much.

HatboxGhost-Hat-03_zpsthshursy.jpg HatboxGhost-Hat-04_zpsa3wcm4us.jpg

For the next step: Plasti Dip. I weighed my options for sealing the foam (Epsilon, Modge Podge, etc.), but decided Plasti Dip would be best for this part. I want it to stay flexible a bit.

Before laying down the Plasti Dip, I went over the entire hat with a heat gun, set on 950 or so, just to even out the texture, and knock down any fuzzy parts.

The hat took a full can of the Plasti Dip. The first two coats were put on very light, allowing 20 minutes dry time between. Then 3 or 4 additional coats, a good deal thicker, allowing 45 - 60 minutes between.

You can still see the seams, but I'm happy enough with it.

HatboxGhost-Hat-06_zpsjg8nhker.jpg

I'm planning on brushing on some acrylics to make it a little less boring, but besides that, the cloth band, and glow paint, this thing is done.

*** Note: I sized the hat based on the brim opening, which actually resulted in the hat being too small once assembled. So I'm likely going to have to make the hat again, a little bigger. The bottom part of the flare makes the hat hard to get all the way on. Keep that in mind, if you follow his plans as well. He does mention that the sizes fit a little small, but doesn't mention the flared bottom as being the problem.
 
Last edited:
Re: Hatbox Ghost - Haunted Mansion - WIP

Can't have a hat without a hat box, so that's up next. I'm completely making this up as I go, but a few key points:

It needs to be large enough to accommodate a copy of the mask, have a clear window in front, and also an area in the back to hold candy, as this will double as the Treat Bag. It'll also have some LED lights in it, to light up the mask, when desired, so I'm building in a battery compartment in the bottom.

The top and bottom will be made with 1/2" foam. I'll probably get some thinner fun foam (or whatever they call it at the craft store), to do the border on top, and bottom.

I'll use 1/4" to make the outside, as well as divide the inside of the box into a front and back. The back part will be for candy.

Planning on making the window in front out of .040 PETG.

The handle will probably also be foam.

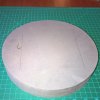
Starting out, the top and bottom were cut. The top piece is 12" in diameter, and the bottom is 10". I'm not sure what the real measurements are, but these seemed to be about the maximum I could reasonably go, and still have a kid be able to carry it.

HatboxGhost-Hatbox-01_zpsyua42doa.jpg

The bottom of the box is pretty thick, so I cut three of the bottom pieces, and they'll get glued together with Duall. But, before that, the battery compartment had to be cut. I re-purposed the middle, which was cut out of the round pattern, to make a pattern for the battery compartment. It's much larger than it needs to be, for no particular reason.

HatboxGhost-Hatbox-06_zps41purutx.jpg HatboxGhost-Hatbox-02_zpsdz9ktx3b.jpg


After gluing all three layers, I ran the edge against the belt sander, to even everything out. Yes, I launched it across my garage a few times. Have to be really careful, it catches easily!

The "cover" fits in pretty snug, but I'll be adding some magnets, to make sure it doesn't go anywhere.

HatboxGhost-Hatbox-03_zpssjrpfodr.jpg HatboxGhost-Hatbox-04_zpshkruqana.jpg

So, now the dilemma: how to make the sides! I'm still not sure how that's going to work. But here's how the top and bottom will kind of look. It looks a little weird here, the top isn't that much bigger than the bottom.

HatboxGhost-Hatbox-05_zpsgcw4ztfy.jpg
 
Last edited:
Re: Hatbox Ghost - Haunted Mansion - WIP

A few questions, if anyone happens along, before I make more progress:

I'm just not sure how to make the sides of the hatbox, and get the foam to work properly, at the proper angle. And also incorporate the plastic window, appropriately curved as well. Any thoughts?

Also...Paint. I'm back and forth on how I want to handle all this. From the pictures, it looks like the character, himself, glows standard glow-in-the-dark green, and the rest more of a blue.

Thoughts on best glowing paint to use, for both different colors?

I've been reading up a lot on glow paints, and I've found some that looks like it works well, but everyone says it has to go on pretty thick, and I'm not sure that'll give the look I want then. Also, what's the best way to apply it to the clothing?
 
Last edited:
Re: Hatbox Ghost - Haunted Mansion - WIP

Wow! This is great work! I've always wanted to make a tophat, but my results have been much much less than epic. :) Keep up the great work!
 
Re: Hatbox Ghost - Haunted Mansion - WIP

Thanks, Grimwood!

All credit to the pattern I used for the hat; it made things really easy. :) Best $6 I've spent in a while.
 
Last edited by a moderator:
Re: Hatbox Ghost - Haunted Mansion - WIP

A little more progress on the hatbox. Decided to make the lid portion a double layer as well, so that there could be inserts to cover the holes. More patterns!

HatboxGhost-Hatbox-07_zpsfsyke3xa.jpg

The the existing top piece was cut to have larger holes, and then a second top piece cut, with smaller holes. These will give decent access to the inside of the hatbox. The front section just needs to open enough to allow setting in the hatbox face mask, then the cover will just sit in place. I'll have to do something with the rear cover, to make it a little easier to remove, so it can be used for candy access.

HatboxGhost-Hatbox-08_zpskopdoff5.jpg

I thought I'd keep the inserts in the top piece when I glued he two halves together, to help it keep its shape, but it was really hard to see how things were positioned, so I actually removed them, before putting the pieces together.

HatboxGhost-Hatbox-09_zpswo4l7k88.jpg

Once they were set in place, the assembly took a ride on the belt sander. This does a really good job of evening out those edges. I didn't catch some of the deeper parts, but for the most part, the edges are about as good as I could ask. They're going to be covered with a trim piece anyway.

And yes, the sander played Frisbee, several times, with this one as well. Arrrg!

HatboxGhost-Hatbox-10_zpsvrpwmtrq.jpg HatboxGhost-Hatbox-11_zpspohbgwp8.jpg

One thing I started worrying about last night is, how to travel with this thing?
We're taking it to Disney in October, and it definitely won't fit in our suitcase.
 
Last edited:
Re: Hatbox Ghost - Haunted Mansion - WIP

Ship it ahead of you? You can deliver it to whatever hotel you're staying at. Call them and ask if they offer a hold service.

Looking great!
 
Re: Hatbox Ghost Costume - Haunted Mansion - WIP

Jumped back over to the cane last night, to make it pop a bit.

The starting point was from the Camouflage Brown base, since I didn't post a picture of that before.

HatboxGhost-Cane-06_zps2ierqyis.jpg

Red/Blue/Yellow were mixed to get a lighter, earthy brown, which was a little more than dry-brushed on. More of a moist-brush, to cover most of the darker color, except in the deepest recesses.

HatboxGhost-Cane-07_zpsebezg0xf.jpg

I mixed up quite a bit of the first color, in order to use it through the whole process. So, using the first color, some yellow was added, to lighten it up just a bit. Again, slightly more of a wet-brush, than dry-brush, went over most of it again.

HatboxGhost-Cane-08_zpsu9jmq6rj.jpg

Using the same paint, white was mixed in, to lighten it considerably. This time, going over lightly, with a dryer brush.

HatboxGhost-Cane-09_zpssezxi8rg.jpg

Finally, one more time, same paint, add more white, and go over the highest points. Flash makes it look much brighter than it really is, so a picture with, and without:

HatboxGhost-Cane-10_zpszvtbpw0o.jpg HatboxGhost-Cane-11_zpsgo2y3f0a.jpg

I do think I took it slightly too far, but that's okay, because I'll go back tonight, and knock it back down some with washes.

Doing it again, I think I would have gone a more blue/brown, to wind up with a blue/gray, more sun-bleached look. As it is here, I think I effectively recreated a Real Fake Wood look. haha

After washes are done, I'm contemplating different methods of adding glow-in-the-dark effect to it. I'm not happy with most of the paints, so I think I might try mixing Glow-Worm in some Smooth-Cast 325, and brushing it over the high points. Then coming back and spraying the whole thing with Flat Clear, to eliminate the "resin shine".

Thoughts on that approach?
 
Re: Hatbox Ghost Costume - Haunted Mansion - WIP

Back with a glow-in-the-dark substance test. I tried 5 different products, and there are definitely some things to think about here.

Left to right: SolarColorDust (violet), Glow Worm (blue-green), Glow Inc. (pure blue), Glow Inc. (ultra green), Rust-Oleum

HatboxGhost-Supplies-04_zpsddp6f8qd.jpg

SolarColorDust
Mixed 1:1:1 with smooth-cast 325
This is a violet color, so a bit dim to begin with, but it's a non-starter... it just doesn't work.

Glow Worm
Mixed 1:1:1 with smooth-cast 325
I wish it wasn't so white with the application, but it works incredibly well

Glow Inc. (blue)
This is a pre-mixed paint
It dries relatively clear, but doesn't glow very well
The right side of this stripe has 2 coats

Glow Inc. (green)
This is a pre-mixed paint
It dries relatively clear, and gives Glow Worm a run for its money
The right side of this stripe has 2 coats

Rust-Oleum
This is a pre-mixed paint
It dries relatively clear, and glows a bit
The right side of this stripe has 2 coats


Of course, all useless without the glow test results. None of them really showed up with less than a 1 second exposure.

4 second exposure
HatboxGhost-Supplies-05_zpsaxf0isww.jpg

10 second exposure
HatboxGhost-Supplies-06_zpsesxtoft6.jpg


Glow Worm clearly wins for glow. But it isn't as "blue" as I'd hoped. It is also quite visible, when the resin cures. This might be alleviated by lowering the mix ratio, maybe 1:1:.5

I need both blue, and green. And the Glow Inc. "green" certainly works for green.

Really wish the Glow Inc. "blue" worked better, because it really does have a good blue tint to it. Just not very bright, which I understand comes with that color, but still a bit disappointing.
I might try adding a few more coats, to see if it helps.
 
Re: Hatbox Ghost Costume - Haunted Mansion - WIP

Back to the hatbox.

Thinking more on how the side of the box will attach, and wrap around, it became clear I needed one more set of patterns for the top and bottom parts. These need to be 1/4" smaller (radius) than the regular top and bottom pieces. This will allow the side piece to sit somewhat even to the top and bottom.

HatboxGhost-Hatbox-12_zpsv5dldrt1.jpg HatboxGhost-Hatbox-13_zpshi6vg4y6.jpg HatboxGhost-Hatbox-18_zpsv0rd5efo.jpg

Next, adding in a couple of magnets for the bottom compartment cover (somebody cue ICP). Holes were "cut" into the pieces using a Dremel, with grinding stone bit. I didn't take a picture of the one I used, but it had a bit of a recess in the top, which caused the middle of the hole to not grind down. Looking around a bit more, I found another one, which didn't have the recess. It still didn't get everything, but did a better job. I finally scraped out some of the final excess, with an x-acto knife. Magnets were secured in place with some 5 minute epoxy. They work great!

HatboxGhost-Hatbox-14_zpsqdhgdpkj.jpg HatboxGhost-Hatbox-15_zpsra2dikmy.jpg HatboxGhost-Hatbox-16_zpsn3rznkdw.jpg HatboxGhost-Hatbox-17_zpsrtjz59m5.jpg


NOW FOR SOME SERIOUS CRAZY...

...getting the correct piece made for the side.

At first I thought I could take the circumference of the top, and the circumference of the bottom, draw a trapezoid, and cut it out. Nope. That won't produce the correct shape. It actually has to be a section of a large circle. So a cone shape, unrolled. A little more difficult than I thought. But I found a good source that explained the math. I won't recreate it here, but if interested: http://mathcentral.uregina.ca/QQ/database/QQ.09.05/nick1.html

Using the information there, I worked through the math to figure out the measurements, based on my numbers.
Top diameter: 12"
Bottom diameter: 10"
Desired height of the side piece (measured on angle): 9.5"

Given all that, I found I needed:
2 concentric circles, one with a 57" radius, and one with a 47.5" radius
And then of that, I only needed a small section of it

So, I laid out about as much paper as I thought I'd need, and fetched a giant compass. I drew as much of the circles as my paper would allow, and then cut out a large portion of it. This was wrapped around the top and bottom of the hatbox, to get an approximate length needed. This was transferred to 1/4" foam, and cut out.

HatboxGhost-Hatbox-19_zpssiepbmnu.jpg HatboxGhost-Hatbox-20_zpsjczqtf7r.jpg HatboxGhost-Hatbox-21_zps0m0jvvdw.jpg

Shew! And it actually fit just about right.
 
Re: Hatbox Ghost Costume - Haunted Mansion - WIP

Loving this build. I think the Glow Worm gives a great blue tint and is similar to both the ride and the artwork I've seen.
 
Re: Hatbox Ghost Costume - Haunted Mansion - WIP

Ack, sorry, missed some replies. Thanks guys! Coming along slow, but sure. Should have some more updates later this week. I'm definitely going with the Glow Worm at this point. I used it for another project (Evil Queen Poison Apple), and it's perfect.

Current update, I finally finished the sculpture for the mask, and head in the hatbox itself. One will be cast with Glow Worm Green, and the other with either Glow Worm Blue, or some UV reactive stuff. Depends on if I will have time to put electronics in the hatbox. My thought is, I can put in UV LEDs, and then press a button, to make him show up.

For the sculpture work: http://www.therpf.com/showthread.php?t=247390&p=3771189&viewfull=1#post3771189
 
Re: Hatbox Ghost Costume - Haunted Mansion - WIP

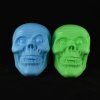
Hatbox Ghost face mold, and trial castings done. 5 different versions have been cast up, each with a different glow additive, all using Smooth-Cast 65D.

First batch is what I'll be choosing from, as they're going to work the best.

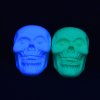
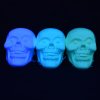
Left to right: Cryptolyte UV Glow Additive, Glow Worm - Blue, Glow Worm - Green

First picture - normal light
Second picture - UV light
Third picture - no light, 4 second exposure

I really like how the Cryptolyte looks. It's a great shade of white in normal light, and then glows a cool blue, under UV light. However it doesn't glow at all on it's own. This actually works well for the face which goes in the hatbox. It can have some UV lights pointed at it, and then a switch can be turned on to make it appear/disappear. Could use the same for the mask as well, but I'm not sure it's a good idea to have a bunch of UV lights pointed at your face(?). edit- just read up on it a bit, definitely not something that should be pointed at your eyes often.

For the Glow Worm versions, I think I like the blue the best. Kind of a bummer, since I bought way more of the green powder, than blue.

HatboxGhost-sculpt-40_zpswpip2y5z.jpg HatboxGhost-sculpt-41_zpsawbdcbsb.jpg HatboxGhost-sculpt-42_zpseegbmgtx.jpg

Second batch were a neat test, but I don't think I'll use either of them for the costume. These are again 65D, but this time using Ignite Fluorescent Color Pigments.

Left: Blue
Right: Green

First picture - normal light
Second picture - UV light

These don't glow on their own, so no picture without light; it'd just be black. :)

Pretty neat effect under UV light, but their color is way to strong under normal light.

HatboxGhost-sculpt-43_zps9hayqbjp.jpg HatboxGhost-sculpt-44_zpspwkt9jpl.jpg
 
Last edited:
Re: Hatbox Ghost Costume - Haunted Mansion - WIP
Some really good info in all these UV tests you've been doing! Really looking forward to seeing how this costume turns out!
 
Re: Hatbox Ghost Costume - Haunted Mansion - WIP

Back to the cane, and time to put the glow paint tests to work.

First, here's the final base paint of the cane. It barely fit in my lightbox, so the angle isn't ideal, but gives an idea.

HatboxGhost-Cane-05_zpsfzdha9gt.jpg

Better picture of the detail

HatboxGhost-Cane-07_zpsfs1vevla.jpg

Last night, it was time for final the final effect, which lended itself to painting by black light. Fun!

For the paint, I rolled my own, using a bunch of different stuff:

1 fl oz. Liquitex gloss medium/varnish
1/2 fl oz. GlowWorm blue powder
1/4 fl oz. Liquitex airbrush medium (to thin a bit)
2 drops of Cryptolyte UV glow.

HatboxGhost-Cane-06_zpsioxt8u0q.jpg

The result of this step left the cane with a pretty rough texture, due to the glow powder. If you sand it, it'll ruin the glow effect, so just giving it several coats of clear instead, to help knock that back a little bit.

I also ended up brushing on a bit much in a few spots, so will give everything a final brown wash, when all done.
 
This thread is more than 7 years old.

Your message may be considered spam for the following reasons:

  1. This thread hasn't been active in some time. A new post in this thread might not contribute constructively to this discussion after so long.
If you wish to reply despite these issues, check the box below before replying.
Be aware that malicious compliance may result in more severe penalties.
Back
Top