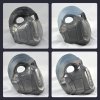
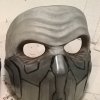
Loki from SMITE - Infiltrator Skin Mask Build

Sinned

Well-Known Member
RPF PREMIUM MEMBER
I thought about doing this for the August contest, but half of the piece wasn't modeled by me, so decided best to not use it.

This was a fairly quick "mixed media" project to create a Loki mask, based on the Infiltrator Skin, from the game SMITE. There aren't many good reference pictures available for the character, so a good portion of it is imagined.

loki-reference_zpsodrymabe.png

The lower half of his mask is a machined metal armor. This could have been sculpted, but in this instance, I thought it really made more sense to have separate pieces made for real, and then added to a larger sculpture. I'm not so awesome at 3D modeling, so digging into RPF sources, I had sauer33 model the lower pieces for me (and they turned out awesome!). I scaled them as necessary, and then printed them. From there, they received several coats of XTC-3D (from Smooth-On), with a good bit of sanding between. Then a couple of coats of primer (more sanding), and finished with Krylon satin clear.

For more details on sauer33's services: http://www.therpf.com/showthread.php?t=242939

Loki-Smite-01_zpssqobapu5.jpg

The full sculpture was started by putting down some support clay, and then arranging all the armor pieces. This actually took a LOT more doing than I thought it would, but the end result is perfect.
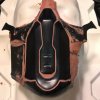
Loki-Smite-06_zpshemuhozv.jpg Loki-Smite-08_zpstz9qinvn.jpg Loki-Smite-12_zps8ytwsuhh.jpg

The overall features are a bit exaggerated, mostly just because I liked them that way. But also, I was hoping it would help them stand out some, once painted. It is getting a very pale flesh look, which I thought might hide more subtle features. Building on my experience from The Silence sculpt, I worked at skin texture a little more with this one. Still learning, but I really liked how it turned out. Not too extreme, almost "just enough". Also threw in some vein work for the first time. Not perfect, but it worked.

Loki-Smite-42_zpsp0w4u7kz.jpg Loki-Smite-47_zpsf1sgzr2f.jpg Loki-Smite-44_zpsb0ypsfur.jpg

Up next, molding.
 
Last edited by a moderator:
I planned to use Rebound 25 for this, but when I went and grabbed my buckets... they were empty. Whoops! This is on a tight schedule, so luckily I had some Mold Max Stroke on hand. I used that for my Twisty mask, and was less than pleased with the result-- some nasty surface bubbles. This time around, I wised up, and hit the sculpture with compressed air, after laying down the first coat. You can see it in the first picture, look pretty "blown around". This ended up working really well. I did still have a couple of surface bubbles, but nothing like before.

Registration keys were made with a key form from BITY, and the round ones were done in a plastic paint tray thing.

Loki-Smite-49_zpsrgh7yiob.jpg Loki-Smite-51_zpscphbxifv.jpg

Turns out I really didn't need a 2-part mother mold, but better safe than sorry! Two pieces of plywood cut to match the profile, and sandwiched together. Those were secured to the silicone with hot glue, and then gaps filled with Van Aken clay. Then the shell made with tinted (for fun) Plasti-Paste. I WAY over-estimated how much I'd need, so wasted quite a bit. :(

Loki-Smite-52_zpsklgt70tm.jpg Loki-Smite-53_zpskdbizvkz.jpg Loki-Smite-55_zpsfnguzdxu.jpg

Aside from the couple of bubbles, which were luckily in obscure areas, everything came out really well, so was time for a test cast.

Loki-Smite-56_zps4qyso1bw.jpg

First cast is just 65D, but the real thing will be a combination of 325, and 65D.

Loki-Smite-58_zpshxqmd8ch.jpg Loki-Smite-59_zpsyted18bd.jpg Loki-Smite-60_zpsmau4v6h1.jpg

Next up, casting for real, and paint!
 
Last edited:
Rather than just painting the armor on the character, I really wanted it to be closer to real metal. You can definitely achieve the same look with paint alone, but you can't really replicate the "cool to the touch" feel that real metal provides. So, enter cold-casting.

I don't have much experience with the technique, especially with something which is being slush-cast, so it took a couple of attempts to get right. I'd still probably change a few things, doing it again.

Loki-Smite-61_zpsymvgpmgx.jpg

First attempt:
Dusted the mold with aluminum powder, and then slushed in Smooth-Cast 325.
Followed this with 3 more layers of 325, tinting the last black
This worked okay, and the metal polished up well, but I had some spots where there was too much powder, which left craters on the cast. I also scrubbed through the dusting layer pretty easily, which wasn't so great.

Second attempt:
Did NOT dust the mold with aluminum powder, and slushed in Smooth-Cast 325, mixed with aluminum powder.
Followed this with 3 layers of 65D
This actually probably would have worked out okay, had I mixed in enough aluminum. But I didn't. This didn't polish up at all. But, the cast is good, so I can always paint it. And I actually did use it as a paint tester, for the skin.

Third attempt:
I went back to dusting the mold first, but went really heavy-handed with it...forgetting my first attempt. Slushed in Smooth-Cast 325, mixed with a little aluminum powder.
Followed with 3 layers of 65D.
This was the worst result of all, as the cratering effect was massive. Polished up nice though. :)

Fourth attempt:
Dusted the mold again, but was very careful to ensure there was just the thinnest layer of powder all around. Almost to the point I was worried I had brushed too much of it off. Then slushed in a mixture of Smooth-Cast 325, that was a 1:1:1 mix (A:B:Aluminum).
Followed with 3 layers of 65D again.
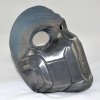
This worked beautifully, and polished up very well.

First, lightly hit the whole thing with 0000 steel wool, and then followed with a buff/polish using Mothers Mag & Aluminum polish.

Loki-Smite-62_zpsvo1unl2k.jpg
 
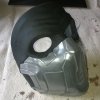
The metal part was masked off, and then the rest of the piece was wiped down with Prep All, and sprayed it with black primer (3M Bondo Hot Rod Black Filler Primer).

Loki-Smite-64_zps78cxblt0.jpg

For the paint, I wanted it to look very living dead. If that makes sense. Essentially just a very pale flesh. I'm not much of a painter, so searched around for some examples, and finally settled on this technique:

http://spikyratpack.blogspot.com/2014/02/pale-skin-tutorial.html

I started out intending to follow that fully, but based on how things went on my test mask, the miniature technique didn't translate that well to a larger piece. But it is an awesome overall method, though after the base color, I followed it fairly loosely.

So, base color was a mix of 5 Citadel color: Baneblade Brown, Cadian Fleshtone, Kislev Flesh, White Scar, Dawnstone (the colors have changed names, since the tutorial was written), thinned quite a bit with water, and applied in 2 layers.

Loki-Smite-65_zpsxwdacyxg.jpg Loki-Smite-68_zps94td5jgw.jpg

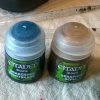
This was followed by several wash layers, using a mix of two Citadel shade colors, and I took it more to the blue side: Drakenhof Nightshade, Seraphim Sepia

Loki-Smite-69_zpszczz6mbk.jpg Loki-Smite-70_zpsgcca5g3g.jpg

After this, is where I really started to deviate, and didn't keep too good of track of what I was doing. But basically I lightened up the base color I used, and put on a very thin layer of that, and then drybrushed on some of the White Scar, and also Pallid Wych Flesh.

Following that, I switched to a couple of Tim Gore's Bloodline paints: Deep Bruise Purple and Code Blue.

The deep bruise purple was lightly brushed below the eyes, and then thinned considerably, and flecked across the skin.
The code blue color was thinned considerably, and flecked across the skin.

Finally, went back to the wash mixture, and darkened it up a little with the sepia color, and darkened all around the eyes, and covering as much of the purple as possible.

For the armor, simple black paint was brushed into the cracks, and allowed to dry.

Loki-Smite-71_zpsoj4ocm04.jpg

After the black dried, I went back with a Q-tip (actually, several) dipped in mineral spirits, and cleaned up the edges, as well as "erasing" a lot of it in the cracks themselves. Then, painted back over most of the exposed areas, in the cracks, with gray wash color. This gave it kind of a chipped up look.

The eyes were covered with a sheer black fabric, and orange LEDs placed behind. There is actually a third on the bridge of the nose, just above the armor, which gives some reflective light back on the skin. Difficult to see, except in a darker room though.

Loki-Smite-72_zpsqqadkr25.jpg
 
And, finally, the completed look!

Loki-Smite-73_zpsono3fzh4.jpg

I actually went back and did a little more work on the LEDs, painting the sides and back, so light doesn't shine in your eyes, but wasn't worth taking new pictures of that. :)
 
Holy !@#$%^&*&^%$#$%^ I don't even know what this is from, but the whole thing is impressive.

That cold casting looks GREAT! Thanks for sharing the technique. :thumbsup I really like your sculpt, and paint job. Awesome
 
Thank you, Bogleo! I'm definitely happy with how it all came out.

The cold casting stuff came from a lot of reading around I did (Volpin, etc.), but everything they had focused on solid pours, so it was interesting learning how it would do with slush-casting.
 
Last edited by a moderator:
Looks good and you've provided a lot of very useful information. Thank you for the detailed breakdown of your process.
 
This thread is more than 8 years old.

Your message may be considered spam for the following reasons:

  1. This thread hasn't been active in some time. A new post in this thread might not contribute constructively to this discussion after so long.
If you wish to reply despite these issues, check the box below before replying.
Be aware that malicious compliance may result in more severe penalties.
Back
Top