First Timer Tie Bomber Build

Big Dog

Active Member
Nearly a month ago I saw a Tested video of Norm interviewing swgeek about his SS Tie Bomber and his custom cutaway model that he was working on. The video blew my mind and immediately caught my interest for diving into the RPF and getting my hands dirty. So for the last month I have been doing my research and building up inventory of the sets that I will need to complete the job. Rafael Mateo Garcia's pdf drawings were a holy grail of information and have put me on the right path along with all of the reference photos I found from a few different people.

So far I have acquired these sets mostly on Ebay:
MPC Vader Tie Fighter
Tamiya 20mm Flakvierling38
Tamiya 20mm Flak38 MIT
Tamiya HANOMAG (2)
Tamiya Aircraft Carrier Junyo
Tamiya M3 Lee Tank
Tamiya British Field Gun
Tamiya 88mm GunFlak 36/37

It was only after I had bought the first two HANOMAG kits that I realized I should try and save myself some money and get some experience casting the few parts I would need duplicates of. So I am thinking for sets that need multiples like the Junyo, Leopold, and Karl that I will try my hand at casting. I'm sure since I am a first time builder this will not go as perfectly as I imagine it, but hopefully I can get some good results in the end. But now that I moved back down to school for the semester, I'm not sure how much progress I will be able to make in actual building, compared to just buying up kits online. So here's hoping I can share some progress this Fall and not have to wait until winter break!

Just yesterday I was looking into the armature and main body of the Tie Bomber when I had a few questions that I wasn't able to find already answered here. Have others just bought themselves some 2" outer diameter PVC piping and smoothly cut off equal 3.5" tubes? And secondly, is there a real measurement to how deep people carve the 12 rings near the front of the tubes? The carving seems substantial, but for someone who hasn't done it yet I have a hard time imagining how deep it could go. And any tips at all about intricacies in casting some of these tiny parts would be GREATLY appreciated as that seems to be the most technical thing I will be running into during this whole experience.
 
Best I know the rings were carved in on a lathe so who knows how deep they should be :)
I kinda cheated as I wasn't in the US and couldn't get 2" tube, so I used 50mm and it's a little smaller. So I used sheet styrene strips for the rings and glued them on. Then I pre scored some sheet and then wrapped the tube with the panel lines already carved in. I wasn't idea and not perfect, but I used where the kit parts go to cover over the joints. In the end you can't tell.

I also used a mix of styrene and resin parts. More styrene that I would if I hadn't already got many of the kits. A couple of pieces I purchased from other members here. If you go 'full Eaton' and make it all with the original kit parts, you'll need deep pockets. It's a deceptive little bugger and more complex than it appears, but well worth it in the end.
Not sure if it'll help but here's some pics: https://www.flickr.com/photos/lee_stringer/albums/72157638685031376

L
 
So after a few more months, I have gathered nearly all of the rest of the kits for the bomber. Thanks to swgeek's generosity, I was able to get some resin casts from him of the Saturn V parts, some wing extensions and a few other kit parts not seen here. All of the necessary Plastruct parts also arrived safely in the mail today. So at the moment I am only missing the correct Shinano part (in naivety I bought the retooled kit seen below) and the Airfix harrier part as well. I have a few more kits not shown but they are at home and not with me in my school apartment.

IMG_2163.JPG

My hope is to build most of this kit in the winter when I will get the chance to go home for a few weeks. I might see if I can figure out some dimensions of the middle armature to get milled in the tool room my family has at their business. And maybe get the long rod threaded there too (once I buy some aluminum :) ).
 
Thanks mucho, Big Dog; I did a search but it didn't come up (probably because I included Rafa's name in the search...)

Regards, Robert

update=====================

Wow! Crazy good drawings! I see what you mean!

Regards, Robert
 
Yeah I find most of what I want by being vague in the search bar. Now if only there were a thread I missed that details the armature dimensions...

I have a strong feeling there was a run of aluminum or plastic armatures at some point in the past that I missed and it has disappeared from that section now. Can't remember what specifically, but someone said something in specific to make me think so.
 
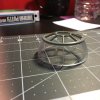
It's been slow rolling on this but finally an update on how it's been going. Buying all the kits was one thing, but as a first time modeller it was scary to start modifying or working with any of the pieces haha. So I started by cutting my 3.5" long ABS tubes.

bomber_tubes.png

I didn't do a perfectly clean job on the edges. I wish I had been able to use a miter saw, but I didn't have one so it was a slow and steady job for the Xacto saw blade. Second, I sanded down the hemisphere to make the dome for the cockpit window. Scribing the lines into the piece hasn't gone perfectly but I'm getting somewhere with it. (The window is just sitting on it not glued at the moment) I'm a bit more worried about the horizontal scribing I have to do on this hemisphere compared to the vertical scribing above that I've almost finished.

IMG_0385.JPG

And lastly, I gathered up most all of the pieces from the kits I have and placed it all in a shoe box to keep together as I keep working on things. I've also got a box of cast pieces from swgeek in this box which he generously provided me when I first joined the site as this model and his first Tested interview are what sparked my interest in the hobby!

IMG_0387.JPG
 
The ABS version of the dome you're using probably scribes better thank acrylic if you want to try that.

THAT ^^^ .. When I did my bomber, I remember someone giving me this tip:

For perfect scribed lines, buy the tapes that is used on those machined that would embed letters in hard/rigid tape. That tape contours well enough and is super easy to follow with the scriber. I did that and it went really well!

Someone here will know the name of that tape for sure!!
 
Thanks everyone for the tips! I will definitely look into getting the ABS version of the domes for a second try at them. It mentions they come in different materials in the description but might require a call to them to order the right piece. And great call using some of that thicker tape I will try and grab some this upcoming weekend! I tried using blue painters tape for this first time and the tape wasn't as rigid as it probably should have held up better against the scribe tool. Hopefully I can get some good work in this fall on getting the tubes worked on and making a dome I'm happy with.

One new question: What piece is added into this elipse cap? I feel like I knew (or thought I did) at one point but I'm not sure what goes in it now. Thanks so much everyone for the tips and interest!
IMG_4714.jpg
 
Tamiya King George 1/700.

I found a sheet from evergreen that I used to scratch mine.


This is coming from my phone, expect errors.
 
Last edited:
Thanks joberg! Hopefully things go fairly well for me even though it's my first model haha. I'm looking forward to continuing it and I enjoy getting one step closer to putting it all together!

What part is the transparant hemisphere. I cant seem to find the info anywhere.

Toxcedo, with some patience and use of the search menu, there is plenty of info to be found here on the site :) here you can find the post which names both of the front end covers that belong on the Bomber. I have a lot of fun searching through threads finding what I need. Of all the models I've looked for on this site, the bomber is easily the most comprehensively covered and detailed on here within a few simple threads.
 
This thread is more than 7 years old.

Your message may be considered spam for the following reasons:

  1. This thread hasn't been active in some time. A new post in this thread might not contribute constructively to this discussion after so long.
If you wish to reply despite these issues, check the box below before replying.
Be aware that malicious compliance may result in more severe penalties.
Back
Top