Hey there,
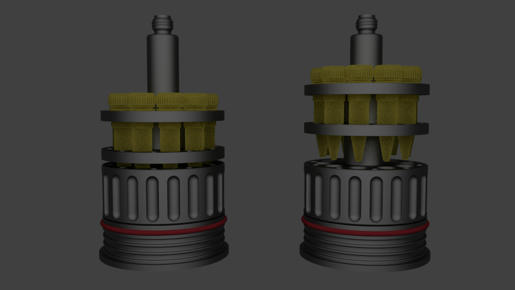
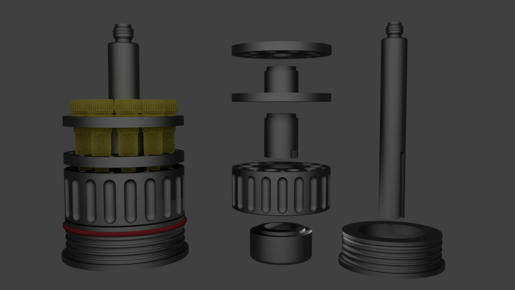
Had some time out of 'the office' recently, so I modeled up a JP cryocan interior as a proof-of concept for a couple of mechanicals I've been working on.... Thought I'd throw the print files up here for you printers out there that might want to give it a shot. I didn't go crazy on this, so while it might fit inside a cut Barbasol can, I'm making no guarantees. I've also not printed this yet myself; I was more interested in getting a printable locking system working, and cryocans have a very similar mechanism to what I need.
So, anyways, I'm attaching a zip with the print files and instructions if anyone with a printer would like to tackle one. You will need to make or buy a 3/4" compression spring (like those in some cheap flashlights) to make the mechanism pop up when unlocked, and their is also a groove for an O-ring if you'd like to add that detail. The zip file also includes print files for the embryo vials (one or ten), and an attached note on the spring and o-ring.
If anyone gives this a shot, please let me know how well the mechanism works, and if the tolerances need adjusting. It should all be fine, but I really don't trust ANYTHING until it's physical item; computers lie sometimes.")
http://www.mediafire.com/download/zobvw0yoas6lx2p/cryocan+exports.zip
(Just to be clear, these files are free to use... I only ask for feedback so I know stuff is working properly. If you're actually looking for the real deal and not just a 3d-printed novelty, then Rylo is your guy; snag one if you can. Thanks!)
Had some time out of 'the office' recently, so I modeled up a JP cryocan interior as a proof-of concept for a couple of mechanicals I've been working on.... Thought I'd throw the print files up here for you printers out there that might want to give it a shot. I didn't go crazy on this, so while it might fit inside a cut Barbasol can, I'm making no guarantees. I've also not printed this yet myself; I was more interested in getting a printable locking system working, and cryocans have a very similar mechanism to what I need.
So, anyways, I'm attaching a zip with the print files and instructions if anyone with a printer would like to tackle one. You will need to make or buy a 3/4" compression spring (like those in some cheap flashlights) to make the mechanism pop up when unlocked, and their is also a groove for an O-ring if you'd like to add that detail. The zip file also includes print files for the embryo vials (one or ten), and an attached note on the spring and o-ring.
If anyone gives this a shot, please let me know how well the mechanism works, and if the tolerances need adjusting. It should all be fine, but I really don't trust ANYTHING until it's physical item; computers lie sometimes.
http://www.mediafire.com/download/zobvw0yoas6lx2p/cryocan+exports.zip


(Just to be clear, these files are free to use... I only ask for feedback so I know stuff is working properly. If you're actually looking for the real deal and not just a 3d-printed novelty, then Rylo is your guy; snag one if you can. Thanks!)