ALIEN Ellen Ripley Costume Tutorial (Flight Suit, Shirt & EVA Flamethrower)

Re: ALIEN Ellen Ripley Flight Suit

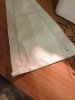
POCKET MEASUREMENTS (DAY 2)

After some brainstorming and messy note making...

P6qUA4C.jpg j3vZc9S.jpg

Here are the measurements I figured out. Most likely to NOT be 100% accurate but it’s the best I could do from working out by eye form my source material and more importantly, what looked best on my costume in relative to my size of person. At the end of the day, I thought if I’m wearing it, it needs to look right on me, rather than having the ‘correct’ size and it might end up looking far too large and out of proportion and even less ‘accurate’. So I think a point to take from here is that my measurements are what worked for me. I would suggest deciding for yourself in relative to your costume and person what your sizes your pockets should be. If my measurements are good for you too then that's fab! In fact, do let me know what you think on the sizes I made up! Also, it may take a wee while fiddling around with them to get the shape desired as I certainly did.

T8vDynD.jpg

Here's another hand-drawn sketch I made and referred to when I started my costume, pictured in a few posts before:

upsoIEw.jpg

T8vDynD.jpg


P6qUA4C.jpg


j3vZc9S.jpg


upsoIEw.jpg
 
Last edited by a moderator:
Re: ALIEN Ellen Ripley Flight Suit

You're right about the G-4B seen in the movie. Not a lot was done on that suit from the costume dept. Since Sigourney is quite tall, I'm sure they had the same size as mine (6"2)
But even then, your pant leg is just at your ankle...hence the high top shoes (Flyers) that completed the look.
The only G-4B that was transformed was for Ash: lacing on the sleeves were added for effect. Don't forget, this suit is in fact two in one. Inside you have another suit and pant legs with lacing to tighten and combat the G forces (specially the waist and legs).
 
Re: ALIEN Ellen Ripley Flight Suit

POCKETS (DAY 2 & 3)

And with the above measurements, here's some progress photographs of the pockets being made from the one metre of dense cotton twill I bought.

IMG_5316.JPG

Fabric comparison between the two. Not sure if you can see the difference in weight here...

IMG_5317.JPG

Over-edge stitching to prevent the fabric from fraying...

IMG_5319.JPG IMG_5320.JPG
IMG_5322.JPG IMG_5323.JPG

Working out for definite the pocket sizes and placement of the zips.
Pictures shown are of the THIGH pockets.

HOWEVER, having made one test pocket and placed it on the suit, I felt that the material I used wasn't quite appropriate:
- I couldn't get over the fact that it felt a little too heavy in comparison to the rest of the suit, and worried that if I were to have 6 of these extra pockets it might add a bit of weight
- Weight being a concern as it might make the suit baggy
- Weight also making it obvious that the pockets are a different material
- Density being a concern that it might not take the dye as well as the rest of the suit.

So in the end, I opted to use a lightweight calico instead that I had planned to use for a different project (a calico kimono).

IMG_5367.JPG IMG_5370.JPG IMG_5368.JPG IMG_5369.JPG

And I think it definitely works better than the cotton twill. Sure it's a bit on the light side, and may not be very good pockets that can hold a lot but I never did plan on using the pockets much in the first place, other than storing bits of paper (convention tickets, cards/money etc.). So in my opinion, I think it'll do just fine. You can see that it's a bit thin (the khaki of the jumpsuit shows through) but once this is dyed and sewn, it shouldn't be an issue. I'll probably just need to be aware of how much I store in these pockets.

IMG_5365.JPG

Working out the chest pocket placement in relation to the side panels and patches! You can see here the noticeable size difference of the Engineer Badge patch on the overall suit.
 
Re: ALIEN Ellen Ripley Flight Suit

POCKETS (DAY 2 & 3) CONT.

Confirming pocket placements and marking it out with heaps of masking tape:

IMG_5372.JPG IMG_5376.JPG IMG_5377.JPG IMG_5378.JPG

Finishing off all pockets:

IMG_5386.JPG IMG_5390.JPG IMG_5387.JPG IMG_5388.JPG

And onto the suit itself...!

IMG_5391.JPG

HOWEVER, at this point in time, I have only sewn the chest pockets, as I need to take in the trousers of the suit, and add the inner leg and extender zips; and therefore sewing the thigh and leg pockets now might risk them being in the wrong position after my nipping and tucking. So bear in mind to leave these pockets last after your legs are sorted otherwise you might have some seriously squeggy pockets!
 
Re: ALIEN Ellen Ripley Flight Suit

BACK LACING AND ZIP PANELS (DAY 3 & 4)

Writing in hindsight, I realise that I actually made this job a lot harder than I needed to. However, hindsight is a wonderful thing and I wouldn't have learned any of this if I didn't make this mistake! In any case, you can see this as an alternative method of doing the back lacing, or just a newbie's mistake!

At this point, I clearly didn't do enough research (most likely due to me trying to rush this project) as I wasn't aware that Ripley's flight suit was a basically unaltered US Anti-Gravity G-4B. And I most definitely was not aware that there were images of the back lacing in detail supplied on the Nostromo costume thread here on RPF!

g4b3.jpg img2224.jpg

So I had to pretty much guess from looking at this screen cap what the back lacing could be:

ripley_backnotes.jpg

My friend Neet suggested that from her previous corsetry experience, this could be achieved through making loops. And me not knowing any better, decided that it was the best route to go. So here's my process of making the back lacing with the 1.5mm round elastic chord I bought in a looped style. Here are my notes I worked out and followed:

Notes3.jpg

Having studied the screen cap for quite a while, I worked out that there was about 10 - 12 loops but I was unsure. Figuring that this should match my figure and 12 might look a little too long, I went for 10 instead. If you look at the original G-4B lacing, turns out I WAS right and it was 12 loops!


IMG_5350.JPG IMG_5352.JPG IMG_5353.JPG

I've made the loops about 1" apart and 1.5cm long, which made the entire lacing length about 7" - which was also so close to the original 8"!! This was a massive pain to do because it was so fiddly pinning them in place before I could sew them. I think it must have taken me about an hour to pin them first time round and another hour or more to sew. Gradually I got quicker as I got used to it but still so massively time consuming.

IMG_5354.JPG

Seeing how it looks in relation to the zips.

IMG_5356.JPG IMG_5357.JPG

All pinned and used the machine to do a basic stitch all along. Massive fail. Held the elastic VERY loosely. I then realised that I would be much better of sewing and securing it by hand. So back to pinning them in place, AGAIN.

IMG_5358.JPG IMG_5359.JPG

Right the hand sew.

Now from the screen caps, the strip down the sides of these loops looks a bit shiny/reflective, so we thought ribbon might help achieve that effect. And figuring it would all be dyed, colour shouldn't have been an issue...

IMG_1062.jpg

Baste one side of the ribbon, to then fold over and top stitch...

IMG_1060.jpg

Then you sew over the fold to secure. And fold the ends underneath so that fraying ribbon is tucked away.

IMG_1061.jpg

Now for the back zips, I decided to use the 12" ones because these are noticeably longer than the other ones on the suit and also need to be larger than the lacing (and guess what, the original zip length is 11", another close call with my guesses!). Judging from screen caps and what looked best in person, in relation to my lacing and the suit and how it would look once I wore it, I decided that I wanted an extra 1" at the top of the zip and 1.5" at the bottom, because you can see that it flips up. So the fabric (calico again) dimensions I used were: 13.5" x 2.5" excluding seam allowances.

IMG_1063.jpg IMG_1064.jpg

Over-edge stitching and top stitching the fold in place.

IMG_1067.jpg IMG_1068.jpg

Adding the zips and finishing off.

And here's how it looks in relation to the lacing.

IMG_1069.jpg

I then did the other one and I was done with the back!
 
Re: ALIEN Ellen Ripley Flight Suit

As you have seen, the loops are all flat and square (basically a rectangle folded in two and sewed to the long main band). The back of the zippers are reinforced by oval pieces (I remember that those pieces were very stiff...don't know what kind of "stuffing" they used).
Good work so far:)

Yes, I have recently started to redo the lacing (yesterday) so will post about it when I come to it on this thread :) Definitely a lot easier than what I initially did!

As for the oval panel inside the zips, I just left it; I thought it would have just been the gather of the suit base so didn't bother with adding any extra material. Didn't want it to bulk too much. Plus, no one would see it when it's zipped... Hahaha

And thanks for your continued support! :D
 
Re: ALIEN Ellen Ripley Flight Suit

BACK ZIP PANEL SKETCH

Thought I'd sketch it out to make my dimensions a little clearer.

backzip_panel.jpg

Despite writing that you should leave an extra 3" to fold back, I completely forgot about it, ahaha. Now mine looks a little flimsy and you can see underneath my stitching and zip... but oh well. Another mistake someone else can learn from and avoid!
 
Re: ALIEN Ellen Ripley Flight Suit

TAKING THE HEM UP, ARM PANELLING AND EXTENDER ZIPS (DAY 4)

Firstly, as I am quite a short person, I wanted to take the trousers up a little as the extra length made it a bit too baggy at my legs. Plus, the flight suit ends just before Ripley's ankles so it needed to be done anyway. And easy enough, I just unpicked all the way round the already turned-up legs.

IMG_5392.JPG IMG_1027.jpg IMG_1028.jpg

Again, stupidly, in my rush to get this completed, I forgot I needed to take it up as high as my ankles so that you can see the hi-tops; so here's another mistake to avoid! To be fair, it's not a drastic difference, you can see the result later in my posts but it's just a little thing to nitpick. Although, I could also justify this with the fact that if it weren't the length I left them at, I would have struggled to add the zips due to a lack of space as I don't know how to take the crotch further up... so there's benefits to both. Suppose you could call this artistic freedom in times of need?!

And having unpicked the hem and turned it up about 3" (I folded it twice, hence why it's 1 1/2"), turns out the cuff was an extra bit of fabric sewn on. Unravel it and it became another handy piece of material (2 1/2" wide, 12" in length), which I used for the arm panelling.

IMG_1071.jpg IMG_1070.jpg

It's not as long as the sleeve but I think it's long enough. The suit is mainly worn with the sleeves rolled up anyway, so no one would know that it doesn't reach the end. It does the trick for added accuracy in my opinion.

For the extenders, you need some extra fabric, and since I didn't have enough excess from the suit, I used the calico again. It's pretty much been decided the suit will be primarily cotton twill with calico to make up any extra parts. Open up the zip and make sure it's straight, and work out how much excess you want the legs to have. 4" was good for me:

IMG_5379.JPG

Cut out 2 pieces and sew your zips on!

IMG_5381.JPG IMG_5385.JPG

Look at it work!

IMG_5383.JPG

Make sure you turn up the ends to neaten it off and this will be the end of the trouser.

IMG_5393.JPG IMG_5395.JPG

And that's it ready to be sewn onto the legs!

IMG_5396.JPG
 

Attachments

  • IMG_5394.JPG
    IMG_5394.JPG
    1.6 MB · Views: 239
Re: ALIEN Ellen Ripley Flight Suit

ATTACHING EXTENDER ZIPS (DAY 5/6)

With the two extender zips done, now you need to attach it onto the trousers of the suit. You'll need to first unpick the entire leg. Next, over edge stitch one side, the one that covers the front of your leg. Top stitch it as well to hold a neat fold in place.

IMG_1026.jpg

Pin and sew your zip behind it.

IMG_1029.jpg IMG_1030.jpg

Next (and I'm not sure if my explanation will be very good, as it took me a while to get my head round this at 5am and even know what I was doing so hope the photographs help!) wear it inside out and pull the unsewn leg trouser over the CLOSED zip to work out how much of the leg you want to take in and therefore where the zip should be placed. Open the zip to release yourself from the trousers and be careful not to stab yourself with the pins!

IMG_1031.jpg IMG_1032.jpg IMG_1033.jpg IMG_1034.jpg

You can double check the amount you've taken in by pinning it really securely and wearing it the right way round. Unzip again to release yourself. I recommend triple checking before sewing! Cut off the excess fabric, leaving an inch or so to over-edge, then top stitch a neat fold to make it easier for yourself to attach the zip.

IMG_1036.jpg IMG_1035.jpg IMG_1037.jpg IMG_1039.jpg

Sew as close as you can to the zip. I also added another stitch 5mm apart as my entire suit features two rows of stitching, which you can see in some close up shots of Ripley's suit. Aside from that, I quite fancied that utilitarian look.

IMG_5400.JPG IMG_5399.JPG IMG_5397.JPG IMG_5402.JPG

Overall, this entire process took me about 3-4 hours to do. I really don't think it should take that long but it will probably have been because it was my first time attempting something like this, and more importantly, it was 4/5am and I had been awake for 16/17 hours hahaha. But it's definitely a bit fiddly and could have benefited from a little help from somebody to at least pin the fabric in place.
 
Last edited:
Re: ALIEN Ellen Ripley Flight Suit

INNER LEG ZIPS (DAY 6/7)

Now as time drew closer to my deadline (Sunday, and here I am on Saturday night), I started getting a little desperate and this is where I usually employed "artistic freedom".

You'll probably have noticed earlier that I just added an extender zip to the lower leg and left it at that, unlike the actual suit Ripley wears which features a pocket, extender zip and long inner zip on her legs.

ripley_legdetail2.jpg

Reason being, I wasn't sure how to attach the two zips together with some of the suit fabric to conceal it (especially not sleep deprived at 5am); and I didn't have time. In any case, I am happy as it is, with the extender doubling to look as if it's the long inner zip too. Even if I had indeed added an extra one, it would have only served for aesthetic purposes because I didn't have a single long zip but would have needed to build one with two 12". Therefore, it wouldn't have acted as a long zip anyway. If anything, it would have been more bulk on the legs and I didn't think I had enough material on the trousers to work with. In any case, moving on...

Over-edge stitch down one side (front again) and topstitch a fold.

IMG_1041.jpg IMG_1042.jpg

Pin to this side of the fabric and work out where the ends of this upper zip should meet the extender, making sure the top of the zip (where the tab is) is placed at the crotch.

IMG_1046.jpg IMG_1045.jpg

Check out my shoddy newb stitching. Luckily this isn't very noticeable unless you go and look for it. Once the zips are attached, carry on sewing it to the actual leg of the suit.

IMG_1043.jpg IMG_1047.jpg

Once again, wear the suit and work out how much you want to take in. Make sure it's not too baggy but comfortable enough that it's not tight. Lots of pinning, unpinning, checking, securing before sewing for certain. You can cut off the excess AFTER when everything turns out the way you want it too.

IMG_1050.jpg IMG_1054.jpg IMG_1055.jpg IMG_1056.jpg IMG_1053.jpgIMG_1052.jpg

When you're sure, sew!

IMG_1057.jpg IMG_1058.jpg

Once attached, turn the trouser legs inside out and cut off the excess fabric. Sew the ends together, over-edge as well, to prevent it from further fraying.

Now that the trousers are finished, you can sew on your remaining thigh and lower leg pockets! This will now be easier to place in relation to the zips.
After that, use any excess and the draw string for the pull tabs! Then that's all the sewing done! Hoorah!
 
Last edited:
Re: ALIEN Ellen Ripley Flight Suit

FINISHED BASE (DAY 7)

After an intense week of sewing, from about 12pm-4/5am almost every day, including one all nighter (Day 6/7) during the most humid week and probably the only week of summer in Glasgow, I finally got it finished. However, not in time for the convention sadly. Nevertheless, seeing as I must have spent about 60 hours on it, I just wanted it finished. So the only job remaining was to dye it. Before I write a post about that, here's images of the finished base. Must have been 8am at this point.

IMG_5415.JPG IMG_5419.JPG IMG_5418.JPG IMG_5417.JPG IMG_5416.JPG
IMG_5420.JPG IMG_5421.JPG

To sum up, I managed this in about 6 intense days, using only the pre-existing jumpsuit, calico, 12 zips, elastic chord and ribbon. But with the correct research and know-how, you could have skipped the chord and ribbon (which I will also write about later in my revision of the back) and definitely saved time. Overall cost of the materials used (up to this point) as follows:
Jumpsuit (£7)
100m Round White Elastic at 1.5mm (£7.68)
Zips (£5.90)
1m of lightweight Calico (£1.99)
Patches (£11.99)
Dylon Antique Grey and Denim Blue (£7.99)

= £42.55. Not too bad for a week-long costume at a budget?

IMG_5415.JPG


IMG_5419.JPG


IMG_5418.JPG


IMG_5417.JPG


IMG_5416.JPG


IMG_5421.JPG


IMG_5420.JPG
 
Last edited by a moderator:
Re: ALIEN Ellen Ripley Flight Suit

DYEING PROCESS (DAY 7)

Despite being so successful up to this point, from here on out it goes downhill; and it's still something I need to fix today.

Definitely not the smartest decision I've ever made but desperation drove me to it. So after an all nighter, being severely sleep deprived, I thought it would be a good idea to just call an end to the journey and dye it at 9am. I just really really wanted to get the patches on and see it done and dusted.

IMG_5422.JPG IMG_5424.JPG

Suit thoroughly drenched with warm water, it was time to mix the dye. Major, major facepalm moment ahead, so never, ever dye something when you've not prior dyeing experience, on top of not having had any sleep and can't think straight.

A bit of research and colour-theory brainstorming, I thought Dylon's Denim Blue and Antique Grey, when mixed, should give me a colour similar to Ripley's flyer suit - I wanted a faded greyish navy, not khaki or olive or green that seems to be the other popular choice.

254cc9dc5b34c2467f2282c20b2d6758.jpg

Stupid, desperate, sleep deprived me thought it would be a good idea to tip all of the blue into the mixing box. Of all the colours I should have tipped all of should have been grey, and I could have gradually added denim and changed it. But once I had all the blue, I panicked and tipped all the grey. Hopefully it would help level it out?!

IMG_5425.JPG

Of course it didn't. Even sleepy me knew that wouldn't change anything. So the next thing I was considering was time. Perhaps only leaving it in for 15-30mins rather than the recommended 45-60mins? Well...

IMG_5430.JPG
IMG_5428.JPG

Disaster. If it looked this dark when wet, I highly doubted it would be any better. At this point I lost all hope and just wanted to sleep. Before heading off to bed, I hung it to dry anyway and kept the dye aside in case.

IMG_5432.JPG IMG_5433.JPG

The next thing I could hope to do was to wash it as much as I could to get as much dye out as possible. For the mean time, when it's dry it doesn't actually look that bad. Upon closer look, you can actually see that I've dyed the colour very close to what the nylon zips were. I quite like the denim look but of course, for what we're going for here, it's much too dark, and the pockets stand out too much. If this weren't a costume, I'd probably have left it as it is.

IMG_5435.JPG IMG_5436.JPG IMG_5532.JPG

And disappointingly, the thread (to be honest, I don't mind too much. I think it's quite nice the grey thread stands out), elastic (which I sort of saw it coming) and ribbon (this I did not see) did not take any of the dye. To solve this, I considered using fabric paints, felts tips or even acrylic paint. But that was the least of my matters.

How am I to fix this dye job?!
 
Re: ALIEN Ellen Ripley Flight Suit

A BREAK

I took a week break to catch up on sleep, life and to try and come up with some solutions to my dye-lemma. I realised that because my suit was originally khaki, it took the dye and turned out a lot darker than it would have done if it were undyed, which you can see that the calico actually comes out in the correct shade (albeit more blue).

So, did a bit more research into the dyeing process and found out about Rit Dye's colour remover product.


(You can actually see that I've left a desperate comment on that video, hahaha).

So my theory is to drop the suit in the colour remover, strip some of the dye and hopefully it'll come out a bit lighter. If all goes wrong, I could just strip it of dye completely and do a redye. Luckily, Rit Dye also provides a handy sample of colours that can be mixed and guides on how to do so. Therefore I'm considering Country Blue from their Archives section, which requires Teal, Royal Blue and Pearl Grey.

However, before I do that, I also did a bit more research into the costume, to see how accurate I was. And that's when I found out about the G-4B and images of the back lacing on RPF. So there was another job, to redo the back lacing.

So the to-do list now became:
- Redo the back
- Source chord or like material
- Colour Remover / ReDye
 
Last edited by a moderator:
Re: ALIEN Ellen Ripley Flight Suit: 90% DYE HELP?

REDOING THE LACING (18-19/07/2015)

Judging from the photographs, the rectangular tabs only look about 1cm-1.5cm wide and 2cm long. I cut some calico and chucked it in the previous dye kept aside overnight. Annoyingly, after sitting unused for about a week and a half, now the fabric turns the desired blue grey tone! Maybe I could just reuse the dye for the entire suit...


IMG_5538.JPG IMG_5540.JPG

12 tabs down each side so 48 strips of fabric in total. Mine measured about 2cm wide and 3cm long so I could fold it back and form loops. Again, top stitched.

IMG_5543.JPG

Working out the placement...

IMG_5541.JPG IMG_1072.jpg

... and realising that 1.5cm is too wide, so I folded it again to make it 1cm wide.

IMG_5546.JPG IMG_5547.JPG

The strips only measure about 1cm or so, as it looks similar in thickness to the tabs; so I cut a strip of 2cm wide fabric, enough to topstitch back. Again, following the technique of sewing down on side first, folding it back; sewing and securing all tabs; then another stitch down the folded side.

IMG_5549.JPG IMG_5550.JPG

Cut enough off the ends to fold back and sew. Repeat for the next rows of tabs left.

IMG_5554.JPG IMG_5555.JPG

And that's the back redone!

Will edit this post later to include a photo of the finished, redone back.
 
Re: ALIEN Ellen Ripley Flight Suit: 90% DYE HELP?

That lacing is looking wwaaayyy much better. As for the colour, it's a mix of grey/green hue. It's getting there for sure.:)
 
Re: ALIEN Ellen Ripley Flight Suit: 90% DYE HELP?

LACING REDONE

Here's a clearer image of the lacing redone:

IMG_5559.JPG

(You may or may not have noticed that I stupidly forgot one tab on the middle right, so I ended up having to make the entire right side 1 tab shorter than it was supposed to. I didn't keep a strict tally of how many I'd sewn, and when I came to where the end roughly needed to stop I realised too late that I forgot one... Stupid, careless error but what's done is done.)

And before I go onto fixing the colour, here are better images of the suit in its current state. Photos are relatively true to the colour in person.

IMG_5558.JPG IMG_5557.JPG

Now, onto fixing the colour...
 
Re: ALIEN Ellen Ripley Flight Suit: 90% DYE HELP?

RIT DYE COLOUR REMOVER (20/7/2015)

As the title states, for this part, I used Rit Dye's Colour Remover. I checked whether Dylon produced anything of the like as it's easier for me to buy Dylon living in the UK but since they don't, I just ordered it off eBay. It's not too pricey at about £3.40.

So the instructions suggest to follow the 'stove-top' method using a stainless steel pot as it's easier to monitor how much dye is removed but since I didn't have one large enough to hold my jumpsuit, I just used a basin and filled it with simmering water.

I must have spent the first half an hour or so testing how the color remover would affect the different fabrics on my jumpsuit, and more importantly, what would happen to my dye. The results were very much varied, unsurprisingly given the materials and colour. The calico's dye (for the back tabs) was stripped almost immediately, reverting back to a yellowy colour with hints of purple left over from the dye. The calico for the pockets, went a little greyer. The cotton twill from the jumpsuit turned a slightly purpley shade of grey. If it was left for longer, it would also go a greyish tone. Sadly, I found that there wasn't a chance that I could gently strip the dye to lighten the nice navy colour. Seeing as it could go grey though, I thought it might be a better idea to just work from light to dark.

IMG_5565.JPG IMG_5566.JPG IMG_5567.JPG

At this point, I am considering buying another box of colour remover and trying to strip as much off as I can across the entire suit to try and get an even blank to do a complete re-dye. But since the pockets are made from a different material, I think I just have to accept the fact that the pockets will never be the same colour as the suit. Unless I take off the pockets, dye it separately and then resew... and I'm not sure whether I want to do that when the extenders would then be different as I couldn't take that out...

IMG_5897.JPG IMG_5898.JPG

Once dry, however, it wasn't so bad? It's a little bit back to its khaki colour but definitely more on the grey spectrum. Perhaps slightly lighter pockets won't be too bad...? I'm at the point of just wanting to get it all finished and it doesn't look like this is something that can really be changed.


This is the most up to date post of my costume's progress, and I'm looking for some suggestions on where to go next.

Do I buy another box of Rit Dye's Color Remover and try to strip more dye?
Or do I just gradually start dyeing the suit towards the grey blue of Ripley's suit?
 
This thread is more than 5 years old.

Your message may be considered spam for the following reasons:

  1. This thread hasn't been active in some time. A new post in this thread might not contribute constructively to this discussion after so long.
If you wish to reply despite these issues, check the box below before replying.
Be aware that malicious compliance may result in more severe penalties.
Back
Top