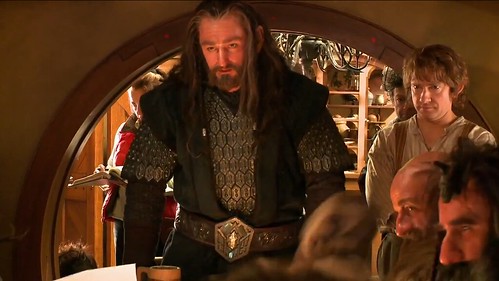
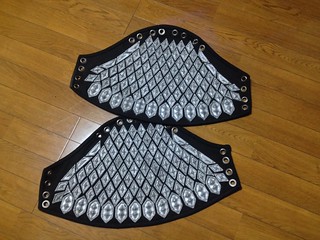
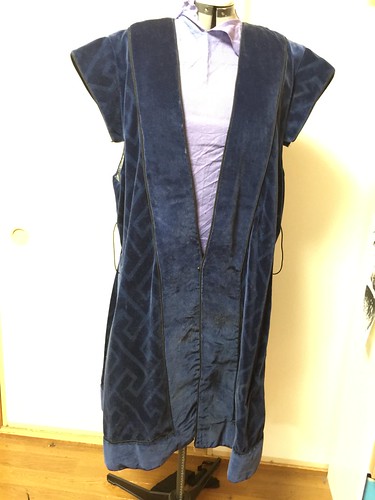
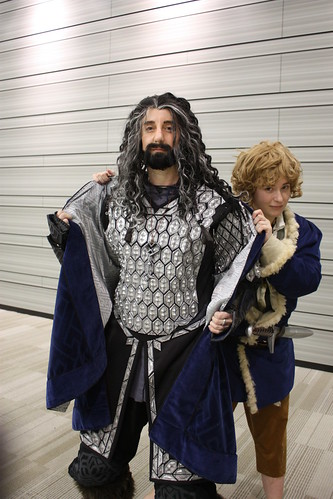
Another Thorin Oakenshield Costume - The Hobbit

jessamygriffin

Well-Known Member
Let me start by saying the costume is done. It was finished in time for the opening of The Desolation of Smaug, which opened here in Japan February 28th 2014, two months after it opened in the States.

16576229510_eceef91a94.jpg
18548618448_ece4ce3b4d.jpg

Photo by yuichiii


And since the Weta Cloaks and Daggers book wasn't out at the time and I was working from screencaps and promo shots available, the costume isn't screen accurate, as I later found out to my dismay. And like all costumes, in the year after it mas made, more was added, some things that could be tweaked were changed, and life went on. It's a great costume, the one costume that really launched me into cosplay. (Not counting the Sherlock coat. I use that every winter for normal use.)

But I loved doing it, it was hard as hell, I learned a lot and though there are loads of others who have their build threads up on the RPF, I'm going to add mine, to commemorate it.

Those who are here for pure accuracy, turn your eyes away. But I will note differences from later research into the costume.
 
Last edited:
I usually start all costumes off with the under stuff, even when it's hardly ever going to be seen. I had plans for doing a muscle suit, but I'd given myself about three months to work on this costume after work and with breaks for sanity, and decided I'd leave that for later. Thus the shirt came first.

First inaccuracy - I found out later (you'll hear this phrase a lot in this thread) that Thorin's shirt was silk noile, and that it had quilting on the shoulders, a chevron seam design on the chest and edging with piping along its hem.
1495251_607291549306454_1191344114_o.jpgshirt2.jpgtumblr_n190fqRLw01rsujm4o1_500.png

What I was working from were design sketches on the web and some blurry pics of Richard Armitage practising sword work in the shirt, so mine wound up a lot simpler. I knew the shirt had a shoulder yoke, laced up the front, had side slits, a collar and gathered sleeves. I used a plain cotton that I dyed with blue and black to get the worn and faded look of Thorin's shirt. The pics below are a bit washed out - the actual shirt is darker.


Boots - Thorin's great hairy boots are wonderful. I was jonesing for the super oversized dwarf ones, but decided I didn't have the facilities and materials to make my own.

Inaccuracy note - from Unexpected Journey and the promo shots, I thought the fur was a dark brown. Turns out it was actually black, and just really dusty and/or aged in the shots I had. I also didn't bother making the same buckles, since I'm leery of breaking things that come under strain.


I started with a clunky pair of secondhand boots that had a broken zipper, padded them slightly and counted on the fur, leather and boot caps bulking them up to something more dwarf-like in proportion.


The fake fur pattern is as above, with an upper that went down to cover the top of the boot. I attached a canvas lining to the boot with Shoe Goo, spreading open and glueing the zipper side of the boot to make it easier to get on and flipped the fur down and glued that as well. The scent of Shoe Goo haunted the apartment for months during the project.


The long piece of leather up the back of the boot was machine stitched on with belt loops before the boot upper was attached to the base.
The heel back pattern was cut and handstitched in a heavy brown leather. The boot sides have stitching at the op as well, though as these piece were glued on in the end, the stitched is decorative. The belts were hand-stamped with a Copic marker cap that happened to be the right size and shape as the patterning on Thorin's boot straps. I wound up cracking the cap, it was only plastic.
Inaccuracy note - the real straps were apparently black, not the brown I made them. THANKS FOR NOTHING, colour corrected promo shots and dusty boot screenshots!

The boot caps were my first time working with Worbla, and I was pretty happy with that experiment. I discovered to my horror that I'd applied one of the designs on upside down, but no one but me, my flatmate and now you know this. My hands wore out hand-cutting the designs with a craft knife, and thus though they should be higher/deeper, I gave up and used paint ageing to make them stand out more. The caps were painted with gold weathered down with brown and black acrylic and finished with clear. I used brass screws to attach them into the side of the sole.


Notes - the boots are mad comfy. A touch warm, but they are boots. My flatmate has borrowed them for occasional use, since looking like a Clydesdale horse from the calf down is a viable and fashionable choice in Tokyo in winter.
 
Last edited:
Under Gauntlets

Thorin's got black fingerless gloves with a decorative stitch on the seams and on the knuckle area.
Untitled-1.jpgUntitled-2.jpg
So it was relatively easy to take some thin black leather and bang out a set of the same. In the pics, the gloves are loose on my forearms but when I got the muscle layer done, they were snug.

]

The vambraces were a touch more tricky. I loathe leatherworking, but chose nonetheless to make them out of leather because I knew that with going to cons in Japan, making them from foam and then wedging them along with the rest of a really bulky costume into a rolling suitcase to get on trains wasn't going to work.


To say the vambraces were a touch over-engineered on my part would probably be putting it mildly. If I added a clamshell of leather to cover the fingers, they'd work as combat ready SCA armor, provided I had some elbow cops.

The top layer is tooled leather (I hate tooling leather and I know it annoyed my neighbours to have tap-tapping noises for days), layered on a med-weight leather and stitched to look like the production piece. Black leather dye was applied repeatedly - it was this cheap Japanese brand and utterly infuriating.

I water-hardened the outer leather in hot water, curved it around my arm that was wrapped in a towel, and as it cooled wound some elastics around it to help it keeps its shape. It can turn a dagger now, at the least.
 
Last edited:
Vambraces continued

Next was to attach the hard leather to the softer stuff that would wrap around my arm. Contact cement did the work there.

For the knuckle guard, two soft straps were attached and stitched together overlapping in the middle so that if the leather stretched out or I needed more finger room, I could unpick it. To attach the guard to the main section, I had to use a hand drill in the hardened leather, and attached them fairly simply with long pop-rivets which were all I had available. Easy to replace, though, if they blow out.

I kind of gave up on the black dye, counting on the final finishing to darken it further and if it looked patchy, well. The costume needed to look a bit worn anyway, not new.
The blue design was simply blue acrylic, which I also applied inside the knuckle section of the vambraces.


Overall, amateur leather tooling (with the few and probably wrong leather tools I have) aside, I'm happy with the flexibility in the wrist and how tough these little guys are. They look quite accurate to the real props in terms of layers of leather and stitching.
 
Last edited:
The pic in the first post isn't working for me.

So far, I am loving the look of this. The bracers are great!

Also, the comment about looking like a Clydesdale gave me the giggles.
 
The pic in the first post isn't working for me.

So far, I am loving the look of this. The bracers are great!

Also, the comment about looking like a Clydesdale gave me the giggles.

Ah. Let me check that. I uploaded/backed up all my pics to my Flickr recently (and have started using it to post pics to the posts here, so no one has to click to see it, unless they want a super size version that takes them to my Flickr). The photo might have privacy permission set or something. The uploader set all the new pics as private. Let me know of any more turn up weird - I'd like to get that sorted and and if I can use my Flickr for ease, I will.

Oh man, the fashions you see here sometimes. No one, NOT A PERSON, looked twice when she wore those boots about.

Edit - Right - the photo is set to public. So...
 
Last edited:
Gambeson padded arms

In the usual spirit of overkill, they were indeed quilted with one layer of cotton quilting and two layers of black cotton in a white thread. Eyelets were put in at the tops to allow them to be tied to the brigandine armour layer. The pattern echoed the shape of the armour plates and I used that for a size template for the quilting.

Quilting is tedious, I must say. Quilters may disagree, but the actual sewing? Nope.


Pants

From what I could see from promo shots, the fabric was black, either a nice thick brushed cotton or cotton velvet, something that gave the impression of suede. Large, baggy, and with that attached knee-pad of lather with the pressed pattern, which I didn't know how to replicate.

The pattern was impossible to tell at the time from the shots, and of course, now that the Weta costume book is out and other costume details have come to light recently, I know that the pattern I chose to doe, in paint on suede, isn't accurate, or at least the bottom half isn't I just winged that, and since it's obscured with being partially tucked into boots, no one really knows.

Here's the actual pattern for you lucky few making this after me.


For anyone looking for costume details for the rest of the dwarves from this exhibit in Japan (Sakai city is the sister city of Wellington), check this Tumblr page.
This page would have very nice to have when I was doing the bracers, the belt buckle, oh, everything with a pattern, yeah?

I put together a design in Photoshop, printed two on sticker paper, cut them out with the craft knife and airbrushed them on to the suede. The suede was backed with with cotton quilting to make them stiffer and more what you see in the photos.


The pants themselves are button-fly cotton grey-black cotton velvet, gathered into a waistband. I don't actually have a picture of the pants by themselves, sorry. But as I was keeping in mind doing the muscle suit at some point, there's a vent in the back with lacing to allow for a bigger waist if needed, and the bottoms are gathered into a band and closed with a button.

 
Last edited:
Brigandine Armour


And here's where I ventured into a new area - sculpting, molding and casting. Japan has tons of resources for this, being model crazy, though it was a bit intimidating to parse a sea of kanji in instructions in packages.

Ergo, I started with the easier portion - sewing the base layer.

Inaccuracy note - I found out from the Weta costume book that his armour is on a dark blue suede. Well, the promo shots and screen caps read so dark, I just assumed it was a slightly faded black and picked up a suede fabric for the project. It was a touch flimsy, so it has three layers - the suede fabric, a thin cotton broadcloth interfacing and a cotton backing in a traditional Japanese pattern that I dyed indigo. It has that nice angular look that seems very dwarven to me. No one ever sees it but me, but I liked the added touch.


Above - the lining fabric, and the front body and skirt panels.

Above - the back body, one back skirt panel and the arm. The pieces put together. All the edges were finished with self-bias of the same suede fabric, which is accurate to the movies as seen below. You can also see the gambeson arms look as if they are another really dark blue, so I didn't get those quite right either.


I made the decision to make the piece as flexible as possible in terms of wear, like any decent armour. The arms attach to the body with with eyelets and ties, the underam seam was left open to be tied closed with more eyelets, which is actually accurate to the movie model as seen in the screenshot below.


Lacing holes also go up the sides and back. I wasn't sure how much help I'd get in putting the thing on at times and wanted the side ties for this reason.
 
Armour plates

With sewing done, it was on to the dread sculpting, and I had never done that before. I did the best I could, the little plates aren't perfectly accurate, but that's down to my lack of skill.

Materials - oil clay for the sculpt, silicon for the mold, and plastic model resin that mixed 50/50 for the plates.

It will come as no surprise to others who have done this costume or people who have read other threads that the way to not go completely mad is to make a mold that will cast many pieces at once. Above are the main armour plates, the original sculpt, the first silicon mold and the castings and then multi-piece mold. I did this for all the various plate types needed for the brigandine.

I also coloured the resin plastic with black dyes before pouring, knowing that if the silver paint got chipped off, I didn't want pure white shining through. This proved to be a very, very good choice, and I recommend it to anyone who is hard on costumes.

You end up with a lot of pieces to be trimmed, primed, painted and aged. The process of making plates took about two weeks of time spent after work in the evenings. It was madness.


Ageing was dark grey acrylic paint slightly thinned and jammed in with a brush, then wiped partially away with a paper towel. A clear coat was laid on after to help protect the finish.


The final part of the madness was to glue the plates down.
 
Lastly for the brigandine was placing the plates in the correct pattern or nearest approximation since my costume was a touch smaller than Richard Armitage's, not being a six foot tall actor. Jiggering the neck pieces with all the types that went into it turned out the hardest.


And the other great issue was glue. I had no plans to rivet or sew the plates down. Attaching plastic to fabric, even a grippy one like the suede, was tricky, since some of the plates were going over stress areas with sharp curves (shoulders), and normal wear could mean I would lose some pieces.

The great glue experiment - leather glue, bicycle tire repair glue, contact cement, crazy glue, white glue, some glues that claimed to be able to attach anything, expoxy glue, hot glue, Shoe Goo. I took several test plates, roughed up the smooth back of the plastic with the rotary brush for my hand drill and tried them all on the fabric. After suitable curing times, I bent, rolled and twiddle the fabric to see which plates would begin lifting corners, peeling away and falling off.

To my actual lack of surprise it was the Shoe Goo that won. I know it's a great product (and please note - it's one of the few good glue-things I could easily get in Japan, I would have tried Barge's Cement or Master's if I could get my grubby mitts on it because I love Masters. It's no good to point out to me there are better glues. I had to work with what was available in Japan without paying disgusting shipping or overseas pricing.

I have in fact, during a trip back home, acquired a small can of Masters and have used it since for a few plates that started coming away (the corners get caught on things sometimes, and then there's the ones I end up sitting on, on the back panels - I cracked two). Not even the Masters can help the stubborn ones on the shoulders - I've had to drill holes and sew some of those down with sinew. But I only had to fix the shoulders after four wearings of the costume - the Shoe Goo worked tremendously well. Next time I ought to cast the shoulder plates, pop them out before they cure completely and give them a bit of a curve. It would help.

So, for my money, Shoe Goo was it. If it can affix leather and cloth uppers to plastic/rubber soles of shoes, it was going to be decent with plastic resin and cloth. If you can, give it a shot. It's pretty price compatible for a lot of glues out there. Three tubes did my project.

Thus, the layout began.


And the end result, with all the lacing done up.


Notes - The arms are heavy with all the plates on it, and I prefer to have someone lace me into the piece. It's big enough I can drop it over my head when it's laced up, but I have to put on make-up and wig and bag my head to avoid snagging hair before attempting this. I CAN lace it myself up the sides, though, which is a blessing when I've gone to events alone. Aside from the aforementioned issue with the shoulder plates and the replacement of a few plates because they cracked when I sat on them, it's a great piece. It really pulled the costume together.

All in all, I was really happy with my first venture into casting. I'll definitely be doing a lot more of that in the future and I hope my sculpting gets better with the process.
 
I love the way the gambeson turned out! It looks really good. I also love the lining fabric you used - I agree the pattern looks very Dwarf-like.

Thanks! The lining for the blue vest is very Dwarven as well. I was pretty happy with the quilting and the arnour!
 
Blue Velvet robe

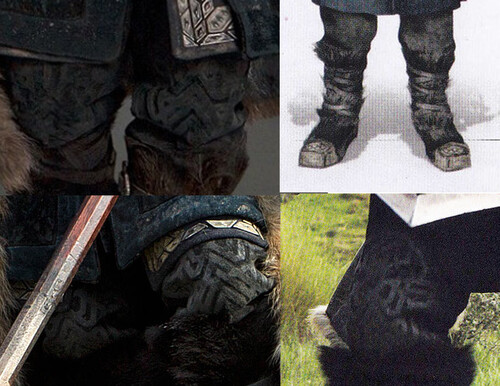
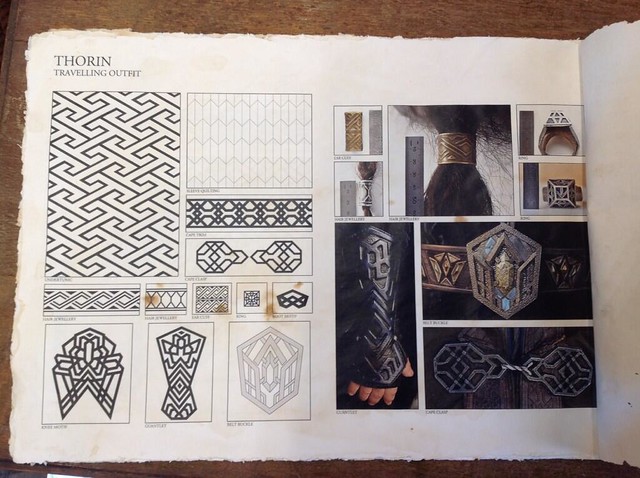
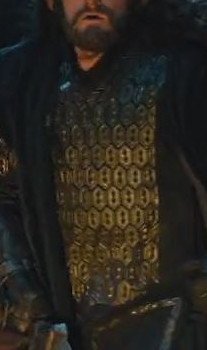
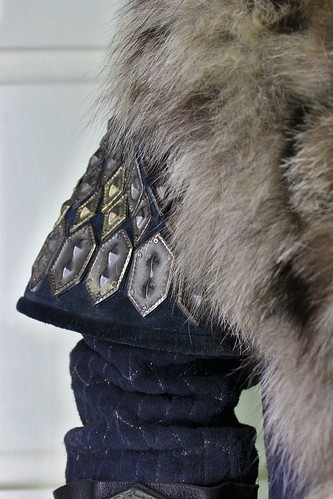
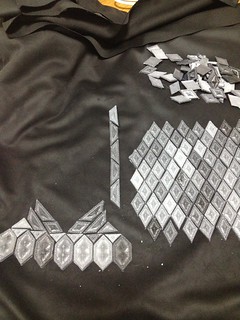
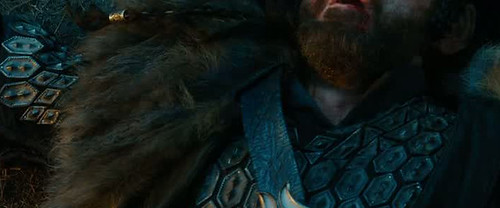
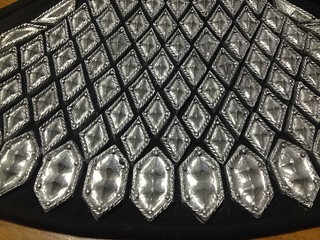
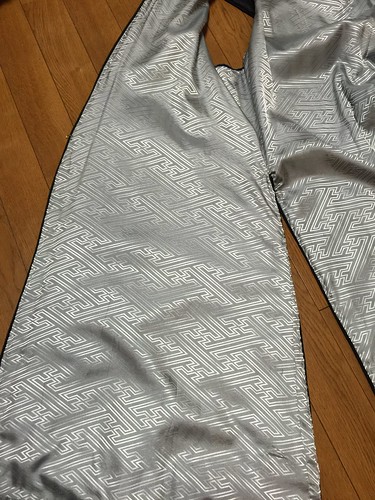
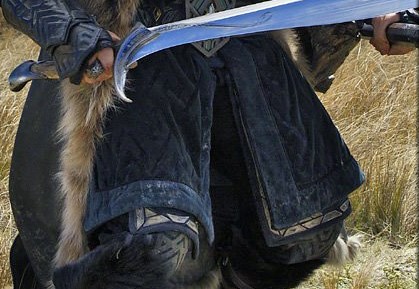
The one confusing part of this costume for me was the pattern on the velvet. The costume book said it was originally a grey velvet with a raised pattern that was dyed to blue. In the Sakai display book, the interlocking skewed Greek Key pattern is horizontal, but from what I could see of the costume pics from the movie, it was more vertical. I still haven't found any good shots of just the vest to tell me.


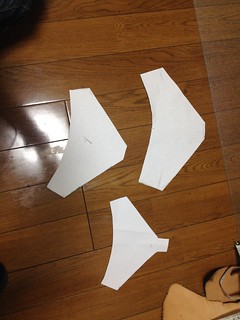
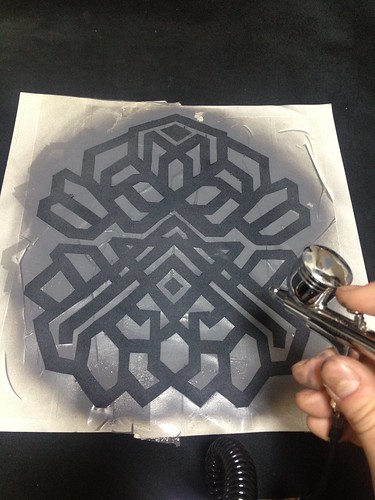
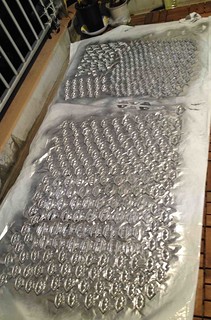
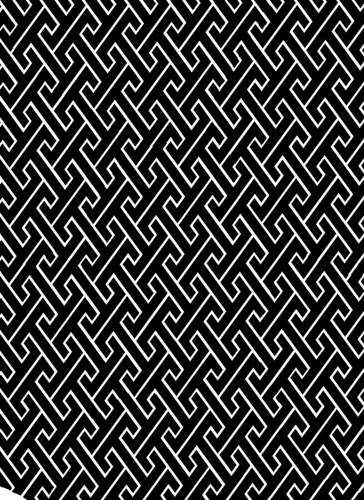
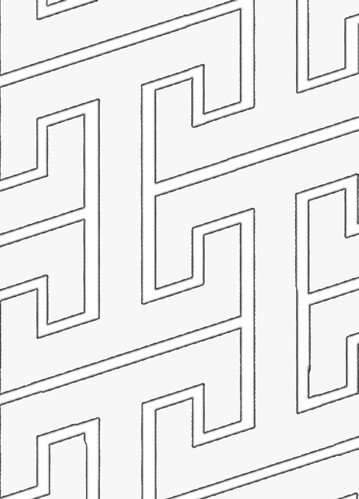
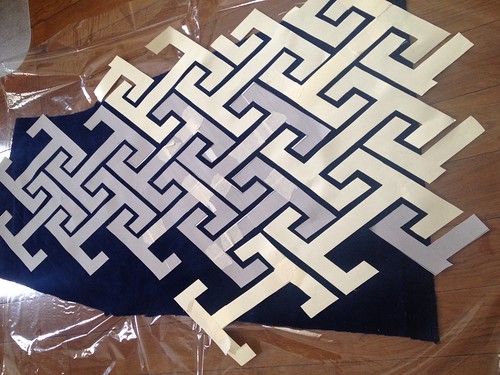
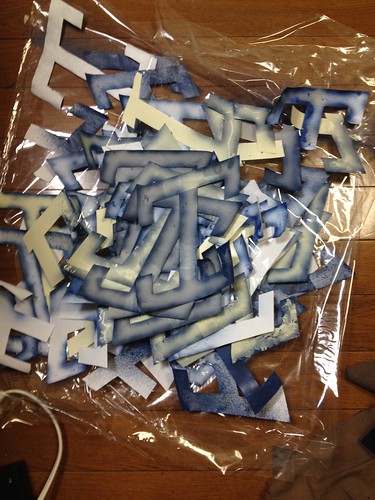
So I decided to heck with it and and went with a vertical orientation. Some work in Photoshop with online clip art of Greek Key quilt fabrics gave me the pattern below, the right hand one being the full page size I printed out on sticker paper with overlaps to apply to the velvet.

Also, please excuse if the pattern doesn't quite look the same as the Sakai city book's (the pic is way up in the pants post). I made mine before that was put on display. Just another example of working from screenshots and not quite getting the angles right.


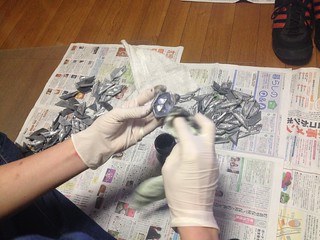
The brilliant thing about sticker paper is that it works really well for spray work. The not-brilliant part is that it can be pricey, and that the velvet pile fuzz will keep it from sticking more than twice. With the amount of stencils I needed, I was bally well going to re-use the pieces and thus 3M's Design Bond spray glue came into play. It's used for graphic designers etc who want something a bit like a Post-it note than can be lifted and moved and reattached. Presto - the velvet fuzz problem was vanquished with applications of Design Bond to the paper.

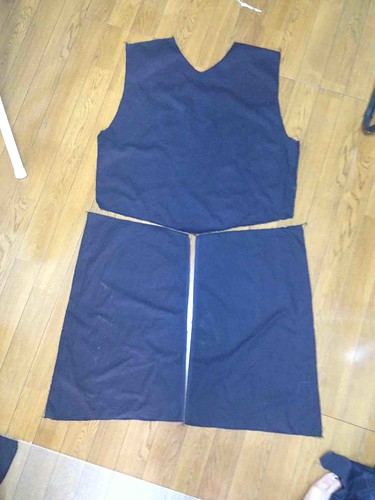
I'd put up the pattern design for the vest shape, but I forgot to take pics, unfortunately.


Fabric Tale

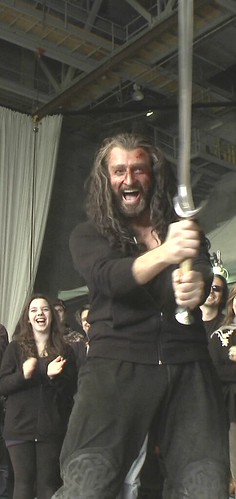
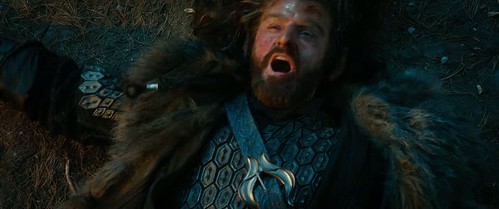
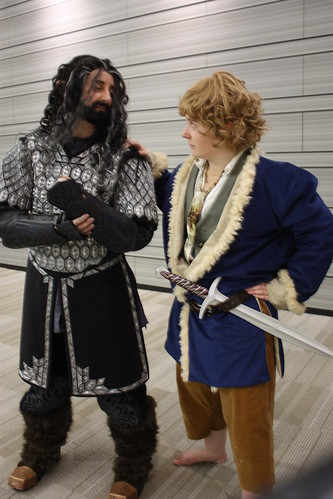
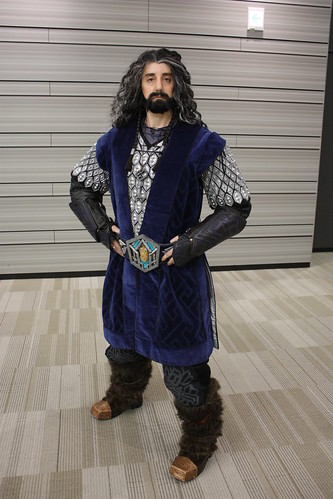
Way back when the first Hobbit movie came out, I said to myself, "That's something I want to make, that costume." And I actually had a gorgeous upholstery weight cotton velvet in the perfect shade, deep and luscious. But I lost my job, got a new job, quit that job for a much better one and also moved to a new place before I actually started the costume. Fabric being what it is, the huge stash came along and the velvet languished until my family decided that 12 years in Japan was quite long enough for them to not have come and visited me before.

And what does that have to do with the costume? Well, I had a new apartment, completely bare except with what I'd brought. And... curtainless. You see where this is going? My family was coming, it's a nice well lit apartment and besides neighbours looking in, there was the fact that I couldn't put up jet-lagged family in a sun-drenched place. Completely forgetting what I'd kept the velvet for, I pulled it out, said, "This will block the light nicely!" and made a nice set of curtains.

I hope they appreciated them. They were nice. And when the time came for the vest to be made and I was digging through the fabric hoard with puzzlement looking for blue velvet I suddenly remembered. Oh god. Oh... well.

They were nice curtains. Down they came, and I hadn't cut the fabric too much not to get the Thorin vest from them. I have a new set in my room now. Made of winter fleece, actually. Keeps the room warm in winter and insulates it in summer to keep the air conditioning in.


Fabric Tip

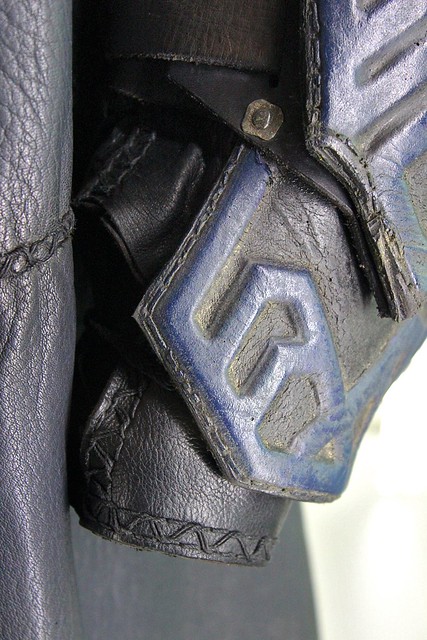
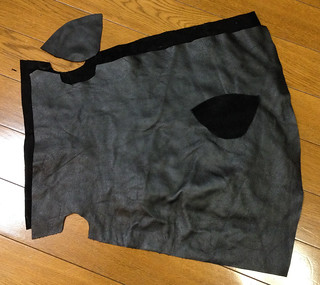
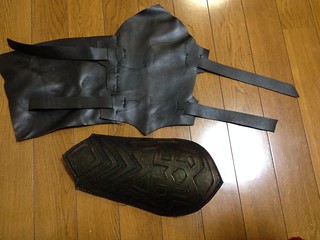
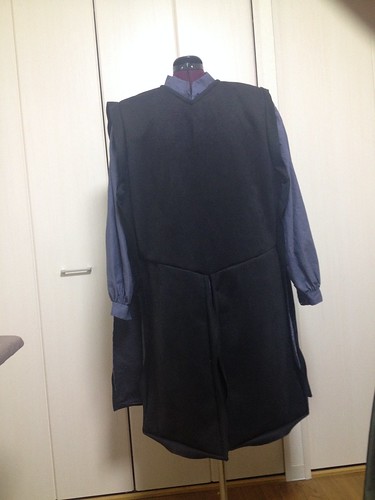
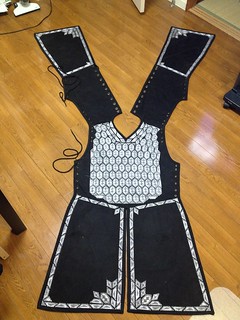
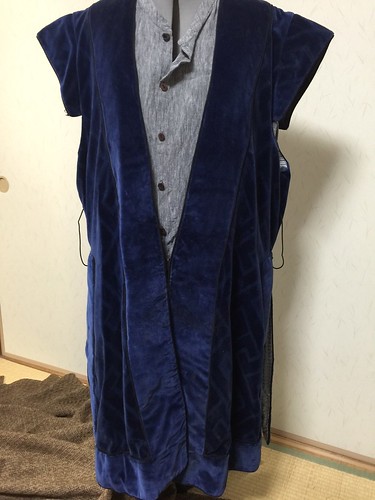
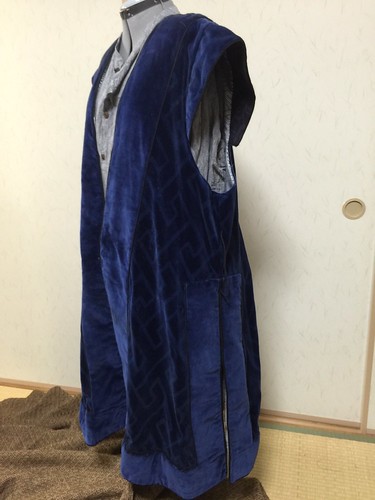
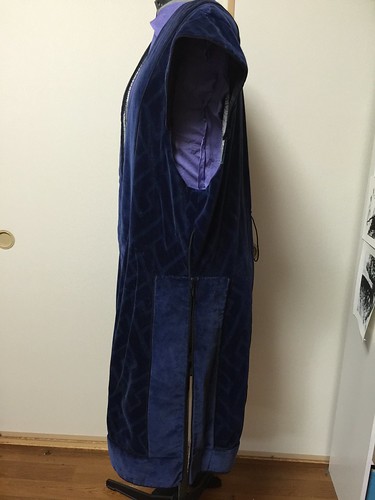
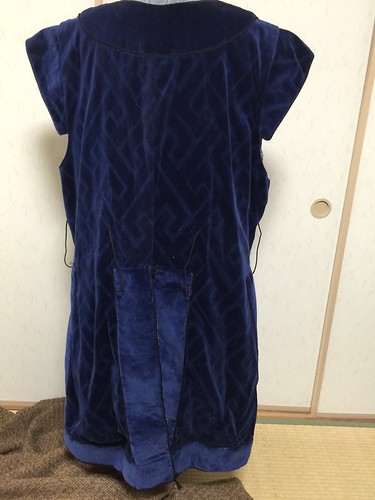
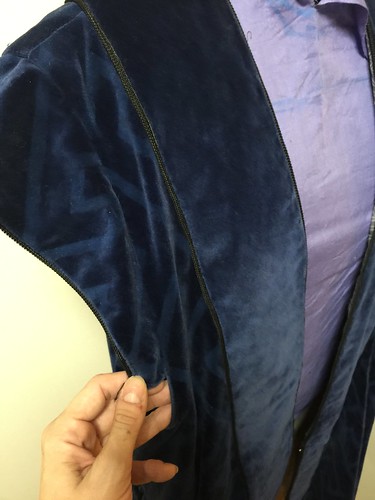
Anyway - the edging on Thorin's vest is a slightly lighter tone that sort of matches how the light catches the raised patterning of the rest of the vest. I wasn't about to get more fabric in that shade. Since velvet hanging properly has the nap facing up so it looks darker and richer, I merely laid the edging pattern so the nap of the velvet faced down and the light reflected from it, making it look lighter. There. That's a good tip for people unwilling to buy two kinds of velvet. Just cheat.
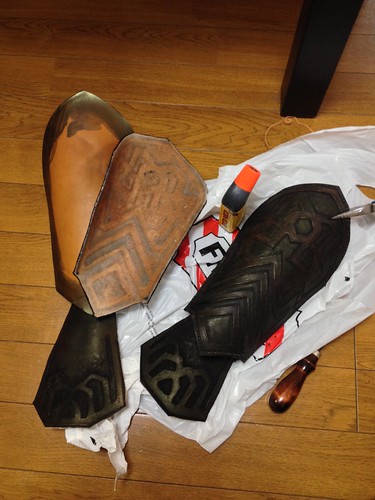
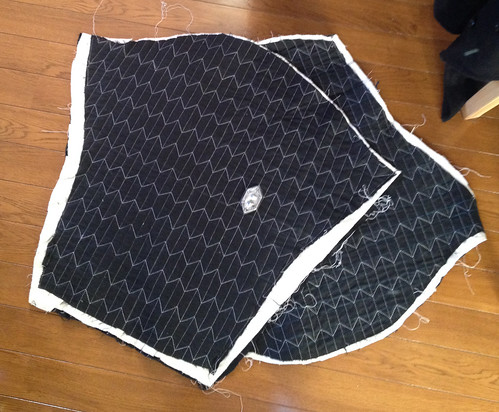
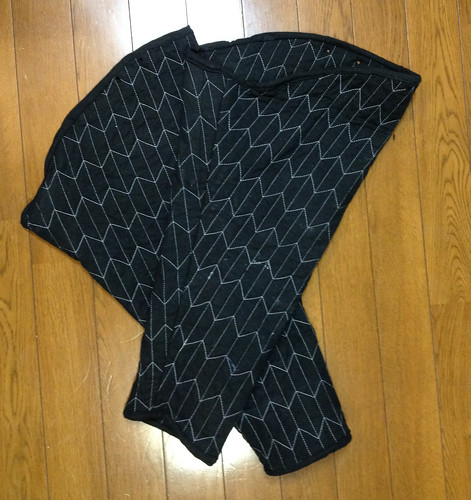
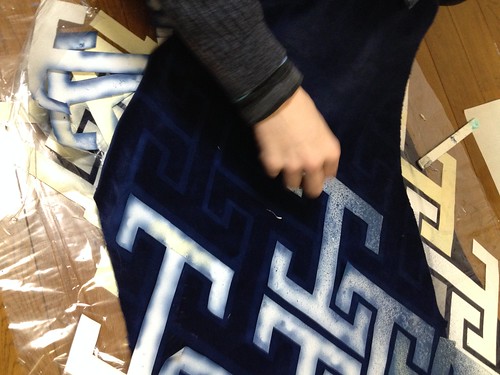
Spraying the Fabric

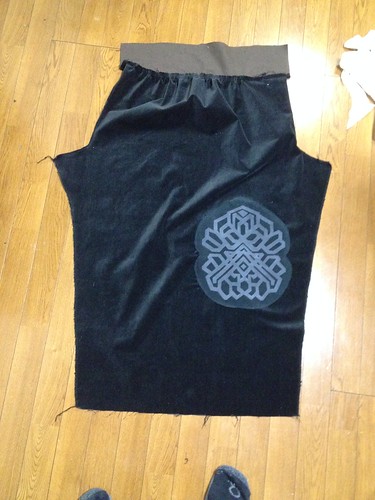
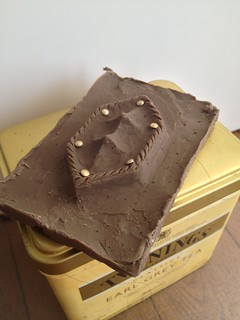
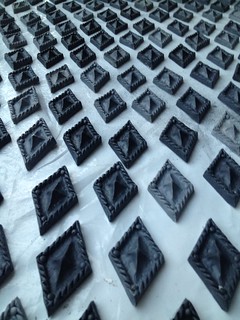
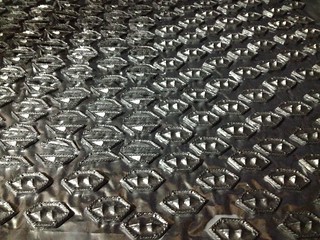
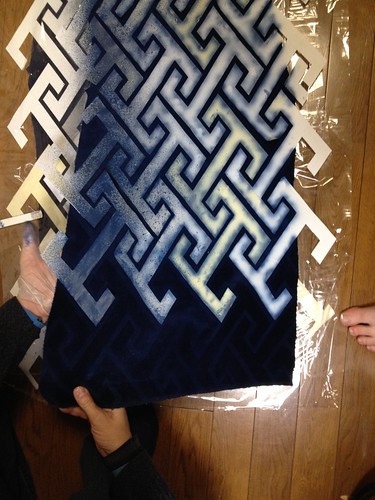
I matched the lighter look of the reversed nap velvet in acrylic paint and thinned it down for airbrushing. The stencil pieces were laid and the tedious process of spraying began.


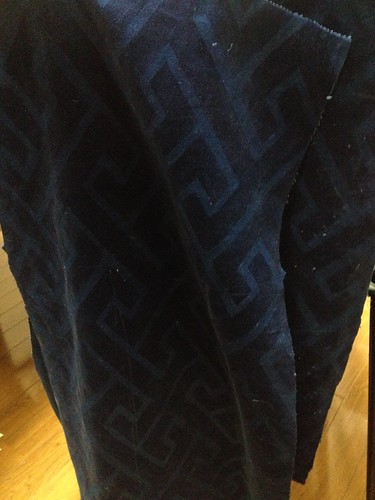
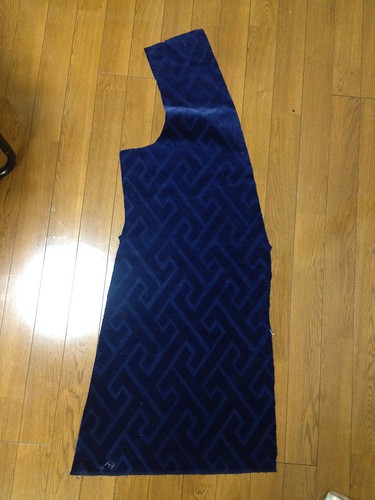
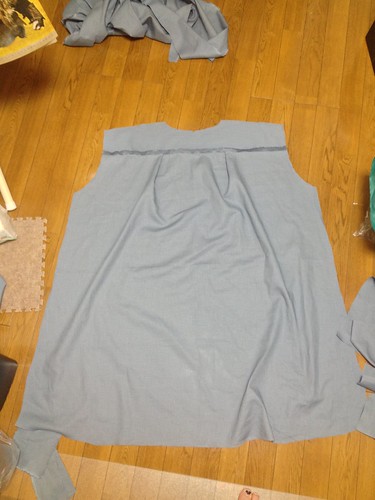
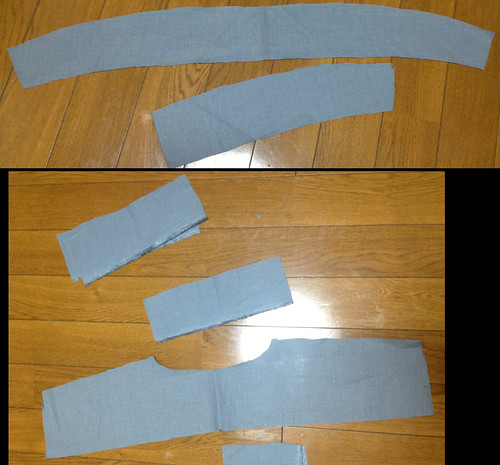
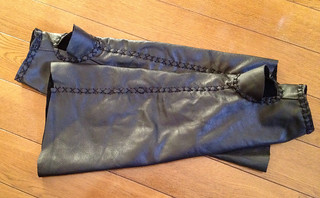
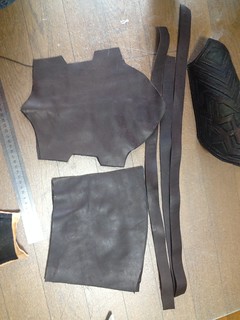
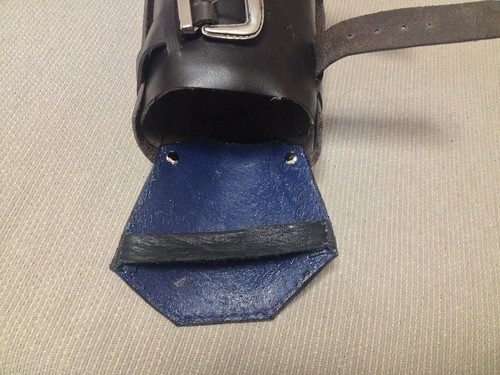
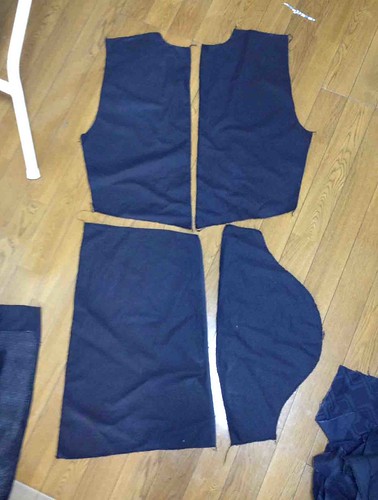
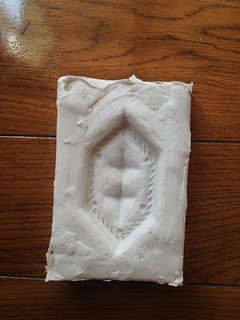
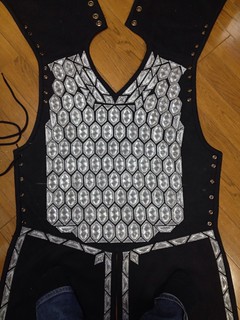
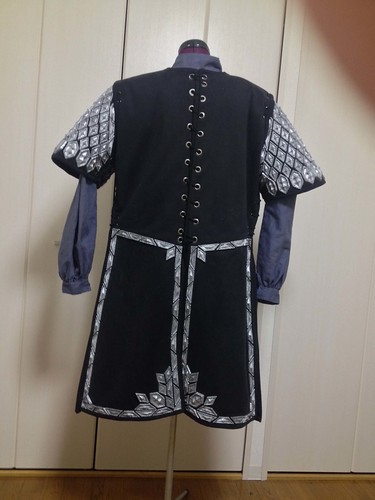
Ah, wait, I did have one pic of a pattern piece for the vest. The last one there - that's the side front before the edging was added. The notches indicate waist area and where the front hook and eye would be placed.

Stencilling like this is just about as tedious as quilting. And like making the armour plates, lord, it takes time.
 
Last edited:
Blue Robe Finished


There's a black piping of some kind on Thorin's robe along the edges of the trim, quite dark. I picked up some cord braid for pillows to use. I also used some cotton quilt batting behind the applied lighter trim to add some bulk.


Thorin's hefty belt is partly held in place with some straps on the velvet robe, and I just added some cords on the sides and back to do the same. Good thing, too - my flatmate judged I was wearing the belt too girlishly high and kept loosening it. I don't have a lot of hip flare and I don't wear the muscle layer when it's too hot and it kept slipping down.


The lining of the epaulettes is dark, from what I can see in pics, so I used leftover dyed cotton lining from the brigandine armour to finish them. The body lining, from the few blurred screenshots I saw of Thorin fighting the Trolls (he isn't wearing his belt or the leather robe in that scene) showed a lighter colour, white or grey.

Japanese traditional fabric came to the rescue again - I found this great satiny stuff with a similar motif to the outer layer and was able to use that. The silver goes with the whole Thorin look. I love it.

You rarely see that lining, again, but it gives great satisfaction.

Below are pics from the first outing of the costume, hence the wig was still in pristine condition (and missing Thorin's side beads to keep my hair back) and I hadn't quite worked out the beard and makeup yet.

 
Last edited:
very impressive costume. YOU look like the actor too.

Thank you! It's kind of great when people think I look like the actor. My own nose could be bigger, but I'm glad it's not. Though by looking like the character so much, it's caused some hilarity when I'm done at cons and want to go into the girl's change room. Staff who haven't seen me come out keep trying to herd me into the men's area. I actually now have some ID on a lanyard around my neck to keep the astonished reaction to a minimum, since all I really want at the end of a day is to get that heavy stuff off.
 
From Looking at your photos posted of you in the costume.. I would have never known either.. that you are of the female side..

Well, since the character is a man, best to go hard or go home, right? I didn't want my Thorin to look girlish. My main thought behind the costume was be as close to the character as possible.
 
This thread is more than 4 years old.

Your message may be considered spam for the following reasons:

  1. This thread hasn't been active in some time. A new post in this thread might not contribute constructively to this discussion after so long.
If you wish to reply despite these issues, check the box below before replying.
Be aware that malicious compliance may result in more severe penalties.
Back
Top