... wish I could figure out a way of doing the hallway light slits easily.

Pick up some 4/0 sew-on snaps and copy those or even use them, when painted they look like the light fixtures in the photo's. do a search for "4/0 sew-on metal snaps", they use them for doll dresses and are super small. ( 4/0 = size 0000 = small)
 
I added small washers (Maplins) with half black pearls from craft shops. The silvers reflective, adding the 3 lines to each orb later...
2d72bd21f46bbb4987cc93a2a36d663a_zps9u2ujoiz.jpg
 
Great idea... am working out a sheath that would fit over a 2mm LED and will putty work the lights to make a mold in resin. There should be 21 lights in all. Got it all mapped out!
 
Hi thanks, I'm not sure about vid but will give a step by step photo hull sample sometime soon including products used etc soon.

It's yellow on the big square patches...sample close up of it here...Seen it a few times on studio close ups . On others (whole shots) its a sand like colour but that could be camera,aged picture,scans etc...
I'm leaving it as a mild sand template and can change it come the Falcon bible photo refs promised in future issues!!! Btw..Great work on your scratchbuilt seats LrdSatyr8.
http://i493.photobucket.com/albums/...189bb606bf21cd11f24a7aea49ef8_zpssl2ewpdm.jpg
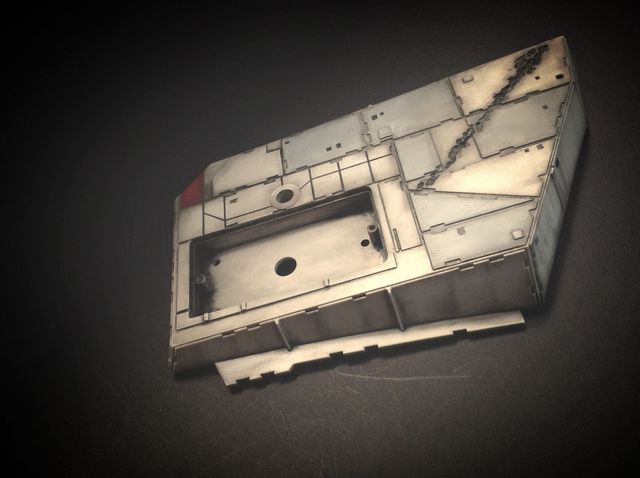
Photo RAMP underside courtesy of: http://www.dnkhobbies.net/32-millennium-falcon-reference-photos/
Great references :)

DARKVIEW,
Great job so far. I really enjoy seeing and following your work.
Also, thanks for referencing our website.
 
Well till l do the guide & slighty off topic thought id show you this cute metal Falcon I got this week from EvilBay...it's approx 3" in length... Millennium Falcon: Metal Earth 3D Laser Cut Star Wars Miniature Model Kit. Relatively easy but darn small for my big mits!!!;-). Took about hr 1.20.


8388222dad998365aa6ad229a1aaaddb_zpsfia2byog.jpg
 
Ok....this is simple & effective...but prepare to have mucky hands unless you wear gloves, personally l don't care...
1. Windsor & Newton. Griffin Alkyd, Lamp Black.
2. Brush ( your choice).
3. The model part...as is, virginal....(you choose). But if it's got blast marks you want to make more authentic to Dremel etc...do first.
4. White Spirit (mines from Wilko) BS245. And lve put some in a small hotel jam jar, don't matter if it's been used for other washes & cleaning.
5. Paper towels, (kitchen towels) textured for wiping. ( lots ready!).
6. Soft silky cloth...(lens cleaner cloth).
295f0e8dcaf69104af2353b370ec05ee_zpsrs13twuy.jpg
 
Last edited:
1-8
1. A little of the oil on a sheet.
2. Brush the cracks & crevices.
3. Add more to all parts.
4.5. Dip brush in white spirit to weaken & wash deep parts.... It's mucky, but don't worry!!
6.7. Rub of excess... Repeat till required effect...
8. Soft lens cloth....circular motions...(cleans a surface area smooth).

And last pictures shows a better effective Base weathering. This then is ready for more repeats or stencil weathering (ie, lines, greys, reds etc).
bf4291776fd1908fe556ec74df9a2d98_zpsnd3rue7q.jpg

Weaken the crack areas or strengthen to yours desire... It's a basically simple way to create an amazing effect.
 
Last edited:
Depending on the use of white spirit to clean & wash your black quick dry oils suface you may get a slight silk shine.....if so then sand with the finest wet dry sandpaper for a matt dusty look... This may take time and if too cleaned redone 1-8... I usually leave the oil technique a good 6 hours to dry.
753c60340ef504dfc01e7a6ac4a38648_zps6hs6byl7.jpg
 
Last edited:
1. A little of the oil on a sheet.
2. Brush the cracks & crevices.
3. Add more to all parts.
4.5. Dip brush in white spirit to weaken & wash deep parts.... It's mucky, but don't worry!!
6.7. Rub of excess... Repeat till required effect...
8. Soft lens cloth....circular motions...(cleans a surface area smooth).
Note: if it's a section with blast marks(like this) that you want to make rougher and drill etc do your dremeling first before my steps....
bf4291776fd1908fe556ec74df9a2d98_zpsnd3rue7q.jpg

Thanks Stormy320 ...below: here's the finiished version for now...adding runs & streaks etc... It's up to yourself how gritty you make them.
I use Tamiya weathering kits... Hope this helps anyone going down my route, you may find your own method/technique & look forward to seeing
peoples efforts. .... :) HAVE FUN!!!
6915eca83993e553bca5eb4cb52ed939_zpsgrl3jibw.jpg
 
Last edited:
More light grey panels & black markings added...
6eafcde152001182d70c0afd504e3d07_zpspa5n992c.jpg

TIP: when adding the black dots & lines use a good quality fin line UNI pin .8 or .2 permanent marker...but even those can take forever to dry (if at all). So use a hair dryer on medium heat & not to close. If anyones using a marker that drys instantly....let us know!!!!;-)
 
Last edited:
You are the Falcon paint master.

I am finally going to be ordering all my paints and weathering supplies and get going. I can't afford it but I don't care. I need something to work on and focus on that;s fun.

Tom
 
You are the Falcon paint master.

I am finally going to be ordering all my paints and weathering supplies and get going. I can't afford it but I don't care. I need something to work on and focus on that;s fun.

Tom

Why do you think I've been focusing on the little details and taking my time bro? Don't want to run out of things to do before I get new parts!
 

Your message may be considered spam for the following reasons:

If you wish to reply despite these issues, check the box below before replying.
Be aware that malicious compliance may result in more severe penalties.
Back
Top