Tom that recess pit look awesome, well done. The beauty of falcon is you can keep adding to the weathering layers both light & darks... The DeAgo forum has a new section with plenty of the underside of the studio Falcon photographs. Loved the movie & it's a defo Falcon making booster.

Got a Link?
 
Just watched the Painting the De Agostini Millennium Falcon Scale Model with Steve Dymszo part 4, never liked the splat with a tooth brush look but l may have to do it... I just remember that my old models would eventually have that effect due to age like molding etc ... Plus it looks like the old sprayguns that clogged up & splatted!!!. It's that or studio modellers were rush at the time. Anyway I'm going to see/findout if the photo close up references are from the 80s or decades after before I go down that path.

This months delivery 43-46 still not arrived!!! Thought they'd have dispatched it early this month to beat xmo delivery problems...!!!
 
Last edited:
I find the splattering in the SD video vastly overdone. I have seen the original in Köln this summer (at the Star Wars Identities), and the splattering is hardly visible even if you know it's there. I doubt that the color faded so much since the 80s... it may be more an issue of the saturation of the printed photographs.

Maybe he exaggerated it for the sake of a tutorial...
 
I think so too... Dymszo really over did a lot of the painting even on the MR Falcons... but the technique is still valid... just not so overdone!
 
I find the splattering in the SD video vastly overdone. I have seen the original in Köln this summer (at the Star Wars Identities), and the splattering is hardly visible even if you know it's there. I doubt that the color faded so much since the 80s... it may be more an issue of the saturation of the printed photographs.

Maybe he exaggerated it for the sake of a tutorial...


Yes and the splattering is not rust color on the original model, it's gray (different shades). He's using the SaG pic as ref which is -badly- color corrected and over saturated.
 
Well lm continuing my weathering till its finished.... Then if l know (crap splats) are there in the 80's (from close-ups of then) ...l'll make a choice :). I do understand that from a little distance theyd look invisible on shots of the studio model.... But my oldest models from that time had same weird old look Splat look due to age and an old cupboard they were in with mold etc... We'll see and report...totally understand its detail as a replica...but as Steve says theirs no exacts.
 
Last edited:
I find the splattering in the SD video vastly overdone. I have seen the original in Köln this summer (at the Star Wars Identities), and the splattering is hardly visible even if you know it's there. I doubt that the color faded so much since the 80s... it may be more an issue of the saturation of the printed photographs.

Maybe he exaggerated it for the sake of a tutorial...


I agree. I saw his re-painted MR Falcon and it was way overdone in many regards.

Tom
 
I just watched the first 30 seconds of part 4 and I am sorry but it looks terrible. Way!!!!!!!!!!! overdone splatter, Way!!!! too much yellow and overall not good.

I knew he really over did his MR re-paint as mentioned but this latest one looks crazy.

Tom
 
Okay I watched a bit more. Those Sculpting A Galaxy pics look awful as well. I am gonna have to go for how I think the Falcon looks in my pics, the movies, etc. He may very well be closely matching it to the real model, as he mentioned it does not show up in pics, but I don't want it to look like that.


Tom
 
Merry Falcon Christmas ...
4d25b715c0d7ccdb900a2d9173e427ff_zps55rasfcu.jpg

My monthly issues arrived....
 
Last edited:
I don't know what happened to the model since the 2002 erra but I've got a metric ass ton of reference from this period and it only has the grey/black splattering effect.Mostly towards the front of the model. Looks like a cat pissed all over it in more recent pictures. The model used to be MUCH cleaner.
 
You nailed it Tom.
I hope it is okay to post some of my progress here. I was inspired by your work so I hope it's okay.

Aside from weathering my "Hasbo Studio Scale" 12" Speederbike and B wing I have zero experience in weathering a ship.

My plan was to completely finish my Old MPC Falcon first to develop my skills. Then my Hasbro 28" Falcon. Once those were done and I was happy I would then start on the Deago.

Well I said screw it and started on the Deago yesterday.

I am always having to wait to get this special paint, or this special glue, etc. and all that stuff adds up fast.

So,...again I said screw it and used my regular supeglue and my $1.50 black craft paint from Walmart.

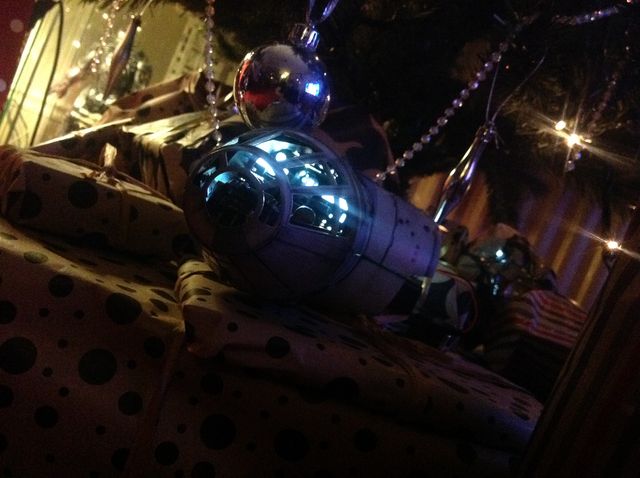
This is my first attempt. I am very happy with the pit. Need to add in a little rust, detail, etc.

The hull I am going to re-do in Tamiya Insignia white but I think for my first try this section came out pretty good.

The fun of this is since the Falcon is so messed up you can just go at it again and again.

The pit and weathering streaks, wash, etc. was done with the above mentioned paint, some regular old brushes, a lot of Q tips, paper towels and a spray bottle of water.

I hope you like it.


I used this pic as a reference. It's the bottom of the ESB 32" Filming model.

http://i63.photobucket.com/albums/h136/jameth1971/jameth1971101/VEH_IA_889.jpg


Mine. I just did the streaking to the right of the pit.


http://i63.photobucket.com/albums/h136/jameth1971/jameth1971102/My New Collection 025.jpg

http://i63.photobucket.com/albums/h136/jameth1971/jameth1971102/My New Collection 039.jpg


Close up of filming prop pit:

http://i63.photobucket.com/albums/h136/jameth1971/jameth1971101/Capture.png


My Deago pit:

http://i63.photobucket.com/albums/h136/jameth1971/jameth1971103/My New Collection 019.jpg
 
Will be working on the whole underside soon.... Not happy about the Four M6 (roofing) bolts of 65mm thats not available till issue 54 so looking to buy them over the festive season. Its very sensitive to flip the underside with the ramp parts attached!!! and If lm to wait for them it would be 2 months...I'm at 43-46 given so far.
 
Last edited:
I decided to go to Screwfix & buy the 4 supports needed for plating process (10 pack) costs £1.75 (that's for M6 roofing bolts, 80mm in length). Better than waiting 2 months for the magazines issued bolts.. I'm ready to rock!!!! :) HAPPY NEW YEAR to all.
2034e0d41477b4153da577b200f151ad_zpsefcf2y8k.jpg
 
Re: FALCON 32" hunk of junk build

I don't know what happened to the model since the 2002 erra but I've got a metric ass ton of reference from this period and it only has the grey/black splattering effect.Mostly towards the front of the model. Looks like a cat pissed all over it in more recent pictures. The model used to be MUCH cleaner.


This is my new favorite unit of measurement. "metric ass ton" Awesome:thumbsup.

I will have to agree. I have thousands of pics, or several metric ass tons, of the original Falcon models and none of this other stuff appears on it.


Tom

- - - Updated - - -

You nailed it Tom.


Thanks. I have to admit it got me really excited to get going on the rest. Still want to add a little rust.


Oh this thing is gonna be awesome. I still get super excited every time I think about my Deago.

Tom
 
I decided to go to Screwfix & buy the 4 supports needed for plating process (10 pack) costs £1.75 (that's for M6 roofing bolts, 80mm in length). Better than waiting 2 months for the magazines issued bolts.. I'm ready to rock!!!! :) HAPPY NEW YEAR to all.
http://i493.photobucket.com/albums/...4e0d41477b4153da577b200f151ad_zpsefcf2y8k.jpg


Smart. I was wondering about that.

I do wish Deago would just do the landing gear and side walls next so we could see the Falcon sitting there being built up. Better than another jig and more space needed. It would be cool to see it built from the bottom up.


Tom
 

Your message may be considered spam for the following reasons:

If you wish to reply despite these issues, check the box below before replying.
Be aware that malicious compliance may result in more severe penalties.
Back
Top