Borderlands 2 Jakobs Pistol build

cecrops props

Active Member
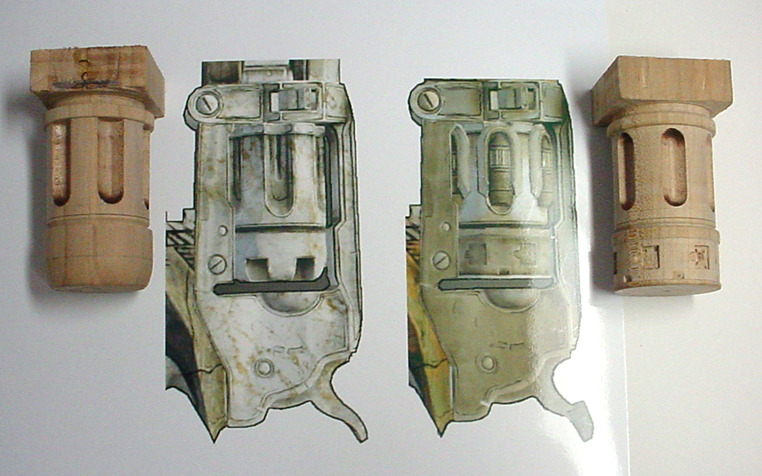
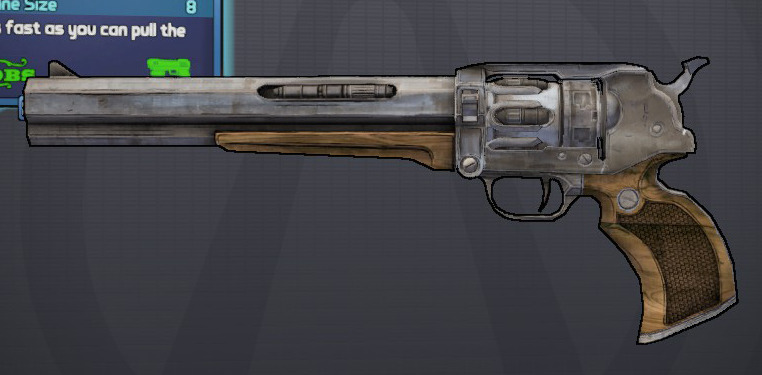
I am in the process of building the Jakobs pistol from Borderlands 2. This will be all of the parts to build the pure Jakobs pistols, such as the Iron and Rex series pistols pictured below.


tumblr_ng4y8wA83A1u53nzpo1_1280.jpg


tumblr_ng4y8wA83A1u53nzpo2_r2_1280.jpg


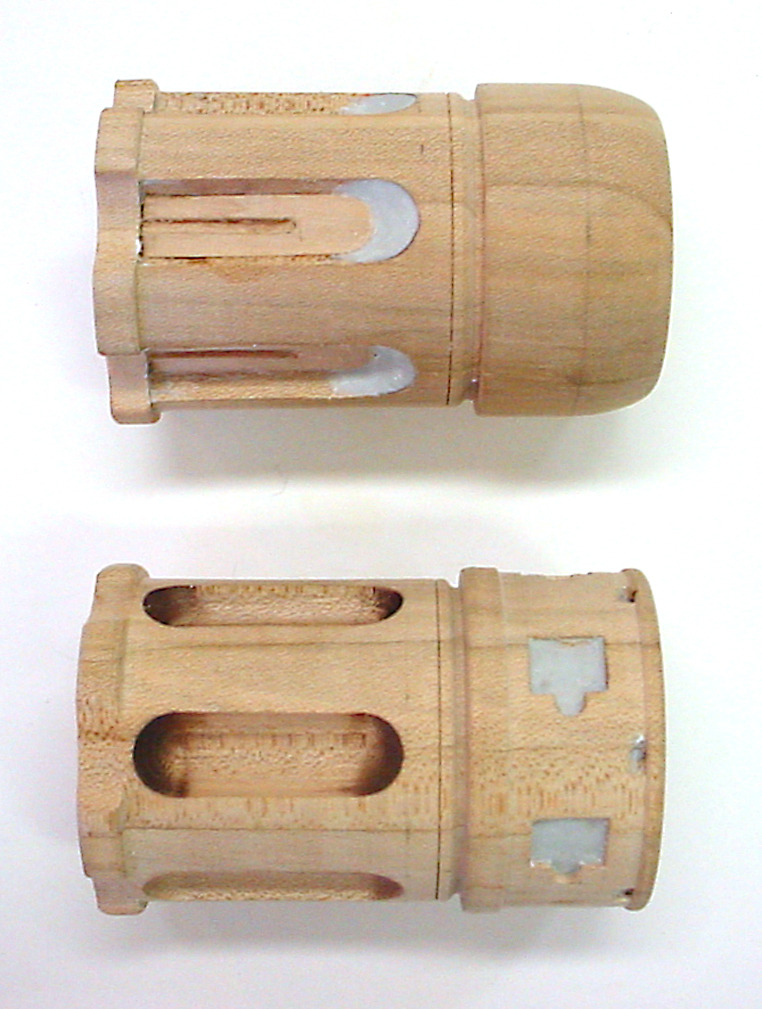
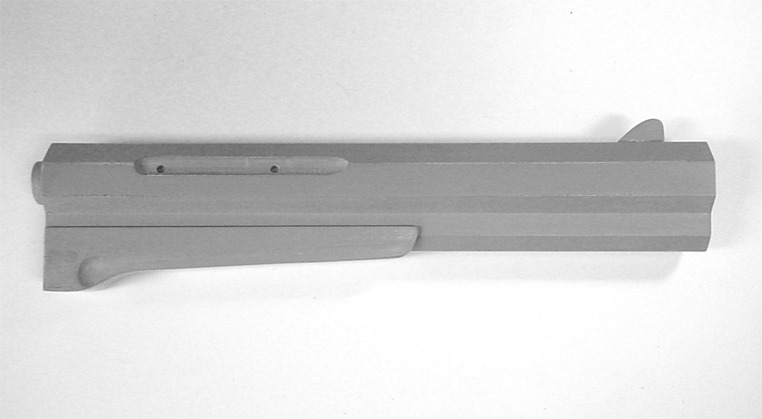
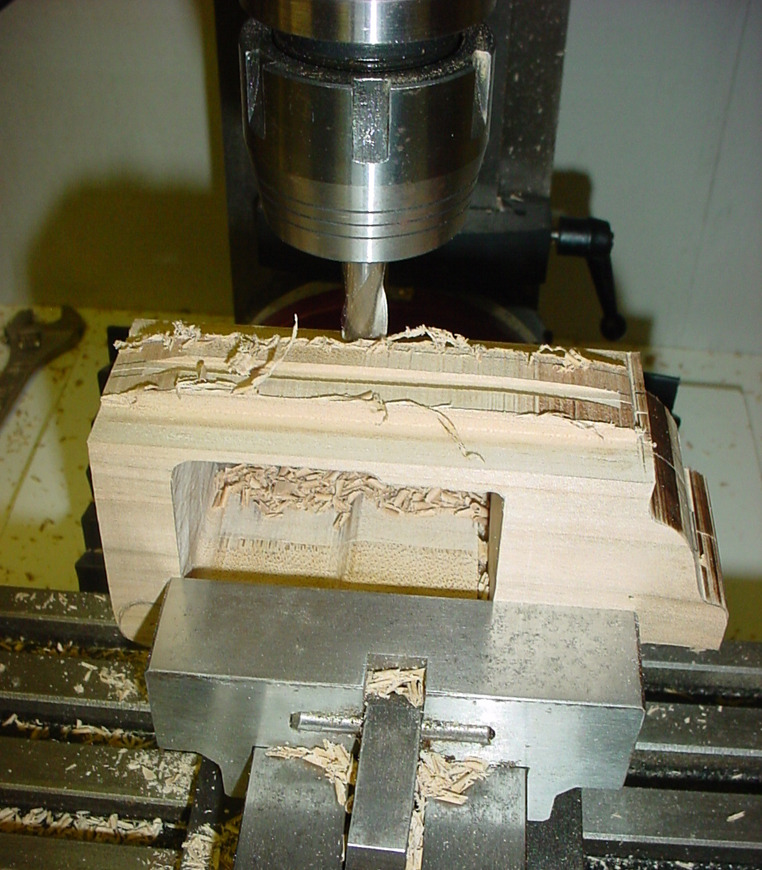
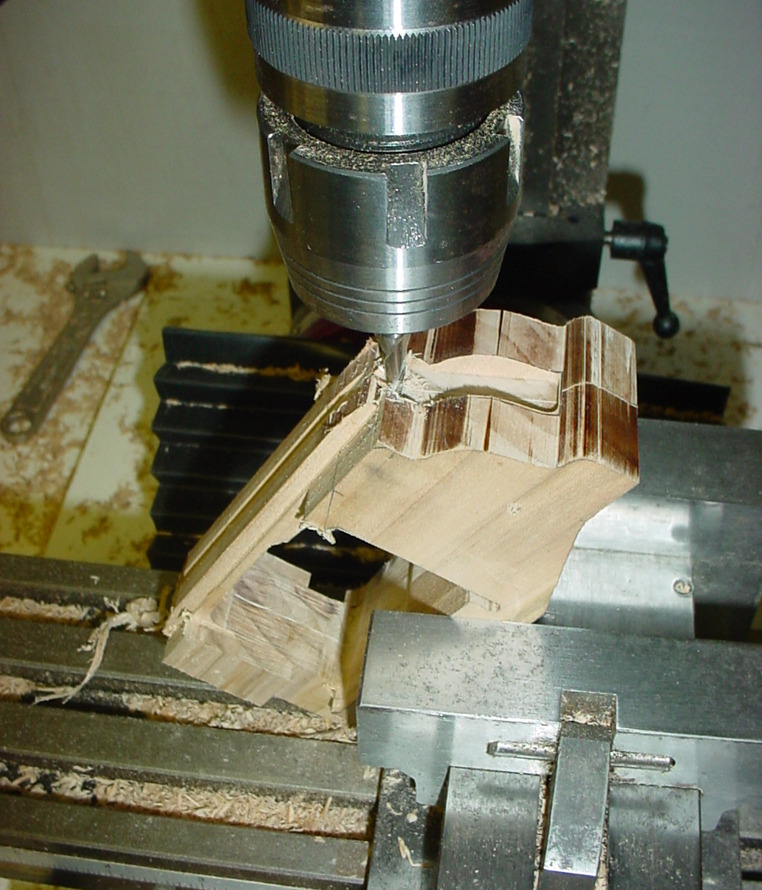
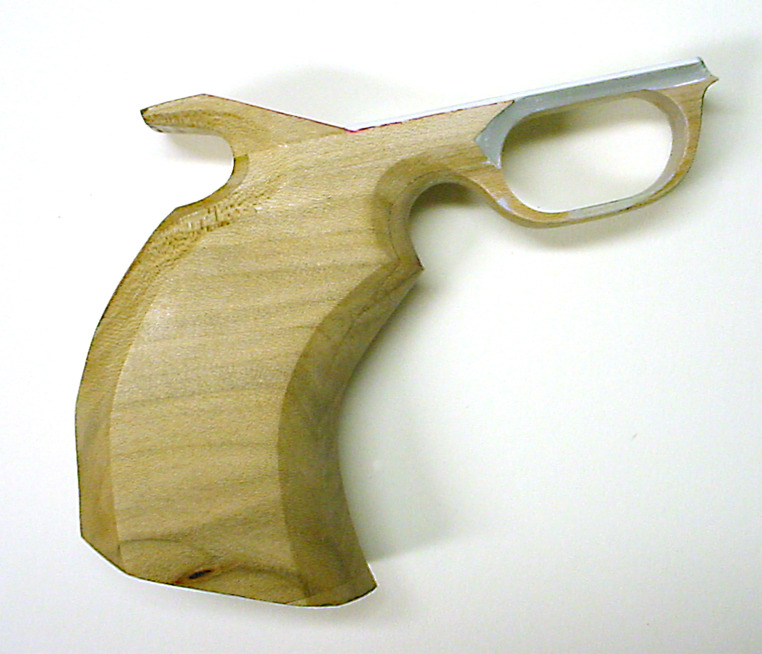
Here are the initial pieces blocked out in maple.


tumblr_ng4y8wA83A1u53nzpo3_r1_1280.jpg


After looking at several alternatives, I chose to use maple to make the master model for several reasons. It is a traditional model making material in foundry work because it is dimensionally stable, has a very tight grain, is relatively inexpensive, and is easy to finish to a smooth surface. It can also be worked with both woodworking and metalworking tools.


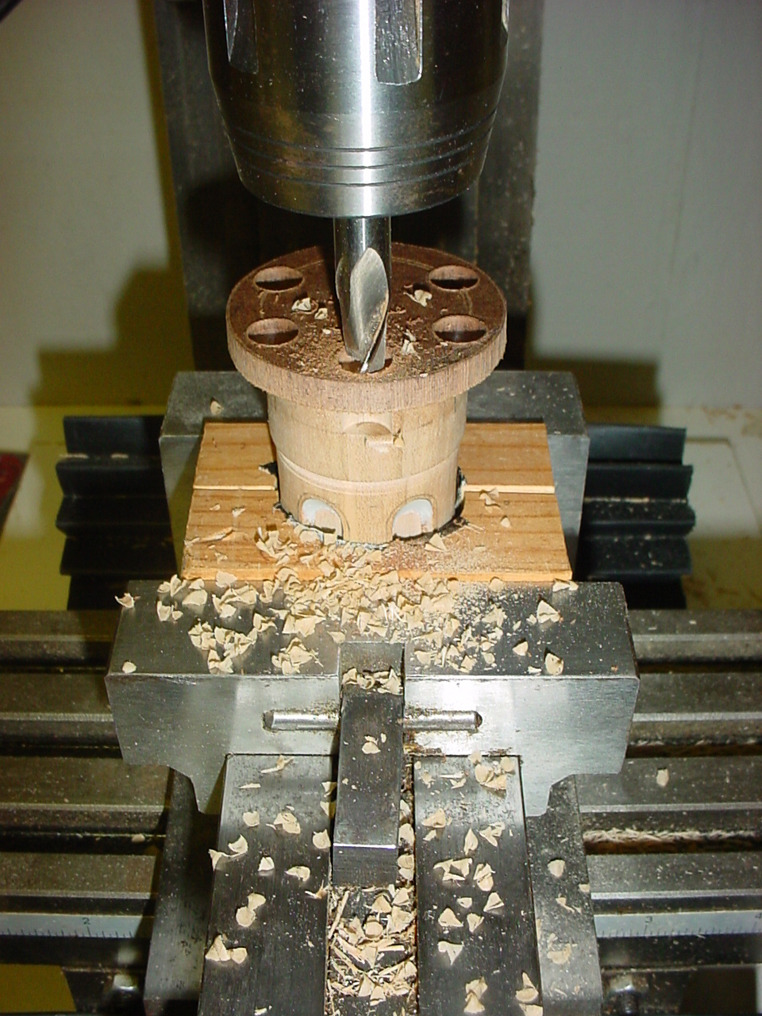
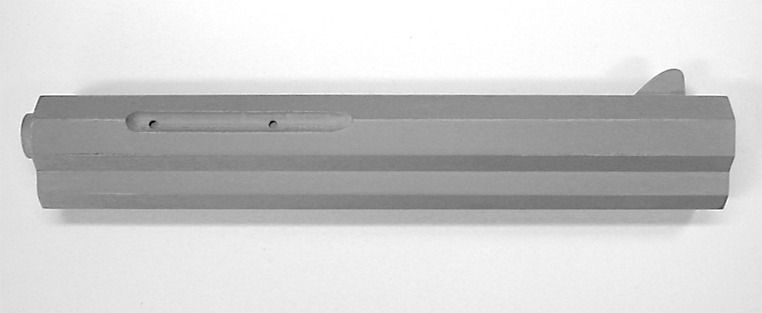
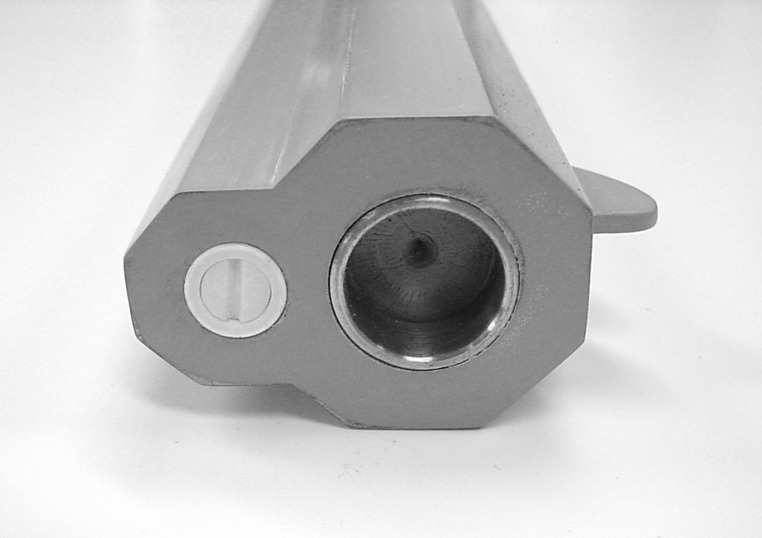
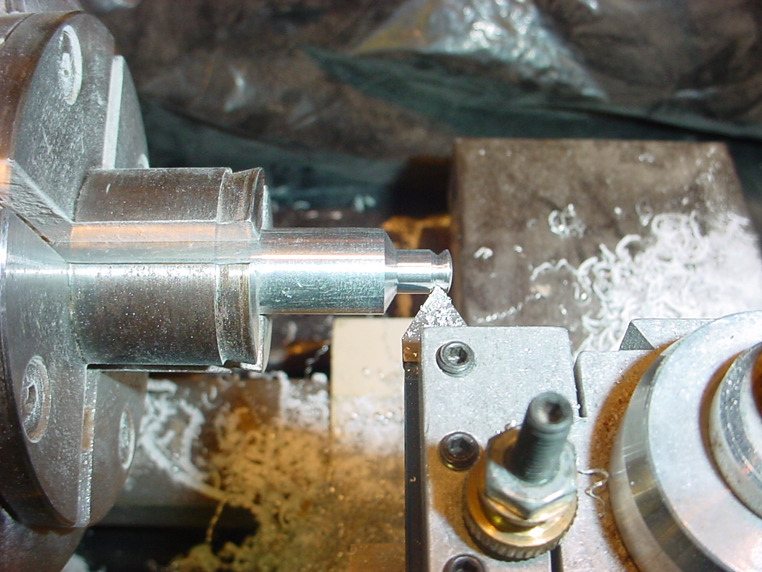
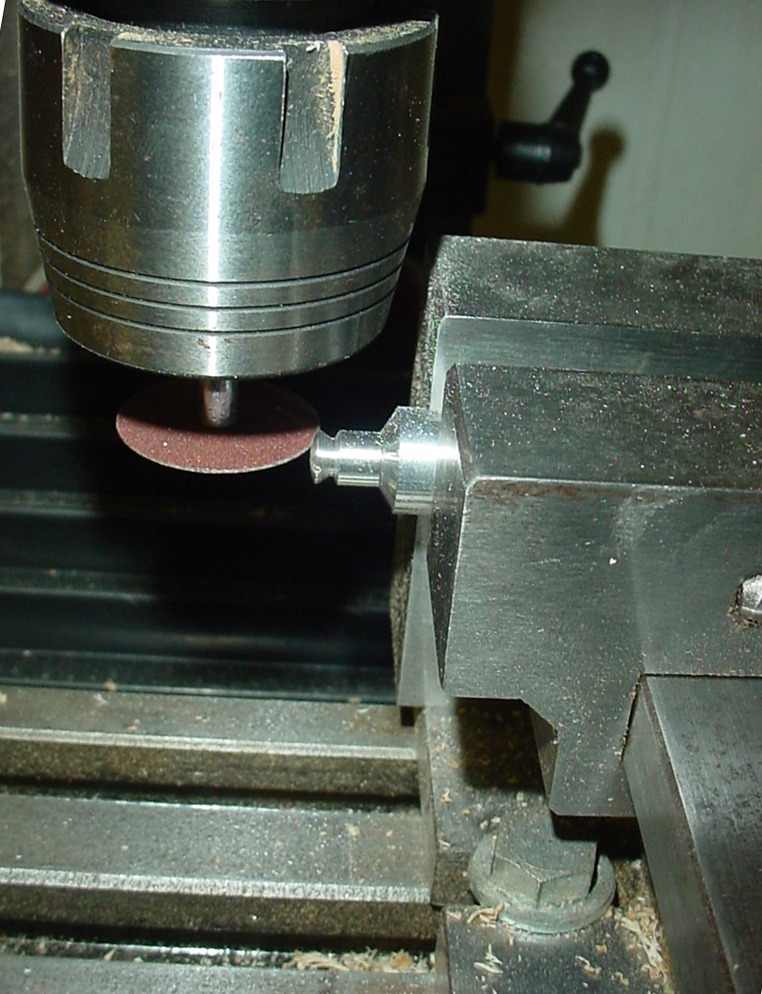
The barrel was cut to size and planed into the octagon profile with a block plane. Using a sheet of sandpaper on a flat surface and digital calipers, I was able to get it octagonal to within a few thousandths of an inch.


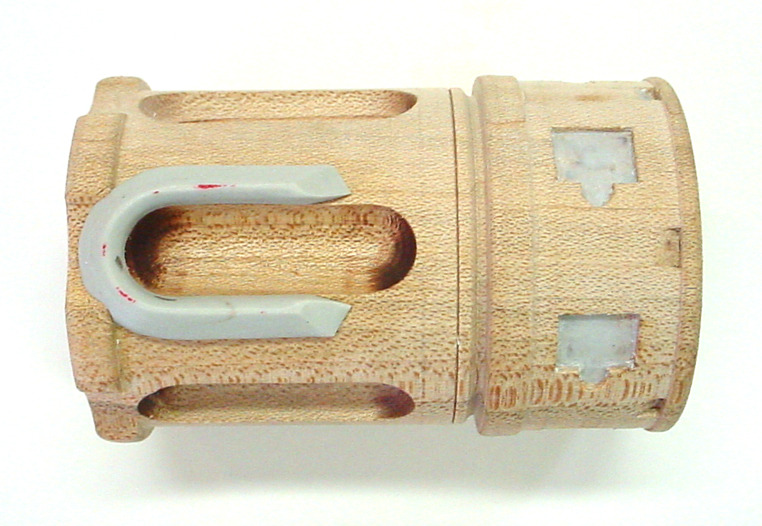
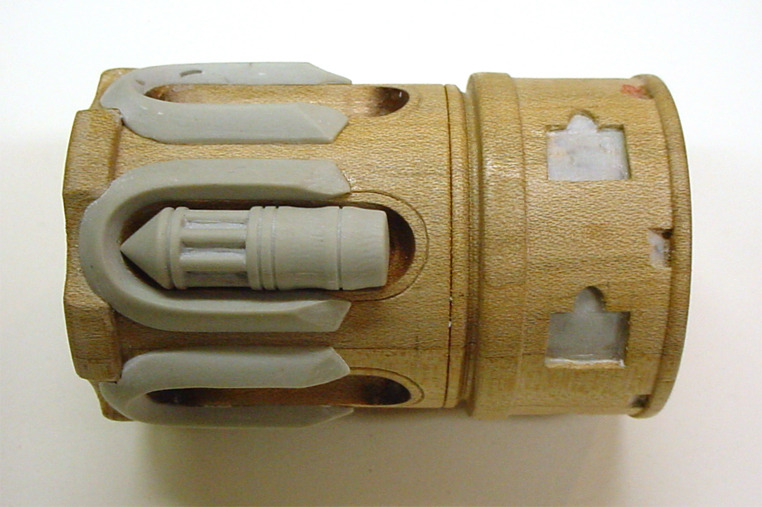
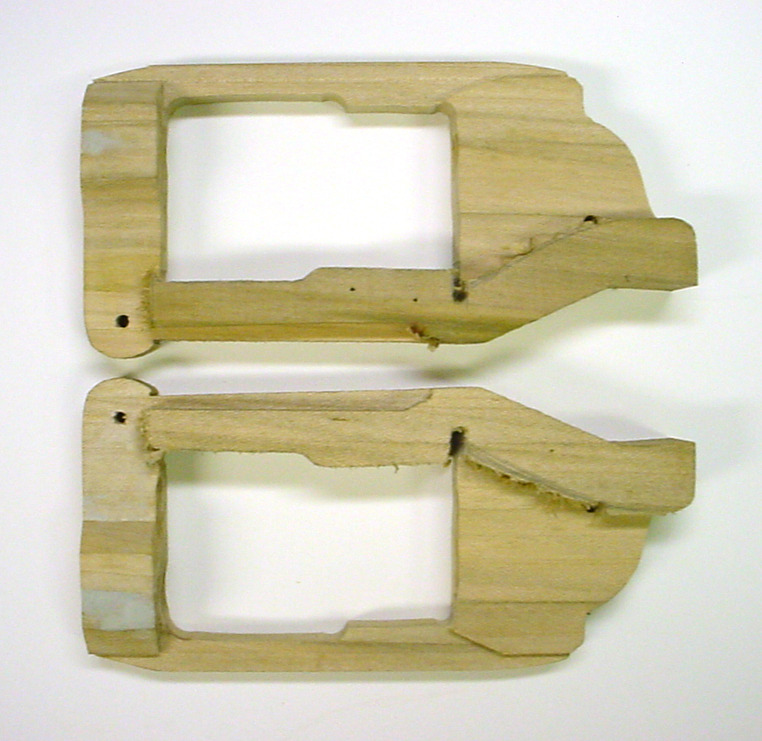
I’m making two cylinders because two different cylinders occur on the Jakobs pistols in the games, as can be seen on the screenshots above. I have also decided to make the parts for gun separated into the various parts that the Borderlands 2 gun generation system uses. That way, when I make other Borderlands pistols in the future, various parts can be interchanged to make all of the pistol variations in the games.


As I continue this build, I will be posting my progress, all the way to the end.
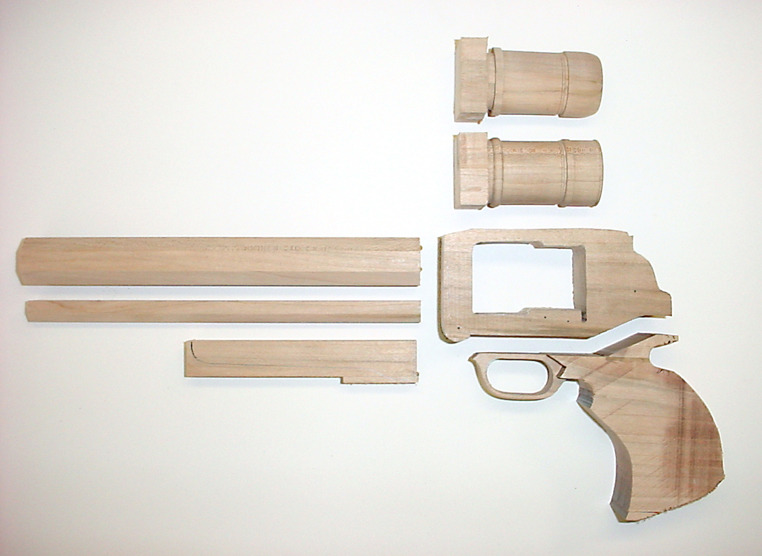
 
10509773_1500350376920846_8808392895505706090_n.jpg


In the first photograph, the cylinder is maple, turned on the lathe. I’m now using the lathe in a different way, to cut the grooves in the sides of the cylinder. This time, the lathe is not turning, I have an indexing plate installed (the blue disc). With it I can lock the lathe in place at very specific amounts of rotation, so that the grooves when cut are precisely spaced around the cylinder. To cut the grooves, I am using a hand grinder with a ball burr. It is locked into a quick change tool post, mounted on a vintage Rivett finishing lathe cross slide. I had an adapter plate CNC milled to fit the cross slide on my wood lathe. Using the micrometer dials on the cross slide, I can move the grinder and burr a set distance back and forth across the maple cylinder. It took four passes for each groove, each a little deeper. The last was a light pass to clean up the cut.


tumblr_ng6uq00ymB1u53nzpo2_1280.jpg


The second photograph shows the two cylinders next to full size printouts from the game files. Full scale printouts like these are very handy, I can use my digital calipers to take measurements right off them, and transfer the measurements to the parts I’m making. I used the indexing system on the lathe to also lay out and start the various little cutouts on the cylinder on the right. There’s still a lot of details to go on these parts!
 
Thank you, I have often wondered how to flute a cylinder, and I imagine the same technique would be used to put a fuller on a knife. I like your build so far
 
And if you're ever going to cosplay as Booker DeWitt, with a few mods this thing could double as a Handcannon. Seem very similar on first glance.
 
OK, now to work on the raised parts on the fancy cylinder. In the first photograph, I have built one of the raised portions with epoxy putty.


In order to make the rest of them all exactly the same (and I admit, to save myself the trouble of carefully hand forming five more), I have mixed up some silicone mold putty and pressed it over the area (no, that’s not bubble gum). The last photo shows a new part pulled from the mold in more epoxy putty. This is a handy and quick way to replicate small and simply shaped parts, without having to mix and pour a liquid silicone mold.


tumblr_ngand6NAeo1u53nzpo1_1280.jpg


tumblr_ngand6NAeo1u53nzpo2_1280.jpg


tumblr_ngand6NAeo1u53nzpo3_1280.jpg
 
More work on the cylinder. The first photo is one of the little bullet like things that go in the grooves on the outside of the cylinder. It is turned on the lathe from a rod of epoxy. I used the same technique that I used to cut the grooves on the cylinder, with the indexing plate and a very small burr to cut the tiny grooved section.


tumblr_ngdwytFD991u53nzpo1_1280.jpg


The second photo shows the little guy in place on the cylinder.


tumblr_ngdwytFD991u53nzpo2_1280.jpg
 
Now it’s time for a little more work on the other cylinder (remember, there are two of them for Jakobs pistols). Here, I have screwed down a guide to perfectly align and space an end mill (that’s the cutting bit here) to cut the half cutouts around the edge of the cylinder. The cylinder is held in the vice of my milling machine.


tumblr_nge87qADnD1u53nzpo1_1280.jpg
 
Finally, the first finished piece! This, of course, is the pistol barrel of the pistol, all ready for silicone. The barrel rib is attached to the bottom, the front sight is in place, and the groove for the ornamental turned thing has been milled in on both sides. I have decided to make the stock part that attaches to the underside separate, to make it easier to paint these two parts during finishing.


tumblr_nghmzgchMl1u53nzpo1_1280.jpg


Here’s the business end of the barrel, with a barrel ring insert of stainless steel, and the screw part made in Corian.


tumblr_nghmzgchMl1u53nzpo2_1280.jpg


Here is the turned ornamental thing (what ever it is), that goes in the grooves on the side of the barrel. It is turned from Corian, and grooved using the same indexing process on the lathe as the bullet shaped thing that goes in the grooves of the cylinder. It has two brass pins inserted into the back, to fit into the holes for it on the barrel.


tumblr_nghmzgchMl1u53nzpo3_1280.jpg
 

Attachments

  • tumblr_nghmzgchMl1u53nzpo3_1280.jpg
    tumblr_nghmzgchMl1u53nzpo3_1280.jpg
    273.6 KB · Views: 349
Here is the finished foregrip, or whatever it’s called when it appears on a pistol. It is a separate piece so that it will be easier to finish in wood grain when it comes time.


tumblr_ngk299a0BH1u53nzpo1_1280.jpg


This photograph shows it as it will look in place.


tumblr_ngk299a0BH1u53nzpo2_1280.jpg
 
Time to start back to work on the frame of the pistol. Here, I am using the mill to cut the different ridges and center groove on the top of the frame.


tumblr_ngluu8v1Y01u53nzpo1_1280.jpg


Now, I am using the mill to cut the slot for the hammer on the back of the frame.


tumblr_ngluu8v1Y01u53nzpo2_1280.jpg


This next step will take a bit of explaining. Since I knew that the cylinder would have to be trapped in the middle of the frame, I knew that the frame would have to be cast in two halves. To make this easier, I added in a piece of thin card stock between the two pieces of maple stock when I first glued up the block for the frame. Once I had the frame sawn out and roughly shaped, I just needed to insert edge of a sharp chisel on the center joint and tap it, and the two perfectly matched halves pop apart! I will add alignment pins and holes on the insides of these two pieces.


tumblr_ngluu8v1Y01u53nzpo3_1280.jpg
 
I’ve completed a bunch of work on the pistol frame. I’ve done a lot of carving, contouring and smoothing of the frame. I then turned and split a half round piece that makes the two humps on the sides. I’ve added some carved trim lines, and carved out the insides of the frame to fit the cylinder.


Next it was time for the screws, or rather, screw heads. Gun screws are different from machine or wood screws that you can get from the hardware store. They have much finer slots, and regular screws would look very clunky on the pistol. Rather than ordering gun screws online, I decided to make my own. The first photograph shows a small screw head being turned on the lathe.


tumblr_ngrfmyL6Cm1u53nzpo1_1280.jpg


The next photograph shows the screw head slot being cut on the mill. Once the screw head was slotted, I chucked it in the lathe again, cut it off, and started on the next screw.


tumblr_ngrfmyL6Cm1u53nzpo2_1280.jpg
 
This is spectacular so far! I'm very excited to see this project finished. I have a particular affinity for this gun as I made a far more simple version of the Jakob's Bloody Justice for an independent film studio's web series. It was a film prop, so a lot less detail than yours. Check it out if you wish at http://www.kretschmerkreativ.com/jakobs-pistol.

Thank you for sharing and well done!
 
This thread is more than 7 years old.

Your message may be considered spam for the following reasons:

  1. This thread hasn't been active in some time. A new post in this thread might not contribute constructively to this discussion after so long.
If you wish to reply despite these issues, check the box below before replying.
Be aware that malicious compliance may result in more severe penalties.
Back
Top