4lpha4dam
New Member
Hello RPF'ers!
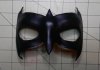
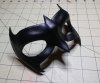
For Halloween of 2014 I am currently constructing a spin on the classic Batman character Nightwing. I am drawing inspiration from many different sources and versions of the hero. Most notably this costume is an armored version of Nightwing, sporting pads and plates over a fabric suit. In this thread I will be posting updated pictures of the costume's indivudal pieces, production methods, and final suit action photos. If you have any questions or comments on how I constructed a particular part of the suit or the suit as a whole feel free to post.
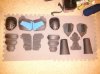
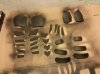
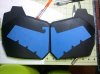
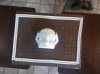
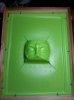
Attached are all of the armored torso pieces for the suit. I formed them from 10 mm EVA floor foam. The "plates" were heat treated, for contour, coated in plastidip and then glued onto a thinner sheet of black craft foam to act as backing. The logo I chose reflects the Young Justice version of Nightwing, as I feel this logo is more visual and better represents the hero as a symbol.
For Halloween of 2014 I am currently constructing a spin on the classic Batman character Nightwing. I am drawing inspiration from many different sources and versions of the hero. Most notably this costume is an armored version of Nightwing, sporting pads and plates over a fabric suit. In this thread I will be posting updated pictures of the costume's indivudal pieces, production methods, and final suit action photos. If you have any questions or comments on how I constructed a particular part of the suit or the suit as a whole feel free to post.
Attached are all of the armored torso pieces for the suit. I formed them from 10 mm EVA floor foam. The "plates" were heat treated, for contour, coated in plastidip and then glued onto a thinner sheet of black craft foam to act as backing. The logo I chose reflects the Young Justice version of Nightwing, as I feel this logo is more visual and better represents the hero as a symbol.

") cheers
cheers