You are using an out of date browser. It may not display this or other websites correctly.
You should upgrade or use an alternative browser.
You should upgrade or use an alternative browser.
33 inch TOS Enterprise - Studio Scale Replica
- Thread starter Shaw
- Start date
Shaw
Well-Known Member
Yes, but I'll save that effort for the final part. I got the edge on the lower primary hull using a combination of a razor saw and sanding... and it didn't take that long to get to that point. So as a test, I'm pretty happy. I was mainly wanting to see what it was like working with the material in this way... and it was great!
Shaw
Well-Known Member
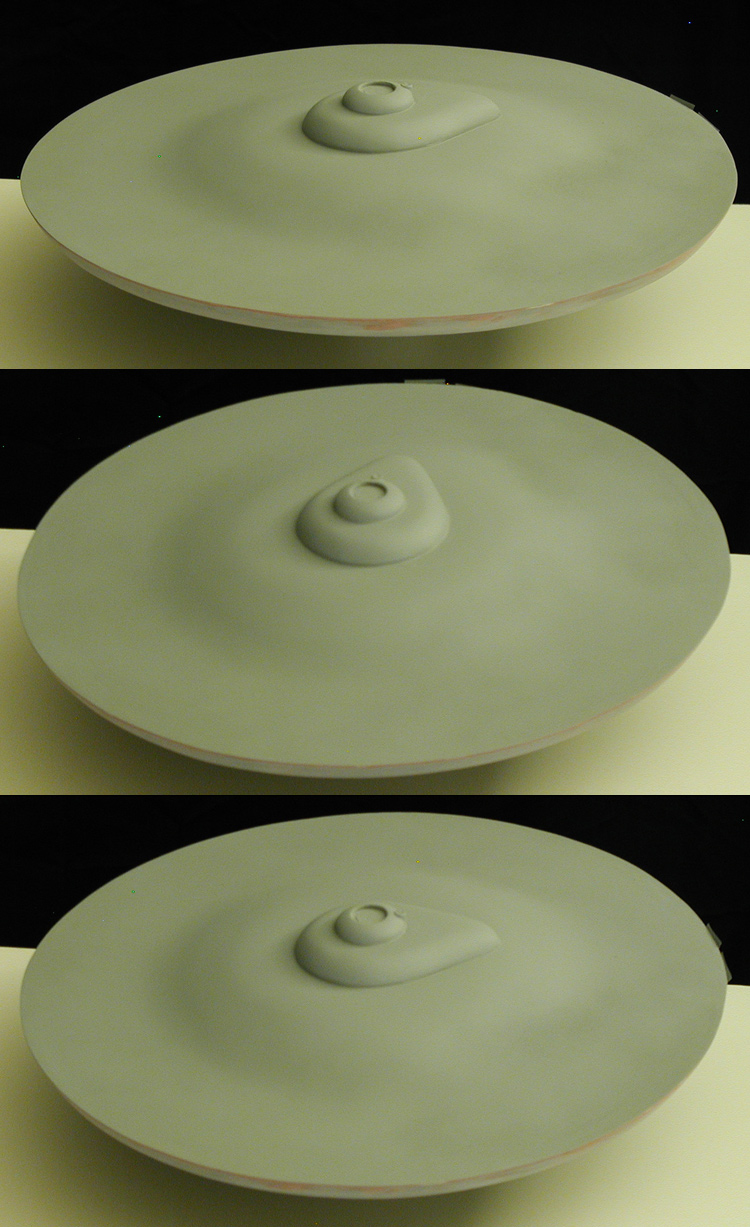
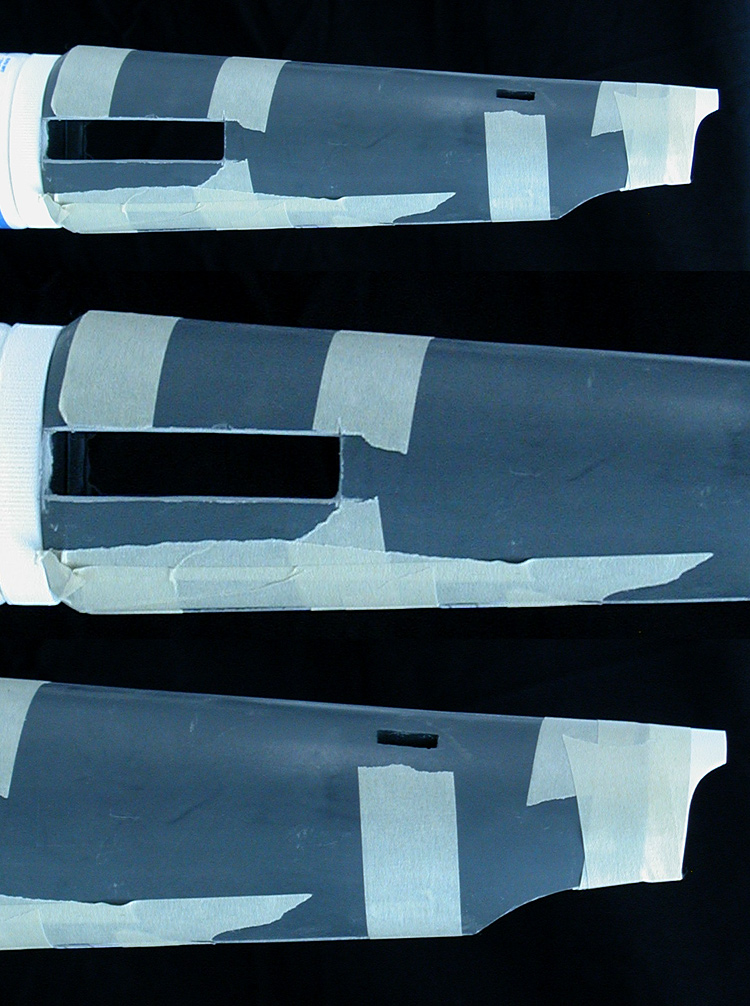
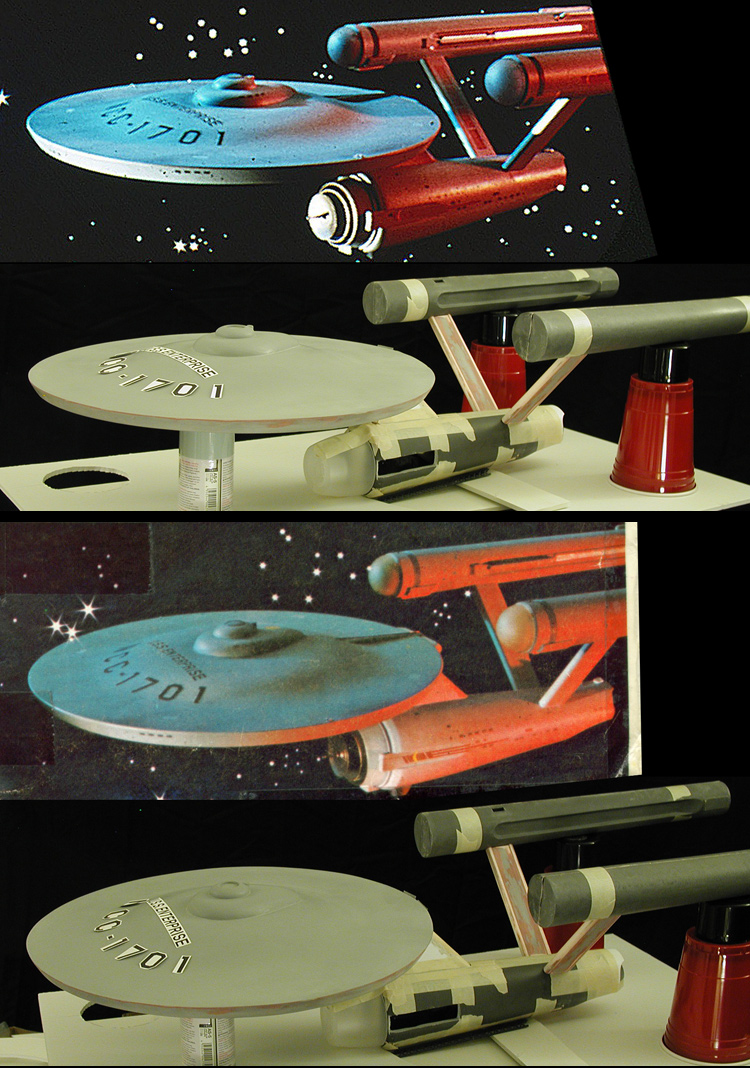
Based on what I learned from the spare lower primary hull, I cut down the main lower primary hull and did a test fit of the top and bottom together...
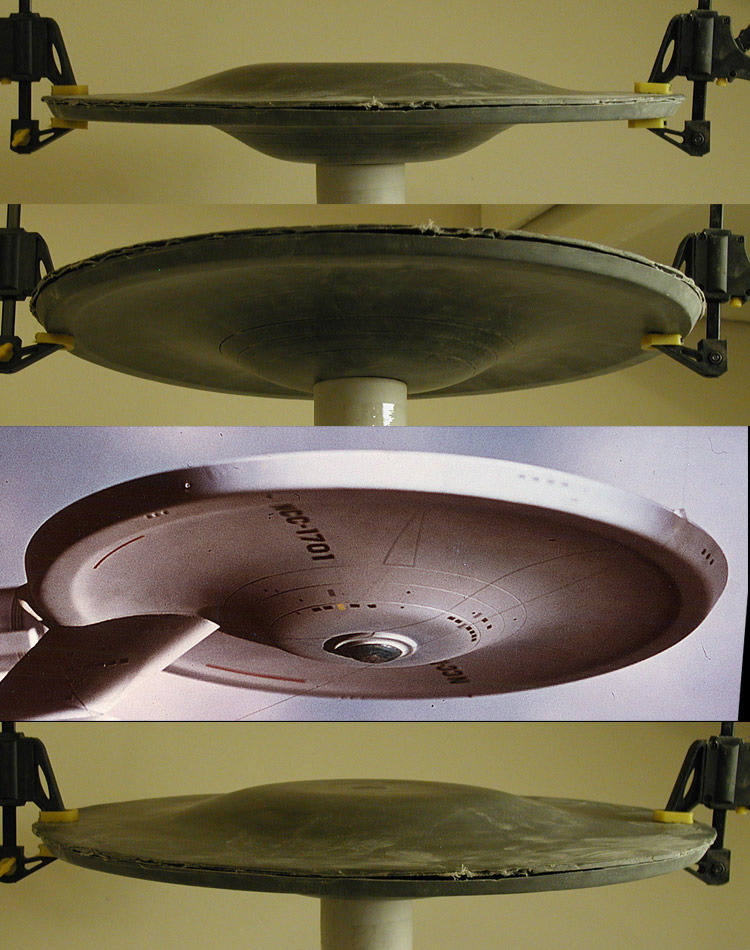
I threw in a shot of the original model from approximately the same angle for comparison. The clamps aren't actually clamping in those images. I had set them to the target thickness I was aiming for for the outer edge. They pretty much freely slide around the rim at this point.
I threw in a shot of the original model from approximately the same angle for comparison. The clamps aren't actually clamping in those images. I had set them to the target thickness I was aiming for for the outer edge. They pretty much freely slide around the rim at this point.
crackerjazz
Sr Member
Very impressive!!! ")
Shaw
Well-Known Member
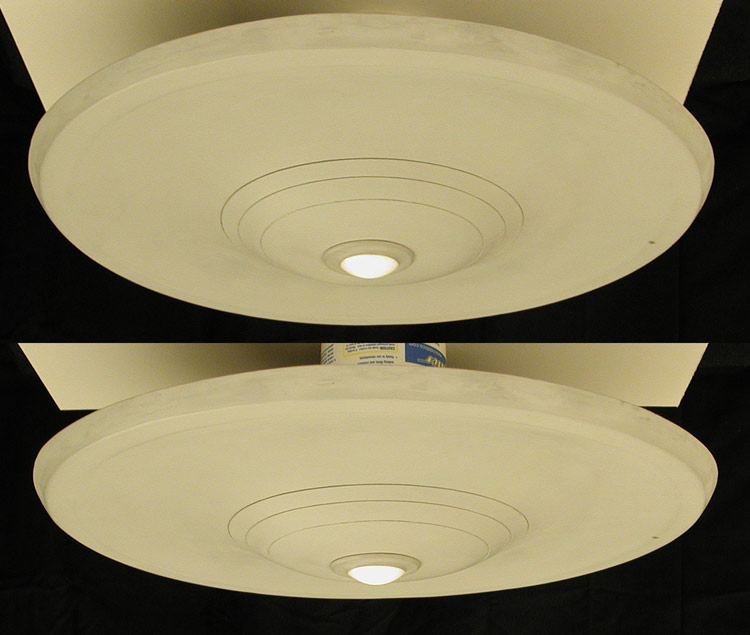
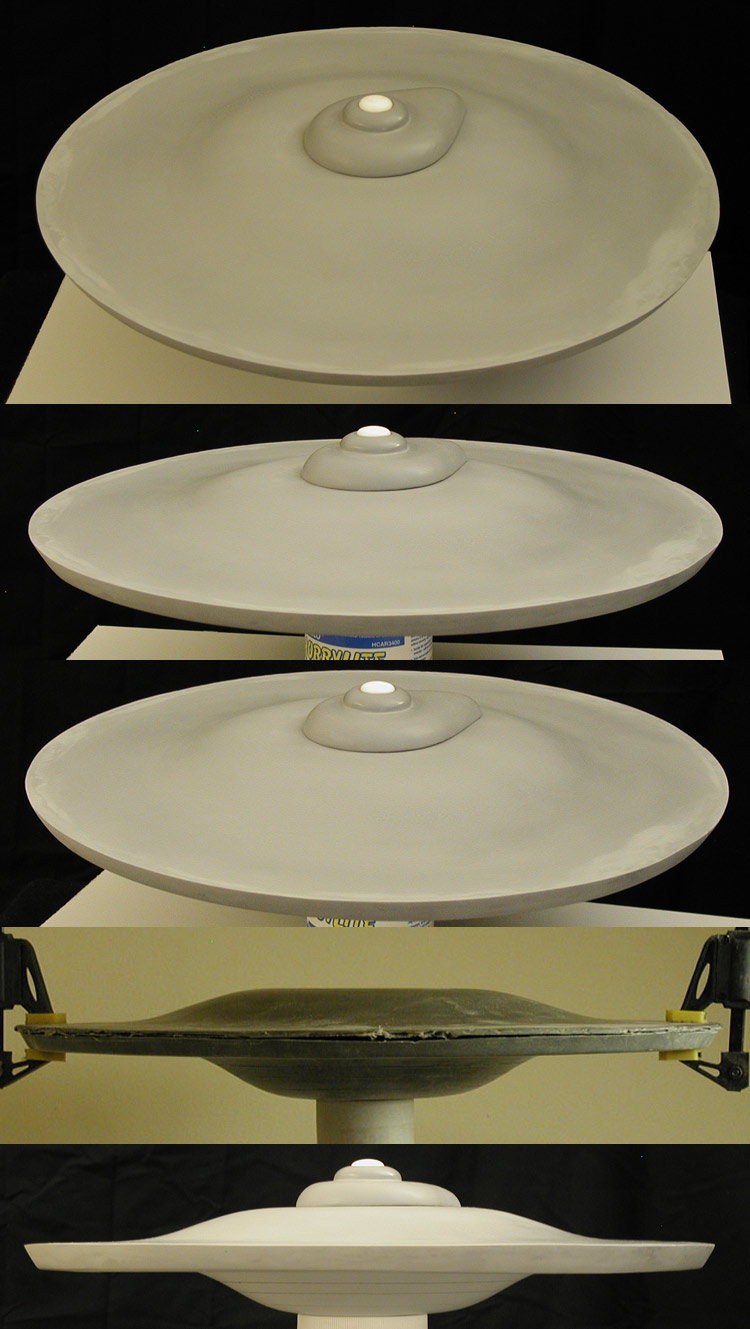
This is the primary hull upper and lower sections together with the bridge/B/C deck master set in place...
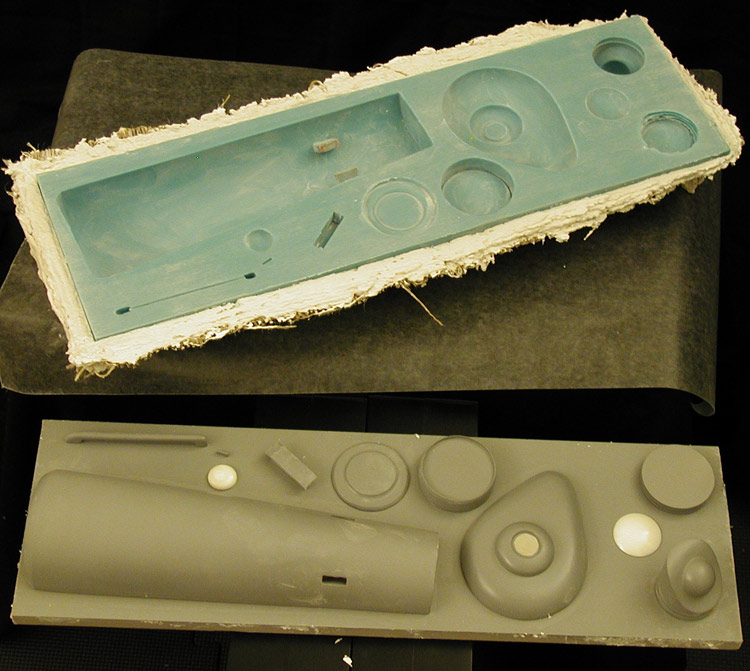
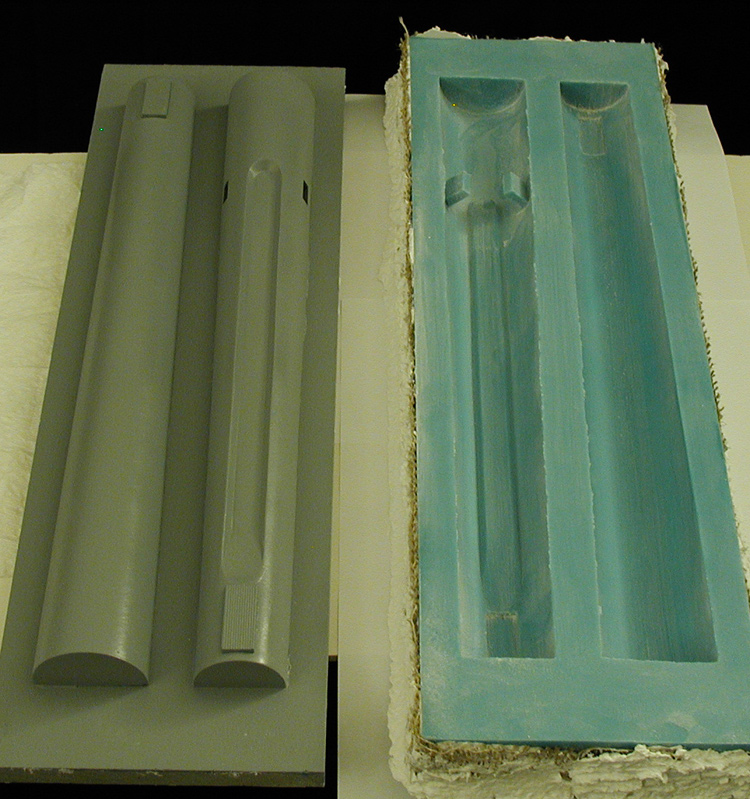
This is the mold for the secondary hull halves, bridge/B/C deck structure and some of the nacelle parts along with the masters used to make it...
Some shots of the final bridge/B/C deck structure in place (still working on blending the seam)...
And I started on making the parts for the dorsal... this is a test assembly of them to make sure that they fit to the primary hull's contour.
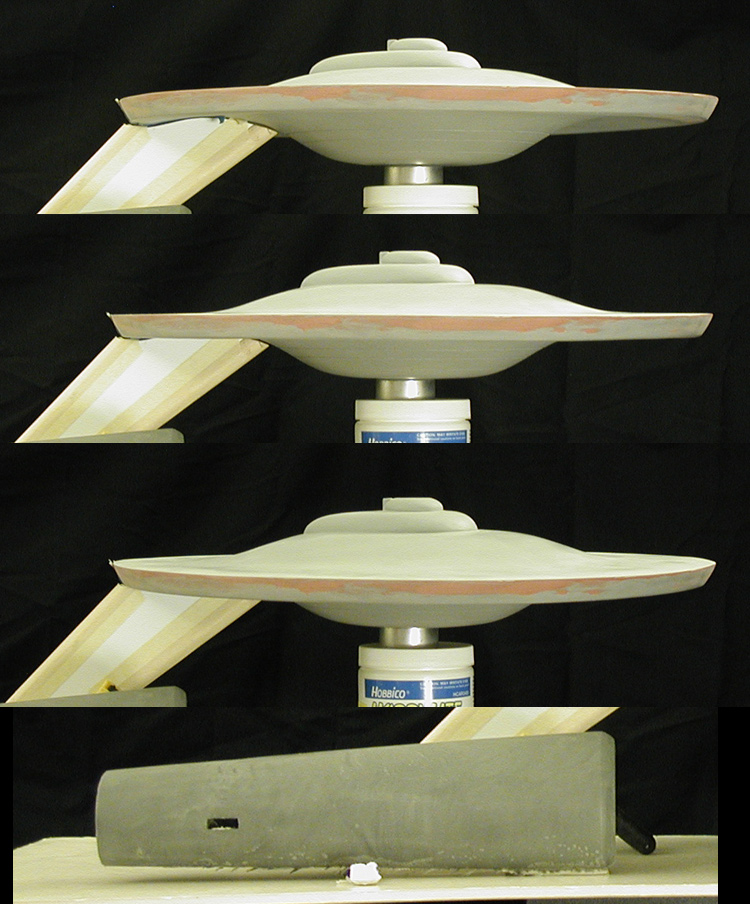
I included a shot of my first pull from the secondary hull mold. I don't know if that is going to be an actual part for the model, but at least I got the shape I was looking for.
This is the mold for the secondary hull halves, bridge/B/C deck structure and some of the nacelle parts along with the masters used to make it...
Some shots of the final bridge/B/C deck structure in place (still working on blending the seam)...
And I started on making the parts for the dorsal... this is a test assembly of them to make sure that they fit to the primary hull's contour.
I included a shot of my first pull from the secondary hull mold. I don't know if that is going to be an actual part for the model, but at least I got the shape I was looking for.
Shaw
Well-Known Member
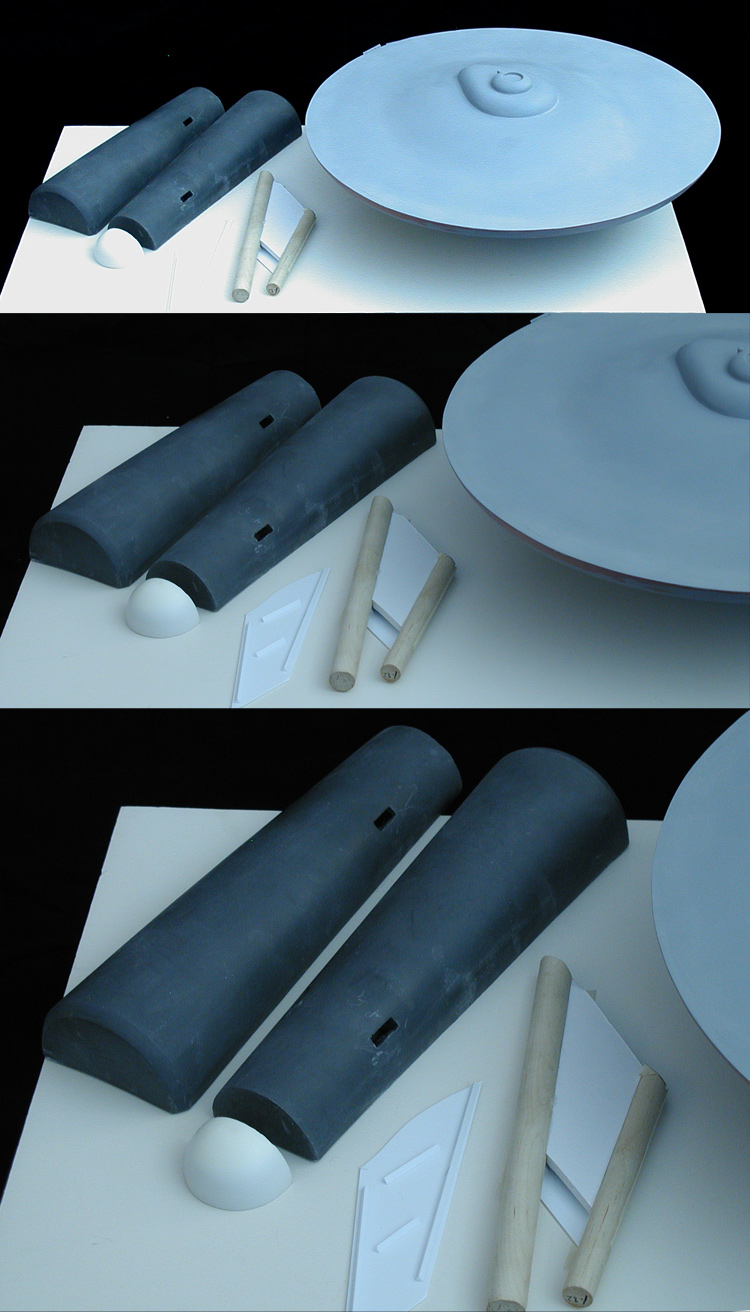
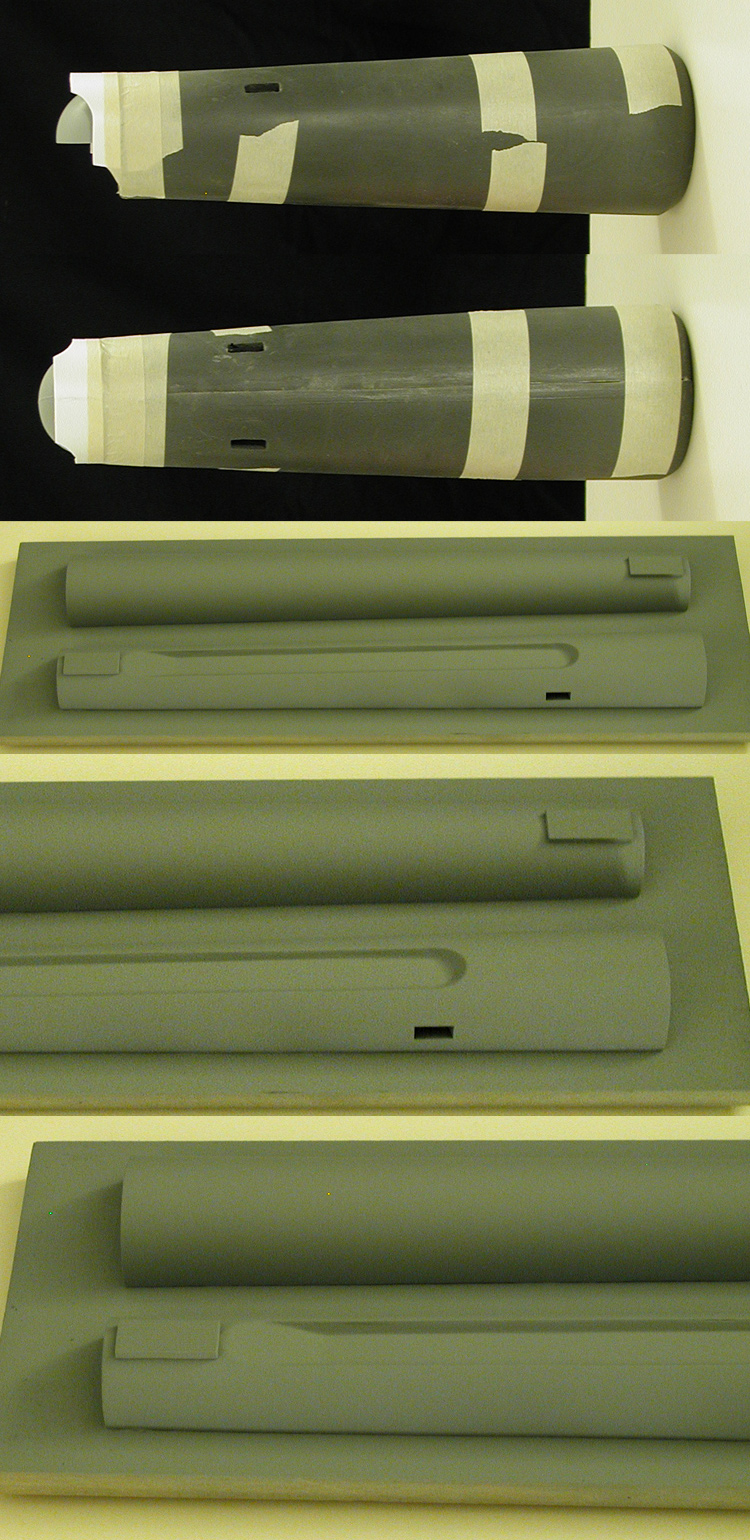
I now have the start of the secondary hull, including the start of the hangar doors (yes, my model will have the hangar doors even though the original model's doors were lost between the second and third seasons of TOS)...
The goal is to replicate the model at it's most iconic period... when being used for publicity photos with the cast members during the first season. Some time between the second and third seasons the model was dropped and imperfectly repaired (the port side nacelle was re-attached wrong and the outboard intercooler on the starboard nacelle was glued on backwards) along with the hangar doors being lost.
The goal is to replicate the model at it's most iconic period... when being used for publicity photos with the cast members during the first season. Some time between the second and third seasons the model was dropped and imperfectly repaired (the port side nacelle was re-attached wrong and the outboard intercooler on the starboard nacelle was glued on backwards) along with the hangar doors being lost.
Shaw
Well-Known Member
I'm not too sure any of my parts would work on something like the 1/350 TOS Enterprise... my model is about 4% larger. Plus my parts are generally far from finished when pulled from the molds, but that is because I designed them for how I build rather than making them kit friendly.
Small update...
Did some trimming of the secondary hull halves an test fit them with the start of the hangar door hood. There is still a ways to go, but it is feeling like I'm making progress.
I also finished up the nacelle masters and mounted them to a board. I hit them with a couple coats of Krylon Crystal Clear before starting in on making a mold.
I finished up with the silicon rubber part, now just making the mother mold for the nacelles.
I also did the first major cuts into the secondary hull... the rear undercut and the side channels.
This is a good example of why my parts aren't kit friendly. The secondary hull was no where even close to finished when I made the mold, but that was by design so I only had to worry about turning out one side to get both. And I knew what I'd have to do to finish the secondary hull as a whole.
This is after a couple hours of cutting/shaping...
The nice thing is that I was totally pounding away at these parts, and they are very strong. They are also very ridgid...which is also quite nice.
Shaw
Well-Known Member
Did some more work on the dorsal today. The last major internal piece was mounting the locking screw (which corresponds to a metal plate I embedded into the lower primary hull piece back in January). I should be able to make pretty quick progress on the dorsal from here.
Once I'm done with the dorsal, I'll build it into the secondary hull, locking it into place.
Once I'm done with the dorsal, I'll build it into the secondary hull, locking it into place.
Shaw
Well-Known Member
Finished making the mold for the nacelle body. It'll be a while before I get a chance to actually use them, but so far they look pretty good.
I've also been testing fit and alinement of aspects of the secondary hull. With the dorsal set in place, I made some nacelle support pylon stand-ins out of foamcore board. I just needed to mimic the size and shape of the final parts to make sure that the slots they will eventually fit into will produce the correct angles...
All the angles look pretty good at this stage. And if there had been nacelles on the pylons, their center lines would have been about 10 inches apart (like they are supposed to be)... so that is a sizable amount of work done early on while engineering the masters that has thankfully paid off.
Shaw
Well-Known Member
Last night I was experimenting with the nacelle body molds to see if I might like Alumilite White better than the TC 1630, and how little material I can get away with (the first nacelle body was about 8 oz). I made a second test nacelle using about 4 oz of Alumilite, but I like the TC 1630 better for this type of part (though I think I can get it down to around 4 oz of material on the final nacelles).
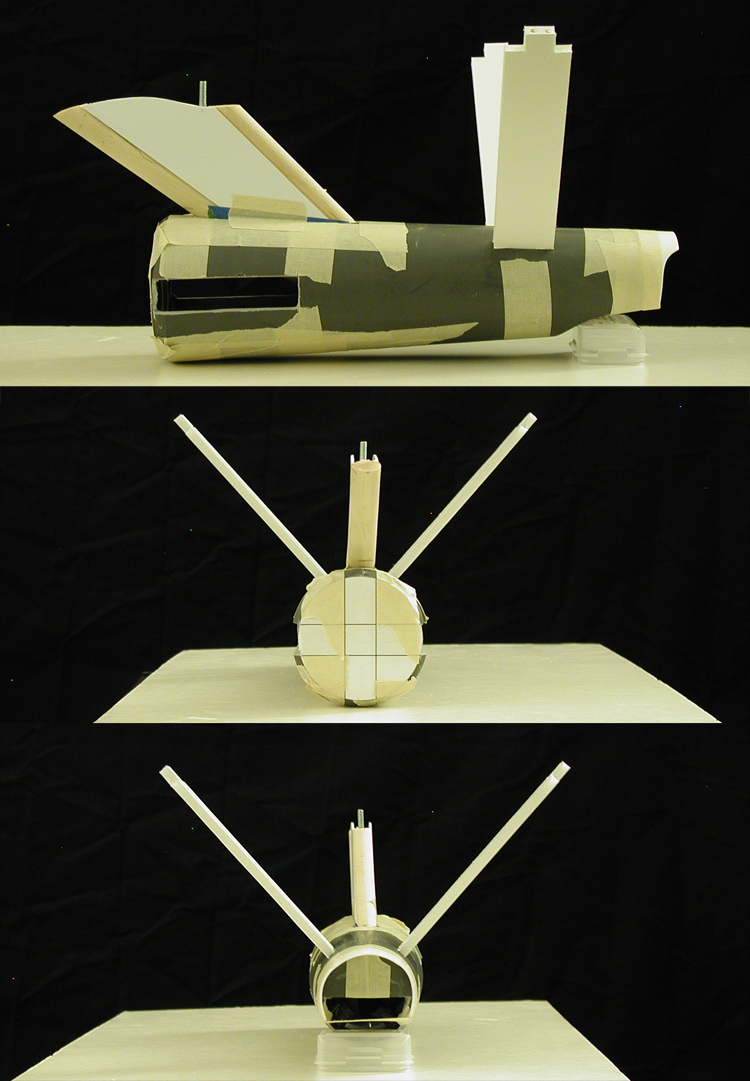
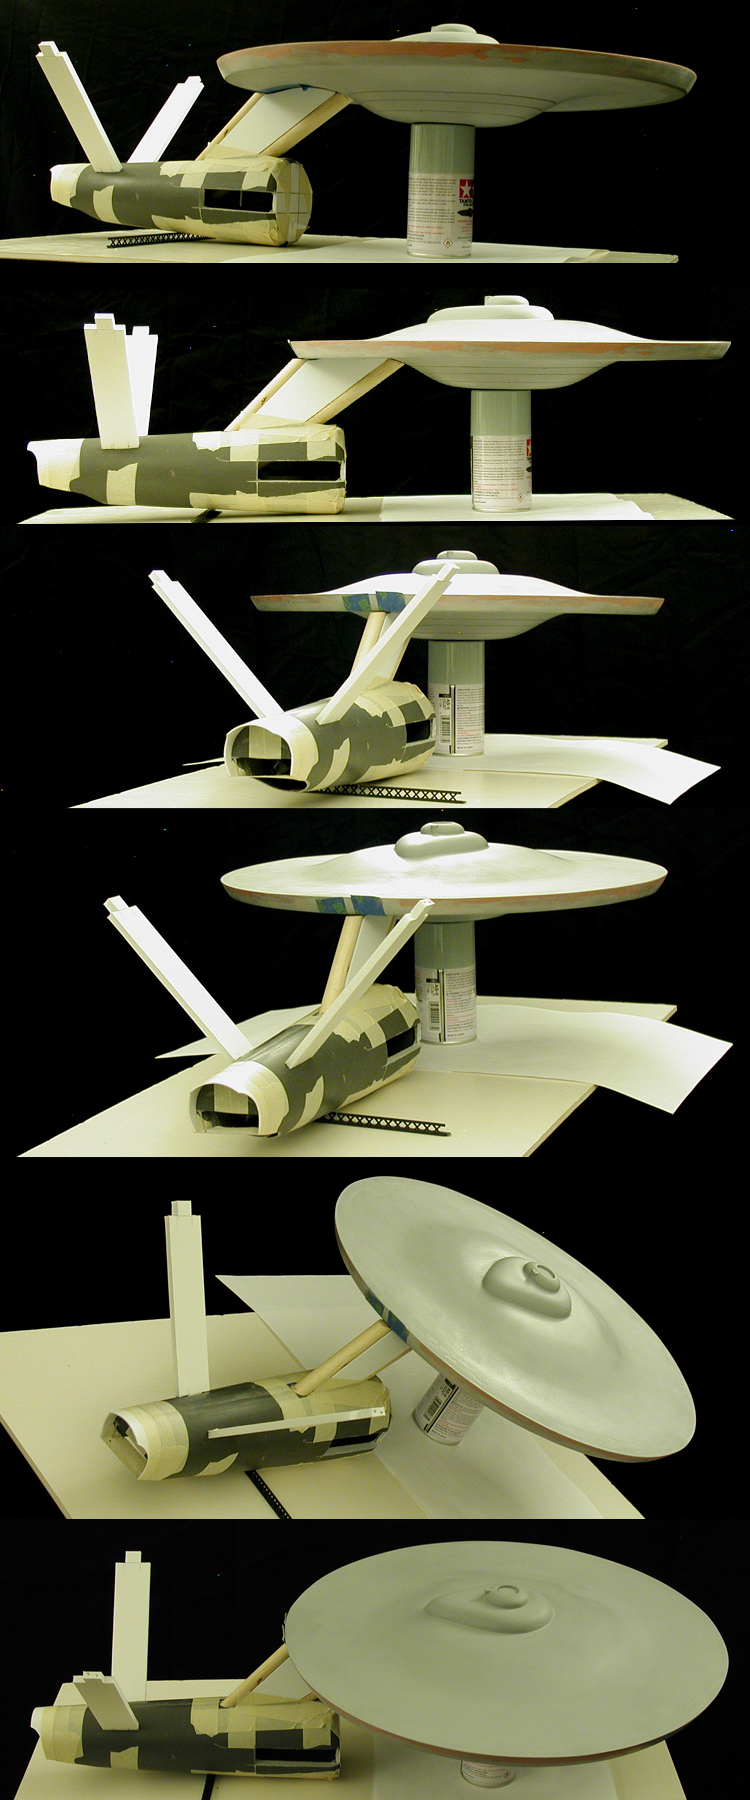
Even though I didn't want to waste any more time on the Alumilite nacelle, it is a second nacelle... which means I can take some more test assembly shots that can help me judge if I'm going in the right direction with this model (I had made additional changes to my plans after the second study model, so this is really my first chance to see them).
Here is how she looks (some images are flipped, I just wanted to see it from a different direction without handling the model too much)...
Shaw
Well-Known Member
Small update...
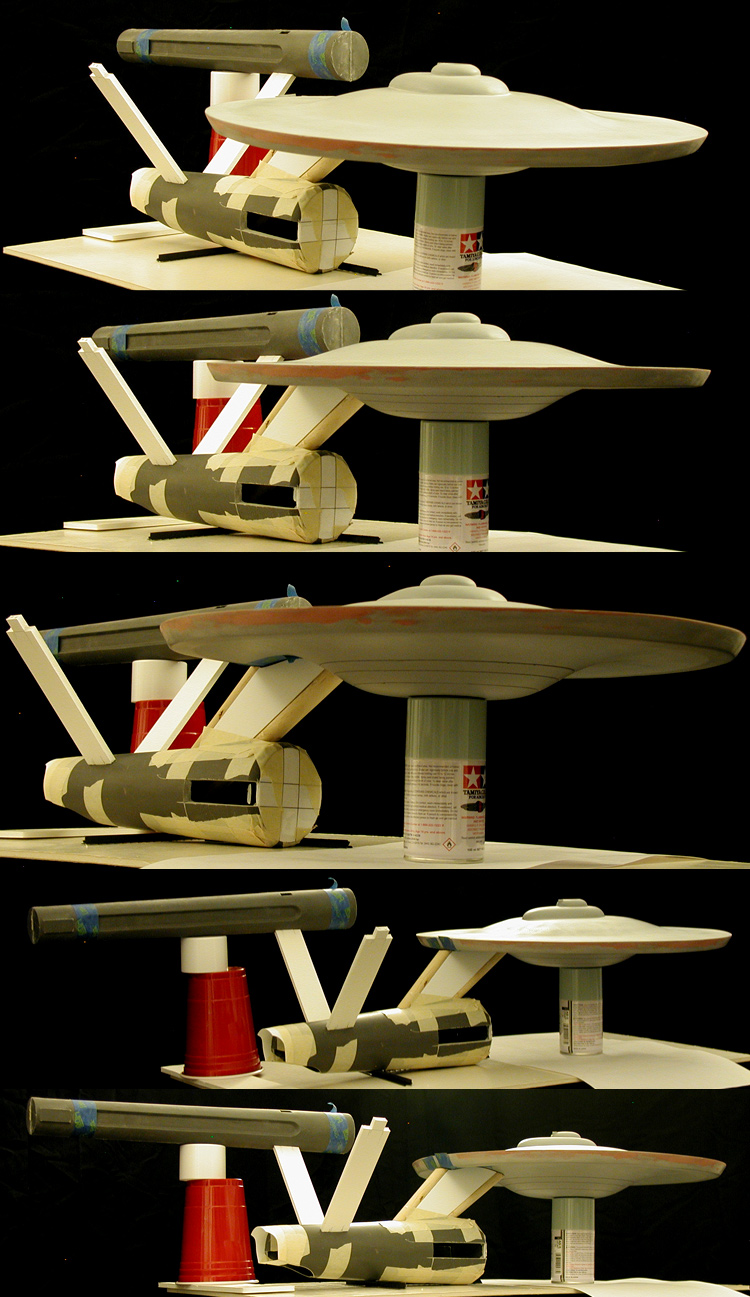
Over the last few days I've constructed the nacelle support pylons. They are actually pretty strong (stronger than I thought they'd be), and can support the weight of either test nacelle. Still, I'd like to get the weight of the final nacelle bodies down a bit more because there are a number of pieces which will eventually be added... adding weight to the nacelles. And even though most of them should be pretty light weight, the domes (which were finished a while ago) are solid and do have a bit of weight to them.
I took another series of test assembly shots, this time with a stand-in for the front of the secondary hull and placement of a test printing of the primary hull decals. I've done a little more work on both the secondary hull and dorsal, but nothing that is note worthy in these images...
It is still pretty rough, but right now I'm mainly happy that all the major elements at least play nicely with each other.
Shaw
Well-Known Member
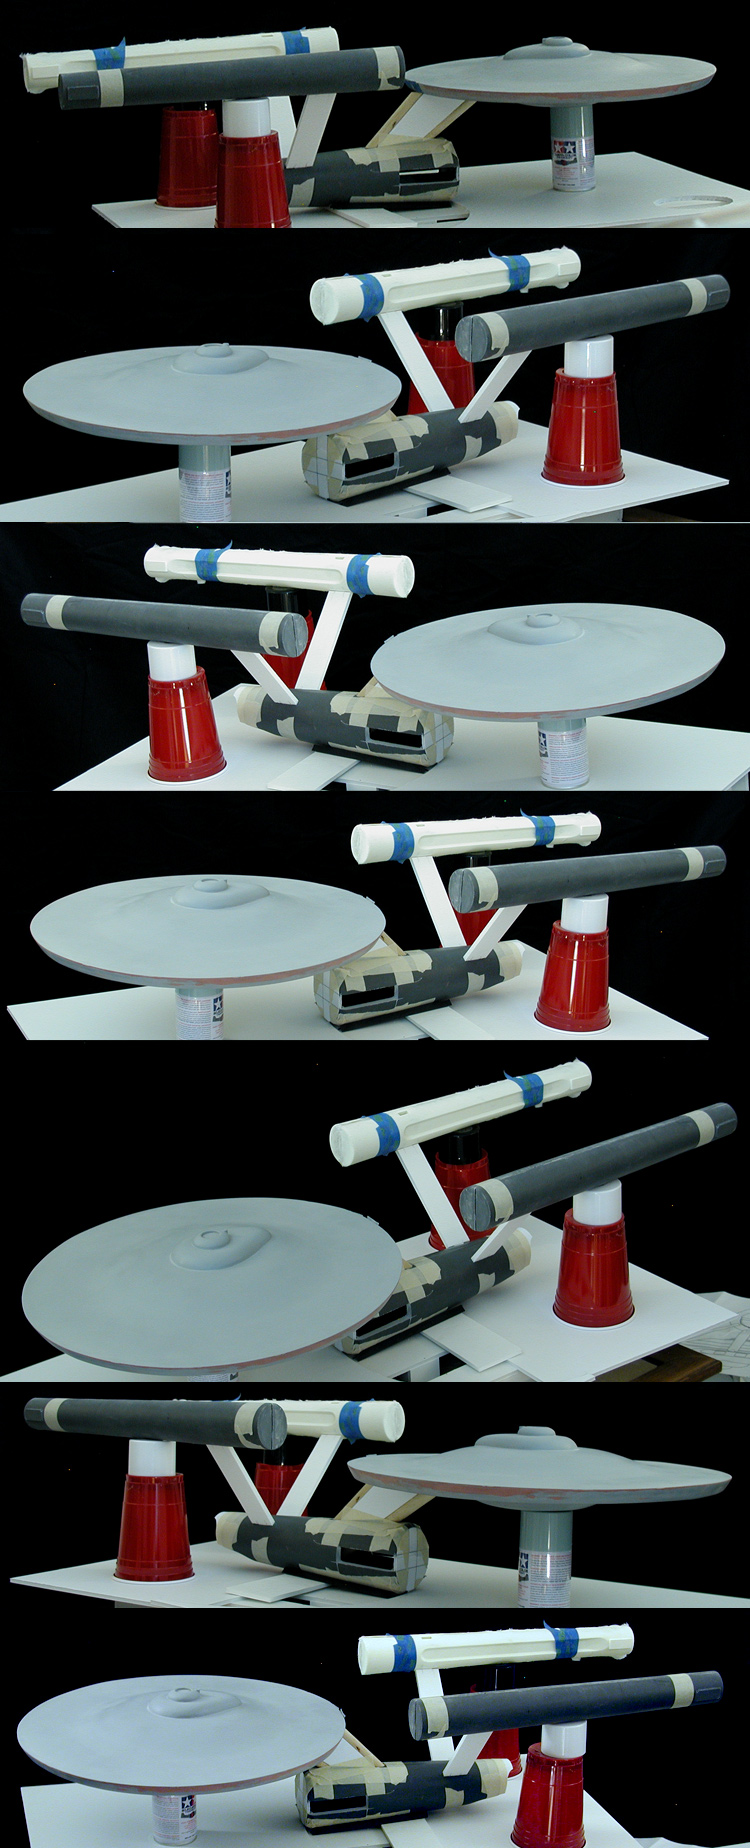
I made another nacelle and tested it against the first nacelle I made... it weighed in at about 90% the weight of the first one, which isn't the significant reduction I was hoping for. Considering that there are a number of additional parts that are going to be added to the nacelles (and assuming that they are all the same weight for each nacelle), we are really looking at something closer to a 5% difference between the first and second tries using TC-1630.
Given that, I'll use that first test pull as one of my nacelle bodies as there isn't a good reason to waste more material if I'm not going to make a significant improvement over what I already have. And now that I know that these are the final parts, I'll start in on bringing them together to make the nacelles.
I took a few more shots of the model with the new nacelle body, I'll be pulling it apart to start doing some more significant work on the secondary hull and dorsal next. In these images I've included the Viewmaster shots of the original model (which I believe predates the accident that damaged the model).
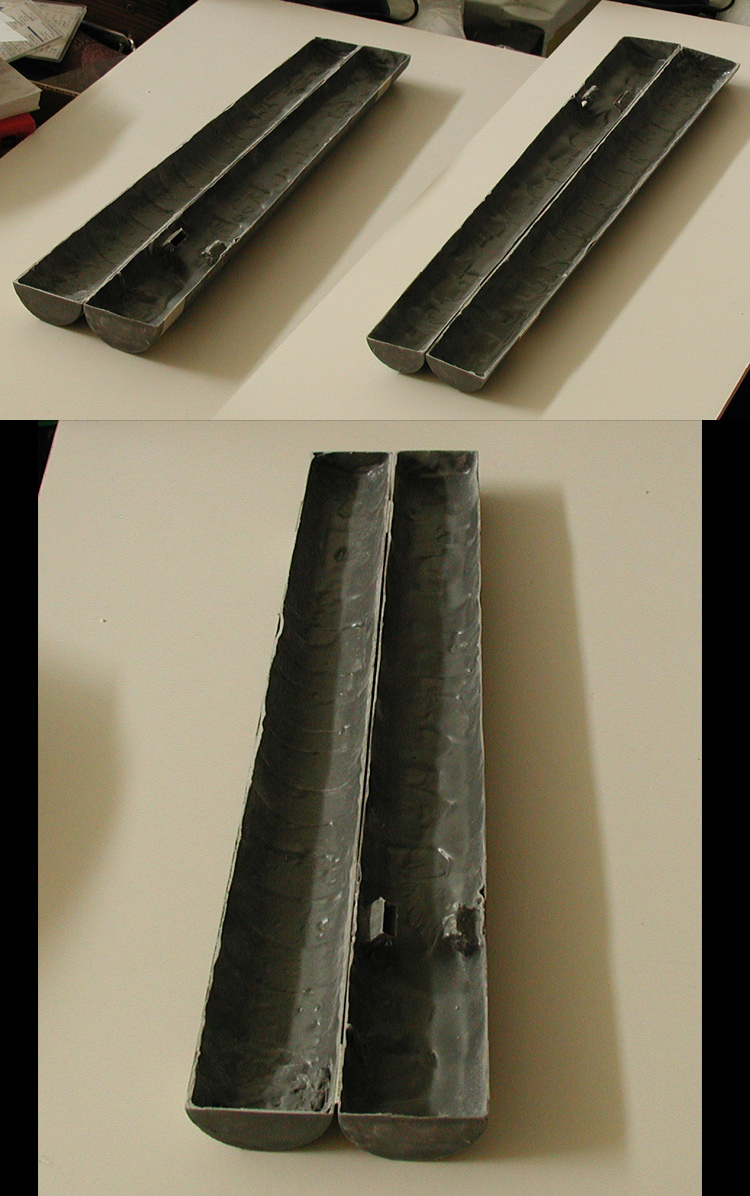
There has been a number of people who have asked about how I'm building these parts. I'm finding that a lot of people are assuming that because these are open faced molds that I just fill them to the rim with resin and end up with solid parts. I avoid making solid parts if at all possible, usually only small parts are cast solid.
So for this model, the primary hull, bridge/B/C deck structure, secondary hull and both nacelles are all hollow. Below is a shot of what the inside of one of the nacelles looks like...
Here is a quick run down of the technique I use...
In the case of the TC-1630, I get about a 10 minute window of work time, so I spread a thin layer over the surface of the mold... making sure to brush it up towards the edges and the higher points. Pretty soon it starts to thicken, and when it stops easily flowing, I let it sit for a couple minutes. I then press in pre-cut sheets of fiberglass cloth, making sure it conforms to the interior contours (it has some give, and you can pre trim it to lay pretty flat against the mold's surface). I then mix up a second batch of TC-1630 and brush it over the fiberglass... making sure it gets absorbed into the material before it starts to set up. Once I get a good covering, I start brushing it up towards the edges like before.
The parts can be removed from the mold pretty quickly... though I usually give it a few hours. After six to eight hours it is pretty hard, after 24 hours it is rock solid (pretty much no-give)... which is why it works so nicely for these larger parts while letting the parts stay pretty thin.
The irregular surface on the interior of the nacelle is from the brushing up process. Irregular surfaces are actually stronger (more rigid) than smooth ones, so it acts sorta like a structural re-enforcement.
The TC-1630 actually cuts nicely too... this is why I wasn't too worried about leaving off key details on the secondary hull master so I could get away with a single master and mold to make both sides. Knowing what I was going to be working with ahead of time is why I knew I only needed one secondary hull half, one outboard nacelle body half and one inboard nacelle body half to build the secondary hull and nacelles.
Hopefully that clears up any confusion. I know no one here has asked about it, but I figured I'd share this with you guys anyways in case anyone was curious.
Given that, I'll use that first test pull as one of my nacelle bodies as there isn't a good reason to waste more material if I'm not going to make a significant improvement over what I already have. And now that I know that these are the final parts, I'll start in on bringing them together to make the nacelles.
I took a few more shots of the model with the new nacelle body, I'll be pulling it apart to start doing some more significant work on the secondary hull and dorsal next. In these images I've included the Viewmaster shots of the original model (which I believe predates the accident that damaged the model).
There has been a number of people who have asked about how I'm building these parts. I'm finding that a lot of people are assuming that because these are open faced molds that I just fill them to the rim with resin and end up with solid parts. I avoid making solid parts if at all possible, usually only small parts are cast solid.
So for this model, the primary hull, bridge/B/C deck structure, secondary hull and both nacelles are all hollow. Below is a shot of what the inside of one of the nacelles looks like...
Here is a quick run down of the technique I use...
In the case of the TC-1630, I get about a 10 minute window of work time, so I spread a thin layer over the surface of the mold... making sure to brush it up towards the edges and the higher points. Pretty soon it starts to thicken, and when it stops easily flowing, I let it sit for a couple minutes. I then press in pre-cut sheets of fiberglass cloth, making sure it conforms to the interior contours (it has some give, and you can pre trim it to lay pretty flat against the mold's surface). I then mix up a second batch of TC-1630 and brush it over the fiberglass... making sure it gets absorbed into the material before it starts to set up. Once I get a good covering, I start brushing it up towards the edges like before.
The parts can be removed from the mold pretty quickly... though I usually give it a few hours. After six to eight hours it is pretty hard, after 24 hours it is rock solid (pretty much no-give)... which is why it works so nicely for these larger parts while letting the parts stay pretty thin.
The irregular surface on the interior of the nacelle is from the brushing up process. Irregular surfaces are actually stronger (more rigid) than smooth ones, so it acts sorta like a structural re-enforcement.
The TC-1630 actually cuts nicely too... this is why I wasn't too worried about leaving off key details on the secondary hull master so I could get away with a single master and mold to make both sides. Knowing what I was going to be working with ahead of time is why I knew I only needed one secondary hull half, one outboard nacelle body half and one inboard nacelle body half to build the secondary hull and nacelles.
Hopefully that clears up any confusion. I know no one here has asked about it, but I figured I'd share this with you guys anyways in case anyone was curious.
Shaw
Well-Known Member
Thanks!
It is mainly a hodgepodge of techniques I've picked up from watching others build their models... modifying the techniques to fit my needs or limitations. Mostly I dissect what I see people doing for the why aspect, then tailor the techniques to reach my goals. I'm sure I could do all this stuff better with more experience, better tools and more resources, but I'm making due.
I just remember what Spock had to go through in The City on the Edge of Forever...
More progress...
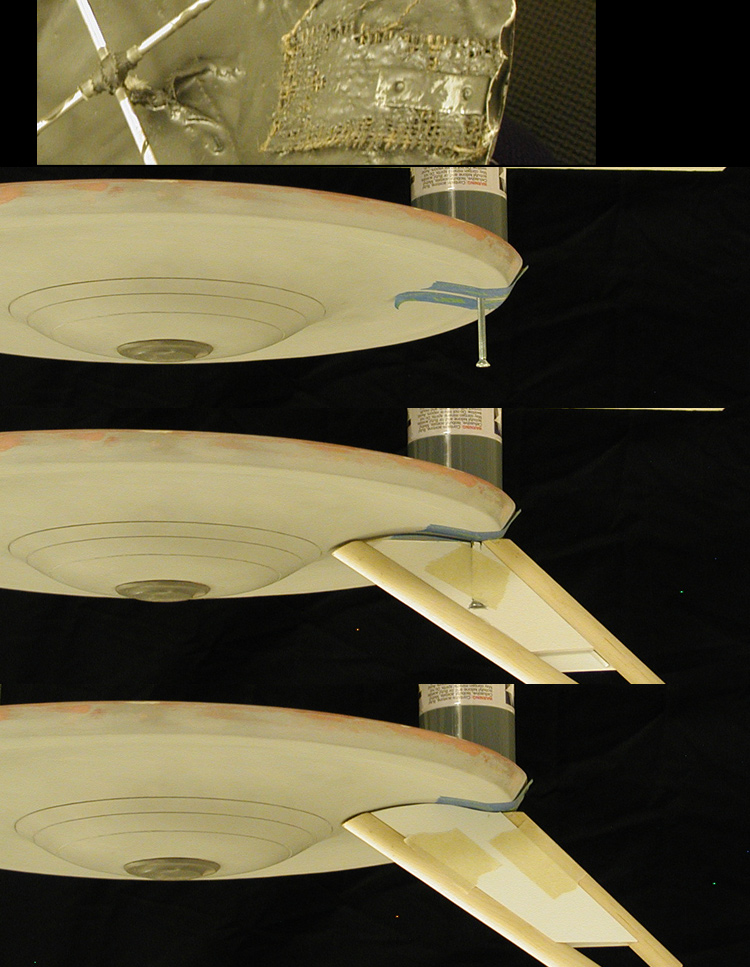
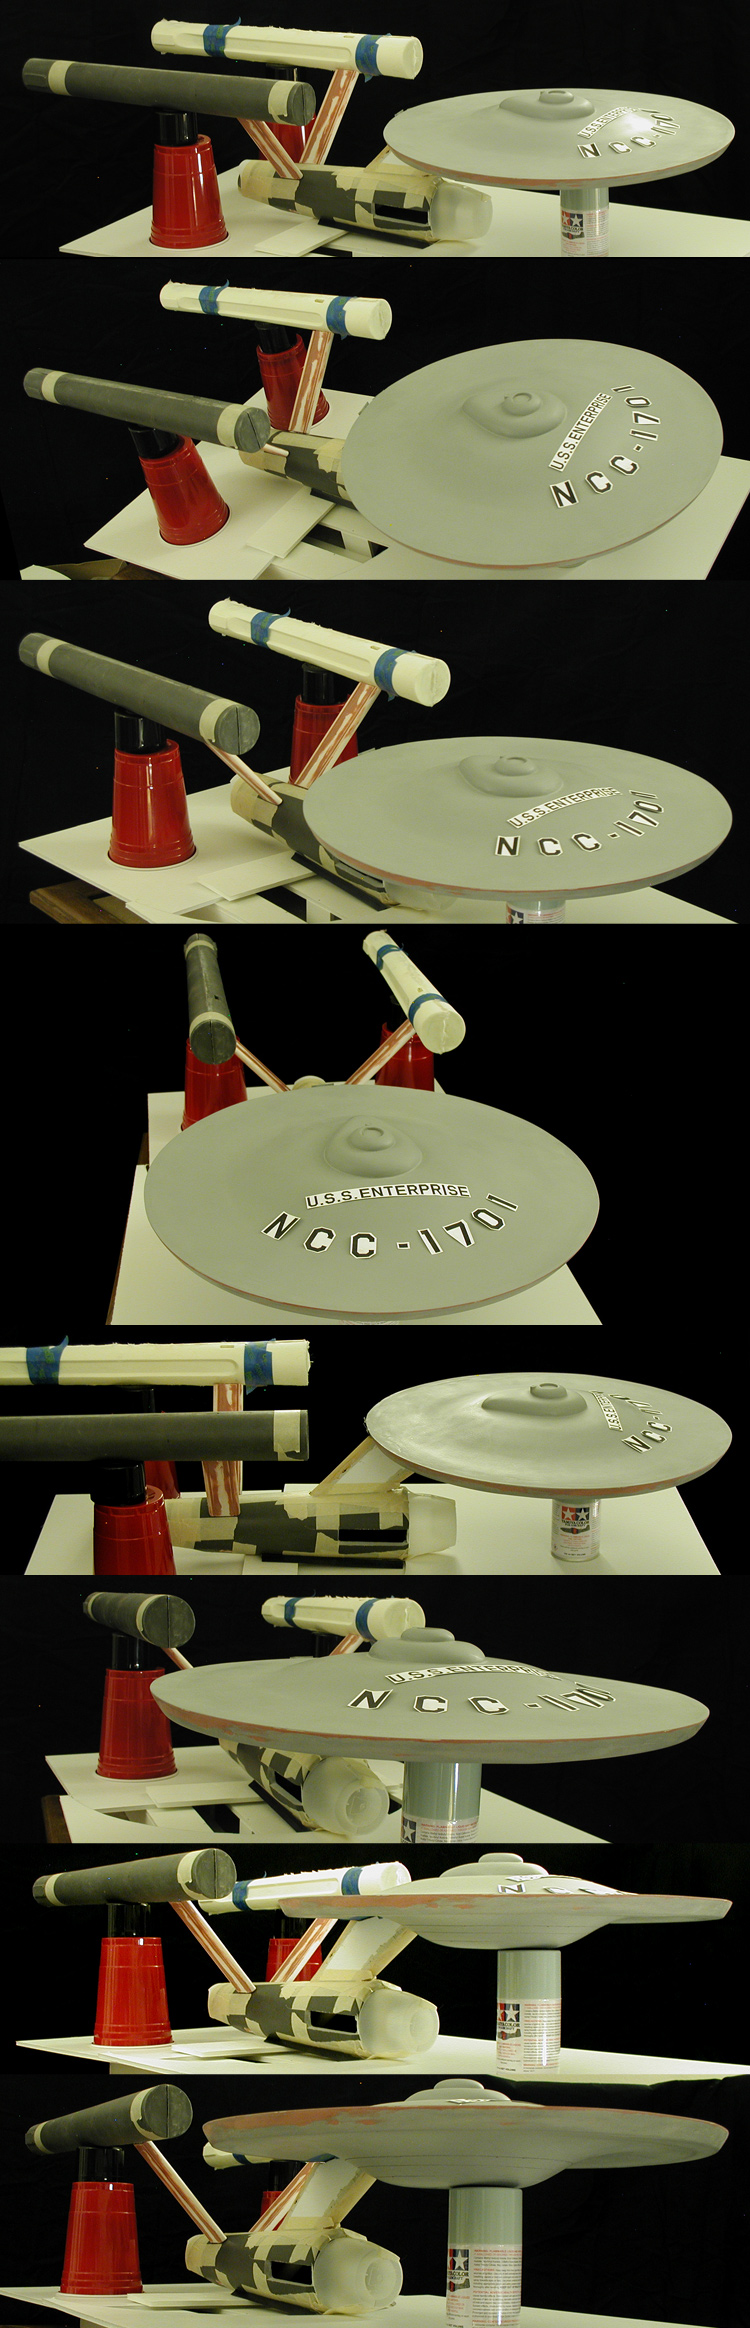
I've been working on a number of different parts of the model recently, mostly the deflector assembly, casting parts for the nacelles and making sure I'm happy with the dorsal and nacelle support pylons. I've also been working on the decals, so I've placed test printings of different decals on the model to compare what I have against photos of the original model.
Most of the work on the dorsal and nacelle support pylons has been making sure that the surfaces between where they connect to parts are in good shape. It is easier to get them nice while they are still on their own. They still have quite a ways to go, but they are starting to look like they should.

I started in on the nacelle parts with the rear end caps. Those came out pretty nice and shouldn't require too much additional work. The main thing I needed from them is to stand in place while I adjust the nacelle body when I bring it together.
I did a quick test assembly to compare some of the decal elements. Oddly, while the original builders of the model took the "U.S.S. ENTERPRISE" straight off the decal sheet, the smaller "NCC-1701" decals have had their spacing adjusted when they were applied to the original model.
I realized after taking these shots of the deflector assembly parts that I had used the templates based on my original (2007) plans and not the updated ones... so the second of the three inner rings is too wide.

This is another couple shots of the deflector assembly with the start of a new second ring and the deflector dish master in place.

With a few more of the nacelle parts cast, I took another series of shots of the model assembled to see how things are coming together.

One of the things I noticed about the secondary hull pennant on the original model is that the rear slopes downward (on both sides) compared to the center line of the secondary hull and the windows. I'll have to figure out how to replicate that without taking it too far as to be noticeable (which on the original it is hard to spot).


It is mainly a hodgepodge of techniques I've picked up from watching others build their models... modifying the techniques to fit my needs or limitations. Mostly I dissect what I see people doing for the why aspect, then tailor the techniques to reach my goals. I'm sure I could do all this stuff better with more experience, better tools and more resources, but I'm making due.
I just remember what Spock had to go through in The City on the Edge of Forever...
Spock: I am endeavouring, ma'am, to construct a mnemonic memory circuit using stone knives and bearskins.
More progress...
I've been working on a number of different parts of the model recently, mostly the deflector assembly, casting parts for the nacelles and making sure I'm happy with the dorsal and nacelle support pylons. I've also been working on the decals, so I've placed test printings of different decals on the model to compare what I have against photos of the original model.
Most of the work on the dorsal and nacelle support pylons has been making sure that the surfaces between where they connect to parts are in good shape. It is easier to get them nice while they are still on their own. They still have quite a ways to go, but they are starting to look like they should.
I started in on the nacelle parts with the rear end caps. Those came out pretty nice and shouldn't require too much additional work. The main thing I needed from them is to stand in place while I adjust the nacelle body when I bring it together.
I did a quick test assembly to compare some of the decal elements. Oddly, while the original builders of the model took the "U.S.S. ENTERPRISE" straight off the decal sheet, the smaller "NCC-1701" decals have had their spacing adjusted when they were applied to the original model.
I realized after taking these shots of the deflector assembly parts that I had used the templates based on my original (2007) plans and not the updated ones... so the second of the three inner rings is too wide.
This is another couple shots of the deflector assembly with the start of a new second ring and the deflector dish master in place.
With a few more of the nacelle parts cast, I took another series of shots of the model assembled to see how things are coming together.
One of the things I noticed about the secondary hull pennant on the original model is that the rear slopes downward (on both sides) compared to the center line of the secondary hull and the windows. I'll have to figure out how to replicate that without taking it too far as to be noticeable (which on the original it is hard to spot).
Last edited by a moderator:
Similar threads
- Replies
- 14
- Views
- 1,079
- Replies
- 2
- Views
- 440