You are using an out of date browser. It may not display this or other websites correctly.
You should upgrade or use an alternative browser.
You should upgrade or use an alternative browser.
The Official V4 Info and Instructions Depot™
- Thread starter mslz22
- Start date
usaeatt2
Active Member
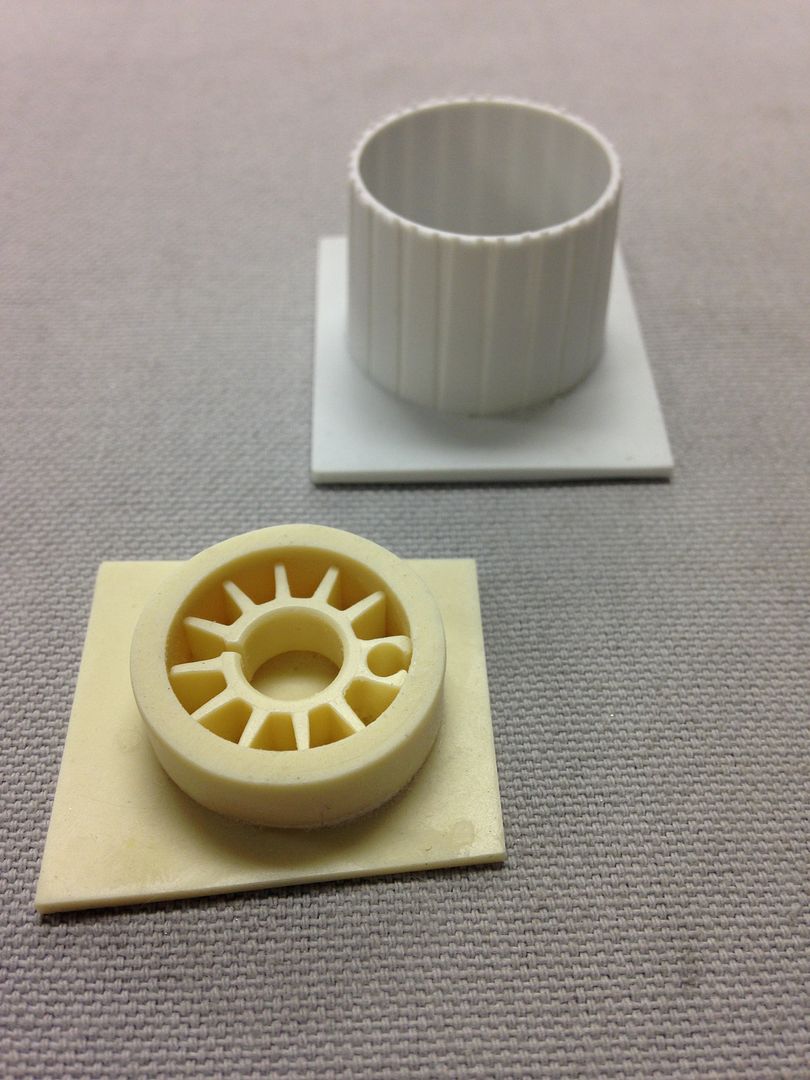
Question for veteran builders: When you have parts that are cast on little base plates, I'm assuming I should sand off the base plate rather than cutting/sanding around the edges. My thought was to gently hold the flat part of base plate against a belt sander to remove the bulk of resin, then fine tune with a sanding block. Thanks! Here's a picture of what I'm referring to:
Avanaut
Well-Known Member
Question for veteran builders: When you have parts that are cast on little base plates, I'm assuming I should sand off the base plate rather than cutting/sanding around the edges. My thought was to gently hold the flat part of base plate against a belt sander to remove the bulk of resin, then fine tune with a sanding block. Thanks! Here's a picture of what I'm referring to:
http://i1362.photobucket.com/albums...0-AB16-442C-8EA3-709A973F4C6F_zpsrkcdusij.jpg
With those parts I carefully cut most of the excess on the sides off with a clipper. With less excess material it was easier to sand. I did not dare to use power tools at all, just sanding with water and paper. I'm not a veteran, though (first two SS models on the bench side by side), but with the sanded and cut finger tips I'm beginning to feel like one.

For the grey phantom part you can actually use a #11 exacto to carefully remove it from the base. Just score it very lightly at first using the base as a guide and go around a couple of times. For the heatsink you can just cut it off the base with a razor saw, you will not see the back side when it's inserted into the engine.
usaeatt2
Active Member
Thanks for the responses! I'm going to give it a go on the belt sander with a 120 grit belt. That way, the back sides of my parts will be perfectly level and smooth. I trust myself more with the belt sander than with exacto blades and saws. I'll post my results! Thanks again.
That ultrasonic cutter is cool! I didn't even know such a thing existed, so I YouTubed it. Only downside is I'd have to think of A LOT of stuff to cut to justify the price!
That ultrasonic cutter is cool! I didn't even know such a thing existed, so I YouTubed it. Only downside is I'd have to think of A LOT of stuff to cut to justify the price!
usaeatt2
Active Member
OK, so here are my results. Since this is my first resin model, I'm asking questions and taking advice.
Maybe another noob has the same question, so it may help someone. If nothing else, I'll keep the thread alive!
I appreciate the responses and the time from the veterans and Mike himself!
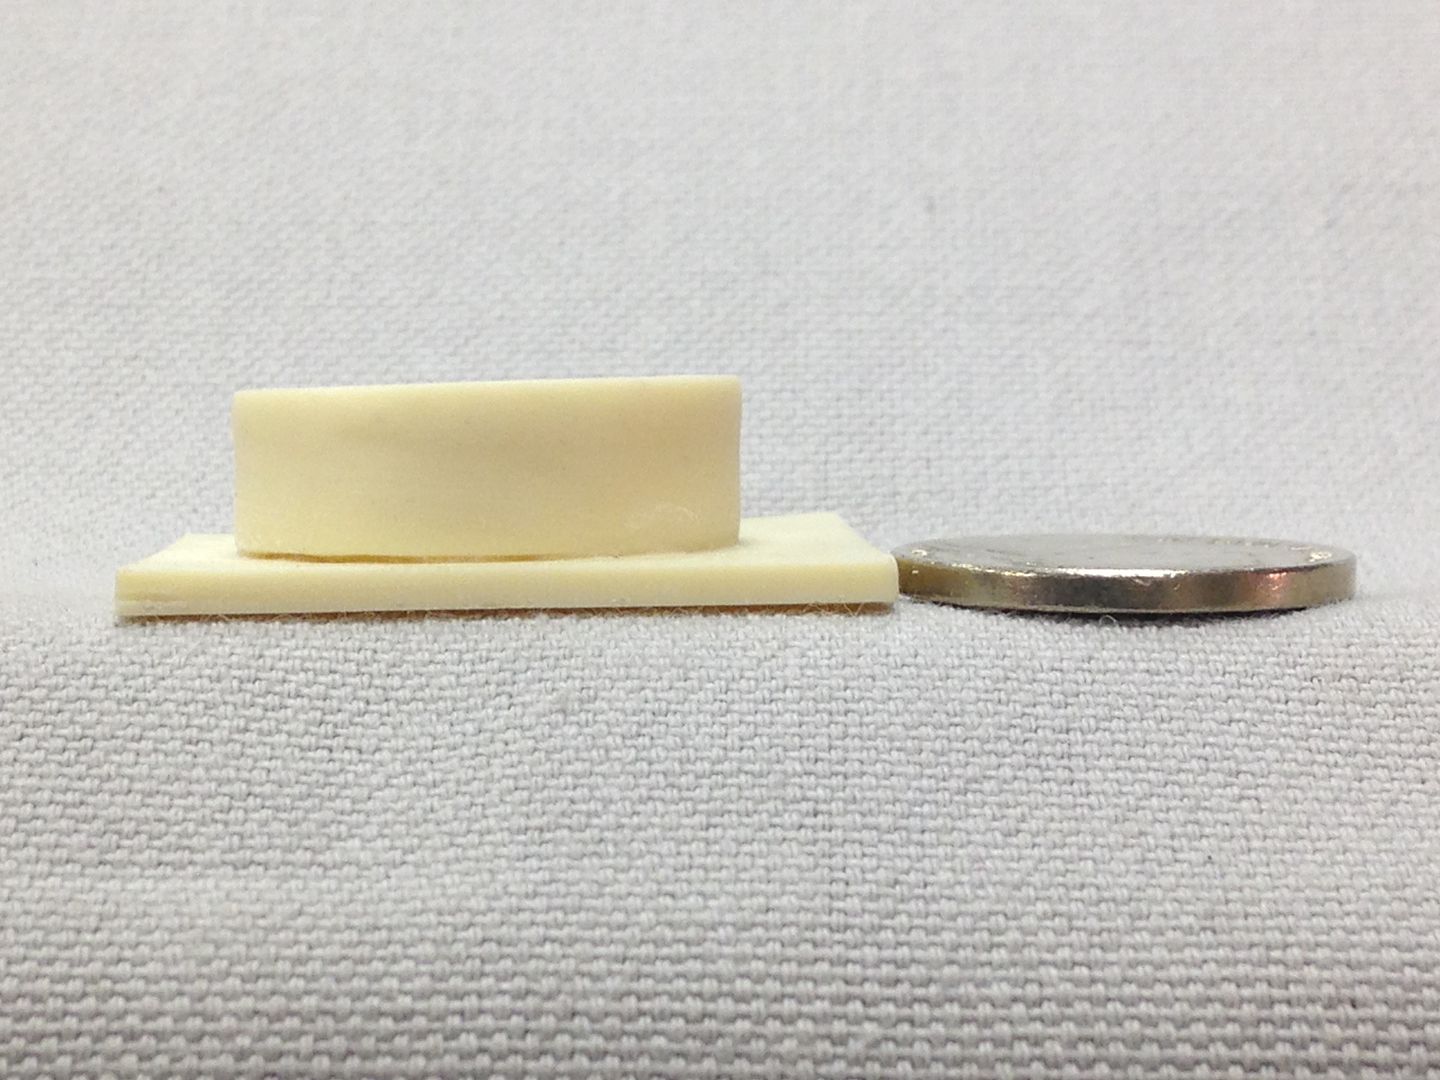
The resin "pad" under the part is about the thickness of a nickle.
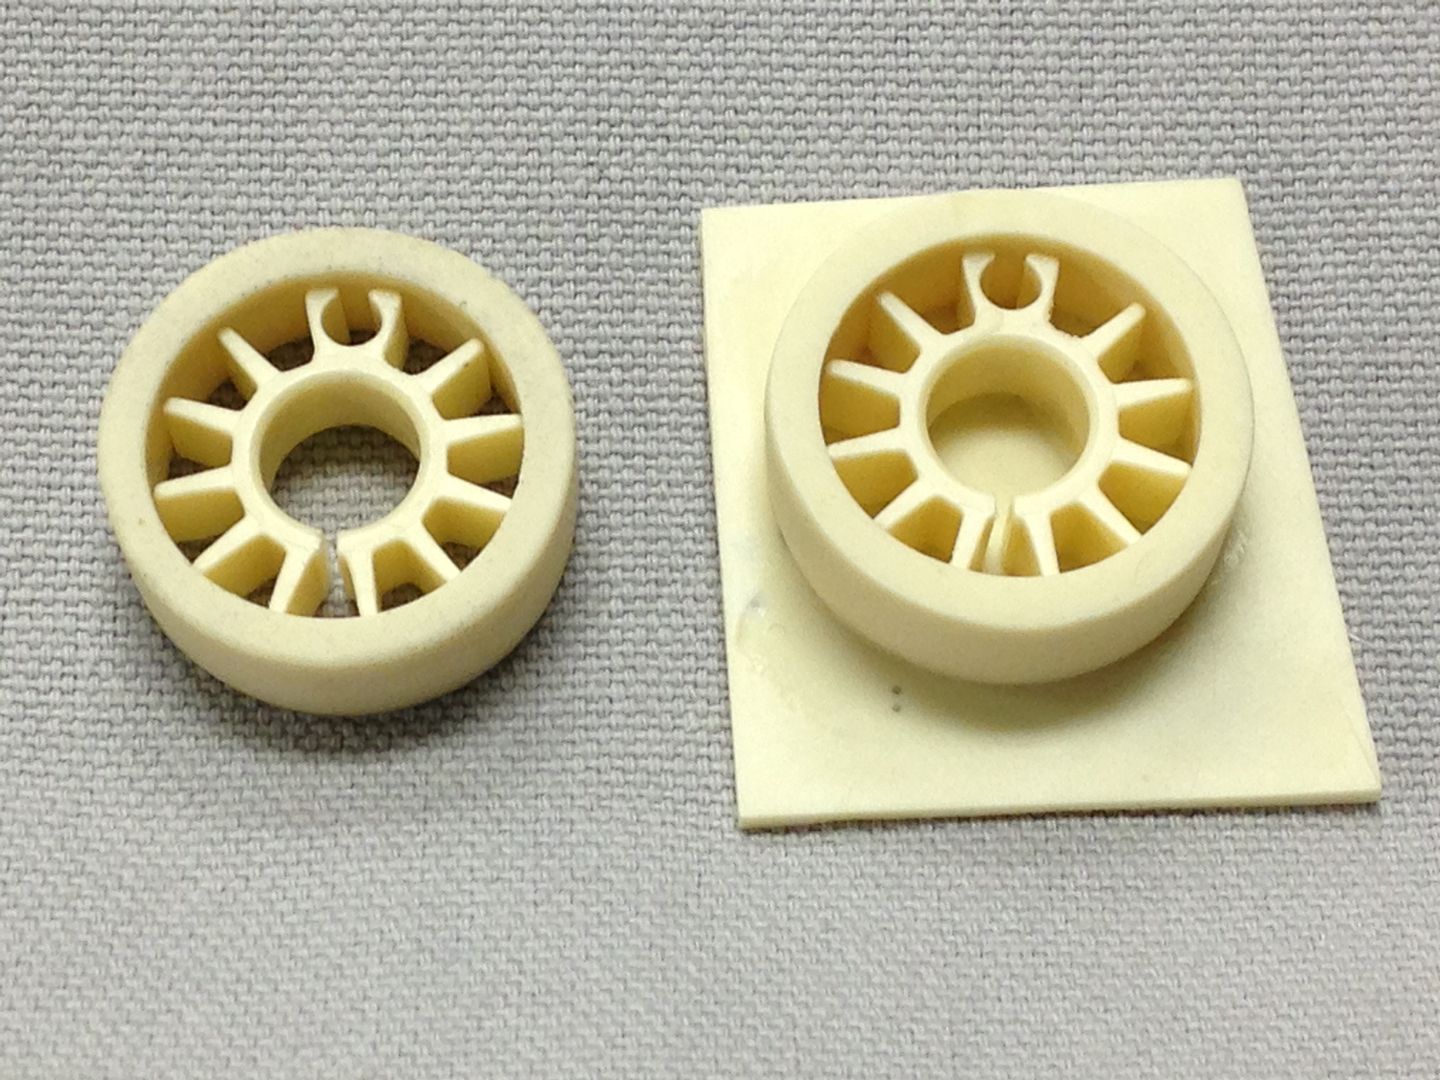
I rotated the part, face up on the belt sander feed table to remove most of the edge.
Next, I GENTLY held the back against the belt to remove the majority of the remaining pad.
There was a TINY gap under one edge of the part - I used this to gauge a little more light sanding on the belt sander.
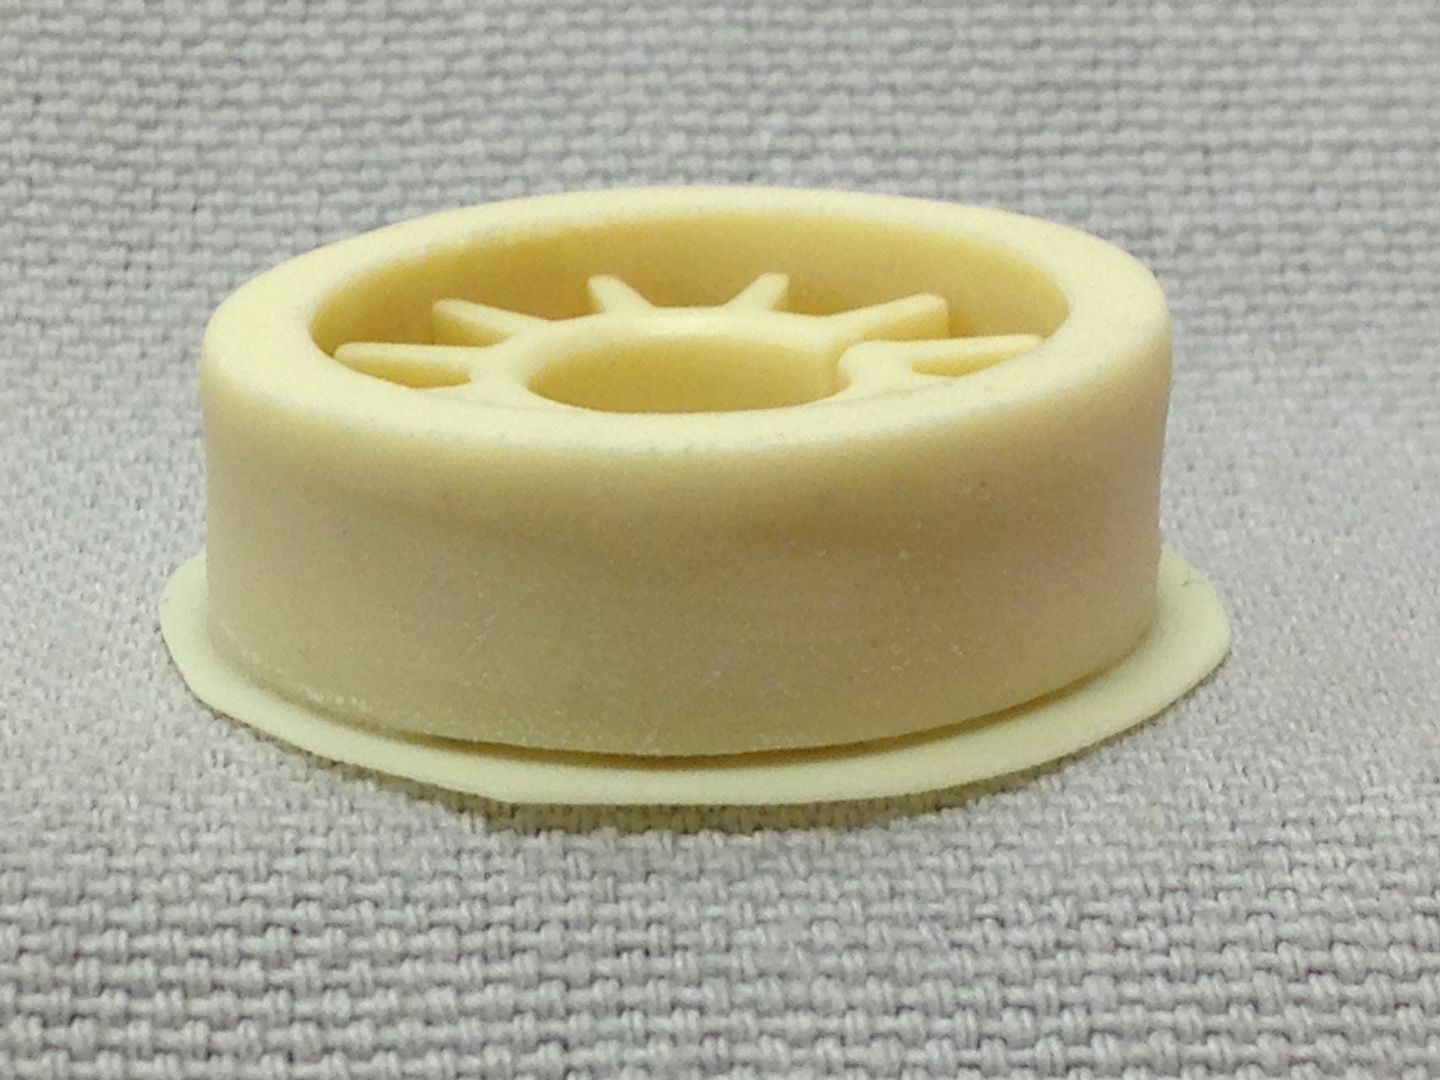
Finally, I cleaned up the whole part with 1000 grit, jeweler's files inside the "teeth" and a 5/16" drill bit through the center.
All together, about 10 minutes.
Probably overkill for something that's mostly hidden, but I want this model to look PROFESSIONAL.
PLUS, I'm having FUN. Does this make the grade?
Maybe another noob has the same question, so it may help someone. If nothing else, I'll keep the thread alive!
I appreciate the responses and the time from the veterans and Mike himself!
The resin "pad" under the part is about the thickness of a nickle.
I rotated the part, face up on the belt sander feed table to remove most of the edge.
Next, I GENTLY held the back against the belt to remove the majority of the remaining pad.
There was a TINY gap under one edge of the part - I used this to gauge a little more light sanding on the belt sander.
Finally, I cleaned up the whole part with 1000 grit, jeweler's files inside the "teeth" and a 5/16" drill bit through the center.
All together, about 10 minutes.
Probably overkill for something that's mostly hidden, but I want this model to look PROFESSIONAL.
PLUS, I'm having FUN.
Does this make the grade?
Last edited:
I've been moving thru the list as fast as i can with the bad weather/snow ice etc. Part of the reason that i have not taken any payments until kits are ready to ship is the unpredictable nature of the winter here. I know everyone is anxious to get kits and i will be getting them out as fast as i can.
I have had some other extenuating circumstances, that i will spare the details on, that are continuing to put me behind a bit, but again a good reason to not take payments until kits are done.
I'll continue to contact people as their kits come up, I'll do my best to get to everyone in as timely manner as i can.
thanks
mike
Does anyone know how far down the list Mike has gotten? Seems like several people have gotten their order, but I know he's juggling several projects
usaeatt2
Active Member
I've been digging through X-wing threads for hours...which isn't a bad thing, but...
I've got most of the brass tubing to make the laser cannons, but I'll need to order a couple more pieces.
While ordering, I figured I'd get the rest of the supplies I'll need, but I can't find the dimensions.
Can anyone provide diameter measurements for the following brass tubes?
Trailing edges of wings
Sides of laser cannons
While I'm making brass cannons and soldering tubing, I'd also like to replace my resin "flashback suppressor" tips with aluminum or brass.
The best I can tell from my resin parts, these could be replicated using (7/8") 0.8750" X 0.058" wall tubing.
Cut two 0.25" thick rings, then slice both rings in half to make four aluminum C-shape tips, then lightly shape as required.
Is that the correct tubing diameter and wall thickness for the flashback suppressors?
Has anyone ever made these pieces with metal?
Thanks for any help you can provide!
Last edited:
usaeatt2
Active Member
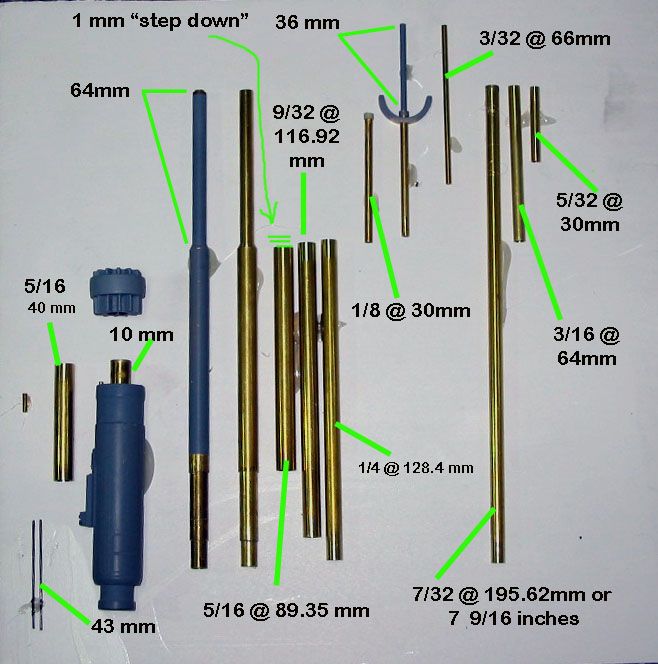
Thanks for the photo reference suggestion. I know the lengths of the cannon tubing based on the attached diagram (thanks to whoever posted this!) and measurements from my resin cannons.
I did more digging and finally found references in Bigturc's thread.
Sides of cannons: 1/32" brass rod
Trailing edges of wings: 1/16" brass tubing
I'm still looking for the correct thickness of the C-shapes. The thickness of the resin C-shapes is inconsistent, so right now, I'm averaging thickest to thinnest to get a rough idea.
Last edited:
Hey Zap, i see your order I will let you know when your kit is ready, then arrange for payment.
I do need to let everyone know it has been super slow going on these. We are pretty much frozen solid here, no kidding we are going to set a record as the coldest month ever recorded here. Usual winters slow me down but this is crazy!
Also I don't usually share stuff like this because it always sounds like a GKitter making excuses but my wifes dad just passed away, it was effecting production for the last few months because my wife was away a lot and i had to watch the kids more than usual, which was already a lot of watching kids. So it slowed this up much more than i expected.
Please accept my apologies for orders taking a long time to get out, but you can see why i don't want to take payments until kits are either ready or near ready. Things are still complicated schedule wise for the next couple of months, but i am getting to orders as i can.
thanks
mike
Similar threads
- Replies
- 55
- Views
- 8,151
- Replies
- 3
- Views
- 636
- Replies
- 9
- Views
- 596
- Replies
- 3
- Views
- 370