Phaser 1 Kit Buildup plus MM P2 Restoration

Re: John Long Phaser 1 Kit Buildup plus MM P2 Restoration

Hey everybody! Sorry about the long absence, but I was taking care of life stuff and celebrating my birthday, and then I had to take one of my 48-hour power naps to recharge. :)

I got in a half-day at the shop on Saturday and finished the shop-dependent parts of the handle job. I'm not going back any time soon, but I will be assembling and painting the knob here at home and posting as I go. The first posts will go up sometime tomorrow.

Meanwhile, here's my YouTube video on the CORRECT way to separate your Kilo knob from the skirt, without marring the face.

2014-11-08 20.43.41.jpg
Cuz that's a real pretty face, and it'd be a shame if somethin' was to happen to it.

:p
 
Re: John Long Phaser 1 Kit Buildup plus MM P2 Restoration

So, turns out I'm going to the shop for a few hours today after all! So while I'm there, here's a picture of the original GJ handle from John's phaser article in Star Trek Communicator, taken during his examination of the phaser.

A trillion phaser points if you can answer this: what's unusual about the handle in this photo? (Hint: it's not related to wear and tear.) And for extra credit, why?

2003-08-22 15.29.27.jpg
Cuz life is too short for easy phaser questions.
 
Re: John Long Phaser 1 Kit Buildup plus MM P2 Restoration

The prongs are filed down (underside) and are shorter (less tall)?
 
Last edited:
Re: John Long Phaser 1 Kit Buildup plus MM P2 Restoration

the handle itself is egg shaped and not oval, the washer that is fiber on the mr is made of copper on the Gj , and I'll shoot a guess that it was only to make sure the handle stays tight on the p2.
 
Re: John Long Phaser 1 Kit Buildup plus MM P2 Restoration

looks like the popsicle sticks are missing on the one side -- as for why, no idea.
 
Re: John Long Phaser 1 Kit Buildup plus MM P2 Restoration

I'll go with the prongs as well. The sides have been filed away where they would act more like hooks rather than locking fit.

EDIT: never mind, I see the holes now :) My eyes are half closed from taking a nap.
 
Re: John Long Phaser 1 Kit Buildup plus MM P2 Restoration

The prongs are filed down (underside) and are shorter (less tall)?
Congrats to Tom for being the first to post the right answer! :)

Vidman:
I'll shoot a guess that it was only to make sure the handle stays tight on the p2.
OOOOOOOHHHHHH so close!

The reason appears to be that the prongs need to be short enough to fit into the bottom of another handle, so the plug is pushed down into the handle to shorten the reach of the prongs. But this makes them unable to lock properly, so the bottoms of the prongs get filed (I used my cutoff wheel). Now, that does soften the lock, as I discovered. It's not as tight in the female plug as it was when the prongs were full-sized. I'm going to do what I can to tweak things, but I think this first handle may not lock properly into another handle. It will fit just fine into the P2, though.

Damn good thing, too -- I don't have another male plug, and they're very hard to find in Bakelite -- I really went out on a limb when I just dove in with the cutting wheel.

out limb sawing.jpg
Yeah, that's right! Cuz I'm one straight-up bat$h!t mofo!

The material of the wafer/washer thingy I have no idea about, except that orange seems to be its original color -- it's definitely not copper. My male plug didn't come with one, so I'll be laser-cutting mine out of very thin birch plywood and painting it orange, then the bronze over that.

But apart from that little wafer, the handle construction is

FINISHED!!!!
Yaaaaay!
:D(y)cheers​

And I'll start posting that part tomorrow. I'll be doing the putty/sanding/painting here at home though, so I'll be serially posting over the next couple of days till the handle is complete.

Then I'm on hiatus from this build till probably after Thanksgiving. I'll still be posting now and then during the break, though -- at a minimum, I'll be backfilling some more video, and possibly getting that battery label uploaded for you guys.

Apart from that, I've had a wonderful day and I'm feeling just divine!!

divine-pink-flamingoes.jpg
Well... okay, maybe I'm just feeling pretty good about things...

See y'all tomorrow! :p

divine-pink-flamingoes.jpg


out limb sawing.jpg
 
Last edited by a moderator:
Re: John Long Phaser 1 Kit Buildup plus MM P2 Restoration

Isn't the gasket the same as what came with a lot of electrical connectors of the time? I've seen them with vacuum tubes too, I think they're a paper/felt combo material, and were almost always that rusty color. But yeah, I once thought it was a copper disc on the phaser handle.
 
Re: John Long Phaser 1 Kit Buildup plus MM P2 Restoration

Yeah, it has to be something flexible like that. I've seen plugs on eBay with the wafer all bent out of shape, like paper or cardboard when it gets wet.
 
Re: John Long Phaser 1 Kit Buildup plus MM P2 Restoration

I have one of the Bakelite twist plugs and the paper insulator is definitely of the "pressed fiber board" variety. I've tried looking it up and the best result I find is that it may be cellulose (if that matters at all).

HubbellTwist_01s.jpg
 
Last edited:
Re: John Long Phaser 1 Kit Buildup plus MM P2 Restoration

Looking at that gasket closely, it did look to be copper. But it's making contact with both prongs which would result in a dead short if the batteries were installed. So it can't be metal.
 
Re: John Long Phaser 1 Kit Buildup plus MM P2 Restoration

It's definitely there as an insulator, to prevent contact with the terminal screws inside the male end.

Prepping the first of my remaining handle posts now... :)
 
Re: John Long Phaser 1 Kit Buildup plus MM P2 Restoration

So last session, I'd gotten as far as the battery terminals in the handle, and I took a little detour to play with my knobs...So first, I had to clean the grunge off the butt plug with an alcohol pad (only slightly more unpleasant than it sounds). Takes dirt and Sharpie marks right out with almost no effort and dries fast. I also hit it with some sandpaper. So that's the wood prepped.

2014-11-08 15.51.24.jpg

Then the brass gets the wire brush treatment:

2014-11-08 19.29.52.jpg

I suppose I could use one of those wire hand brushes -- the kind that looks like Julia Roberts' toothbrush -- but life is WAY too short, and I'm WAY too lazy, and I have a life, and I'm not into breaking my wrist for a prop. But that's just me, YMMV.

600full-julia-roberts.jpg
Seriously, would YOU go spelunking in there
without a Dremel and a Hazmat suit? Didn't think so.

2014-11-08 19.44.11.jpg

Just a little JB Kwik does the trick. Nothing fancy.

Time to make the internal contacts. Unlike the butt plug ones, these can be anything, because no one's ever going to see them. I had a small pile of battery springs on hand, so I went with those. Everything seemed okay at first. Cleaned my hardware, soldered it together, test fit it, no problem. My second solder came out way cleaner than my first, but that happens a lot, and both were fine.

2014-11-08 17.41.36.jpg2014-11-08 17.52.12.jpg2014-11-08 18.01.11.jpg2014-11-08 18.15.48.jpg2014-11-08 18.19.15.jpg


That's 24 files...
 
Last edited:
Re: John Long Phaser 1 Kit Buildup plus MM P2 Restoration

So after having puzzled out how I was going to hold my handle innards in place in order to get just the right spacing for a solid fit for the batteries against the terminals, I finally had an epiphany about five minutes before it was time to work on it. I locked the butt plug in place between the tang nut and a steel hardware nut, and the interior terminals between two steel nuts. I was incredibly proud of myself for sussing that out like a real prop genius...

And that's when I noticed the problem with my spring terminals...

2014-11-12 17.22.28.jpg2014-11-12 17.25.05.jpg2014-11-12 18.18.36.jpg
2014-11-12 18.22.35.jpg2014-11-12 18.23.46.jpg2014-11-12 18.17.53.jpg

They weren't holding the batteries straight enough, and the nuts and washers were rotating around to the outside, right where they were sure to short out against the walls of the handle. I was no longer quite so proud of myself...

Yoda_SWG_by_Steven_Ekholm.jpg
Happen to you these things do, because uppity tw@t you are.

Then, I had a real stroke of luck: While sanding down the sides of those washers in the hope of keeping them from shorting against the handle walls, the disk sander caught my piece and pulled it down into the pit underneath the disk. Because that pit is closed up on all sides, there was no way to retrieve it without having the staff dismantle the whole machine, which would cost me time and probably p!$$ them off. So I had to make a new one, and fast.

I went picking through my brass hardware and couldn't find the same screw/washer combo... but I did find a lot of it in smaller sizes. That was when I finally realized the obvious and decided all I needed was smaller hardware...

Yoda_SWG_by_Steven_Ekholm.jpg
Uppity tw@t and complete ***ktard, make that.

Much more better nice! I also ground out the round holes a bit so that I could slide the terminals a little more to the center. This got them even farther away from the walls, and improved the battery holding.

2014-11-12 19.53.23.jpg

One final voltage/continuity check before I commit (because like all men, I fear commitment. And roaches.):

2014-11-12 20.46.19-1.jpg2014-11-12 20.45.39-1.jpg

Then I just cut the second bolt down with the cutoff wheel, and potted those puppies in with JB Kwik. I totally went to town. Then I came back and put on lots more epoxy. :p

2014-11-12 21.26.23.jpg

That was when I had my second epiphany: I had to attach the wires to the battery assembly, not the plug, or I'd have a helluva time installing everything. So I moved the wires over, and now I had a finished battery assembly. YAAAAAAY!!!!

2014-11-12 21.48.26.jpg
Why do I keep thinking about roaches?

Of course, I tested it again, and still got my 3V. At this point it was really paranoia, because this is probably the simplest circuit known to man, and even beginners can do great with it. But, you know, maybe it was my fear of commitment, maybe it was the roaches, maybe it was the roach that kept trying to get me to commit... whatever it was, I tested the circuit every time I finished a step.

Yoda_SWG_by_Steven_Ekholm.jpg
So now, complete pu$$y must I also add.
Tw@t, ***ktard and pu$$y...
Some kind of loser trifecta you have hit.

Then I epoxied the battery assembly into place, butt plug and all, and thought I'd get fancy and add heat-shrink tubing. Got melted insulation for my trouble.

2014-11-12 22.08.57.jpg2014-11-12 22.45.39.jpg


charlie_and_the_chocolate_factory_willy_wonka_gene_wilder_1920x1080_wallpaper_Wallpaper_1080x960.jpg
It's really amazing how such a tiny brain moves your
legs and your bowels and still has enough power left
over to make you do such creatively stupid ****.

Fortunately though, those wires don't show, so I didn't bother to replace them. I just removed the heat shrink tubing, because it also made the wires harder to connect to the plug. I like to screw things up as thoroughly as possible. That's just how I roll. :p

Here, you can see how nicely the battery compartment works with the smaller hardware. I also potted in this side of the compartment. So it's held in place in the center on both sides, and around the edges on both sides. It should stay there just fine.

2014-11-12 23.48.06.jpg2014-11-12 22.20.09.jpg

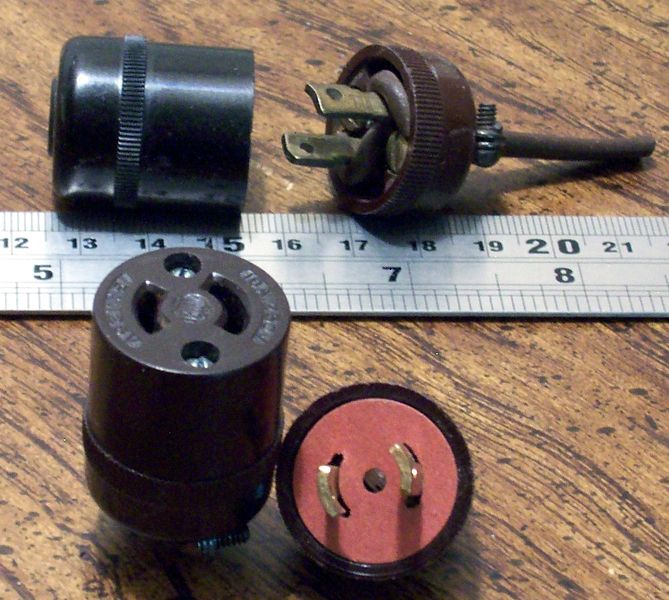
And finally, we get to the plug. I cut down the prongs with my cutoff wheel and checked the fit -- it was great!

2014-11-12 18.31.14.jpg2014-11-12 18.30.32.jpg

Then I pared down the brass connectors around the sides till I got a nice, loose fit. That's because I needed to put electrical tape over the connectors to keep them from shorting against the walls of the handle.

2014-11-12 22.57.21.jpg

Unfortunately, I completely forgot to take a photo of the electrical tape in place...

tantrum2.jpg
No photo?! Were you just phoning this in, you hopeless pud??

Also, if you take another look at the photo with the prongs, you can see where my cutoff wheel slipped. Yikes! The last thing I managed to get done by midnight was to hog out the center of another wood wafer to make room for the prongs, and epoxy putty them in place with JB Steel.

2014-11-12 23.30.09.jpg

That was it, it was time to clean up and leave before the staff released the hounds. All I have left to do is pot that top rim with JB Kwik, and Evercoat the crap out of the whole top, then create my plywood circular wafer for the top of the handle. After that, I'm back to putty/sand/primer/sandsandsand/putty/repeat, and then a final paint job away from my hiatus. :)

Back here soon with the action from home. :)
 
Last edited:
Re: John Long Phaser 1 Kit Buildup plus MM P2 Restoration

Wow you really are quite the craftsman, Aureliano. I cant believe what's going into this project. I can do pretty good finish work on props, as in basic painting, gluing, and puttying skills, but something like this is daunting to me. Honestly I wouldnt even want to attempt it, lol.
DON'T underestimate yourself! You've gotta just dive in, screw it up, and learn, and try it again! I once couldn't do much besides painting and finishing, either. You've seen me screw up here. When I run into a wall, I pick up my teeth, stagger away, and after the concussion passes, I look at the wall again and look for a new way over, under, around, or through. That's all it takes. Plus ibuprofen.

Never forget:

image.jpg
 
Re: John Long Phaser 1 Kit Buildup plus MM P2 Restoration

Uh, I searched up the world "phaser" and when I went to the second page, there are 4 results that are exactly the same and link to this thread.
Does anybody else have this problem?
 
This thread is more than 5 years old.

Your message may be considered spam for the following reasons:

  1. This thread hasn't been active in some time. A new post in this thread might not contribute constructively to this discussion after so long.
If you wish to reply despite these issues, check the box below before replying.
Be aware that malicious compliance may result in more severe penalties.
Back
Top