IPMS Orlando Modelpalooza 2014 Seaview entries

mrchester

Well-Known Member
RPF PREMIUM MEMBER
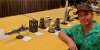
Another year has passed and its Modelpalooza time again. This is the second year that I have entered the competition and I kept it simple. Both versions of Moebius' 1/128 scale Seaveiw. I will also add some other photos I shot at the show
. modseaviews.jpg modseaviews4.JPG modseaviews3.JPG ssrn.jpg usos.JPG modseaviews5.JPG modseaviews1.JPG modseaview2.JPG

This is a big difference from last years entries:

model1.jpg
Yeah, its time for Irwin Allen. Over the next few weeks, I'll post the other pictures I shot at the show, after which, I'll discuss the ins and outs of these two neat models. I got silver for S.S.R.N. Seaview (got's to work on demarcation lines and should have told the judges that the incredible interior was a result of using Paragraphix decals).
 

Attachments

  • modelpalooza 2013.jpg
    modelpalooza 2013.jpg
    206 KB · Views: 800
And , as promised, I'll put up the pictures I shot at the show. Now the disclaimer. I am not one of those guys that shot a picture of every entry. I only had so much time and I botched a few of the shots. Now, to quote Tom Schnieder..." Enjoy the pictures as they fly through the air".
modarmor.JPG modarmor1.JPG modarmor2.JPG modarmor3.jpg
modarmor4.JPG modarmor5.JPG modarmor6.jpg
 
Last edited:
Sorry for the delay, but here are some pics from my favorite subject...Sci-fi and fantasy (and real space craft). A few notes, Ben Grimm busting out of the comic was very clever. The Enterprise bridge was full of Tribbles and had a cooing sound card. The Galactica model took up most of the table... very big. The other Seaview is Moebius' 1/350 scale and I really liked the way the owner painted the stand. And I really liked the look of the Veritech with the Cat's Eye radome... nicely executed.
bengrimm.jpg klingon.JPG mod007.JPG modbridge.JPG
modetship.jpg modgalactica.jpg modindattacker.jpg modlilseaview1.jpg
modsandcrawler.jpg modslave1.jpg modtime.jpg modveritech.JPG
modviper.JPG modvostok.JPG
 
Greetings... I have finally gotten around to freeing the photos (from my damaged Laptop) that were intended for this thread. The pictures mainly cover how I handled the interiors of both of Moebius' large scale Seaview models. The great thing about both kits is that the rear sections of both models are somewhat the same. The front halves are in little more different (four windows versus eight windows) but they both share the clever design of having the front interior detail section(s) that mount to a plate that goes into the underside of the nose. This gives the option of working on finishing the bulk of the sub for a while then, for a change of pace, working on the front internal detail section. For a teaser, I am posting a few pictures that I shot of the work on the bulk of the sub body. I had finished and painted the main bodies of both subs and masked off the limber holes for painting. It took about two hours to mask off the models to eventually receive several coats of Flat Black paint. Yes, I did both models at the same time in the tiny space pictured (they also went to work with me during the week(s)... which I'll cover soon). Also, I'm throwing in the picture of that Werewolf from the Project Lemondrop thread. He's wearing a uniform and is standing next to a Nuclear Reactor... only from Irwin Allen).
DSCN0620.JPG DSCN0621.JPG IMG_1533.PNG
 
I'll try to continue here with both sub's builds simultaneously. Moebius handled the issue of the Flying Sub bay well with a module that ( once built ) fit into the bottom plate that mounts under the front of Seaview. I opted to eventually mount the completed Flying Sub perminatly into the bay since I intended to light it (along with the control room). I opted for strip LEDs for the control room and the Flying Sub interior. Since they are in straight lines, they can be set up in two rows that form a grid that worked with the photo-etched girders that I would add. But first, the Flying Sub. When docked in its bay FS-1's headlights and part of the interior can be seen. One section of LEDs would work to light all three. The strip is mounted to the back of the sub, with a pair of Estes launch lugs used to 'pipe' the light to the headlights. Wires are through two holes drilled in the top of the Flying Sub.

DSCN0627.JPG DSCN0626.JPG DSCN0628.JPG DSCN0630.JPG
 
Last edited:
For the control room, I took a radical approach. I milled out areas from the bottom side to remove the items that were cast into the floor. The periscope island, helm/plane console, Flying Sub access hatch, and chart table were removed along with the posts for the station chairs. All holes were filled and positions marked on the back side. Holes were drilled for the chair posts ( that I turned from aluminum rod) and in the areas in the floor for the removed items (and to tack the pieces in place from below). This gave me a chance to get a decent finish on the floor without dealing with the cast-in obstacles. Sorry only one picture.
DSCN0629.JPG
 
Just a note... I've put some pictures of the Seaview(s) on my Pinterest boards, Rocketguru ("The World's First Privatley Owned Nuclear Submarine... Seaview" and "Bitchin' Subs of Sci-Fi That I Like"). I will get the stuff posted that leads to those pictures posted soon. Thanks for your patience.
 
Last edited:
For the Control Room, I opted to use Paragraphix decal and photo-etch set for detail work. The decals take care of the pesky issue of all of those panel and console details. This includes dealing with wood grains and metallics. After painting the wall sections, floor, and the parts that I cut from the floor, I stared the arduous task of applying the decals. I did not plan to light any of the panels or consoles for this model. After everything was set to my satisfaction, I reassembled the control room floor, then added the walls. The chair pillars were installed and the freshly "Oranged" chairs were added to them. I added the girders from the Photo-etched set and would some furniture and the long console table with the Seaview model on it. Here are some pictures of the mostly completed Control Room (with the Observation Nose divider partition omitted). And yes, a cleaning crew needs to get rid of the loose debris.
DSCN0632.JPG DSCN0633.JPG DSCN0634.JPG IMG_0099.JPG
 
This thread is more than 7 years old.

Your message may be considered spam for the following reasons:

  1. This thread hasn't been active in some time. A new post in this thread might not contribute constructively to this discussion after so long.
If you wish to reply despite these issues, check the box below before replying.
Be aware that malicious compliance may result in more severe penalties.
Back
Top