You are using an out of date browser. It may not display this or other websites correctly.
You should upgrade or use an alternative browser.
You should upgrade or use an alternative browser.
Groot - foam build - WIP - Pic Heavy
- Thread starter BobbyFromBUF
- Start date
BobbyFromBUF
Well-Known Member
Thanks again to everyone for the kind remarks! I am glad to see that my thread is helpful for many people.
I have a generic dremel tool from Harbor Freight Tools. The tip I am using so far looks like this:
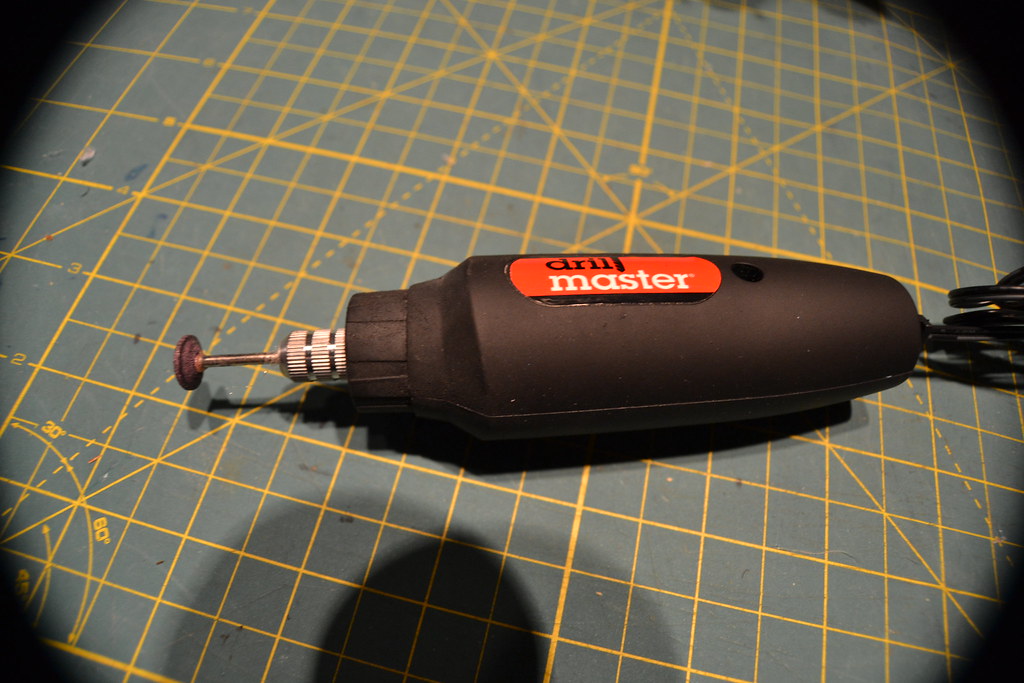 DSC_0803 by bobby_whalen, on Flickr
what dremel tip did you use? looking good can't wait to see more.
I have a generic dremel tool from Harbor Freight Tools. The tip I am using so far looks like this:
DSC_0803 by bobby_whalen, on FlickrBobbyFromBUF
Well-Known Member
So, I know I haven't posted any updates for a while. I got distracted by another project. However, tonight I was able to make some progress...
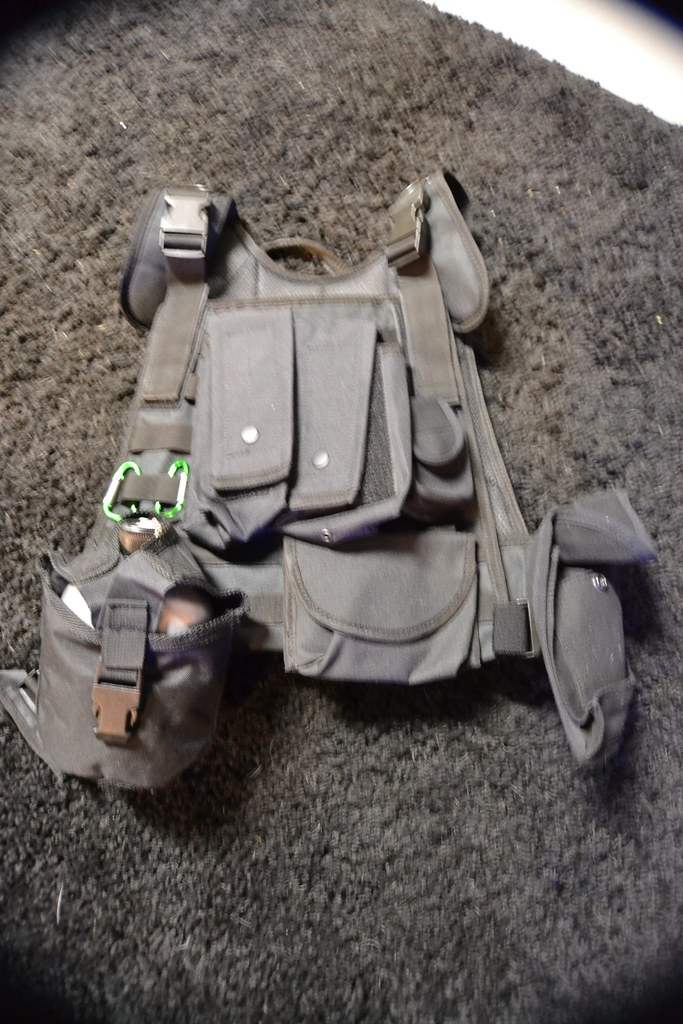
As I stated previously, there are many great Groot builds out there using morph suits. Despite those examples, I feel more comfortable doing my build "armor style". With that said, I was thinking that I wanted to build using a chest plate, back plate, biceps parts, and a neck seal.
A few years ago, my friends hosted an "End of the World Party" (December 21, 2012 - the so-called "end" of the Mayan Long Count Calendar). Well, I'm pleased to report that the world has continued to spin on. My costume for that party was a tactical body armor plate carrier, machete, etc...
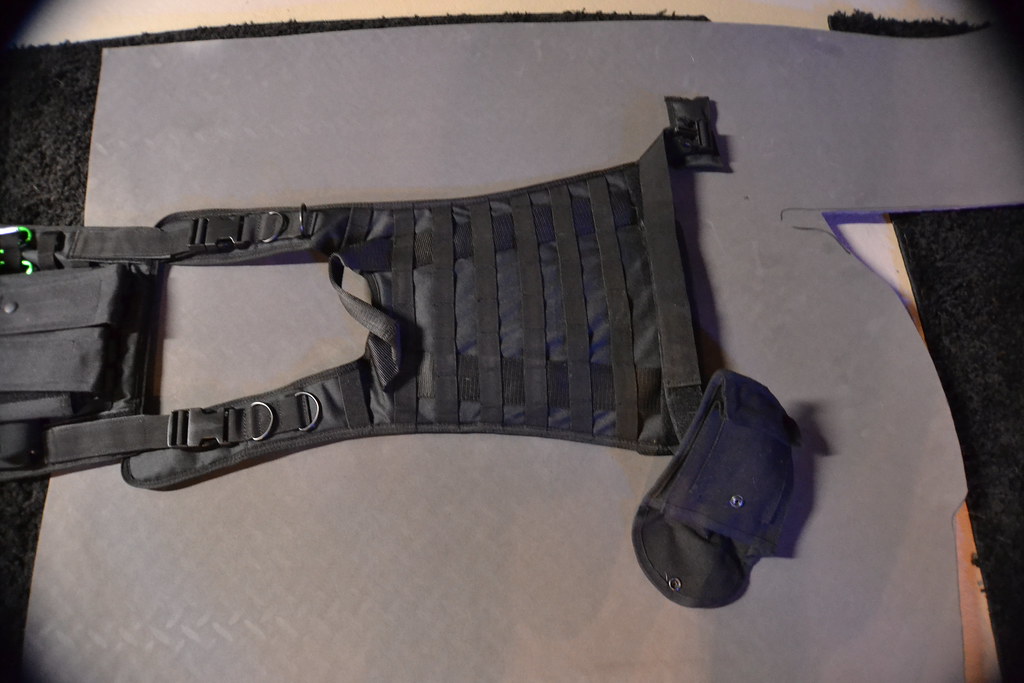
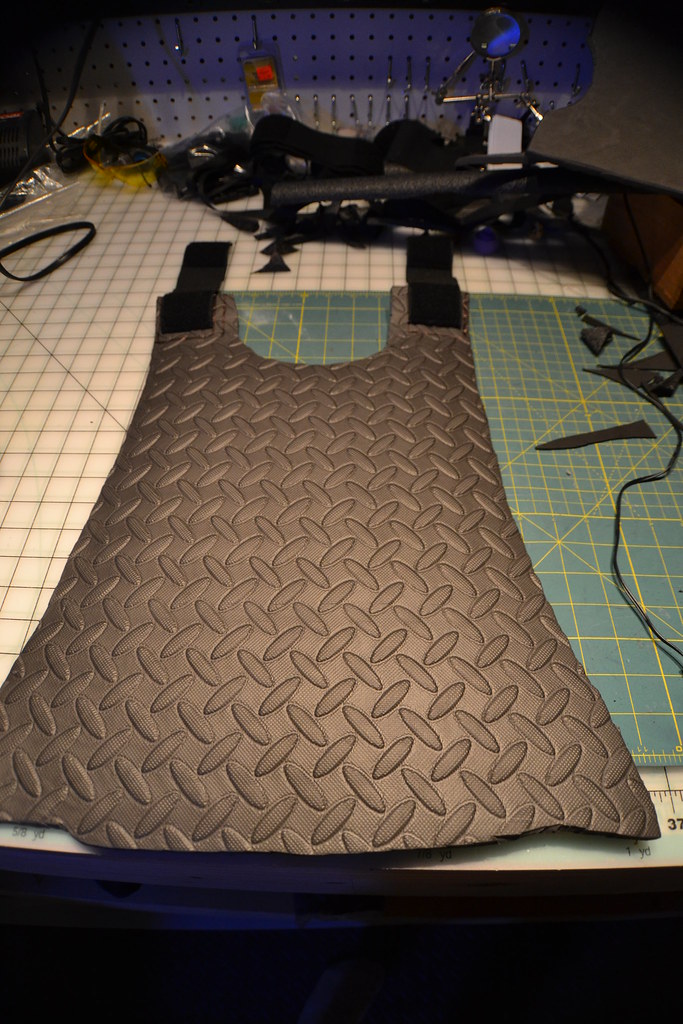
Well, I still have the plate carrier, and since I know that it fits me, I am using it to design the shape of my chest and back plates for Groot...
 DSC_0365 by bobby_whalen, on Flickr
 DSC_0366 by bobby_whalen, on Flickr
I had some elastic straps laying around, so I glued those to the chest and back plates....
 DSC_0370 by bobby_whalen, on Flickr
 DSC_0371 by bobby_whalen, on Flickr
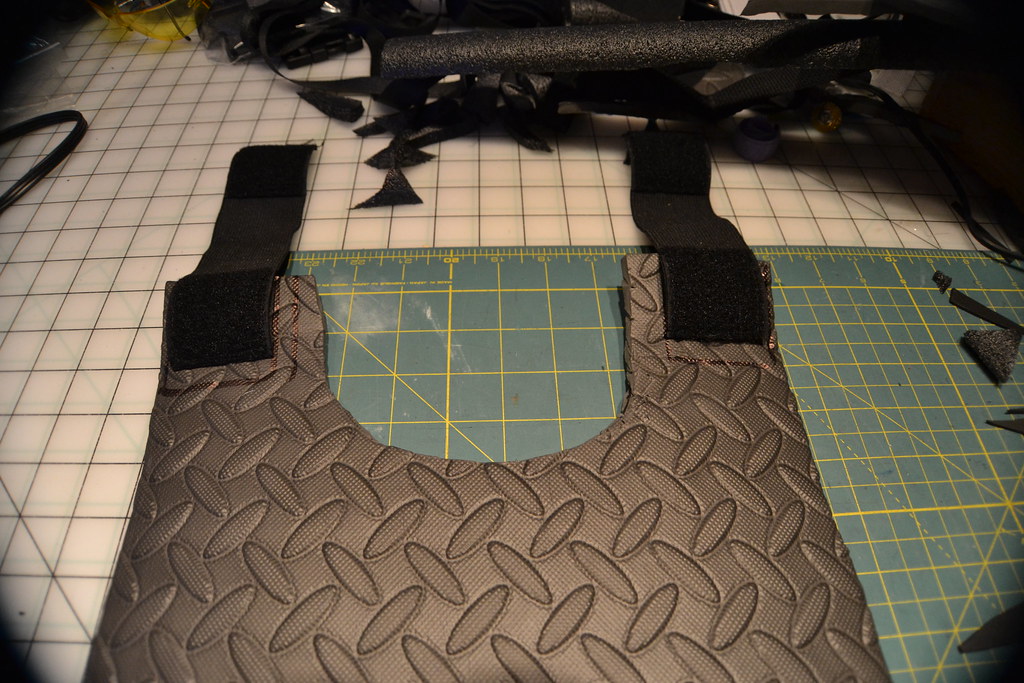
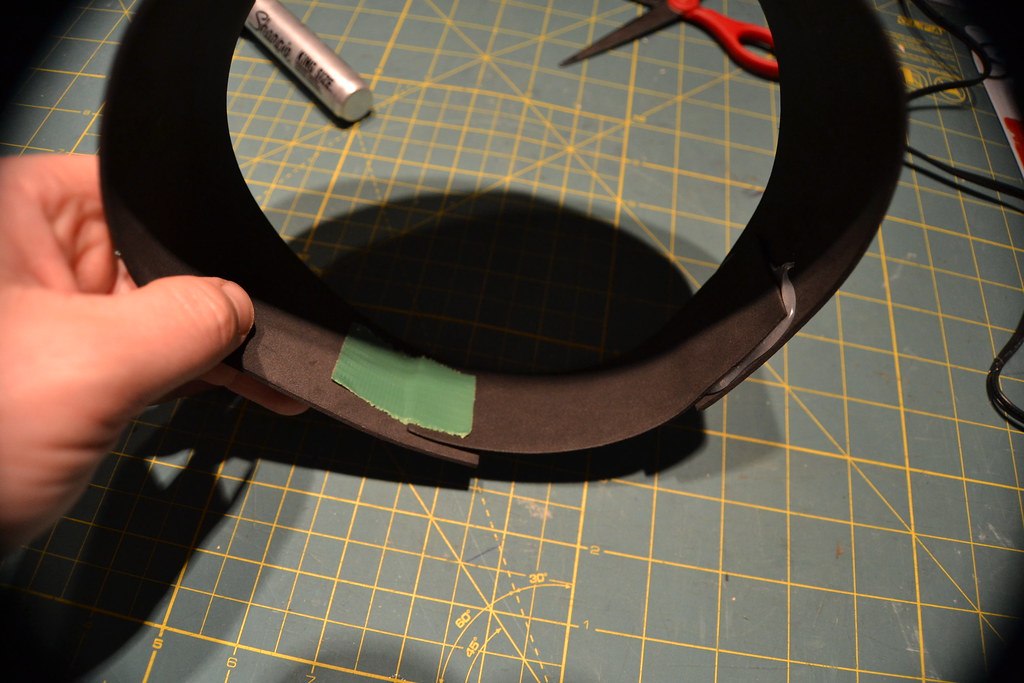
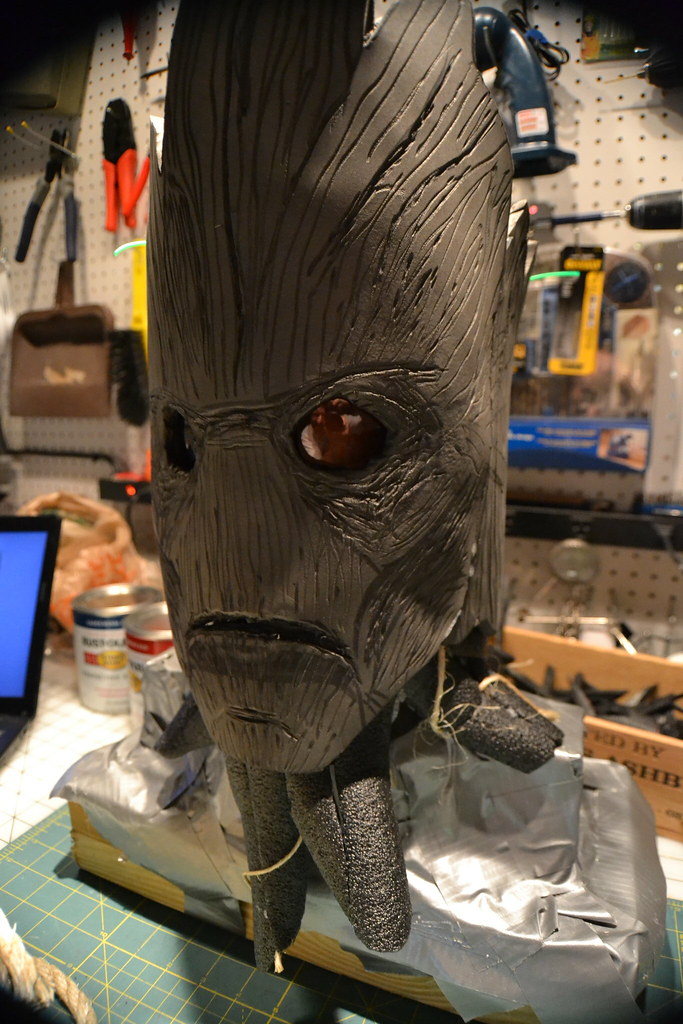
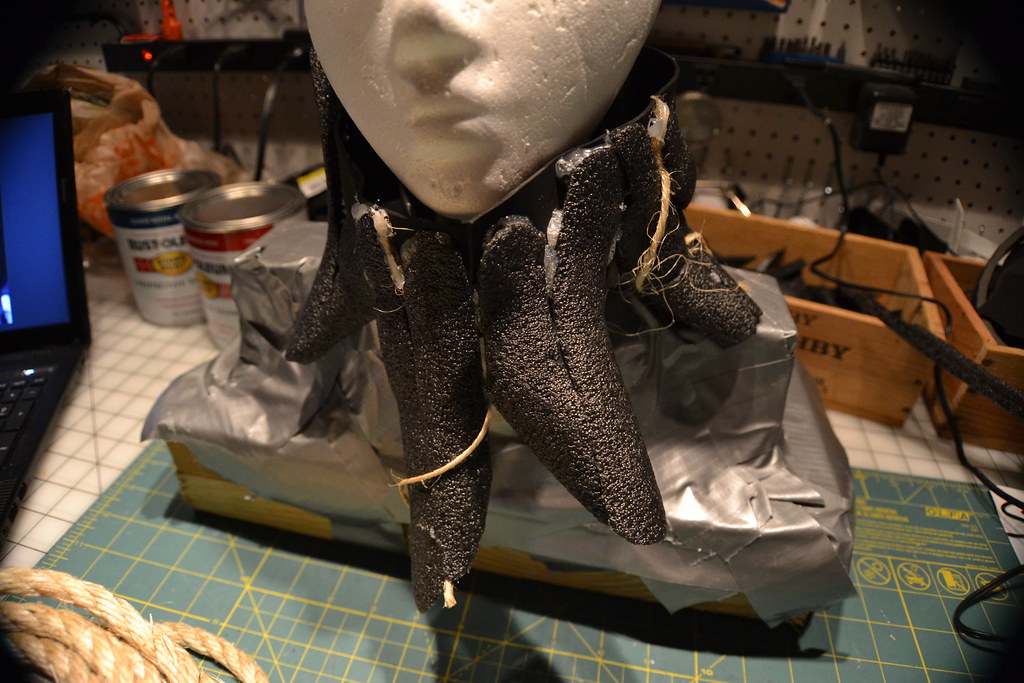
Next, I thought I would begin building the neck seal, since that will tie the mask to the chest and back. I just used cheapo craft foam for this...
 DSC_0769 by bobby_whalen, on Flickr
I am all out of velcro at the moment, so I just used some tape until I can go to the store tomorrow.
 DSC_0770 by bobby_whalen, on Flickr
 DSC_0771 by bobby_whalen, on Flickr
 DSC_0772 by bobby_whalen, on Flickr
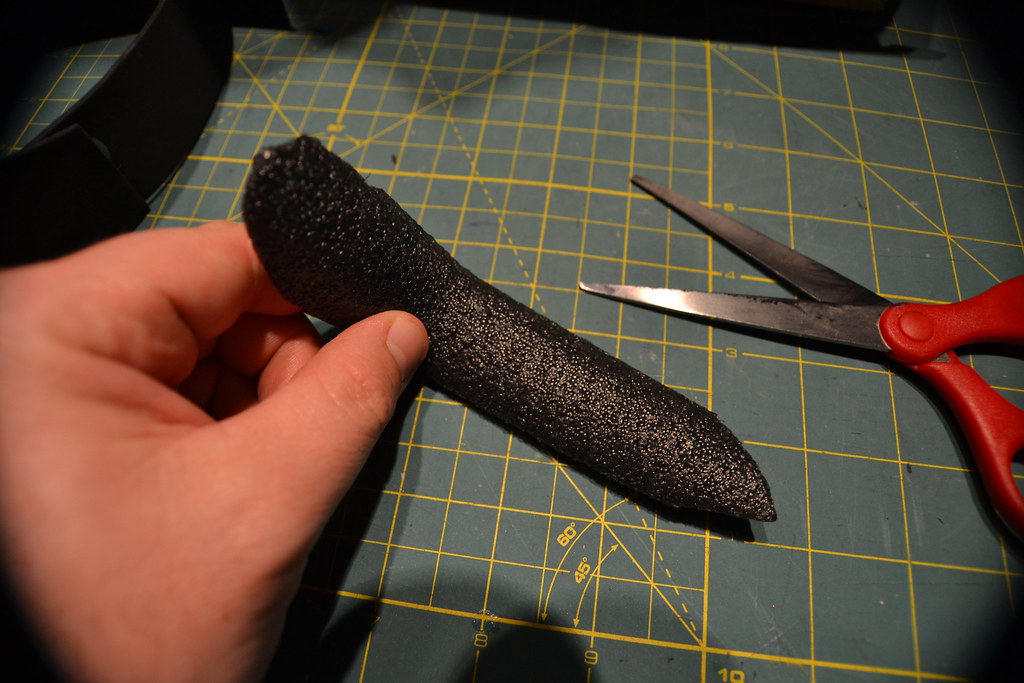
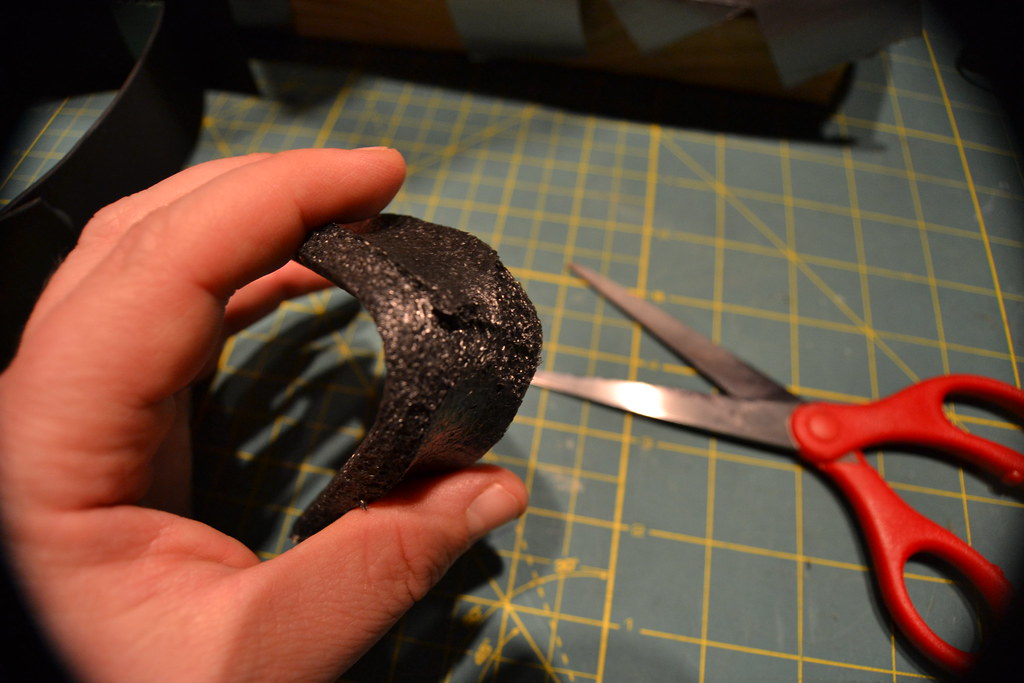
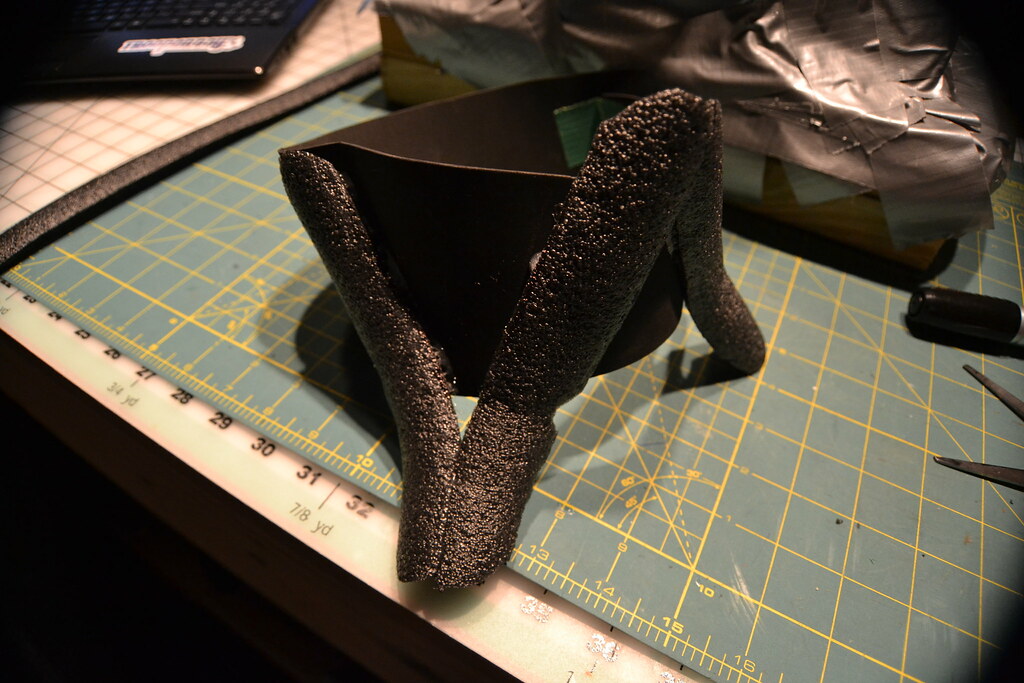
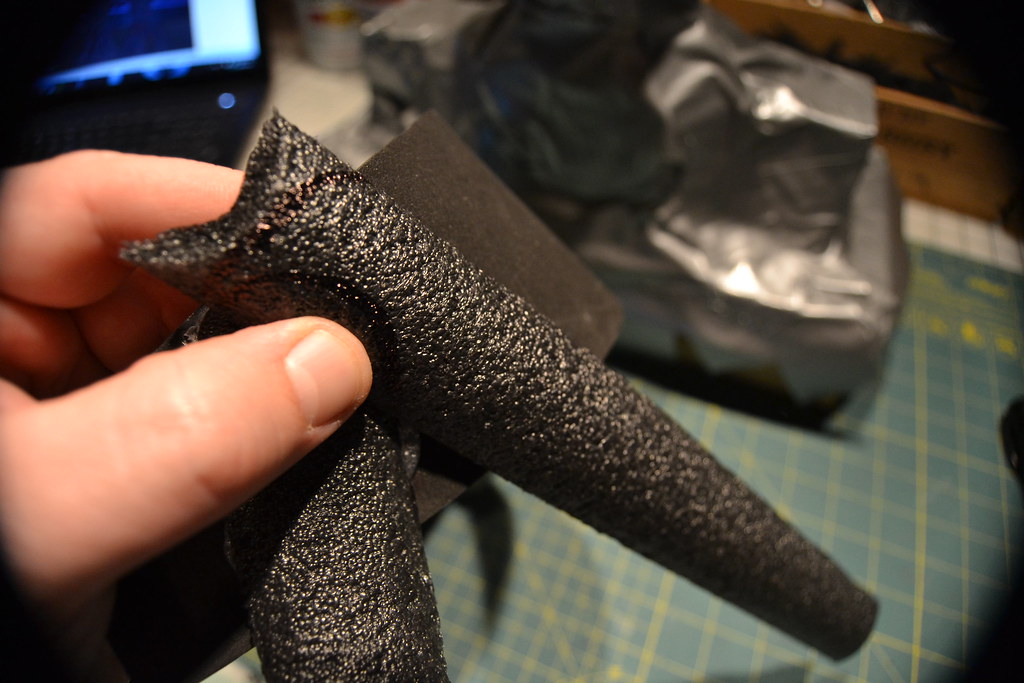
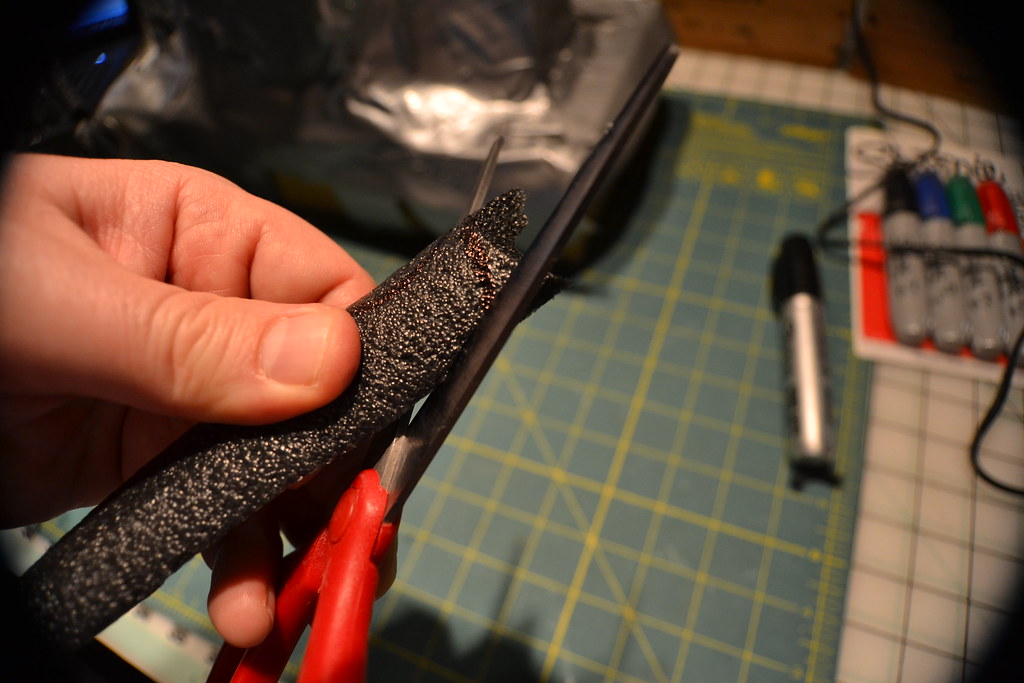
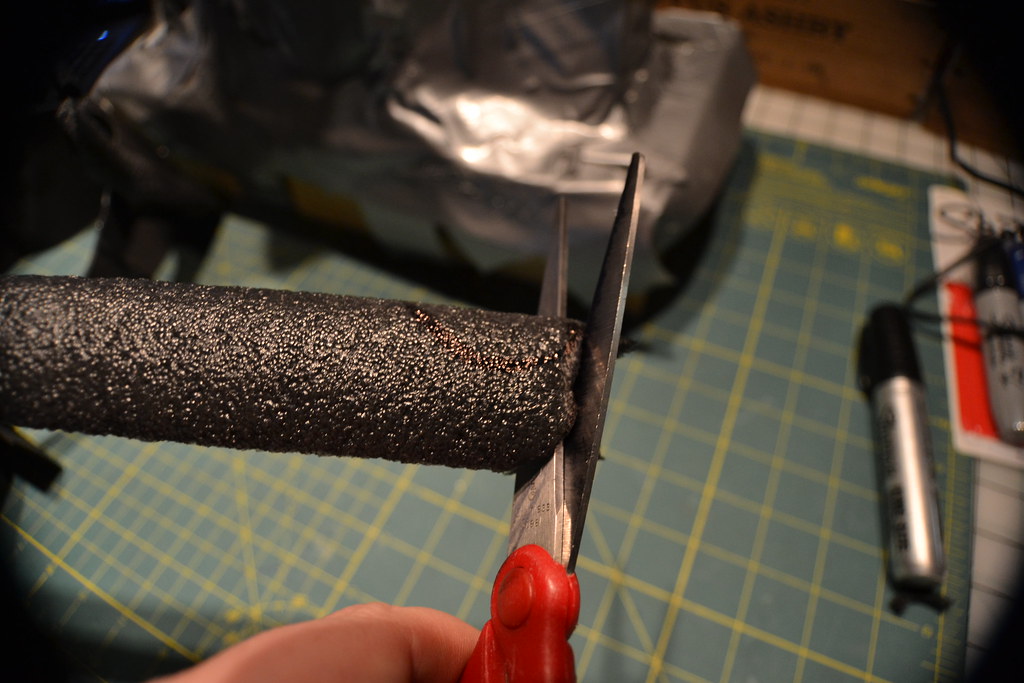
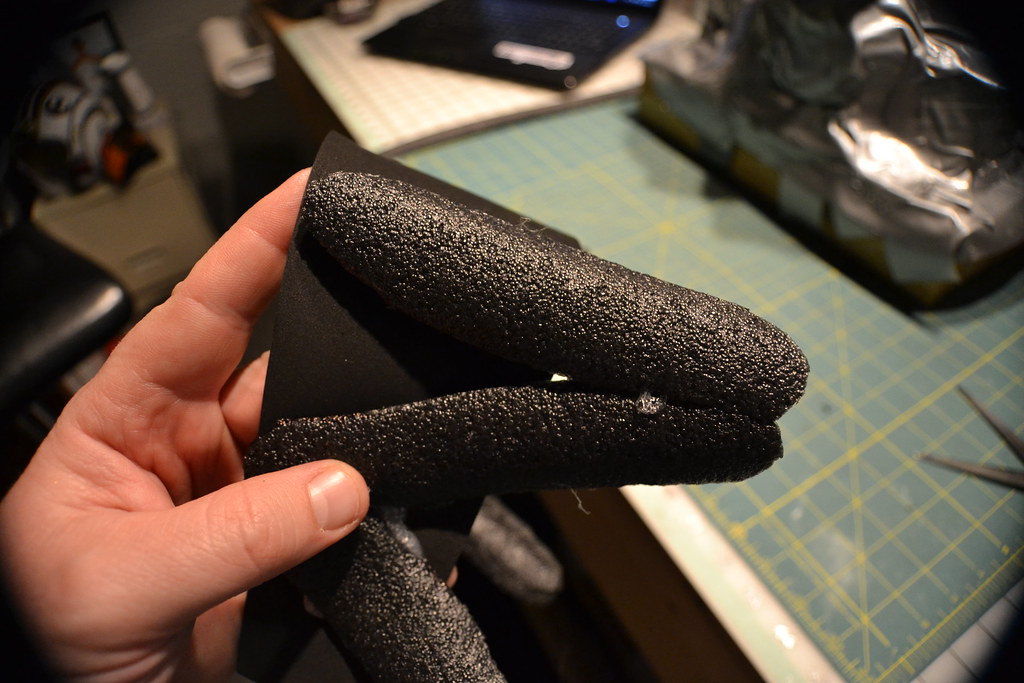
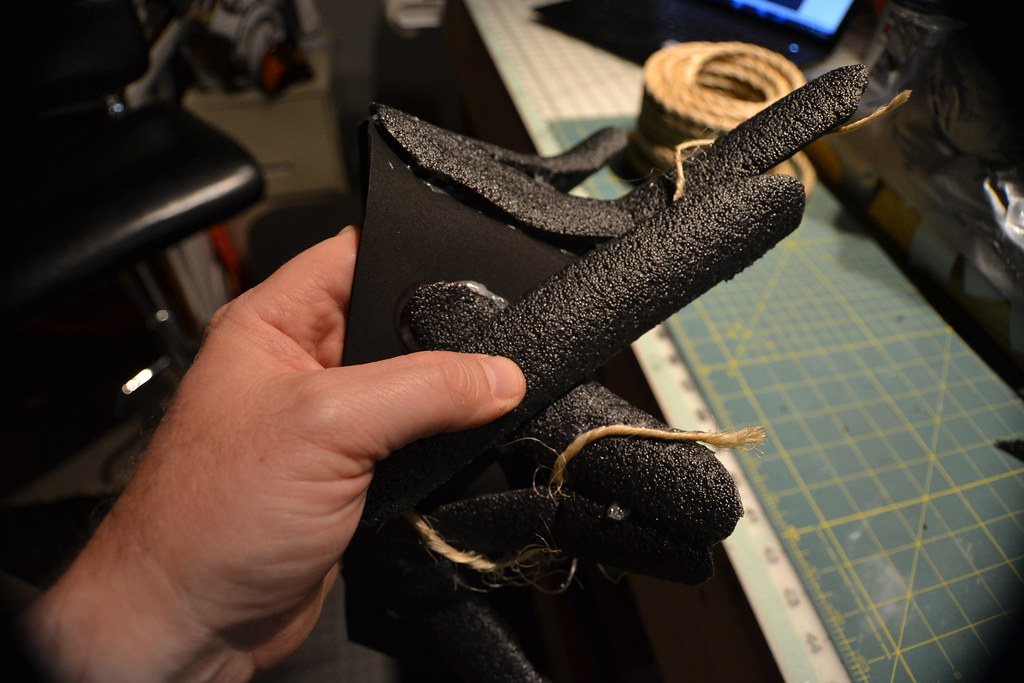
Since the neck seal will overlap a bit down to the chest I decided that the "branch" like tubes would need to be flexible. To ensure this I snipped them on the underside. This will make them thinner, and more pliable.
 DSC_0774 by bobby_whalen, on Flickr
 DSC_0775 by bobby_whalen, on Flickr
 DSC_0776 by bobby_whalen, on Flickr
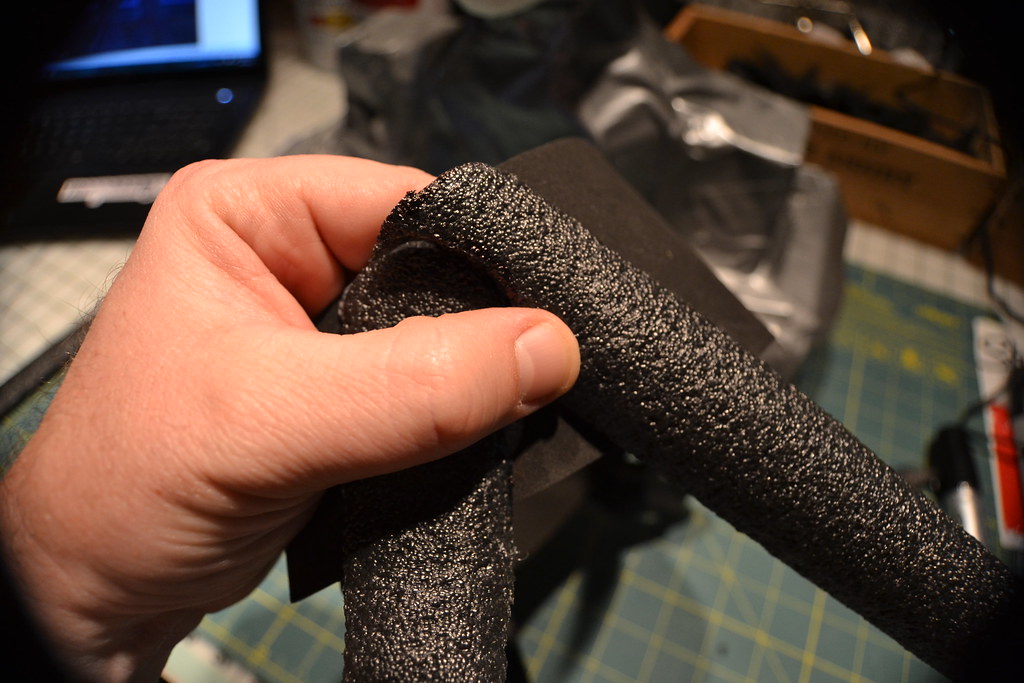
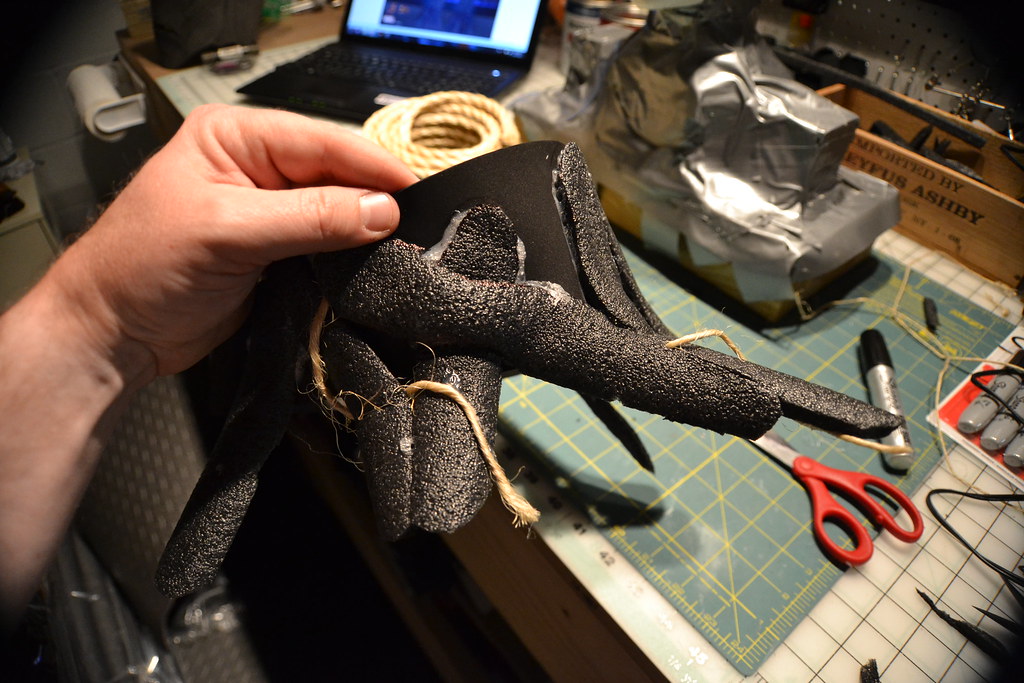
Then I just started attaching them...
 DSC_0777 by bobby_whalen, on Flickr
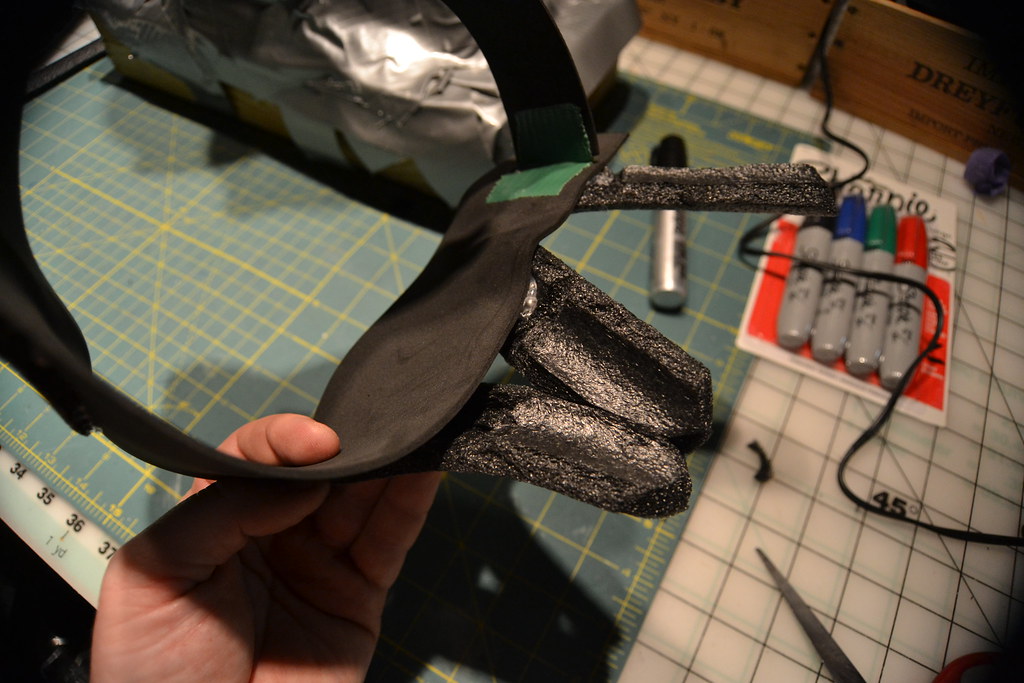
I am trying to use as many scrap pieces throughout this build to minimize waste. Sometimes, the piece needs to be trimmed to fit together with the other pieces and preserve continuity. If you look closely, you can see where I have drawn cut lines with a marker.
 DSC_0778 by bobby_whalen, on Flickr
 DSC_0779 by bobby_whalen, on Flickr
 DSC_0781 by bobby_whalen, on Flickr
 DSC_0782 by bobby_whalen, on Flickr
 DSC_0783 by bobby_whalen, on Flickr
 DSC_0784 by bobby_whalen, on Flickr
 DSC_0785 by bobby_whalen, on Flickr
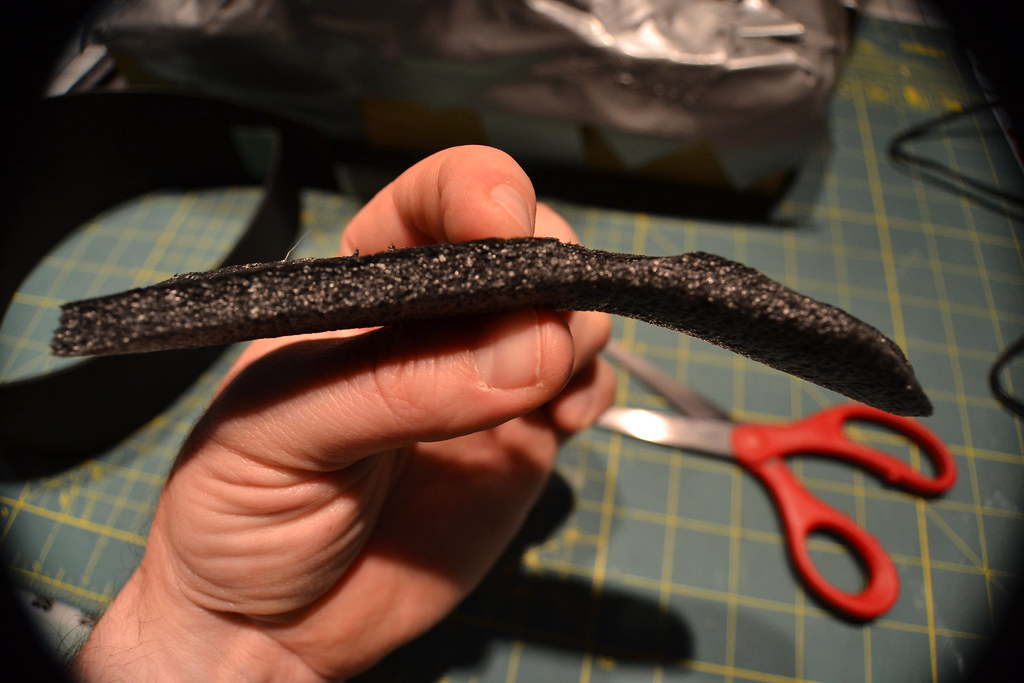
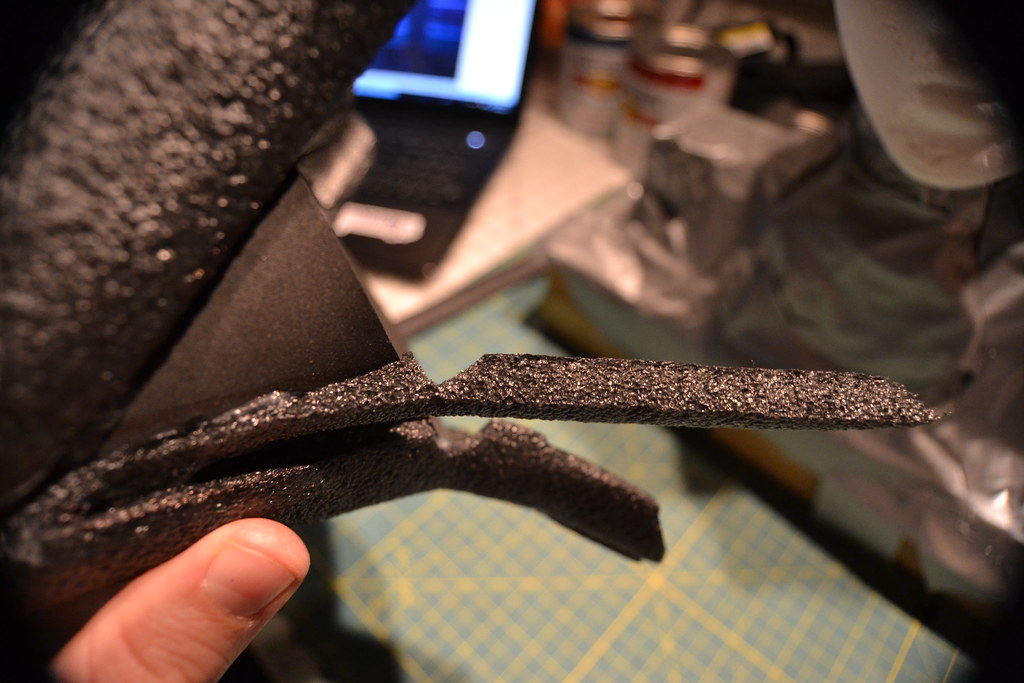
This is a look at the underside of the foam. You can see that there are spots where I have trimmed the foam small to ensure flexibility.
 DSC_0786 by bobby_whalen, on Flickr
 DSC_0793 by bobby_whalen, on Flickr
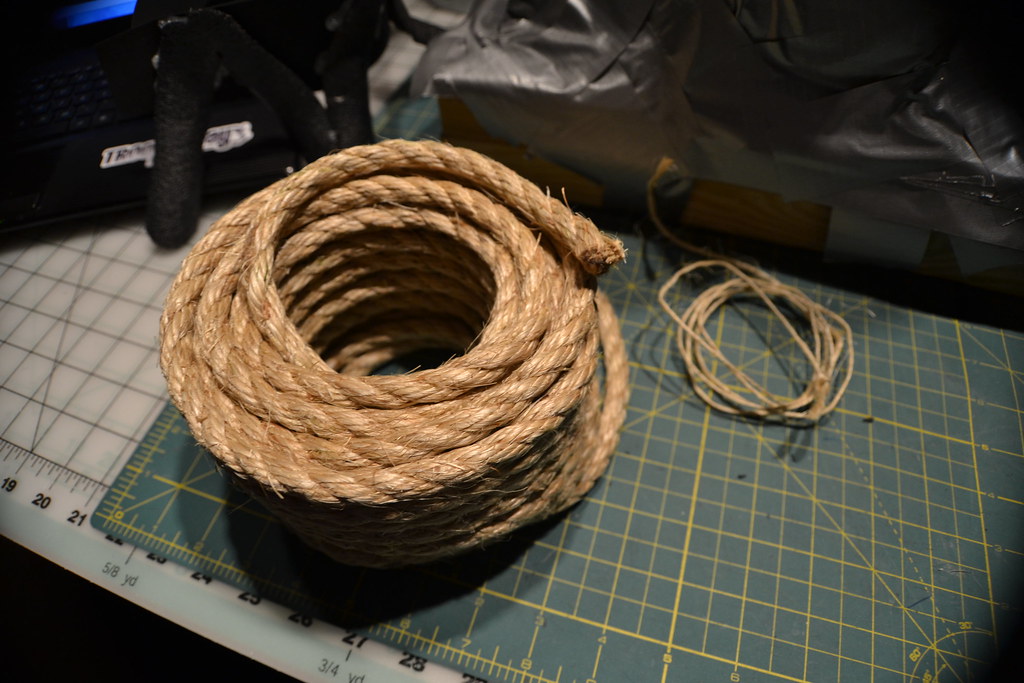
So, I had some of this rope, and I thought it looked kind of cool and vine like (for now I just used the smaller twine on the right). I added some to the foam. I like the change in texture....
 DSC_0794 by bobby_whalen, on Flickr
 DSC_0795 by bobby_whalen, on Flickr
 DSC_0796 by bobby_whalen, on Flickr
 DSC_0797 by bobby_whalen, on Flickr
 DSC_0798 by bobby_whalen, on Flickr
 DSC_0799 by bobby_whalen, on Flickr
 DSC_0800 by bobby_whalen, on Flickr
 DSC_0801 by bobby_whalen, on Flickr
As I stated previously, there are many great Groot builds out there using morph suits. Despite those examples, I feel more comfortable doing my build "armor style". With that said, I was thinking that I wanted to build using a chest plate, back plate, biceps parts, and a neck seal.
A few years ago, my friends hosted an "End of the World Party" (December 21, 2012 - the so-called "end" of the Mayan Long Count Calendar). Well, I'm pleased to report that the world has continued to spin on. My costume for that party was a tactical body armor plate carrier, machete, etc...
Well, I still have the plate carrier, and since I know that it fits me, I am using it to design the shape of my chest and back plates for Groot...
DSC_0365 by bobby_whalen, on FlickrDSC_0366 by bobby_whalen, on FlickrI had some elastic straps laying around, so I glued those to the chest and back plates....
DSC_0370 by bobby_whalen, on FlickrDSC_0371 by bobby_whalen, on FlickrNext, I thought I would begin building the neck seal, since that will tie the mask to the chest and back. I just used cheapo craft foam for this...
DSC_0769 by bobby_whalen, on FlickrI am all out of velcro at the moment, so I just used some tape until I can go to the store tomorrow.
DSC_0770 by bobby_whalen, on FlickrDSC_0771 by bobby_whalen, on FlickrDSC_0772 by bobby_whalen, on FlickrSince the neck seal will overlap a bit down to the chest I decided that the "branch" like tubes would need to be flexible. To ensure this I snipped them on the underside. This will make them thinner, and more pliable.
DSC_0774 by bobby_whalen, on FlickrDSC_0775 by bobby_whalen, on FlickrDSC_0776 by bobby_whalen, on FlickrThen I just started attaching them...
DSC_0777 by bobby_whalen, on FlickrI am trying to use as many scrap pieces throughout this build to minimize waste. Sometimes, the piece needs to be trimmed to fit together with the other pieces and preserve continuity. If you look closely, you can see where I have drawn cut lines with a marker.
DSC_0778 by bobby_whalen, on FlickrDSC_0779 by bobby_whalen, on FlickrDSC_0781 by bobby_whalen, on FlickrDSC_0782 by bobby_whalen, on FlickrDSC_0783 by bobby_whalen, on FlickrDSC_0784 by bobby_whalen, on FlickrDSC_0785 by bobby_whalen, on FlickrThis is a look at the underside of the foam. You can see that there are spots where I have trimmed the foam small to ensure flexibility.
DSC_0786 by bobby_whalen, on FlickrDSC_0793 by bobby_whalen, on FlickrSo, I had some of this rope, and I thought it looked kind of cool and vine like (for now I just used the smaller twine on the right). I added some to the foam. I like the change in texture....
DSC_0794 by bobby_whalen, on FlickrDSC_0795 by bobby_whalen, on FlickrDSC_0796 by bobby_whalen, on FlickrDSC_0797 by bobby_whalen, on FlickrDSC_0798 by bobby_whalen, on FlickrDSC_0799 by bobby_whalen, on FlickrDSC_0800 by bobby_whalen, on FlickrDSC_0801 by bobby_whalen, on FlickrAlpha Proto
Sr Member
The use of rope fore vines is brilliant.
dlcramer
New Member
I have been following a lot of the Groot builds. Trying to build my own (while helping my wife work on her Rocket) and love what I have seen in this thread! I need to remember to take more pictures of the process.
Here is my almost finished mask. Like most everyone else it started out as 3/8 thick EVA foam. I wasn't happy with the nose and mouth, so I cut it completely off (almost like the cheek cuts for a Fett helmet) and redid the area with 2mm EVA and did the caulk coat before painting. While looking for ideas for the hands, I came across this thread and never thought about doing the same idea to some cotton gloves. This is something I will be trying in the morning. Our comicon is in 3 weeks. No big deal, right? DOH!

Here is my almost finished mask. Like most everyone else it started out as 3/8 thick EVA foam. I wasn't happy with the nose and mouth, so I cut it completely off (almost like the cheek cuts for a Fett helmet) and redid the area with 2mm EVA and did the caulk coat before painting. While looking for ideas for the hands, I came across this thread and never thought about doing the same idea to some cotton gloves. This is something I will be trying in the morning. Our comicon is in 3 weeks. No big deal, right? DOH!
Last edited:
BobbyFromBUF
Well-Known Member
Thanks for the kind words! I know this build kind of got interrupted for my Snow Mando build. But I'm hoping to finish it up this summer.
BobbyFromBUF
Well-Known Member
Well, it's been a really long time, but better late, than never... Haha.
I have an update! I finally made some new progress. I have completed both of the feet, and now I am working on finishing the legs. I have also begun creating the patterns for the "bark" sections that help complete the trunk. Hopefully, I'll have more to update tomorrow!
I have an update! I finally made some new progress. I have completed both of the feet, and now I am working on finishing the legs. I have also begun creating the patterns for the "bark" sections that help complete the trunk. Hopefully, I'll have more to update tomorrow!
BobbyFromBUF
Well-Known Member
BobbyFromBUF
Well-Known Member
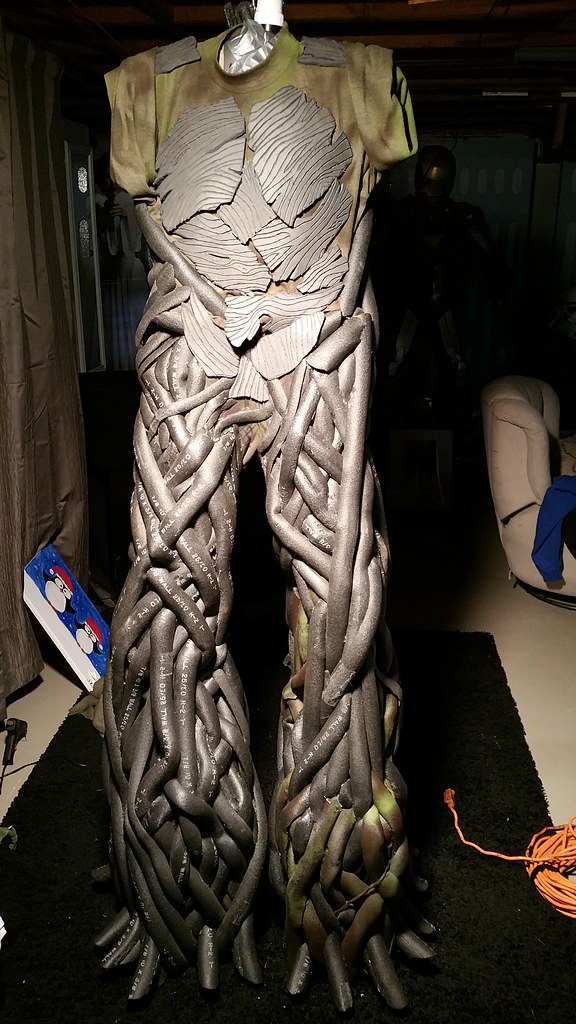
So, here is a photo of a bit more progress. It might not look like much, but now I have most of the sizing and alignment planned out.
BobbyFromBUF
Well-Known Member
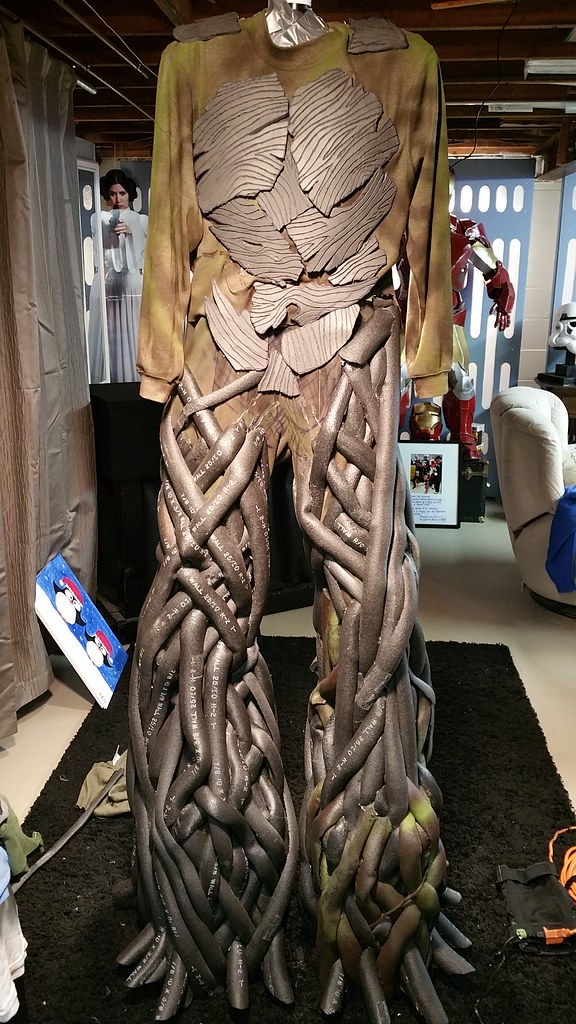
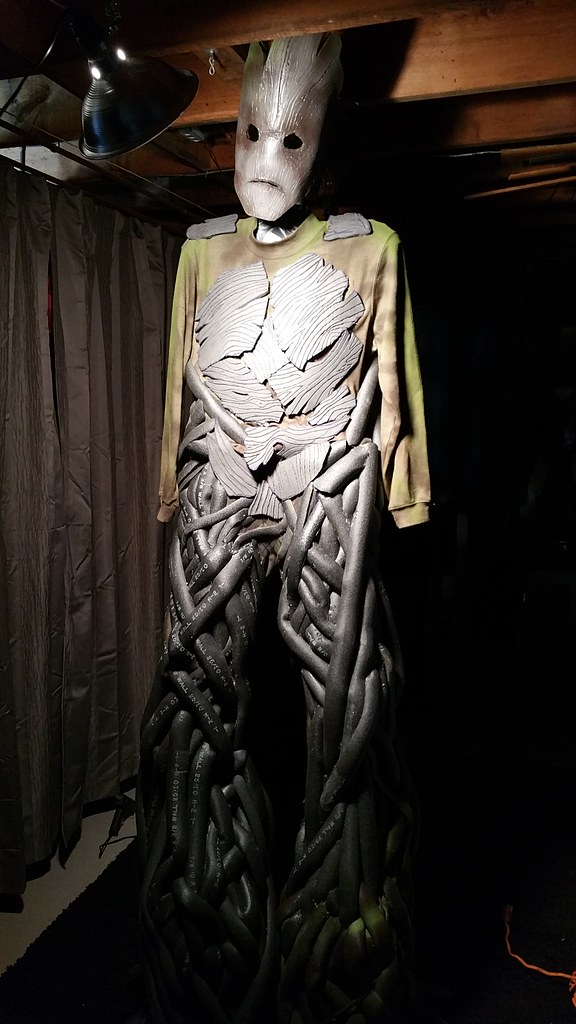
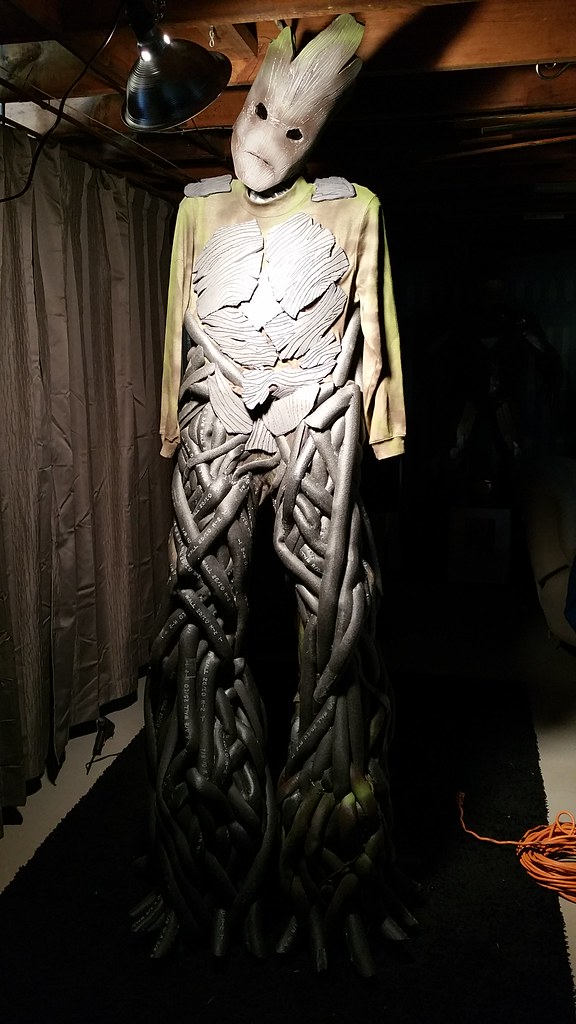
Well, it's only about a year and half passed the deadline, but I am finally finished. I'm uploading my pictures, and organizing my thoughts. I'll update the build thread shortly ;-)
 20160520_224745 by Robert Whalen, on Flickr
BobbyFromBUF
Well-Known Member
So, the last thing that I explained was that I had worked out the sizing.
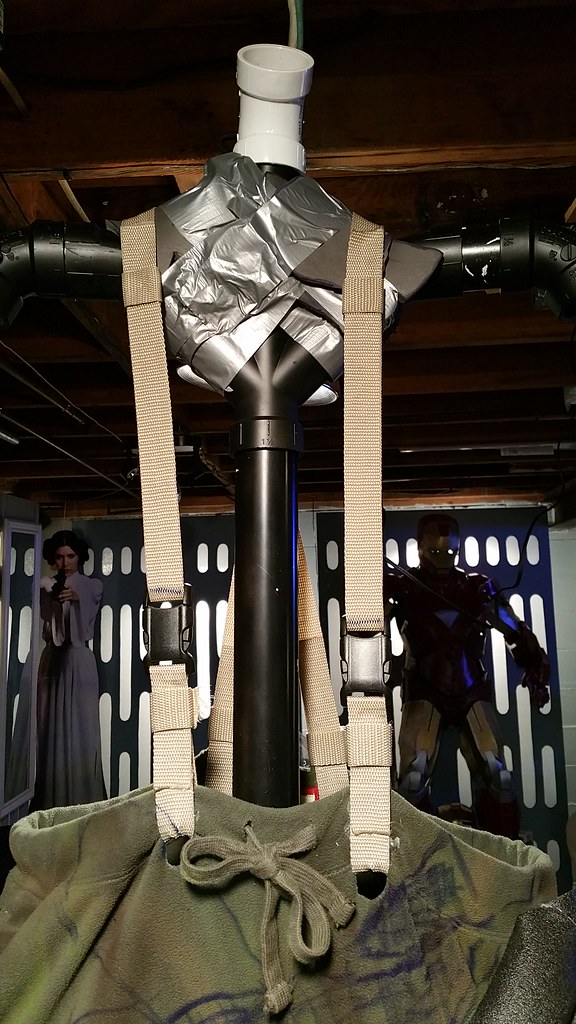
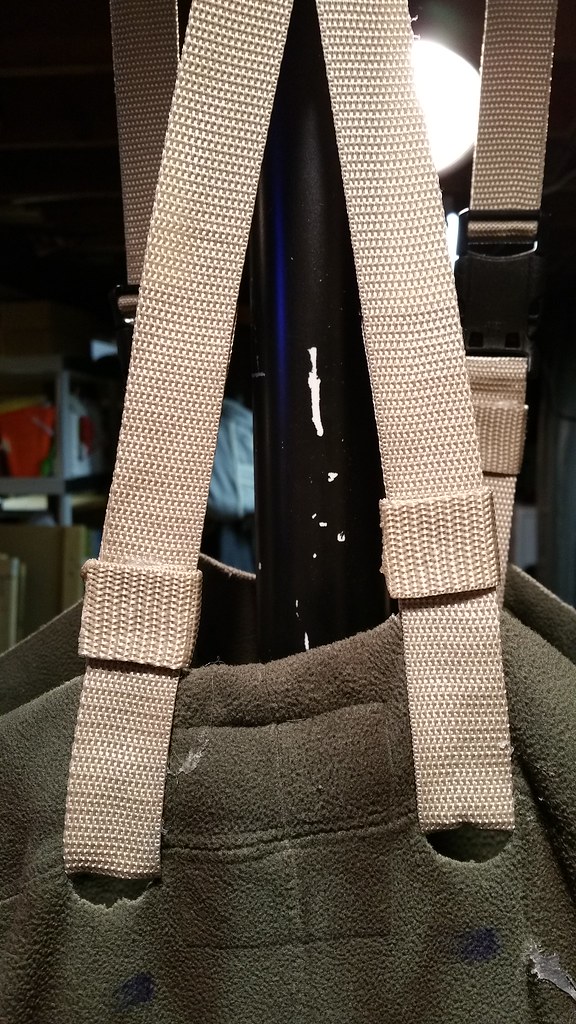
The inner layers of the this costume ended up being made of wood (for the stilts), sweatpants from the Thrift Shop (originally Old Navy Brand), and a sweatshirt from the Thrift Shop.
The sweatpants were very big on me. I'm 5'8" and about 182lbs. The pants were XL and extremely long. I found that when I put them on, and pulled them up as high as I could that they went well above my naval. So, I decided to use that to my advantage. I made some suspenders using 1" nylon webbing from Hobby Lobby and some 1" buckles I had from another project.
 20160418_225355 by Robert Whalen, on Flickr
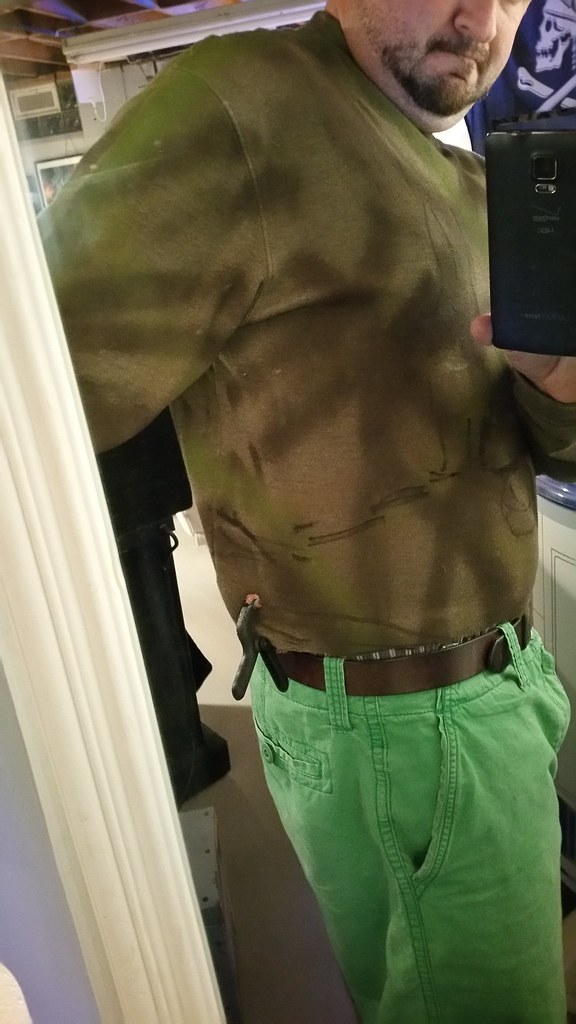
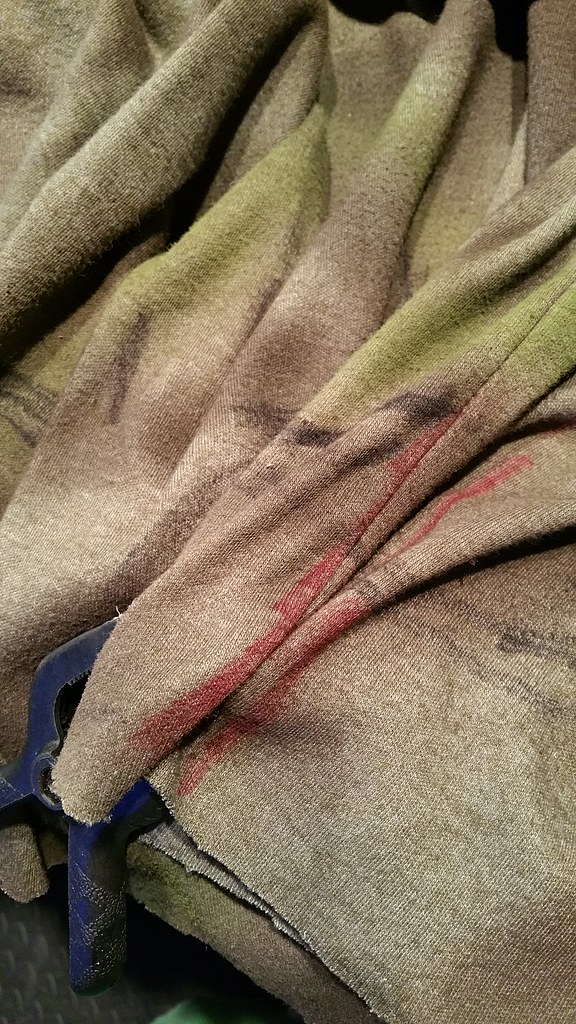
I worked my way up from the boots attaching the pipe insulation to the pants using hot glue. As I got near the crotch area I started mapping out where the chunks of bark would go. I used screen captures from Guardians of the Galaxy to figure about approximate sizes and shapes.
 20160419_004747 by Robert Whalen, on Flickr
 20160419_013715 by Robert Whalen, on Flickr
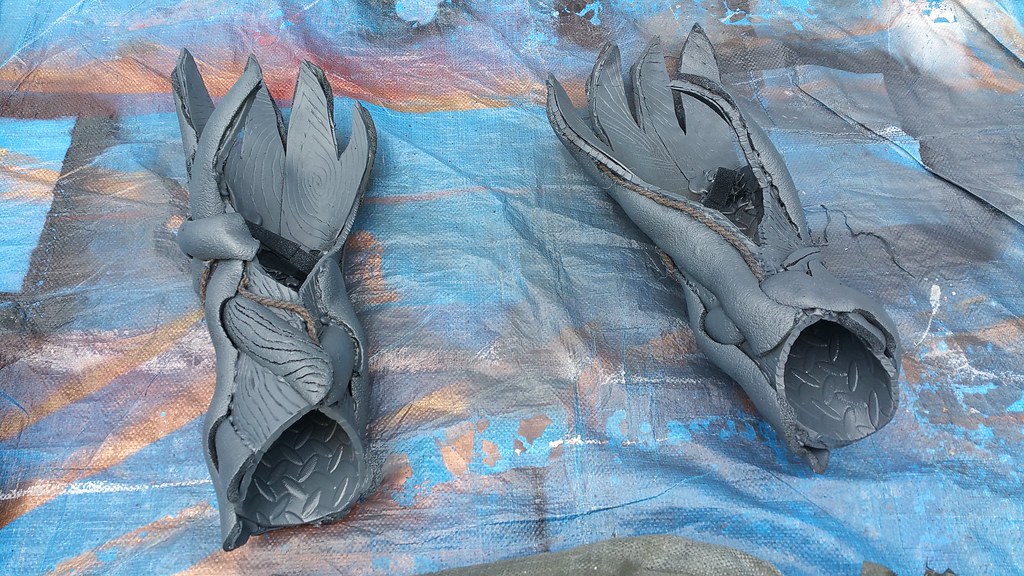
Next, I decided that the legs didn't look right. They were just too "boxy". It didn't look organic to me. So, I finally realized that I was missing "feet" or "roots" if you will. I made the roots from pieces of pipe insulation and bits of EVA foam mat.
 20160419_103351 by Robert Whalen, on Flickr
 20160419_105601 by Robert Whalen, on Flickr
 20160419_112536 by Robert Whalen, on Flickr
 20160419_122738 by Robert Whalen, on Flickr
 20160419_135941 by Robert Whalen, on Flickr
 20160419_135951 by Robert Whalen, on Flickr
The inner layers of the this costume ended up being made of wood (for the stilts), sweatpants from the Thrift Shop (originally Old Navy Brand), and a sweatshirt from the Thrift Shop.
The sweatpants were very big on me. I'm 5'8" and about 182lbs. The pants were XL and extremely long. I found that when I put them on, and pulled them up as high as I could that they went well above my naval. So, I decided to use that to my advantage. I made some suspenders using 1" nylon webbing from Hobby Lobby and some 1" buckles I had from another project.
I worked my way up from the boots attaching the pipe insulation to the pants using hot glue. As I got near the crotch area I started mapping out where the chunks of bark would go. I used screen captures from Guardians of the Galaxy to figure about approximate sizes and shapes.
Next, I decided that the legs didn't look right. They were just too "boxy". It didn't look organic to me. So, I finally realized that I was missing "feet" or "roots" if you will. I made the roots from pieces of pipe insulation and bits of EVA foam mat.
BobbyFromBUF
Well-Known Member
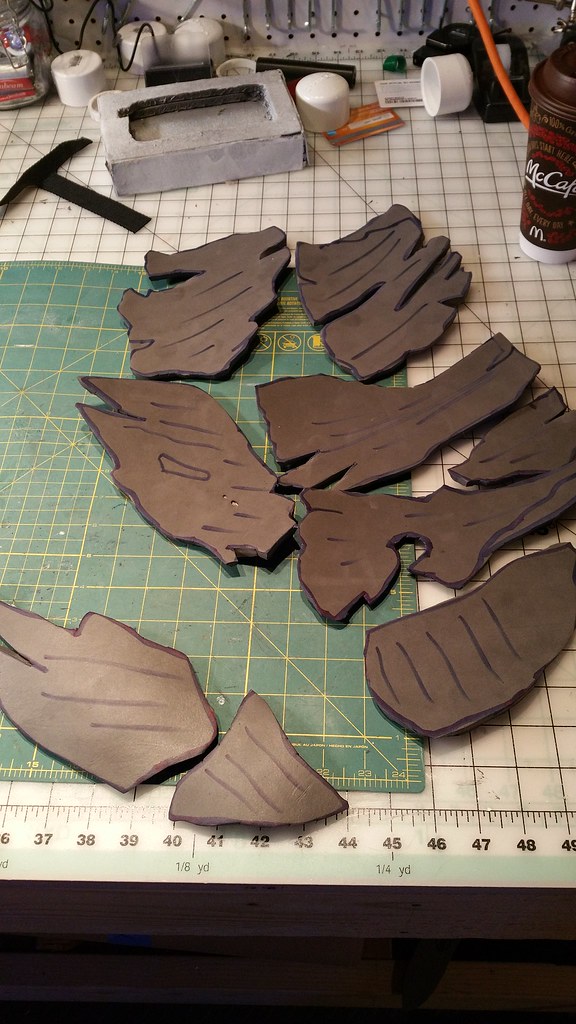
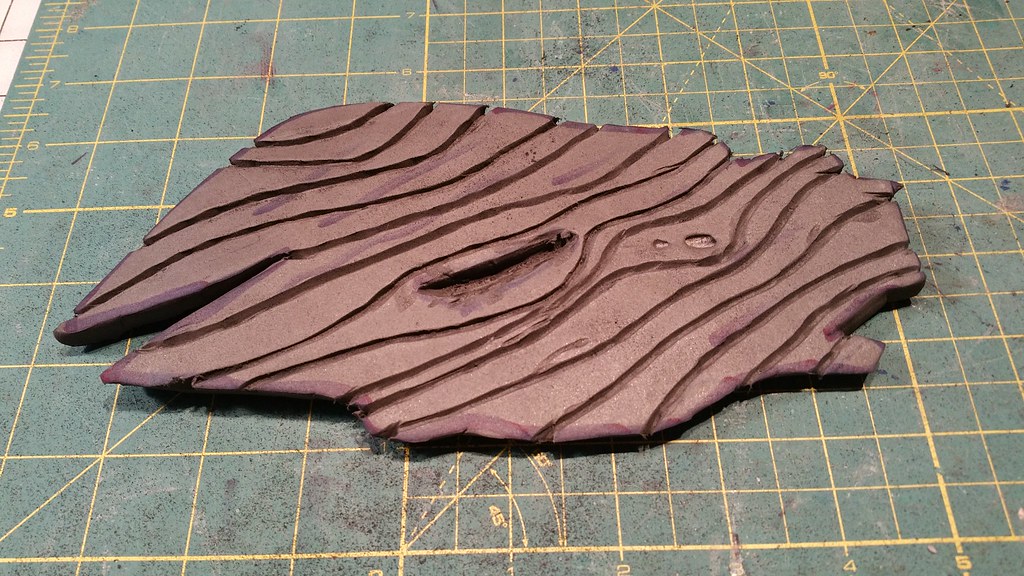
Then I was ready to move on to the bark. Using screen captures I drew some shapes that I thought looked correct. This is all free-hand, so nothing is perfect, but I do a better job of drawing when I use specific references. So, that's what I did...
 20160419_143542 by Robert Whalen, on Flickr
The "front" pieces are on the left, and the "back" pieces are on the right.
 20160419_151430 by Robert Whalen, on Flickr
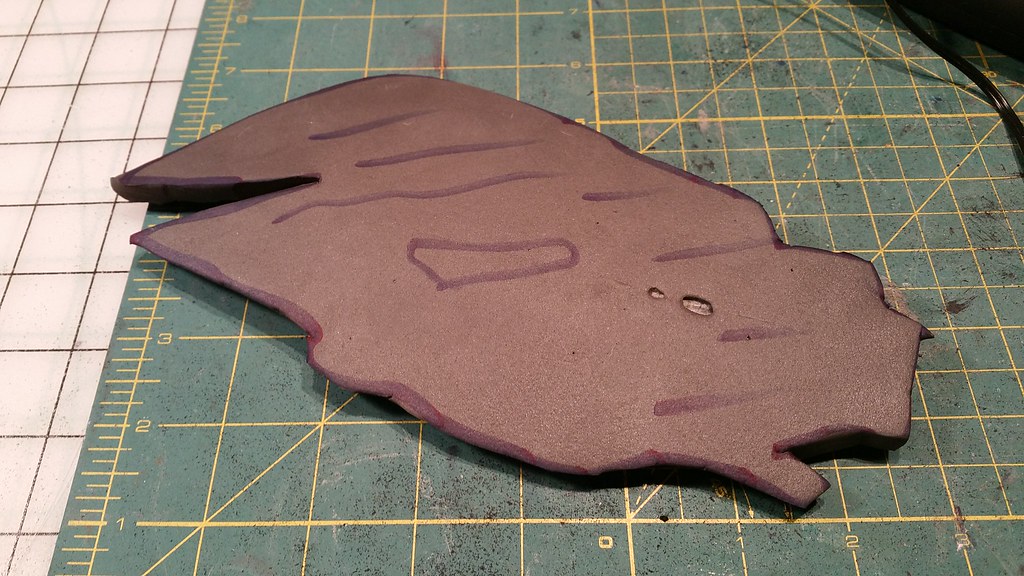
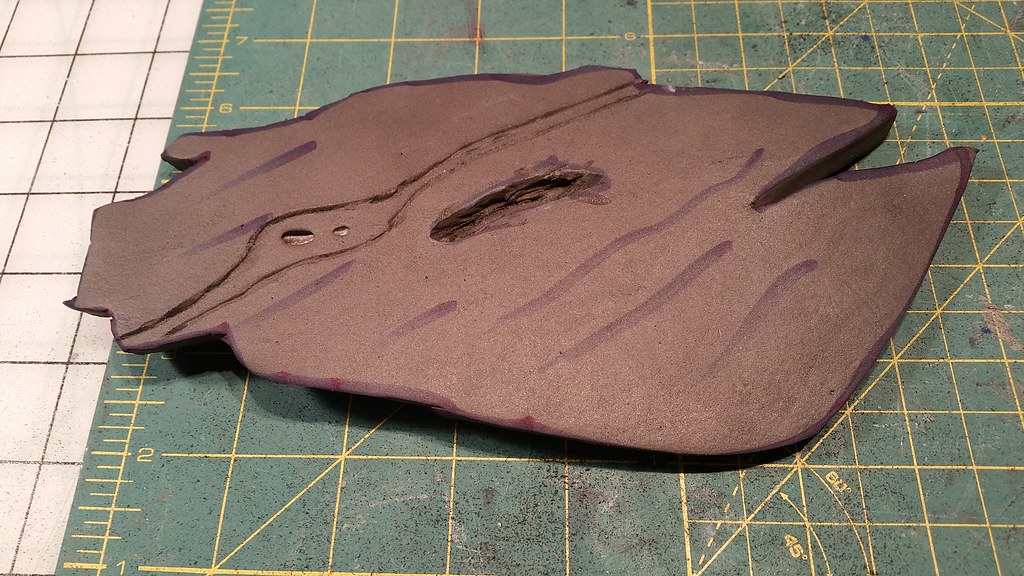
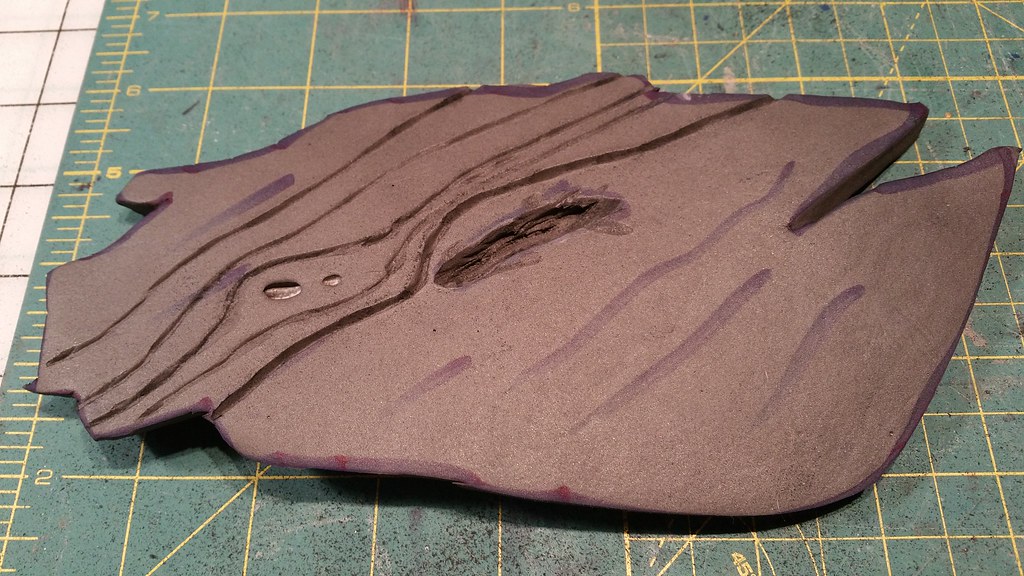
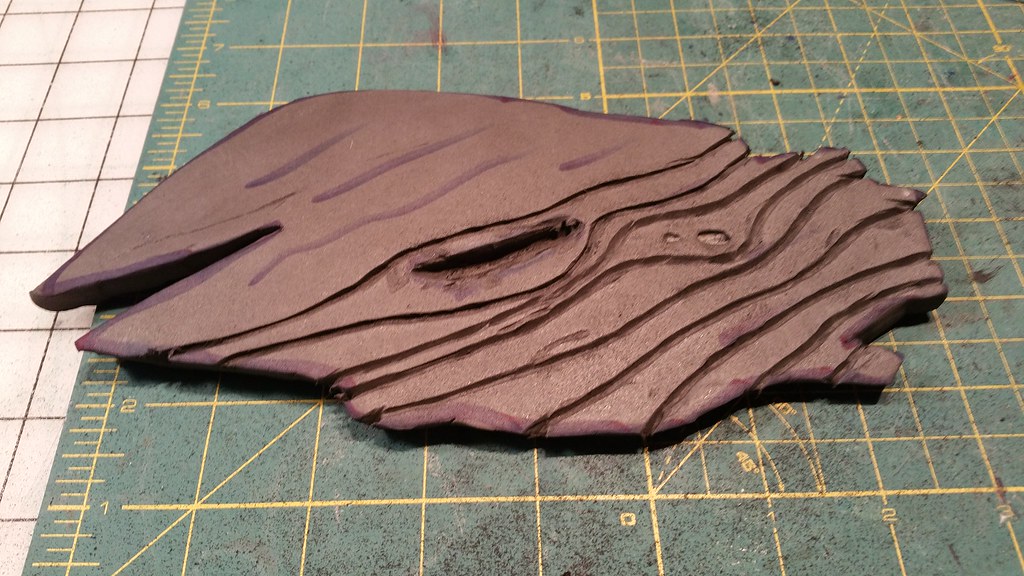
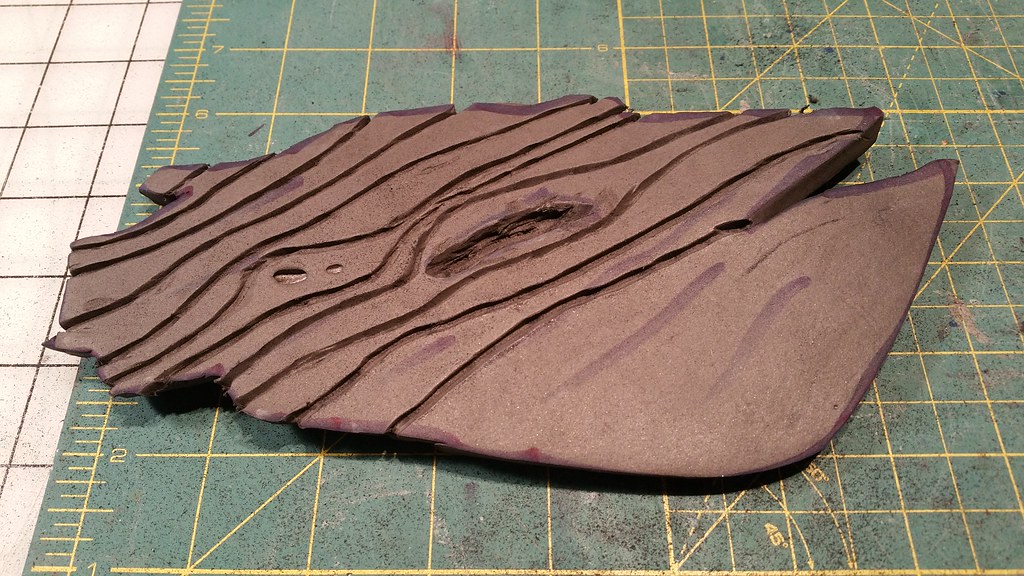
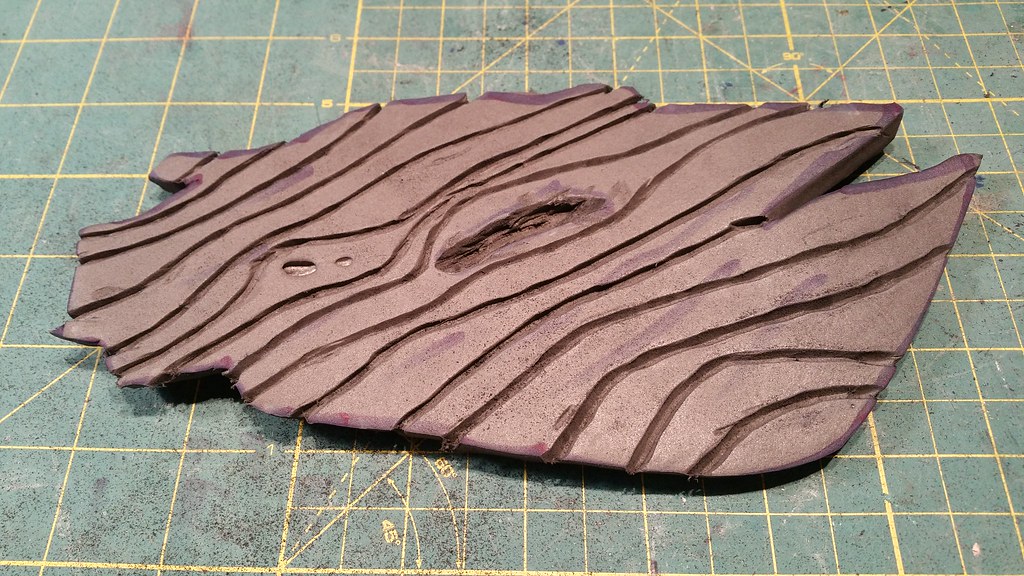
I wanted to make each of these pieces of "bark" to look unique. So, each one has it's own pattern. I drew on each one with a marker, and then used my rotary tool to copy the directions of the pattern. I tried to line this up with screen captures as often as I could, but again, it's not perfect.
20160419_151430 by Robert Whalen, on Flickr
 20160422_123032 by Robert Whalen, on Flickr
 20160422_123359 by Robert Whalen, on Flickr
 20160422_123549 by Robert Whalen, on Flickr
 20160422_124213 by Robert Whalen, on Flickr
 20160422_124600 by Robert Whalen, on Flickr
 20160422_125003 by Robert Whalen, on Flickr
 20160422_125008 by Robert Whalen, on Flickr
20160419_143542 by Robert Whalen, on FlickrThe "front" pieces are on the left, and the "back" pieces are on the right.
20160419_151430 by Robert Whalen, on FlickrI wanted to make each of these pieces of "bark" to look unique. So, each one has it's own pattern. I drew on each one with a marker, and then used my rotary tool to copy the directions of the pattern. I tried to line this up with screen captures as often as I could, but again, it's not perfect.
20160419_151430 by Robert Whalen, on Flickr20160422_123032 by Robert Whalen, on Flickr20160422_123359 by Robert Whalen, on Flickr20160422_123549 by Robert Whalen, on Flickr20160422_124213 by Robert Whalen, on Flickr20160422_124600 by Robert Whalen, on Flickr20160422_125003 by Robert Whalen, on Flickr20160422_125008 by Robert Whalen, on FlickrBobbyFromBUF
Well-Known Member
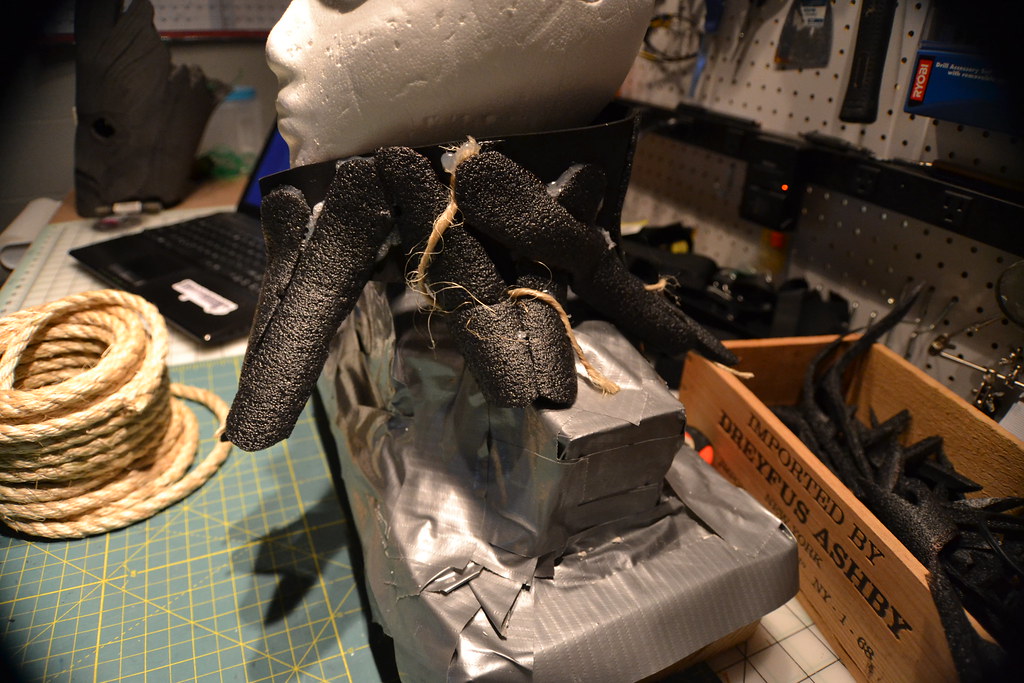
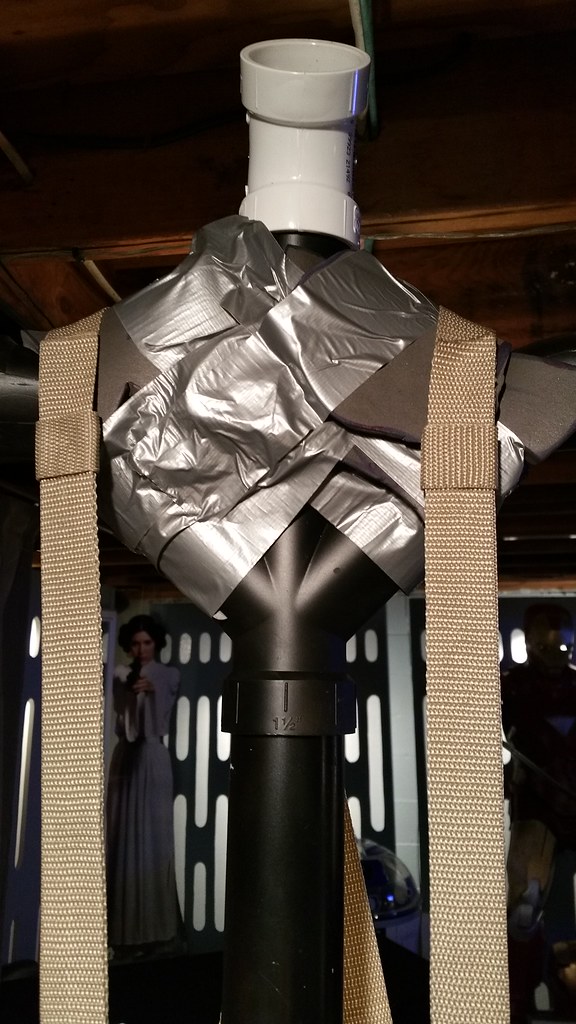
The next thing that I realized was that the PVC pipe mannequin I was using wasn't exactly mimicking my neck very well. I added some scrap foam with duct tape to make the shape more like my neck/shoulders.
 20160423_005246 by Robert Whalen, on Flickr
 20160423_005253 by Robert Whalen, on Flickr
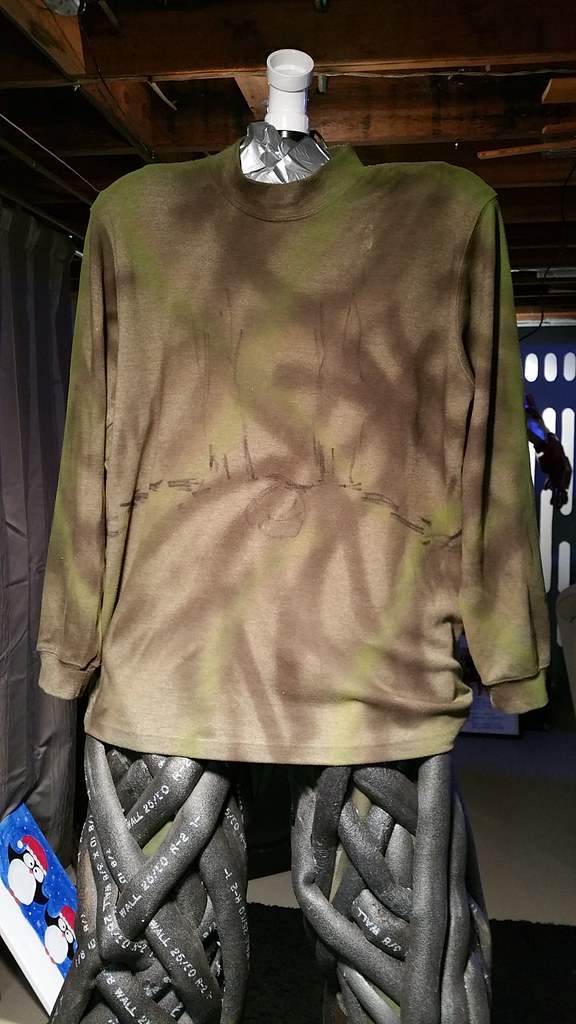
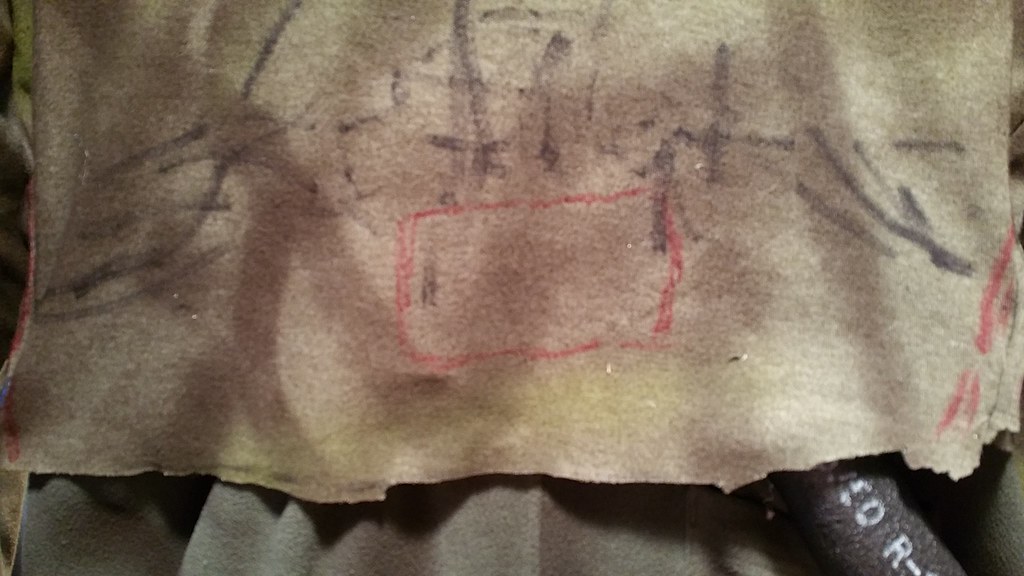
I then tossed the sweatshirt over to line up my overlaps. You can see that I faintly traced the pattern of where the pants were lining up onto the shirt...
 20160423_005341 by Robert Whalen, on Flickr
Once I figured out how much overlap I wanted, I cut the sweatshirt to get rid of some of the extra.
 20160423_010448 by Robert Whalen, on Flickr
 20160423_010655 by Robert Whalen, on Flickr
Next I "took in" some of the extra on the sides with hot glue.
 20160423_010854 by Robert Whalen, on Flickr
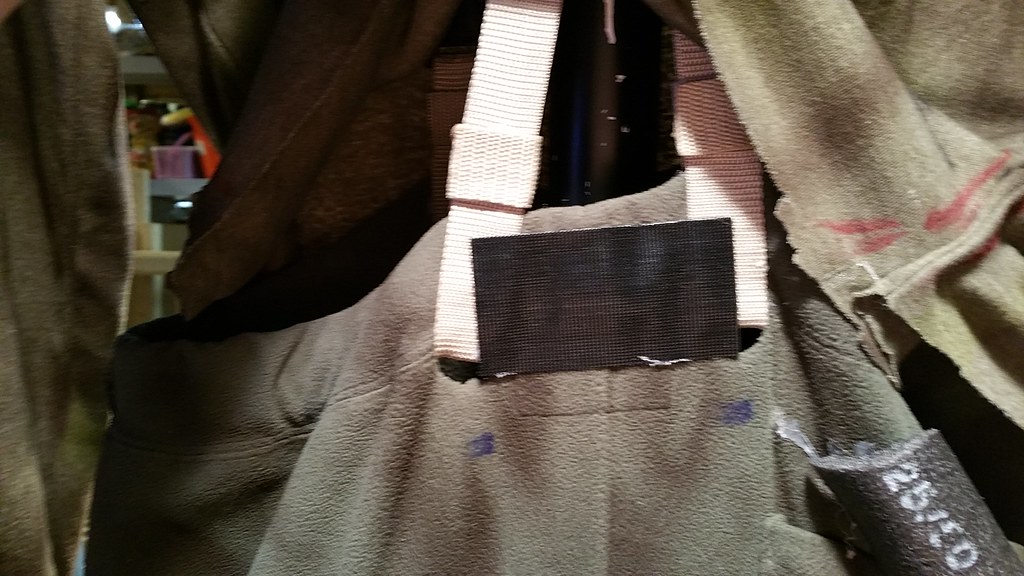
Once I had all of this worked out, I installed some heavy duty velcro with hot glue.
 20160423_013124 by Robert Whalen, on Flickr
I marked on the sweatshirt where the velcro would need to line up.
 20160423_013133 by Robert Whalen, on Flickr
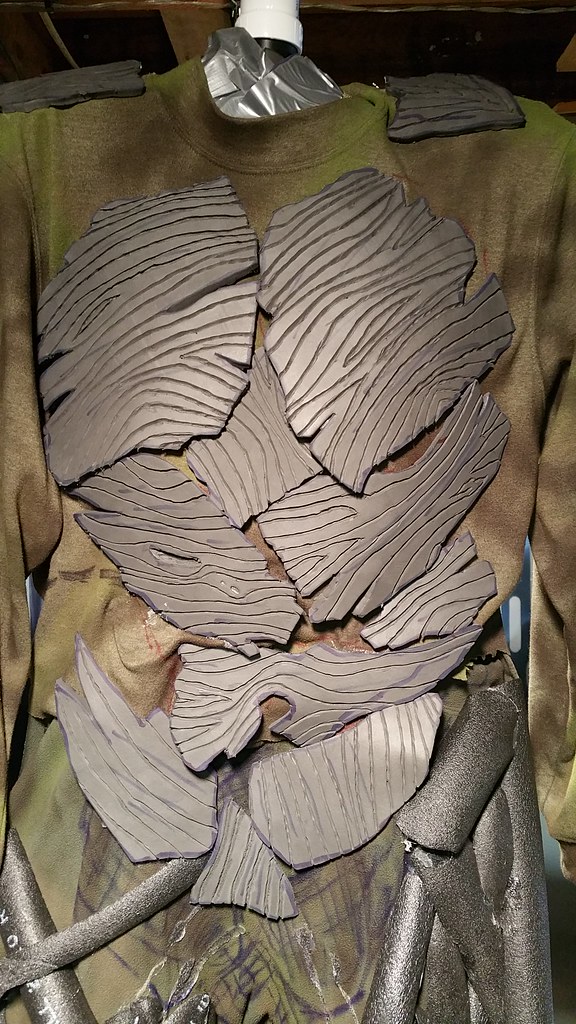
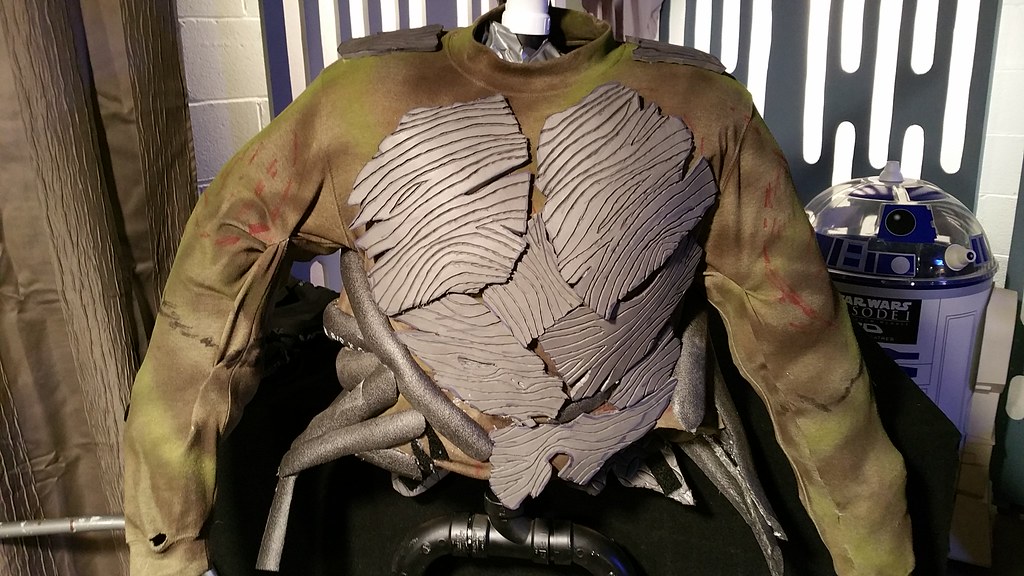
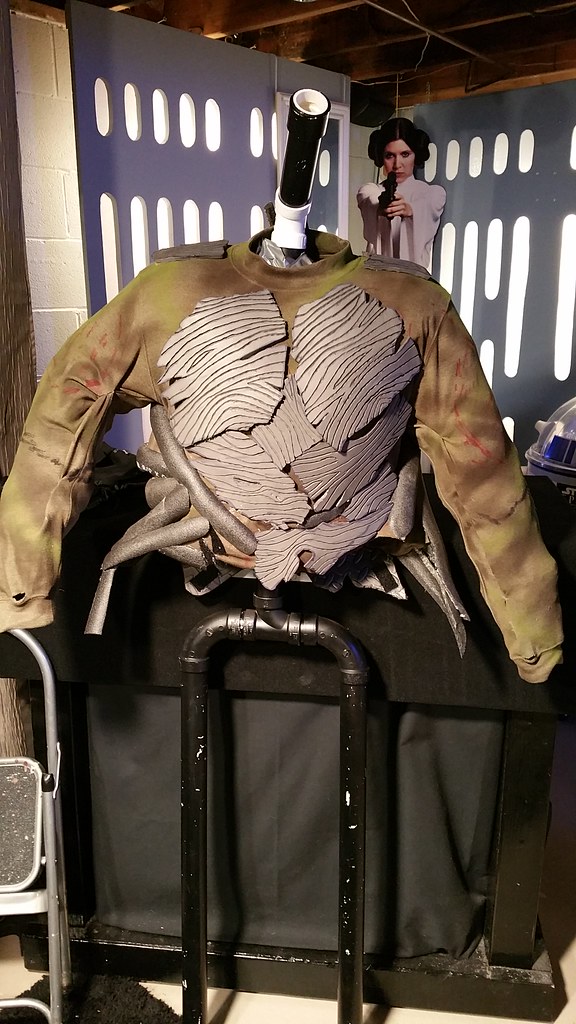
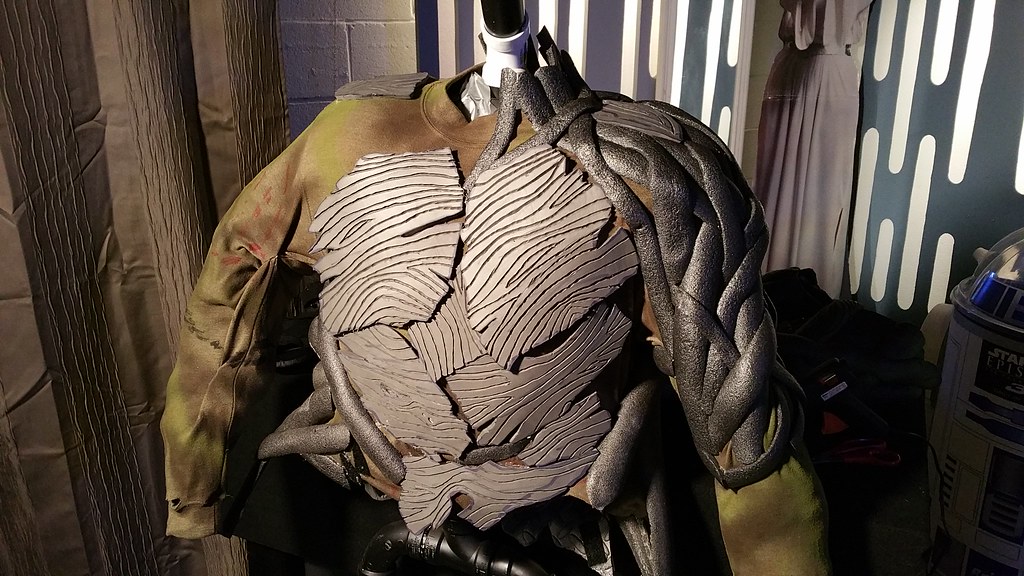
Then I started slapping the bark on.
 20160423_030103 by Robert Whalen, on Flickr
 20160423_030111 by Robert Whalen, on Flickr
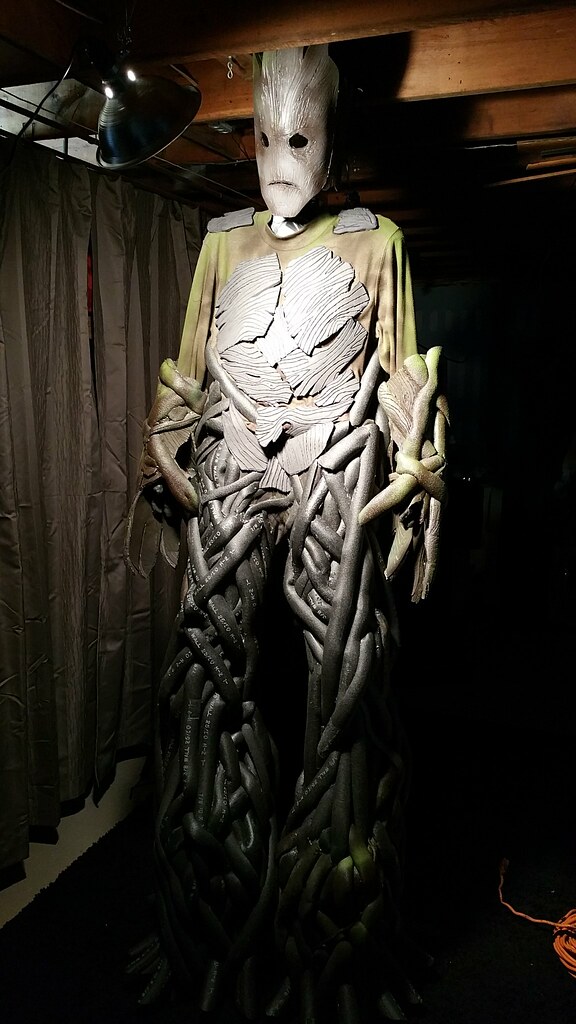
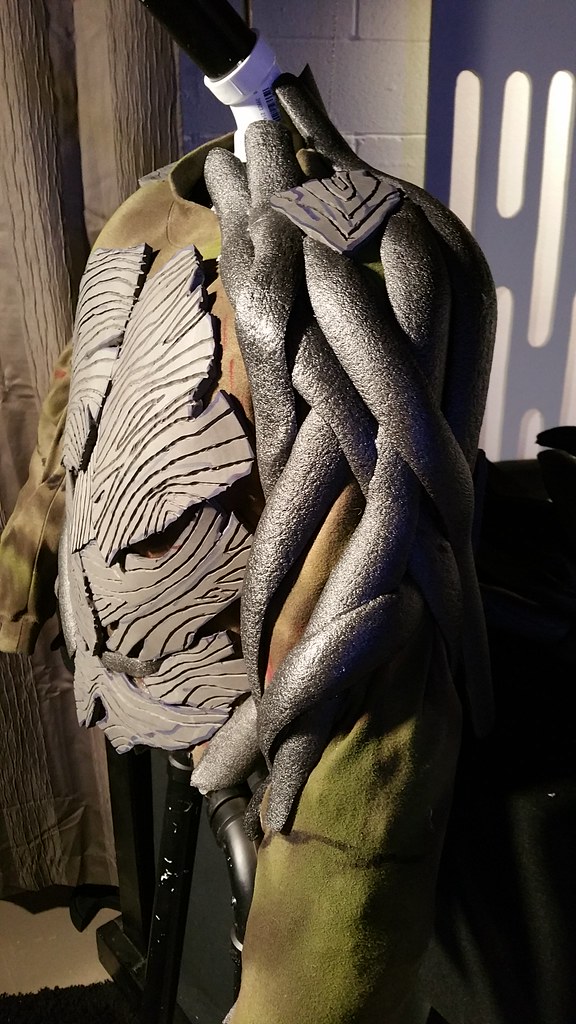
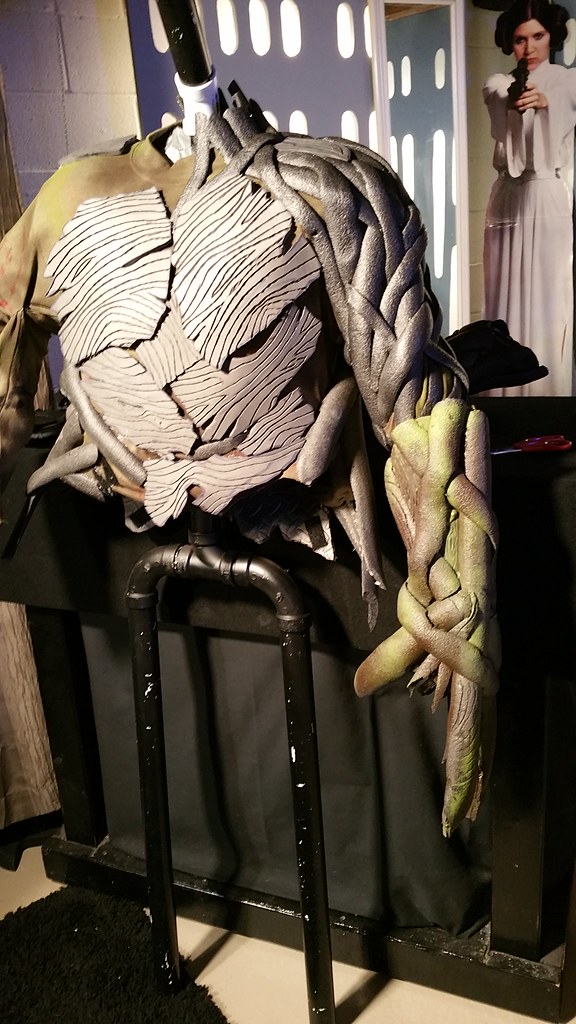
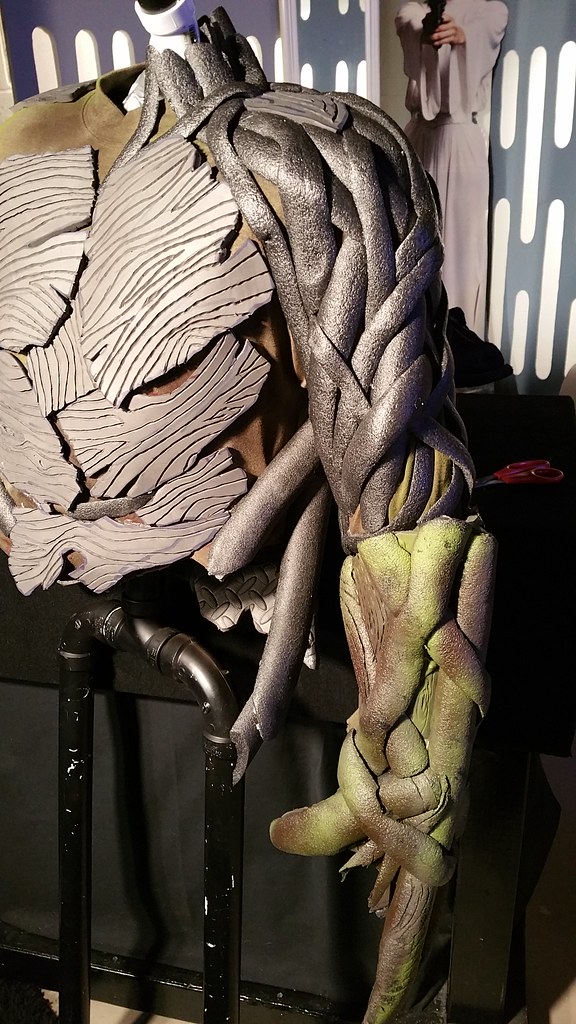
With the bark installed, I could just keep adding more "vines" in the negative space.
 20160423_160652 by Robert Whalen, on Flickr
 20160423_160937 by Robert Whalen, on Flickr
 20160423_161024 by Robert Whalen, on Flickr
 20160423_161218 by Robert Whalen, on Flickr
20160423_005246 by Robert Whalen, on Flickr20160423_005253 by Robert Whalen, on FlickrI then tossed the sweatshirt over to line up my overlaps. You can see that I faintly traced the pattern of where the pants were lining up onto the shirt...
20160423_005341 by Robert Whalen, on FlickrOnce I figured out how much overlap I wanted, I cut the sweatshirt to get rid of some of the extra.
20160423_010448 by Robert Whalen, on Flickr20160423_010655 by Robert Whalen, on FlickrNext I "took in" some of the extra on the sides with hot glue.
20160423_010854 by Robert Whalen, on FlickrOnce I had all of this worked out, I installed some heavy duty velcro with hot glue.
20160423_013124 by Robert Whalen, on FlickrI marked on the sweatshirt where the velcro would need to line up.
20160423_013133 by Robert Whalen, on FlickrThen I started slapping the bark on.
20160423_030103 by Robert Whalen, on Flickr20160423_030111 by Robert Whalen, on FlickrWith the bark installed, I could just keep adding more "vines" in the negative space.
20160423_160652 by Robert Whalen, on Flickr20160423_160937 by Robert Whalen, on Flickr20160423_161024 by Robert Whalen, on Flickr20160423_161218 by Robert Whalen, on FlickrBobbyFromBUF
Well-Known Member
Due to the stilts, I found that I was needing a step ladder to continue the installation. Then it dawned upon me that I could take it apart. DUH! Haha....
With the upper half at a more manageable height I continued.
 20160425_230507 by Robert Whalen, on Flickr
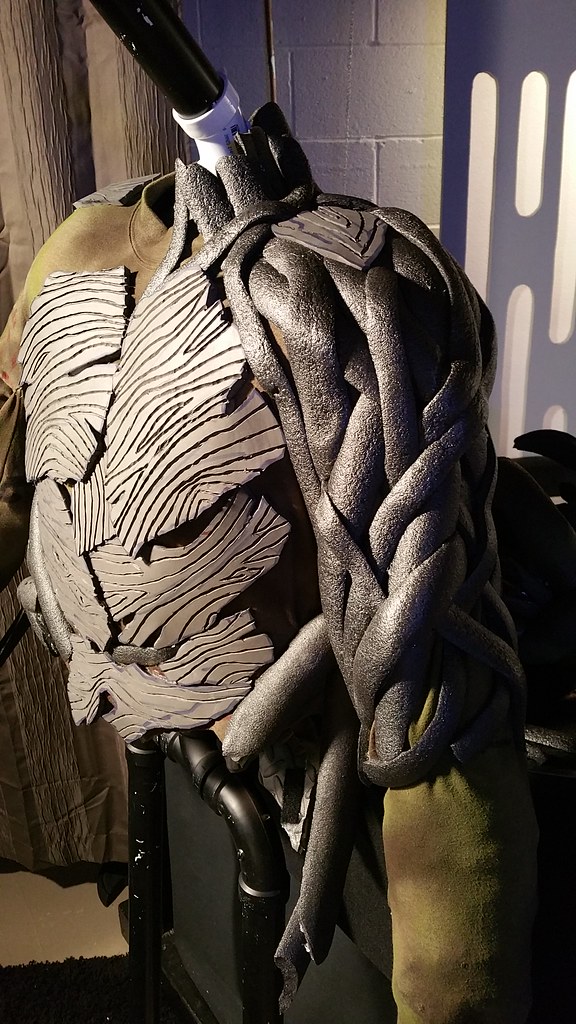
After looking long and hard at Groot's movement in the movie, and even watching the extra features I concluded that I wanted the vines of his arms and neck to almost mimic human musculature. So, I used a marker and drew the larger muscle groups as best as I could imagine them. I marked off where the traps, delts, biceps, and triceps would likely be. Since my mannequin was only PVC pipes it was tough to figure out the lines of where the muscles should be. To solve this I used an old pair of hockey shoulder pads underneath. In the end, this may have made Groot look a bit "beefier" than I was originally intending, but oh well...
 20160425_230513 by Robert Whalen, on Flickr
 20160425_232117 by Robert Whalen, on Flickr
 20160425_232124 by Robert Whalen, on Flickr
 20160425_234759 by Robert Whalen, on Flickr
 20160425_234805 by Robert Whalen, on Flickr
 20160426_005053 by Robert Whalen, on Flickr
 20160426_005059 by Robert Whalen, on Flickr
 20160426_005331 by Robert Whalen, on Flickr
 20160426_005348 by Robert Whalen, on Flickr
With the upper half at a more manageable height I continued.
20160425_230507 by Robert Whalen, on FlickrAfter looking long and hard at Groot's movement in the movie, and even watching the extra features I concluded that I wanted the vines of his arms and neck to almost mimic human musculature. So, I used a marker and drew the larger muscle groups as best as I could imagine them. I marked off where the traps, delts, biceps, and triceps would likely be. Since my mannequin was only PVC pipes it was tough to figure out the lines of where the muscles should be. To solve this I used an old pair of hockey shoulder pads underneath. In the end, this may have made Groot look a bit "beefier" than I was originally intending, but oh well...
20160425_230513 by Robert Whalen, on Flickr20160425_232117 by Robert Whalen, on Flickr20160425_232124 by Robert Whalen, on Flickr20160425_234759 by Robert Whalen, on Flickr20160425_234805 by Robert Whalen, on Flickr20160426_005053 by Robert Whalen, on Flickr20160426_005059 by Robert Whalen, on Flickr20160426_005331 by Robert Whalen, on Flickr20160426_005348 by Robert Whalen, on FlickrBobbyFromBUF
Well-Known Member
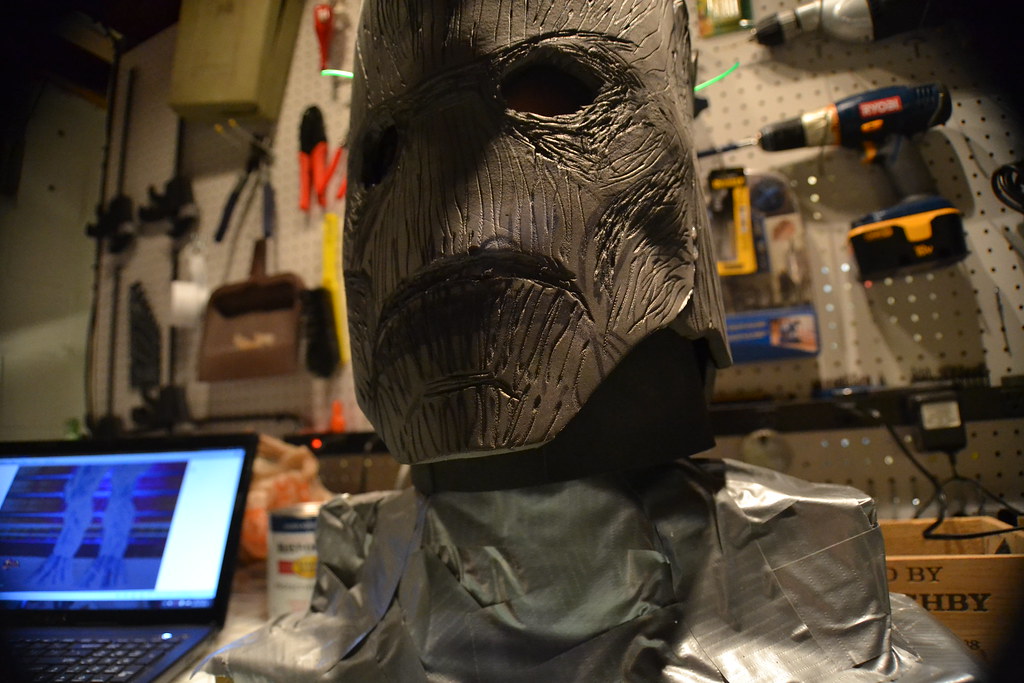
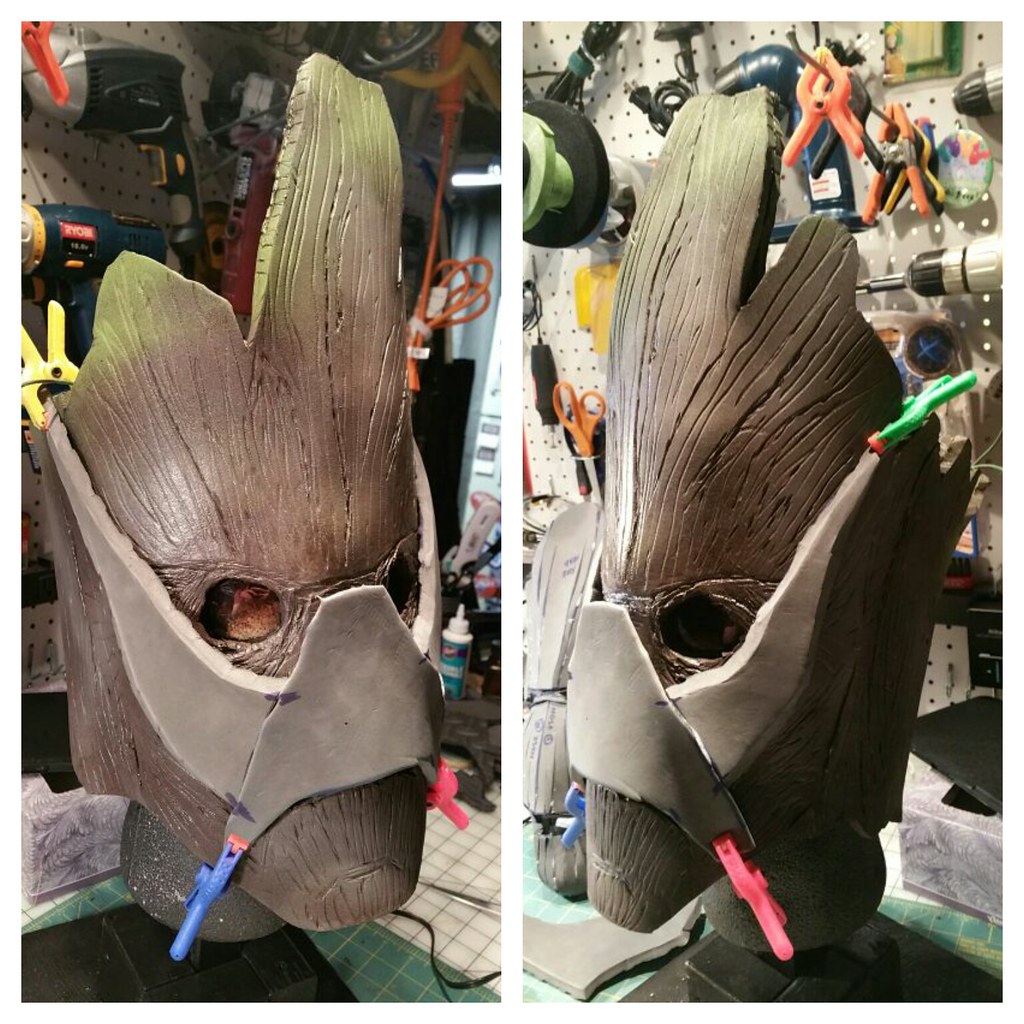
I think that your face on this looks great. You might be able to achieve more depth by adding another layer of foam around the face or just in the eyes and by adding a dremeled thicker upper and lower mouth. This is a great build!!
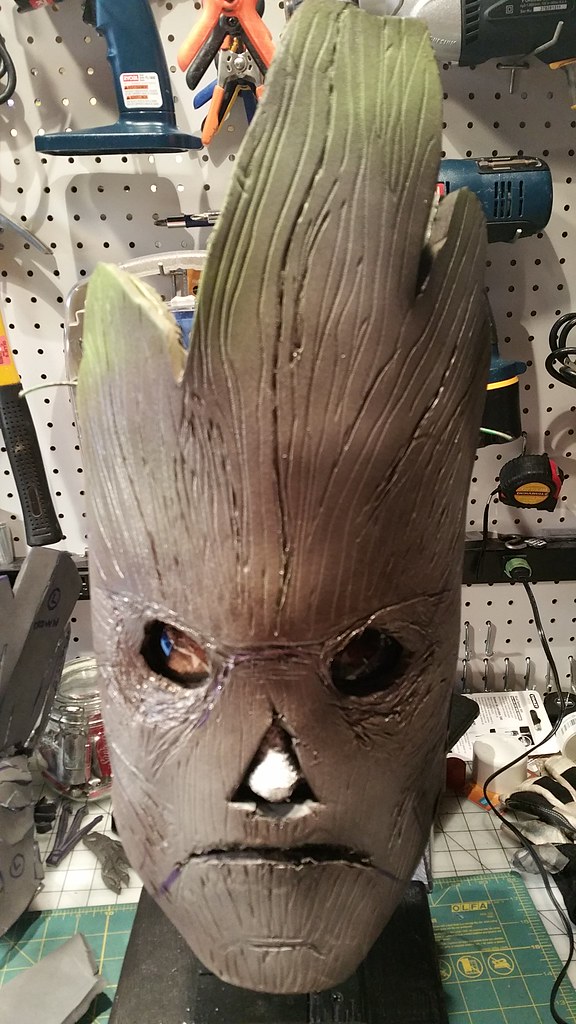
Thank you! This suggestion made a huge difference!
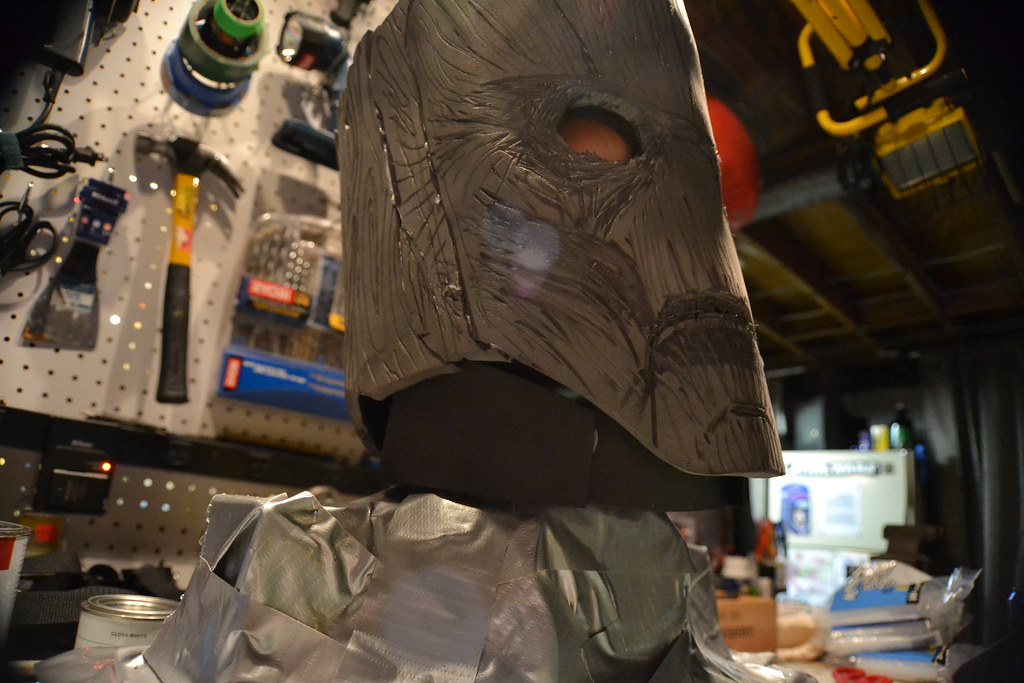
I thought that I was happy with the design of the mask, but the more that I thought about it, the more I realized that it just looked too flat and 2 dimensional. With that said, I did take your advice and add more layers to the mask to add depth. I am very pleased with the results.
 1462557969579 by Robert Whalen, on Flickr
 20160506_140503 by Robert Whalen, on Flickr
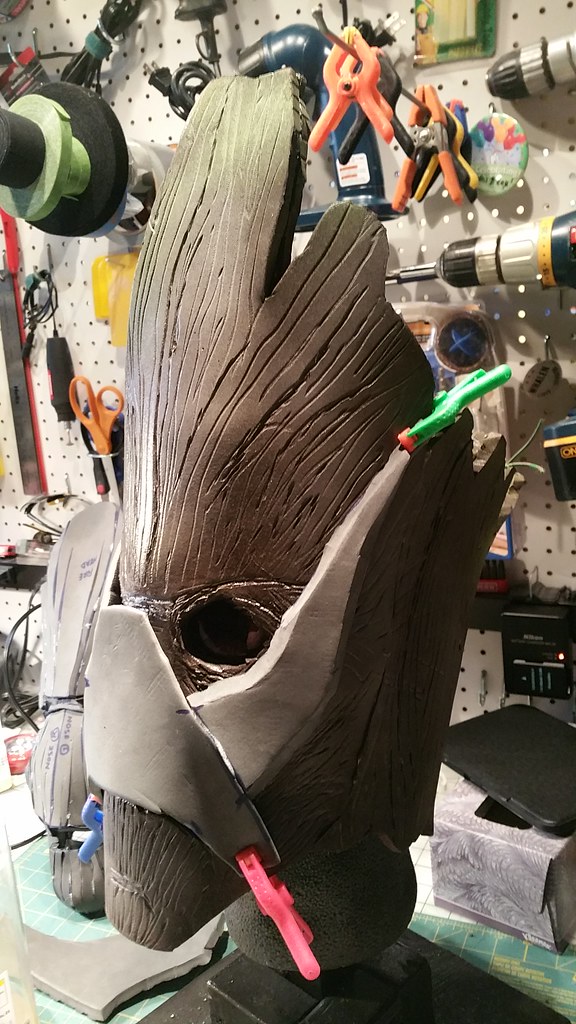 20160506_140510 by Robert Whalen, on Flickr
Also, while I was at it, I cut a hole for my nose. It was just uncomfortable before...
 20160506_142044 by Robert Whalen, on Flickr
 20160506_142318 by Robert Whalen, on Flickr
 20160506_232637 by Robert Whalen, on Flickr
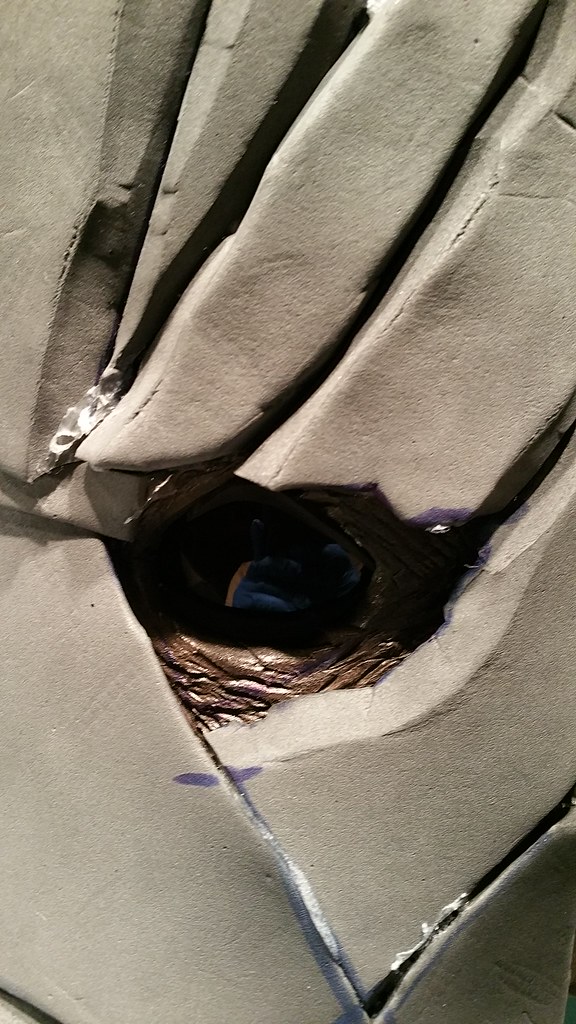 20160506_232652 by Robert Whalen, on Flickr
 20160506_232700 by Robert Whalen, on Flickr
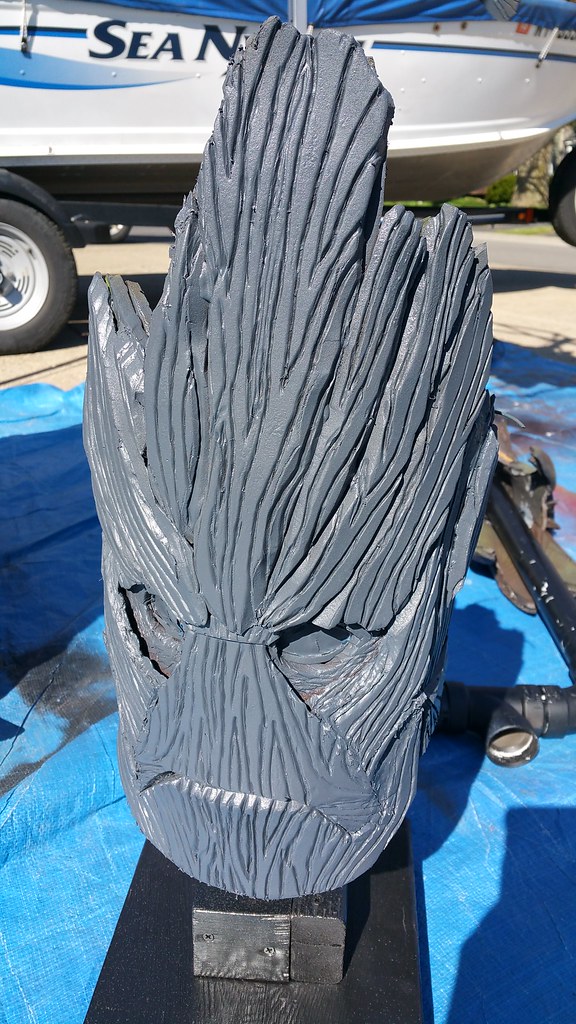
I also added "eyelids". I feel like this tiny detail made a huge difference in the realism.
 20160506_233241 by Robert Whalen, on Flickr
Then more dremeling...
 20160507_031832 by Robert Whalen, on Flickr
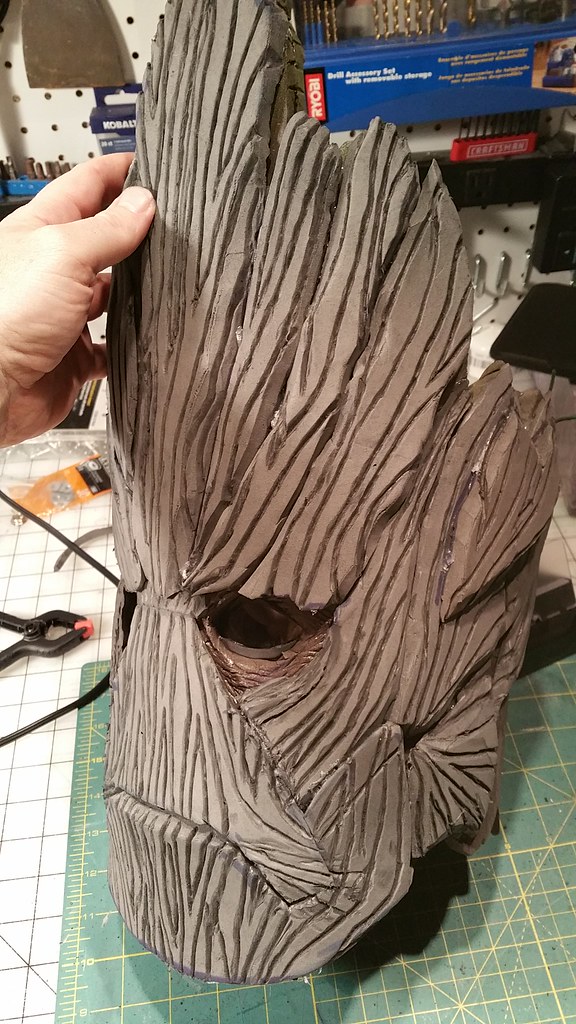 20160507_031840 by Robert Whalen, on Flickr
 20160507_031900 by Robert Whalen, on Flickr
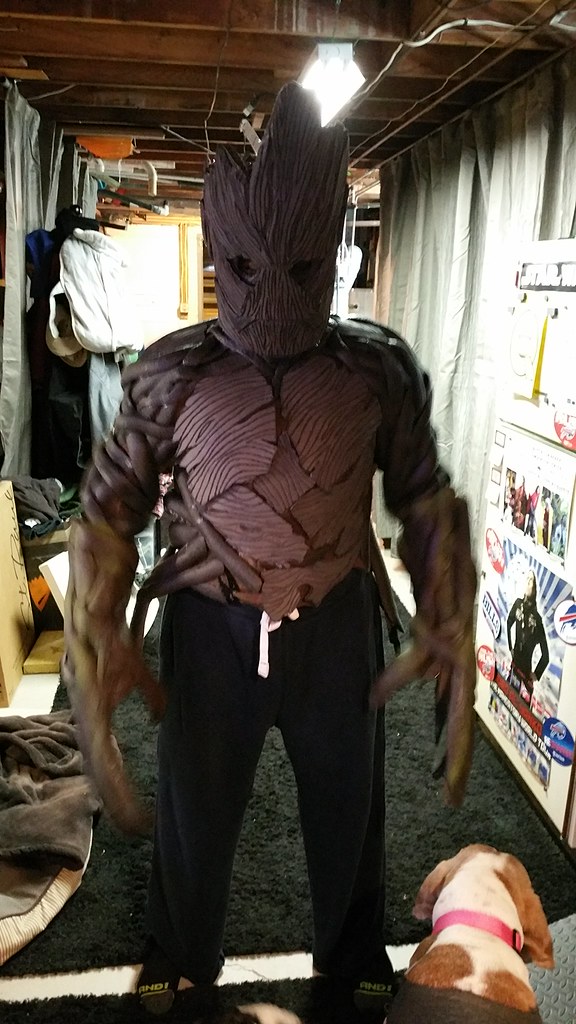 20160509_170019 by Robert Whalen, on Flickr
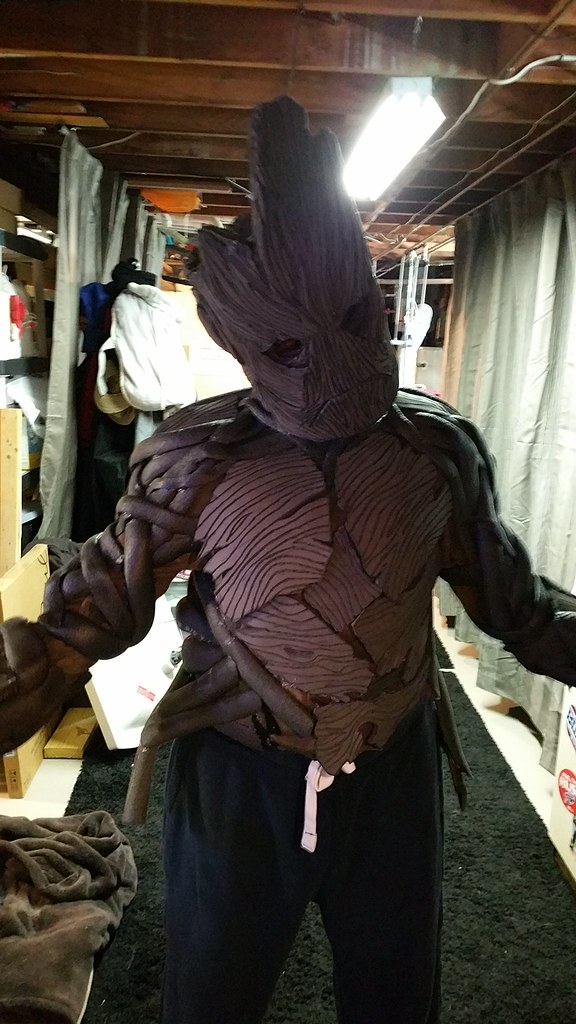 20160509_170028 by Robert Whalen, on Flickr
 20160509_170038 by Robert Whalen, on Flickr
 20160510_003903 by Robert Whalen, on Flickr
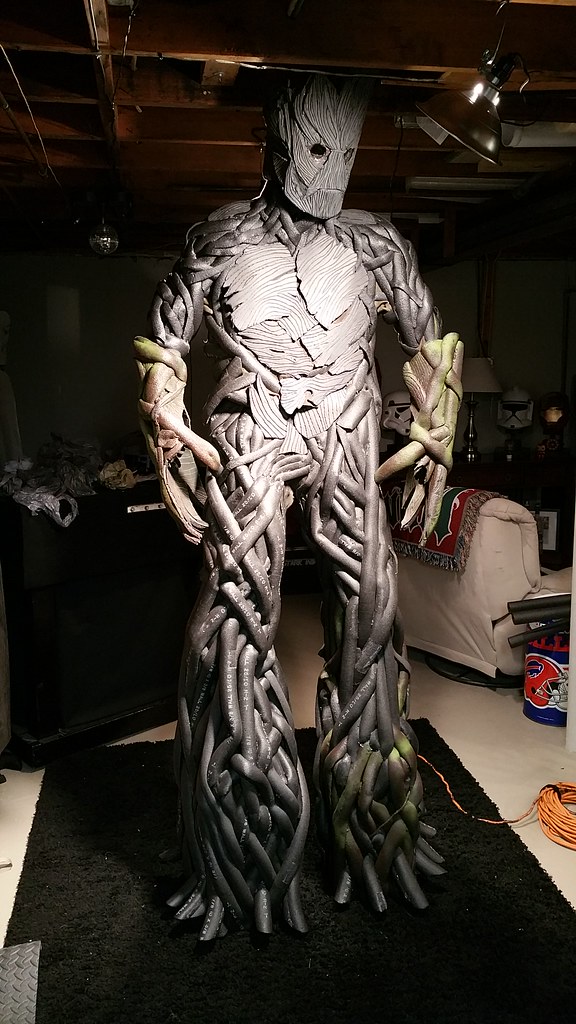 20160510_010203 by Robert Whalen, on Flickr
 20160510_010220 by Robert Whalen, on Flickr
BobbyFromBUF
Well-Known Member
Okay, I know that I originally posted that my goal was to complete this within a month, and for less than $40. Let's talk about that. None of that happened. I probably ended up spending around $200. Most of which was on paint. With a little better planning, this could easily have been half that amount. I'll show you what I did, and you can learn from my mistakes.'
First of all, I used 5 cans of Plasti-Dip. At $6 each, that adds up fast.
 20160516_164752 by Robert Whalen, on Flickr
 20160516_164800 by Robert Whalen, on Flickr
 20160517_123029 by Robert Whalen, on Flickr
 20160517_123037 by Robert Whalen, on Flickr
 20160517_123045 by Robert Whalen, on Flickr
Here are 15 different cans of spray paint that I used throughout the project. With better planning, this could have been much less.
 20160517_124621 by Robert Whalen, on Flickr
First of all, I used 5 cans of Plasti-Dip. At $6 each, that adds up fast.
20160516_164752 by Robert Whalen, on Flickr20160516_164800 by Robert Whalen, on Flickr20160517_123029 by Robert Whalen, on Flickr20160517_123037 by Robert Whalen, on Flickr20160517_123045 by Robert Whalen, on FlickrHere are 15 different cans of spray paint that I used throughout the project. With better planning, this could have been much less.
20160517_124621 by Robert Whalen, on FlickrSimilar threads
- Replies
- 0
- Views
- 766
- Replies
- 4
- Views
- 692
- Replies
- 4
- Views
- 610
- Replies
- 2
- Views
- 709
- Replies
- 0
- Views
- 253