indiefilmgeek
Sr Member
This started as a fun little X-mas holiday build... I was hunting for something to do while on holiday and as I was scrolling through lots of prop pics, my 8yr old son saw the ESB Fett helmet and asked if I could build it. Well, I needed no further encouragement to take this! ")
I will admit that I'm was (and still am) very self-conscious about this build. Artists from here and the Dented Helmet that I deeply admire have spent YEARS perfecting hand-made versions of this piece, and I know darn well that my modest build will be a very pale imitation of their incredible work (most of which I'm using for reference material).
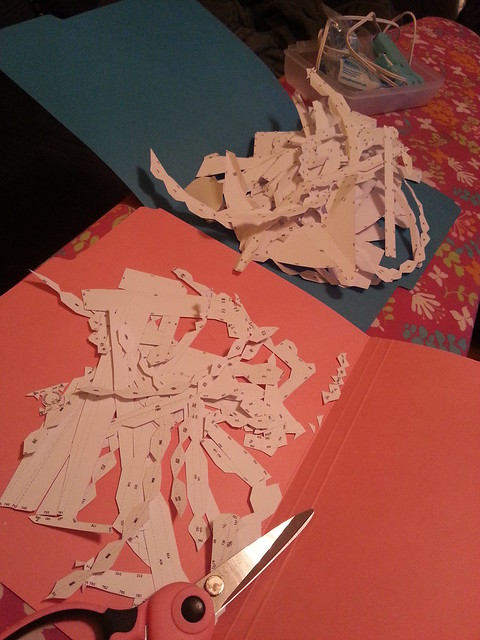
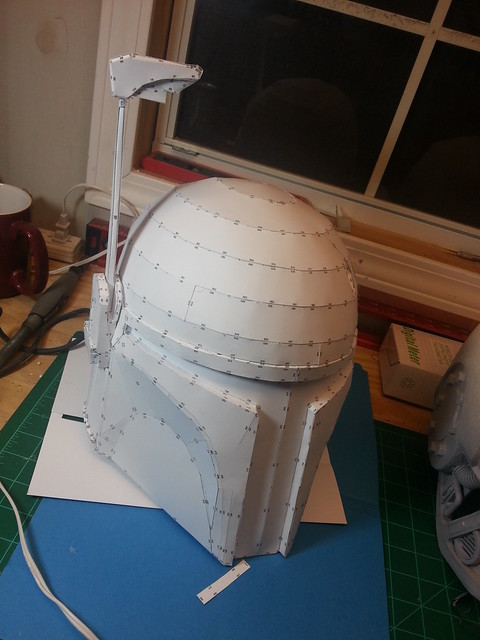
So, to begin, I started by working out the scale of the helmet by building a pepakura model.... and that means lots of cutting and gluing!
Luckily, I got the scale right on the first try! Hurrah!
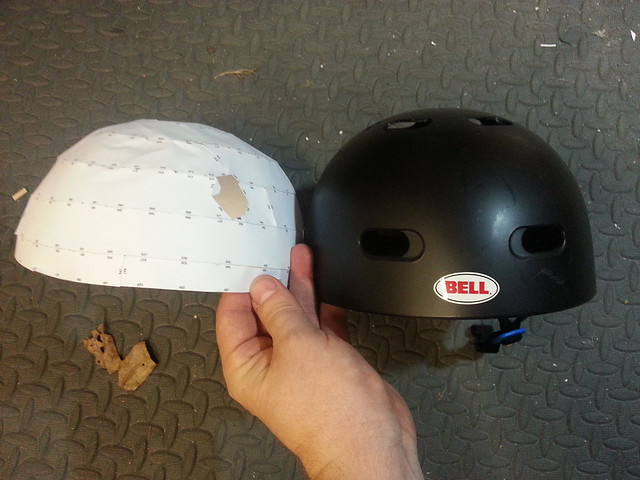
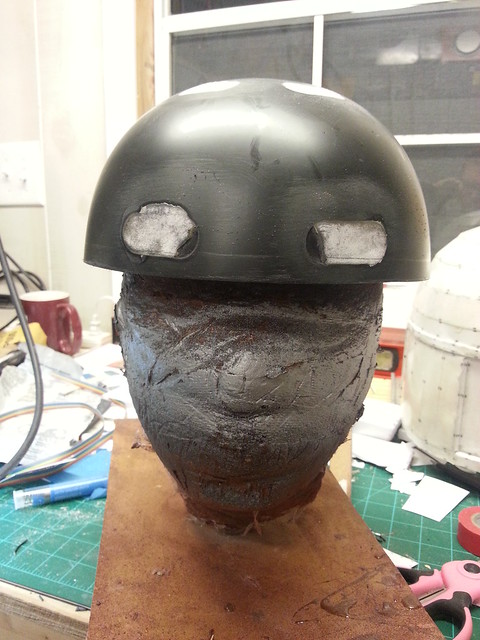
I wanted to make this quickly and on a budget, so I grabbed the dome off of the top of the pep and went shopping for a used helmet that matched (closely enough) the scale and size of the Fett dome. I found a Bell skate board helmet that was very close (and cheap).
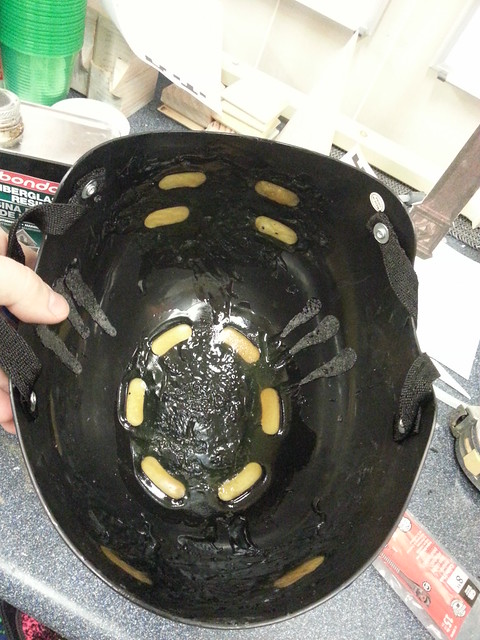
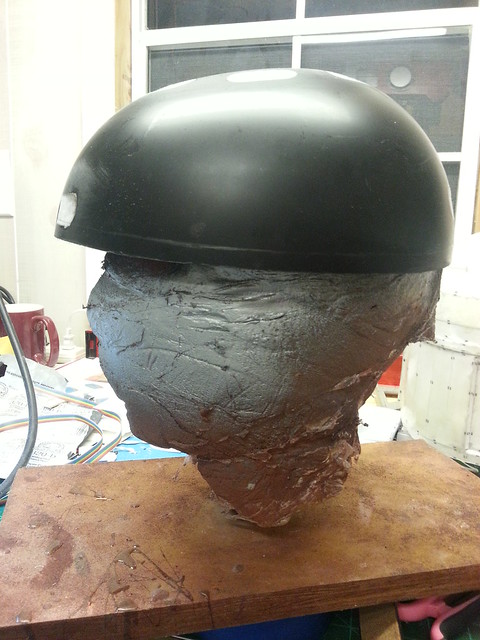
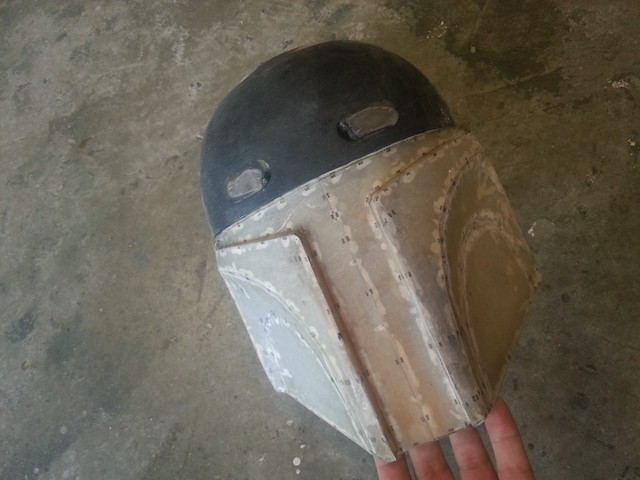
After pulling out all the padding, I need to fill in the air vent holes. I did this by duct-taping cardstock paper over the outside (smooth) surface of the holes, then pouring fiberglass resin into them from the inside of the bucket.
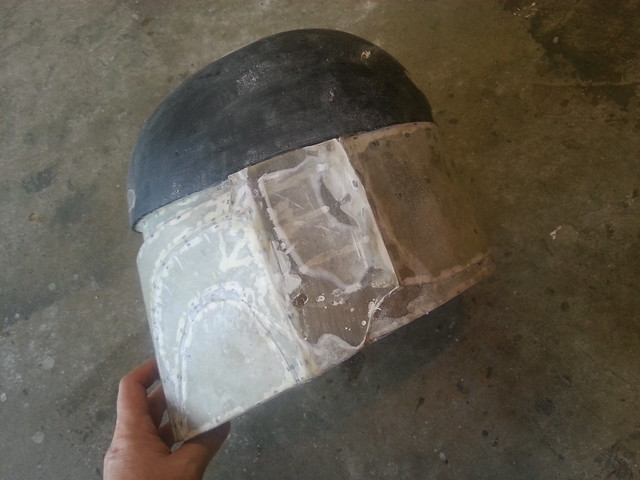
With a little bit of sanding (and still lots of bondo to go), it looks like this:
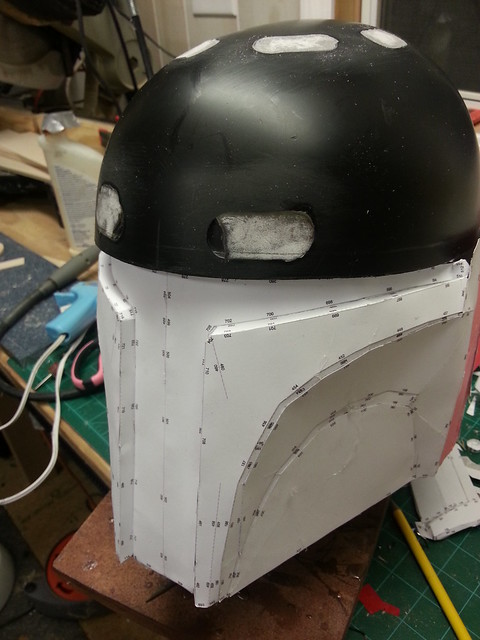
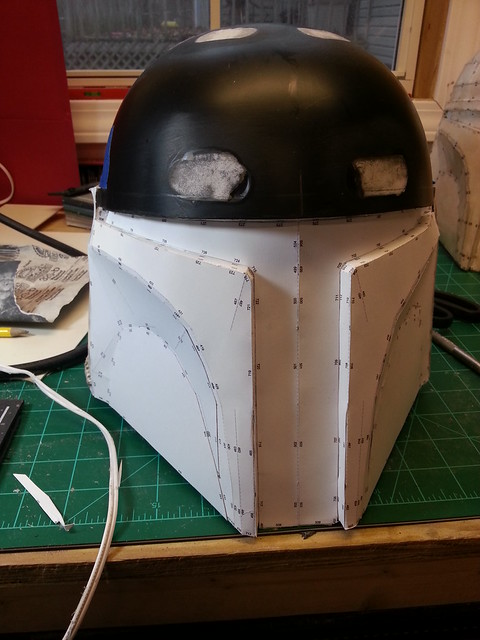
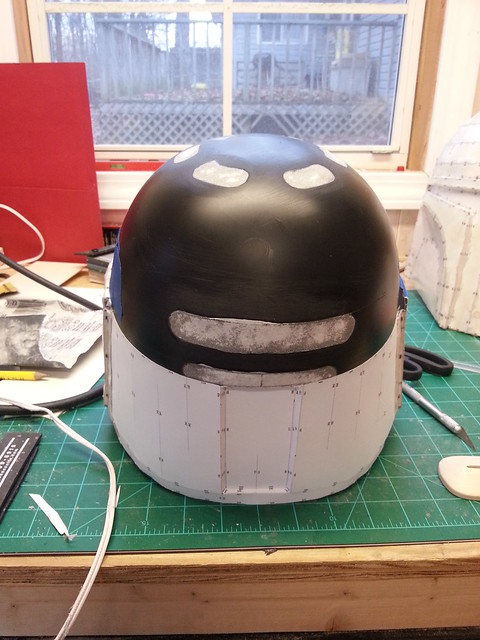
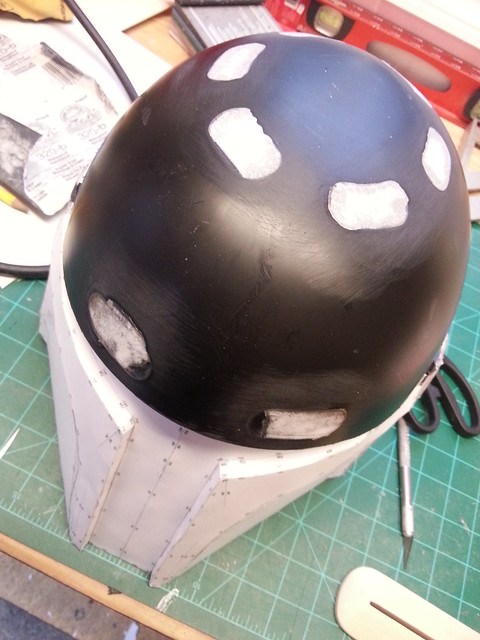
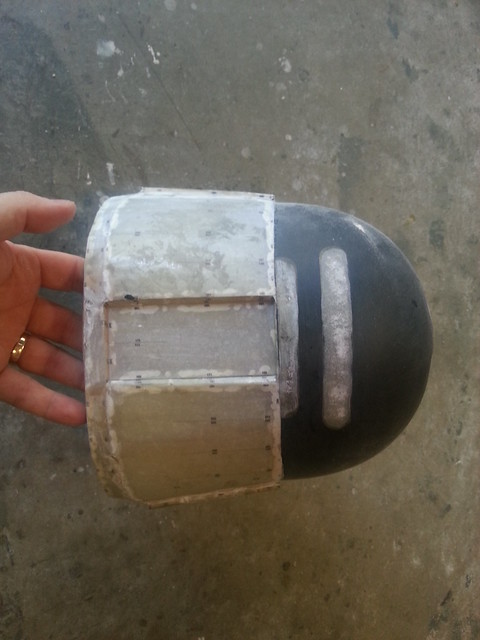
I then went back to the pep and attached the lower part of the helmet to the modified skateboard helmet.
I then glassed the paper section (always make sure to use respirators, gloves and a well-ventilated space when using fiberglass/bondo).

After some quick clean-up...
...and after some bondo...
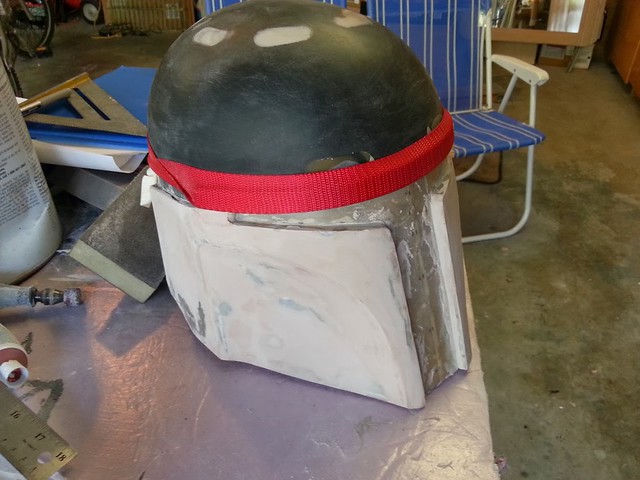
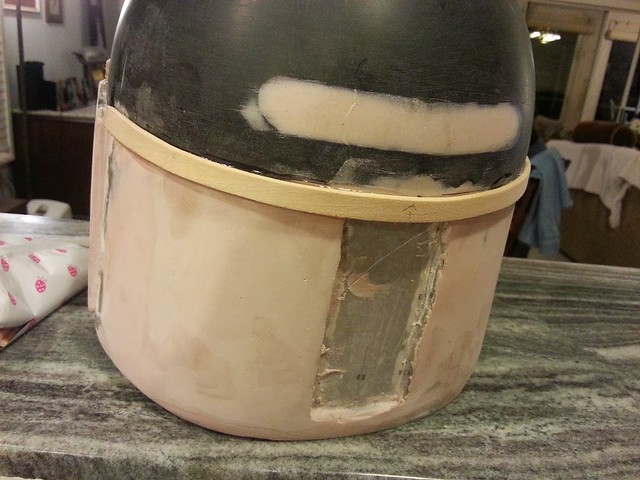
To complete the shape, I bought craft wood of the right size and we let it soak in hot water for about 24hrs. At that point, we were able to bend it around the rim of the helmet and epoxy it in place (using tie-down straps to hold the wood in place while the epoxy dried).
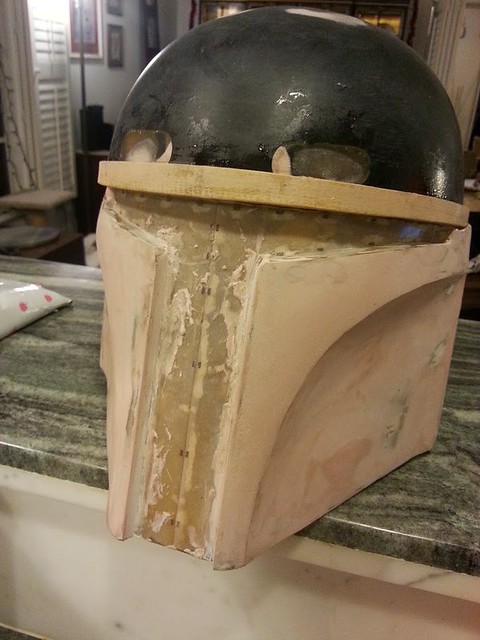
Here's what it looked like after it dried and finished setting...
And from the back:
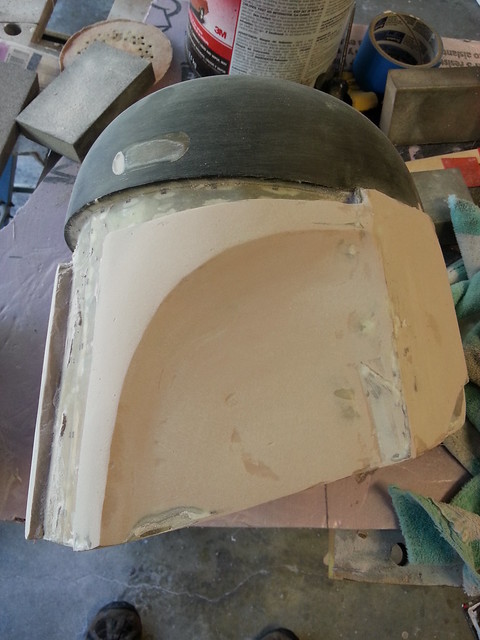
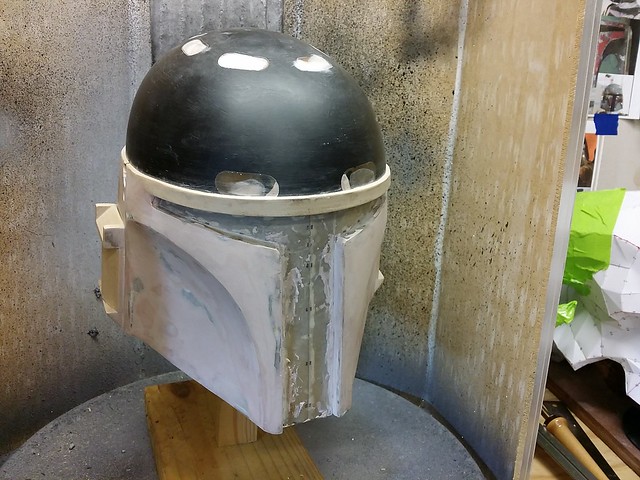
After cleaning it up, more bondo work etc, here is the result prior to it's first coat of primer:
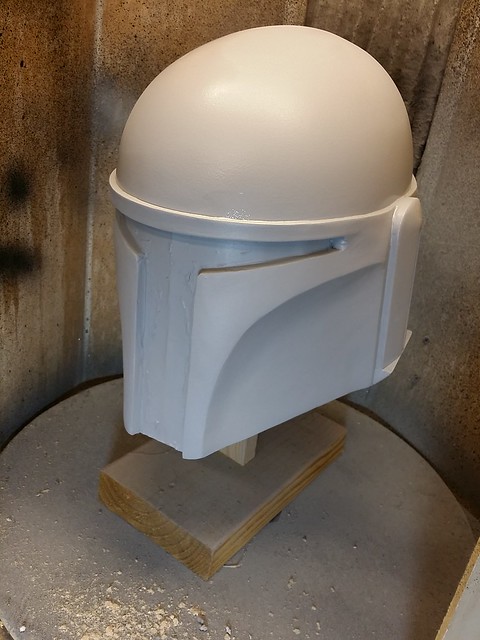
It still needs a lot of work, but I really wanted to see how it looked in primer, so I painted it up with some filler primer. Here's what it looks like as I finished the primer coat...
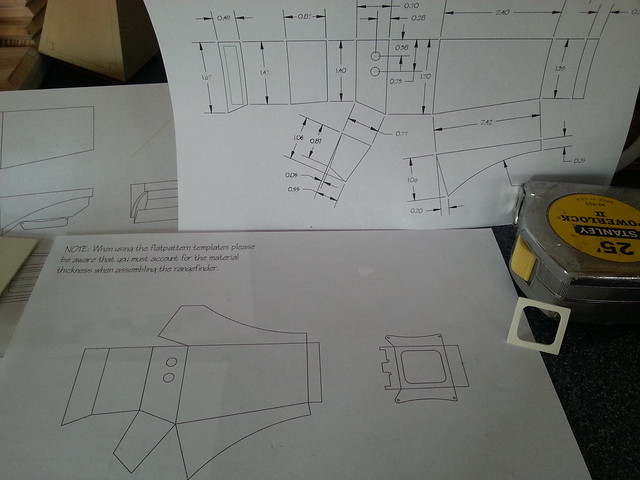
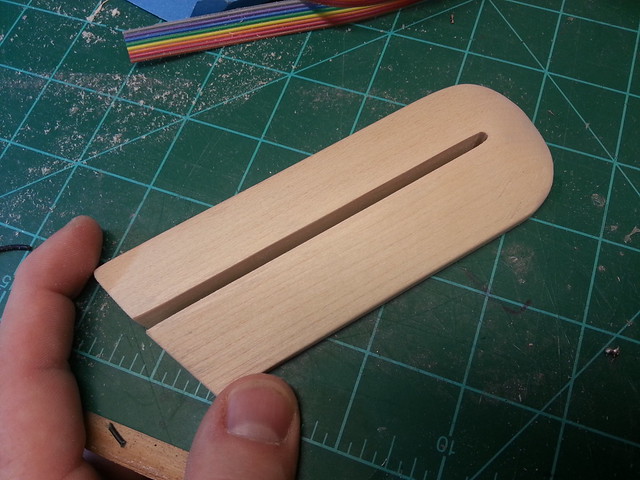
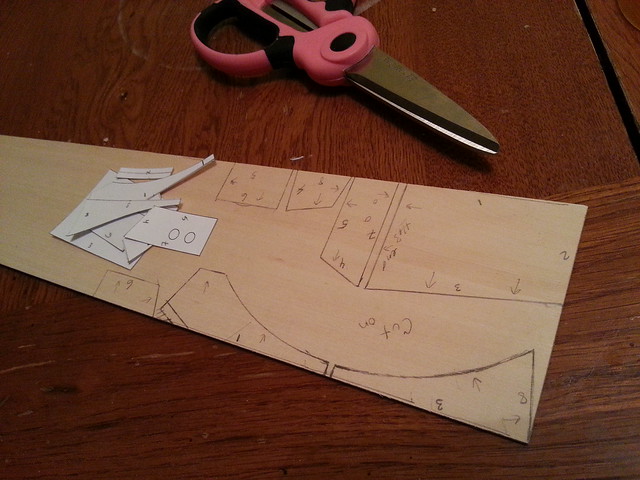
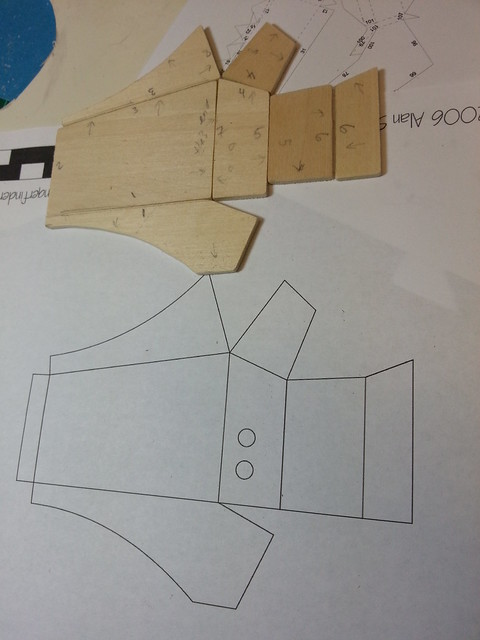
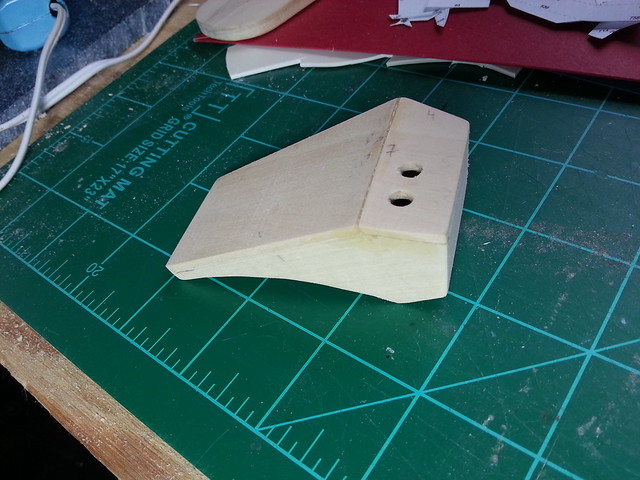
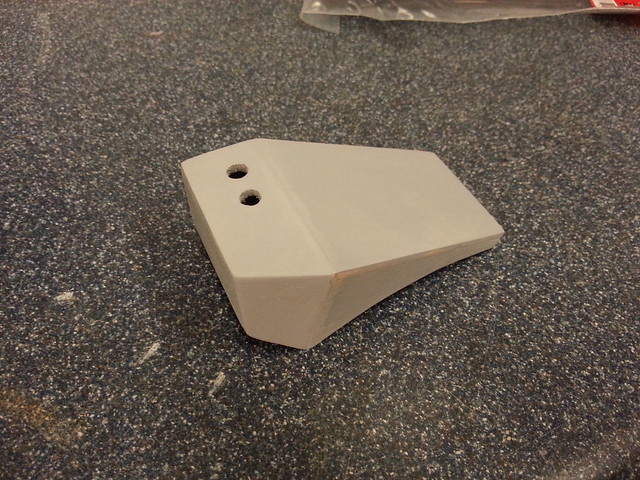
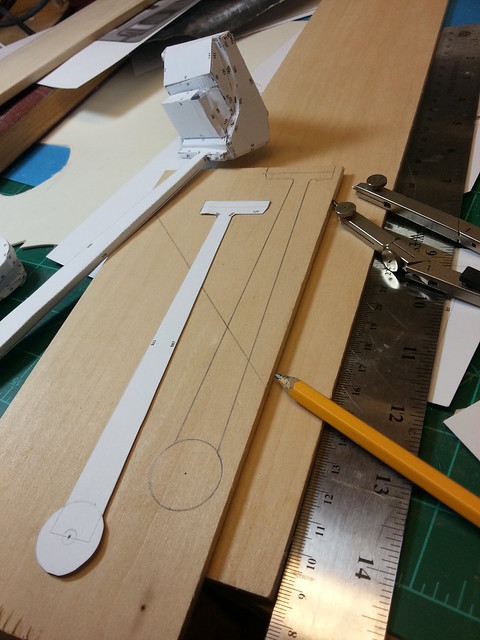
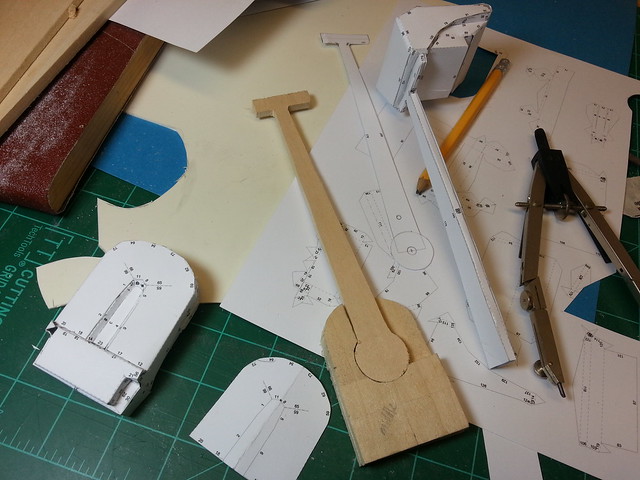
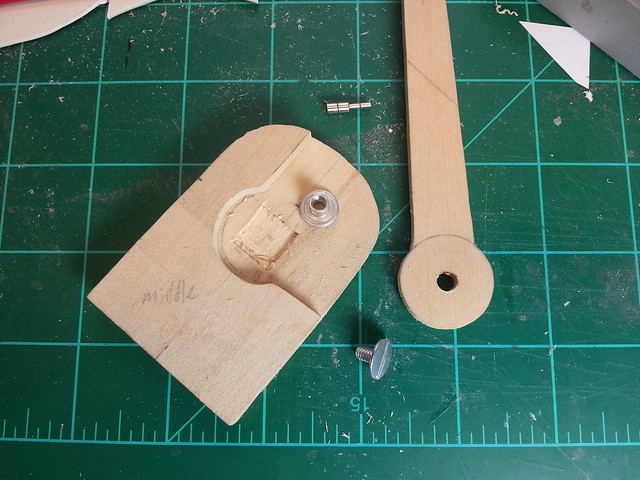
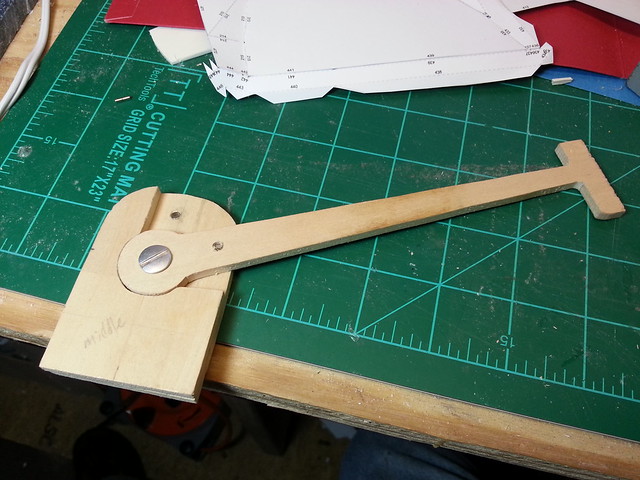
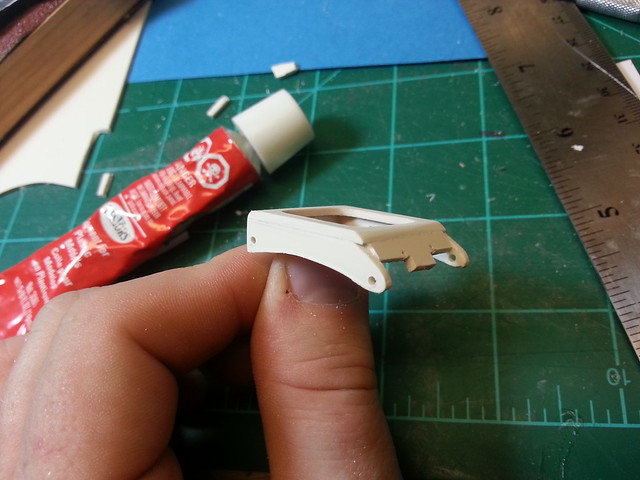
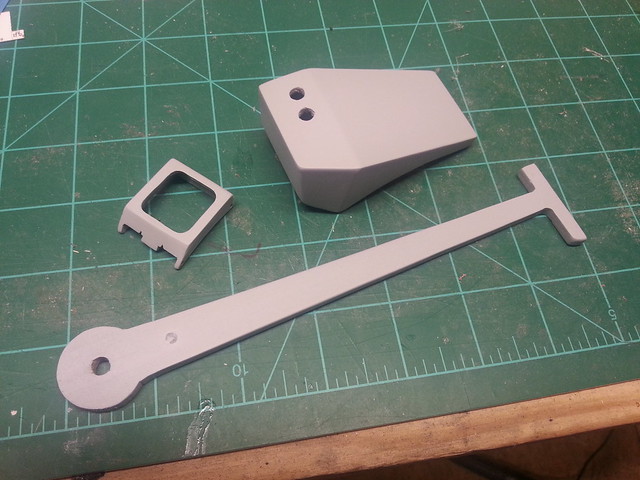
I'll try to post more details on the craft wood ear pieces and range-finder work I did in a bit!
I will admit that I'm was (and still am) very self-conscious about this build. Artists from here and the Dented Helmet that I deeply admire have spent YEARS perfecting hand-made versions of this piece, and I know darn well that my modest build will be a very pale imitation of their incredible work (most of which I'm using for reference material).
So, to begin, I started by working out the scale of the helmet by building a pepakura model.... and that means lots of cutting and gluing!
Luckily, I got the scale right on the first try! Hurrah!
I wanted to make this quickly and on a budget, so I grabbed the dome off of the top of the pep and went shopping for a used helmet that matched (closely enough) the scale and size of the Fett dome. I found a Bell skate board helmet that was very close (and cheap).
After pulling out all the padding, I need to fill in the air vent holes. I did this by duct-taping cardstock paper over the outside (smooth) surface of the holes, then pouring fiberglass resin into them from the inside of the bucket.
With a little bit of sanding (and still lots of bondo to go), it looks like this:
I then went back to the pep and attached the lower part of the helmet to the modified skateboard helmet.
I then glassed the paper section (always make sure to use respirators, gloves and a well-ventilated space when using fiberglass/bondo).
After some quick clean-up...
...and after some bondo...
To complete the shape, I bought craft wood of the right size and we let it soak in hot water for about 24hrs. At that point, we were able to bend it around the rim of the helmet and epoxy it in place (using tie-down straps to hold the wood in place while the epoxy dried).
Here's what it looked like after it dried and finished setting...
And from the back:
After cleaning it up, more bondo work etc, here is the result prior to it's first coat of primer:
It still needs a lot of work, but I really wanted to see how it looked in primer, so I painted it up with some filler primer. Here's what it looks like as I finished the primer coat...
I'll try to post more details on the craft wood ear pieces and range-finder work I did in a bit!
Attachments
Last edited: