C1-10P Rebels Chopper scratch build

kczimmy

New Member
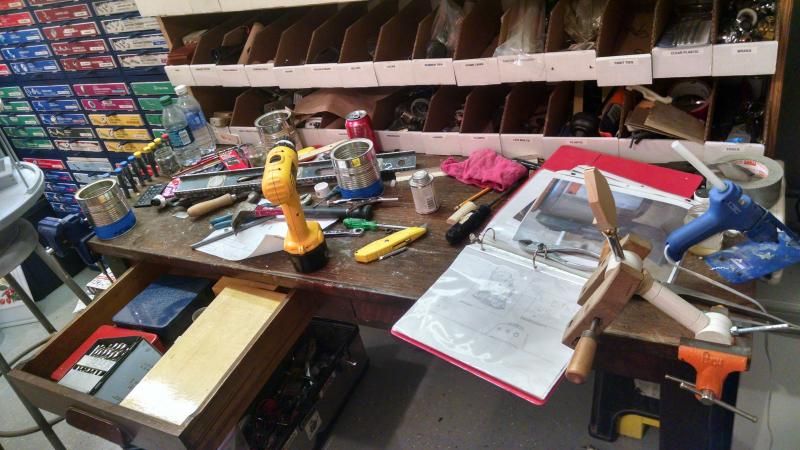
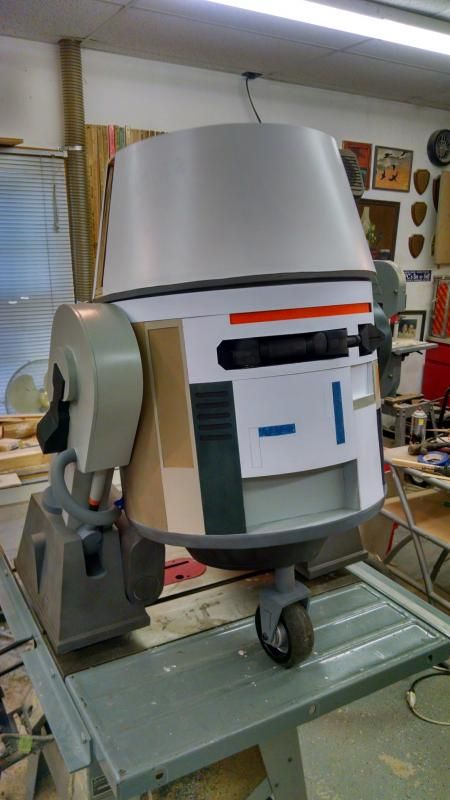
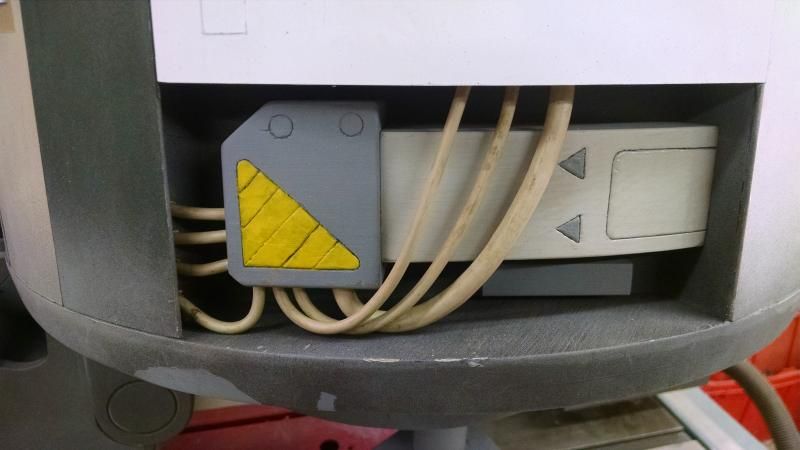
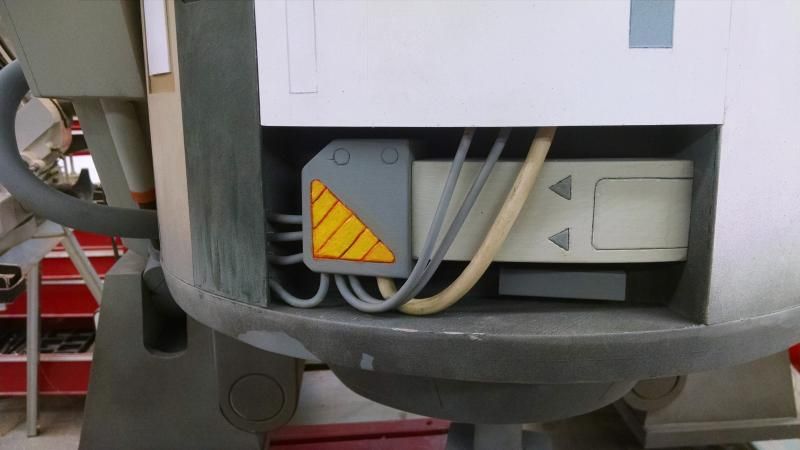
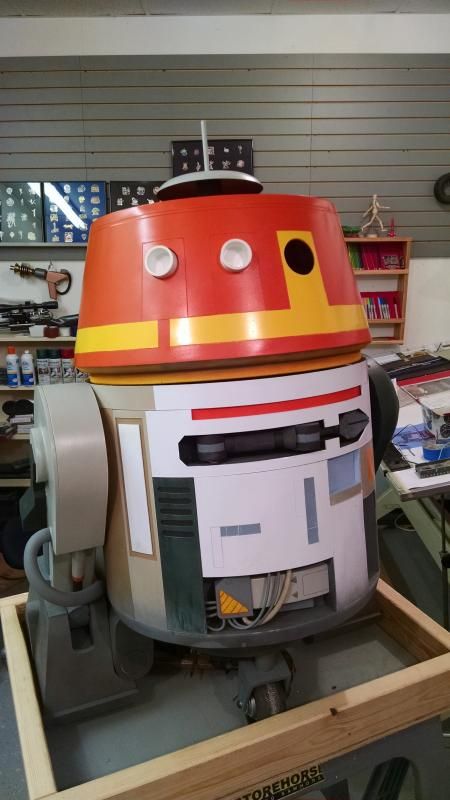
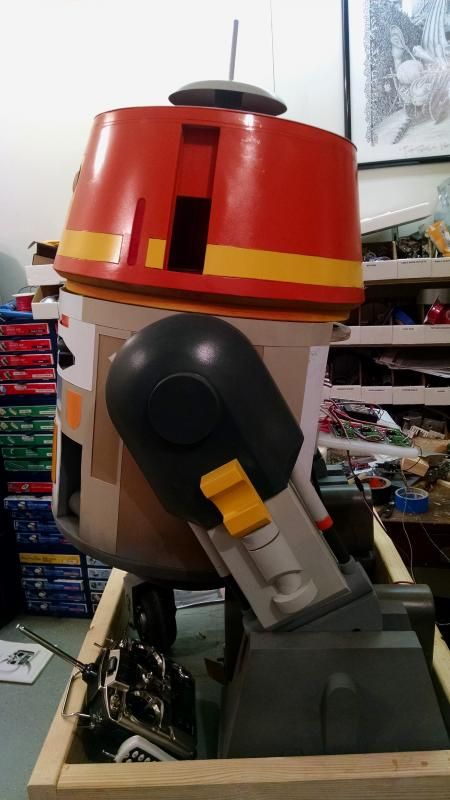
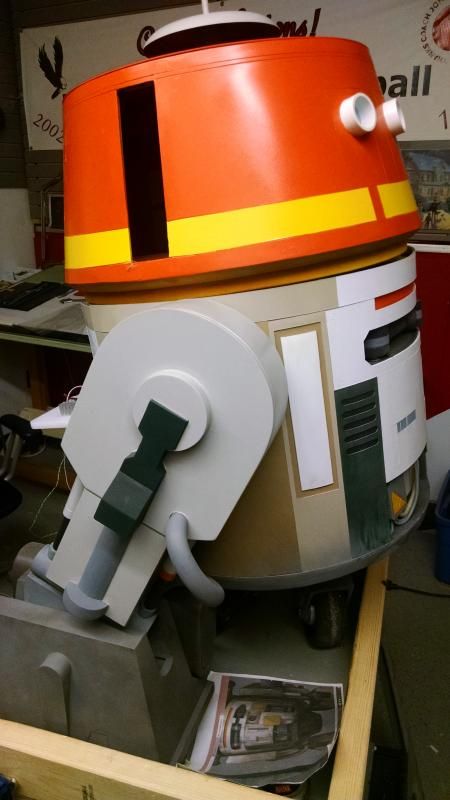
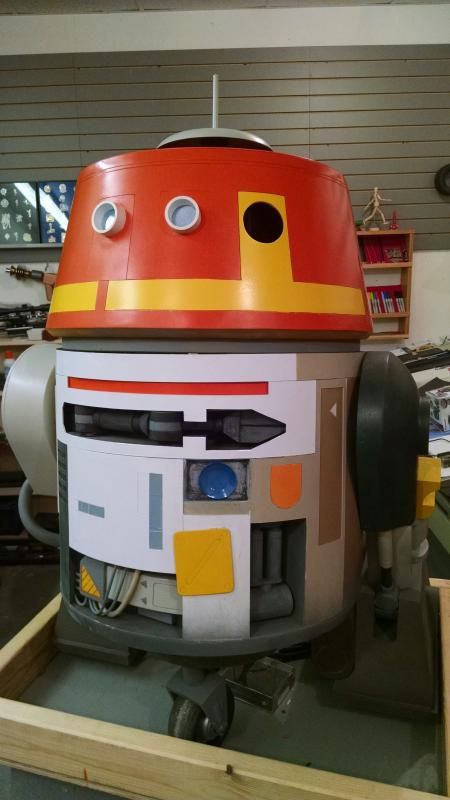
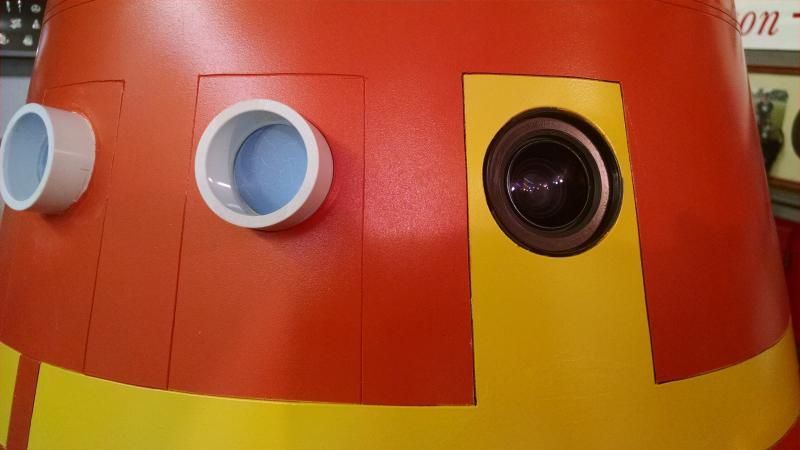
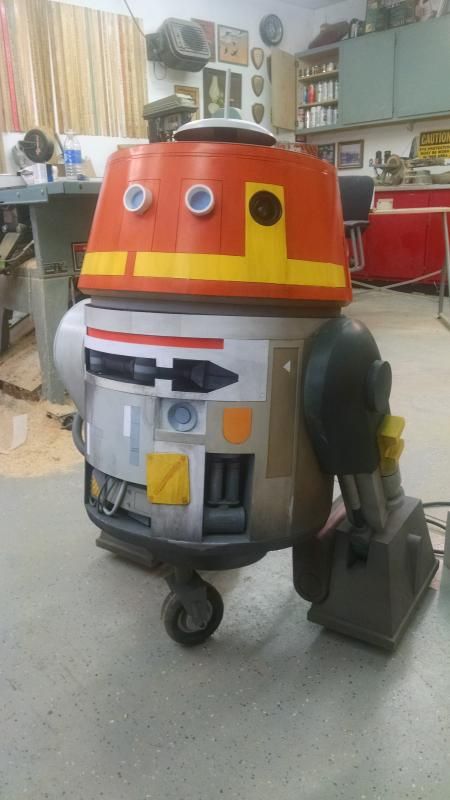
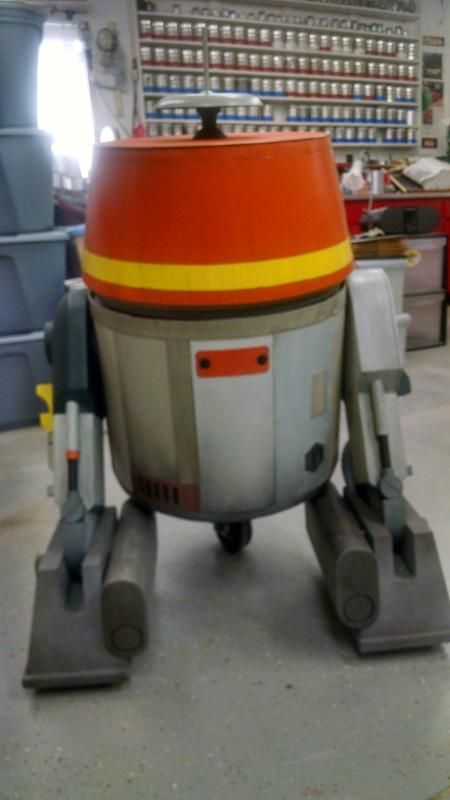
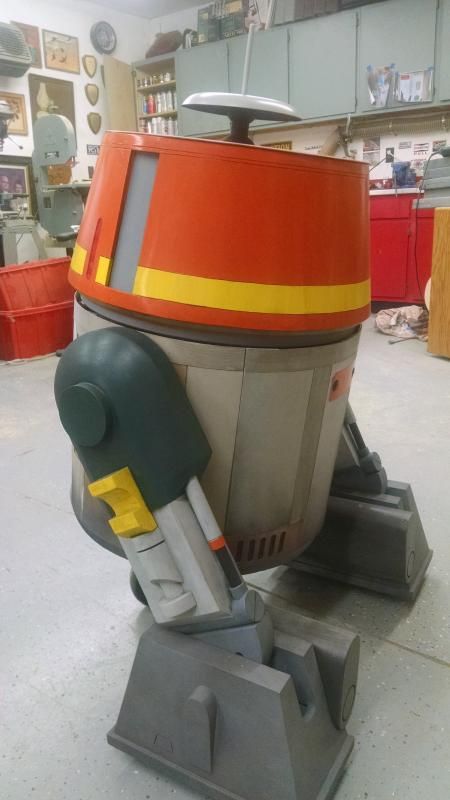
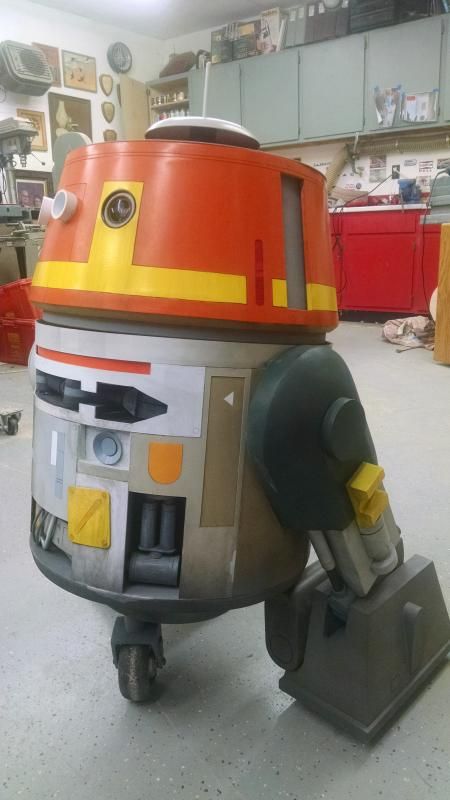
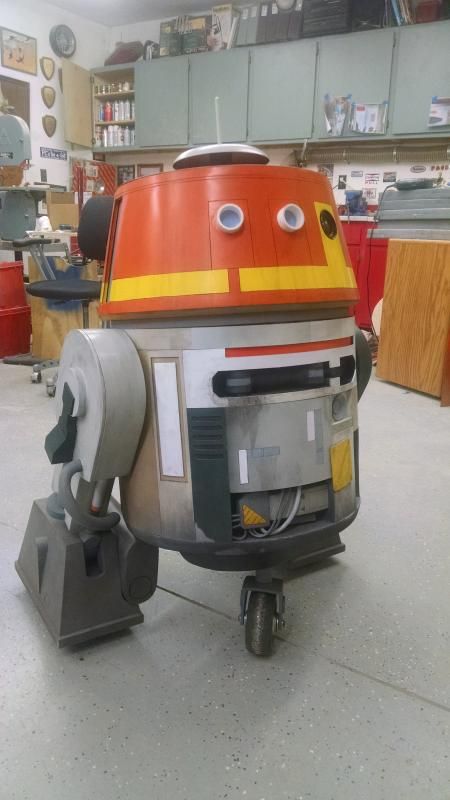
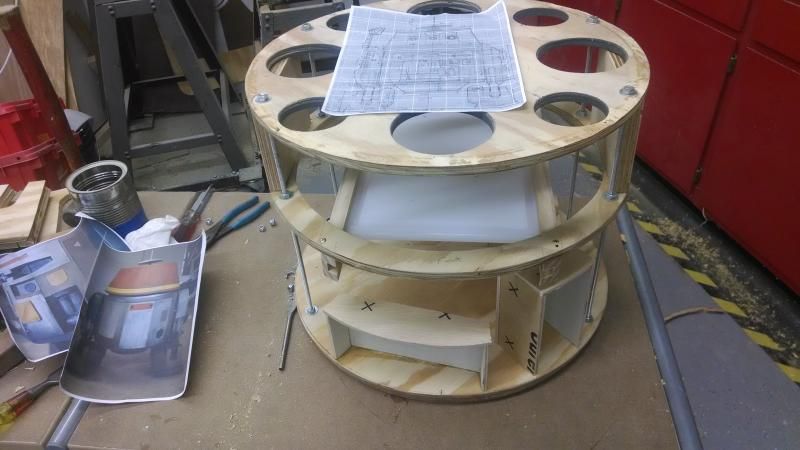
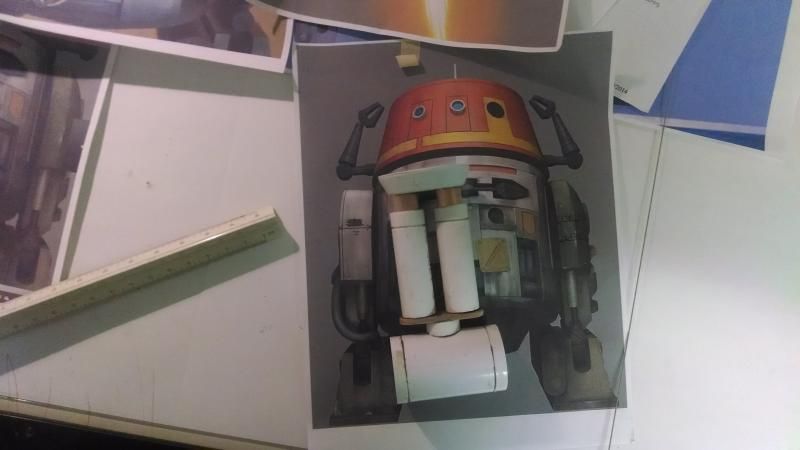
After a lot of research and combing the internet for pictures, drawings, video and anything else Chopper related, I felt confident enough to start building. Luckily, I was able to get a couple of key measurements from the Lucasfilm Chopper before I got too far along, so this build should be very close to accurate, as compared to the Chopper build that Michael McMaster did for Lucasfilm.

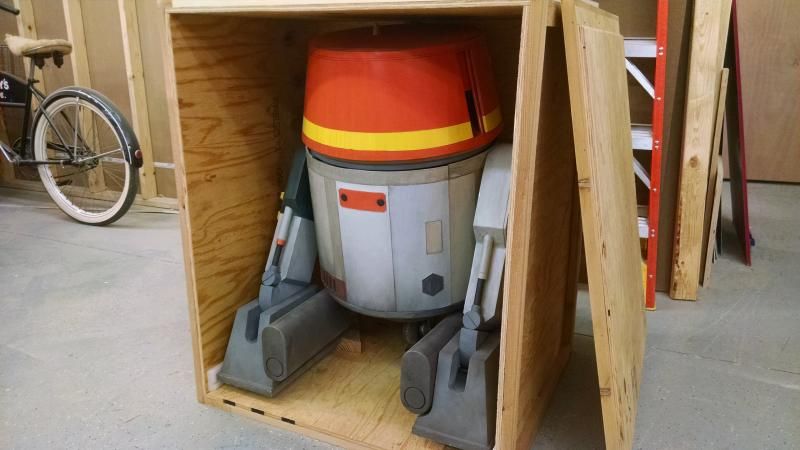
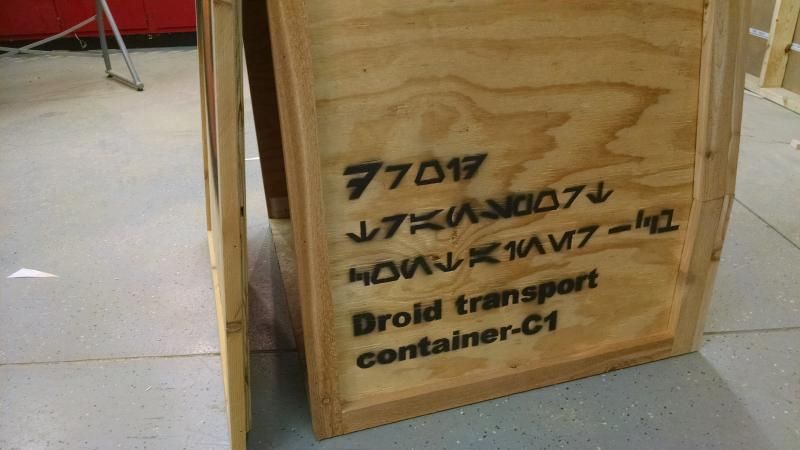
I will try to post updates every few days, as this is going to be a fairly quick build, hoping to get it finished before the Rebel show debuts in October.

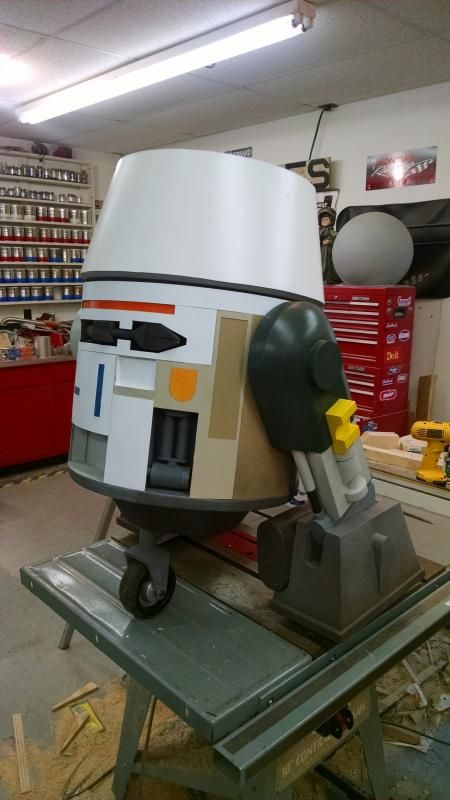
Following the storyline from Star Wars Rebels, this build will utilize plenty of recycled parts, and will stray from the traditional R2 type of building.
Wish me luck and thanks for checking back every few days!

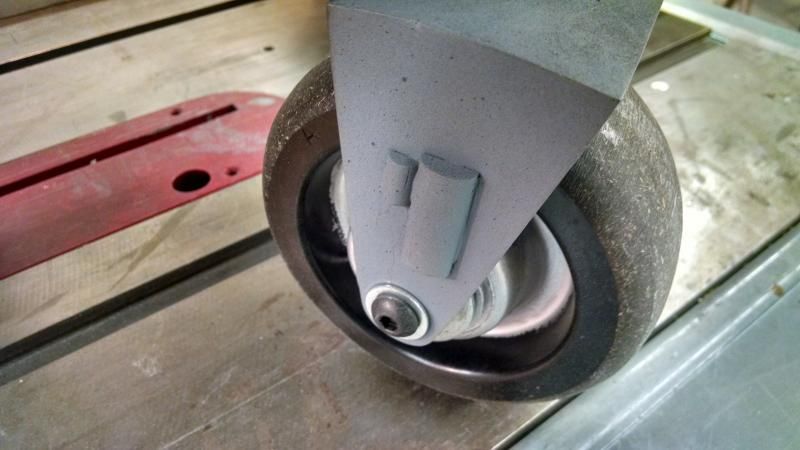
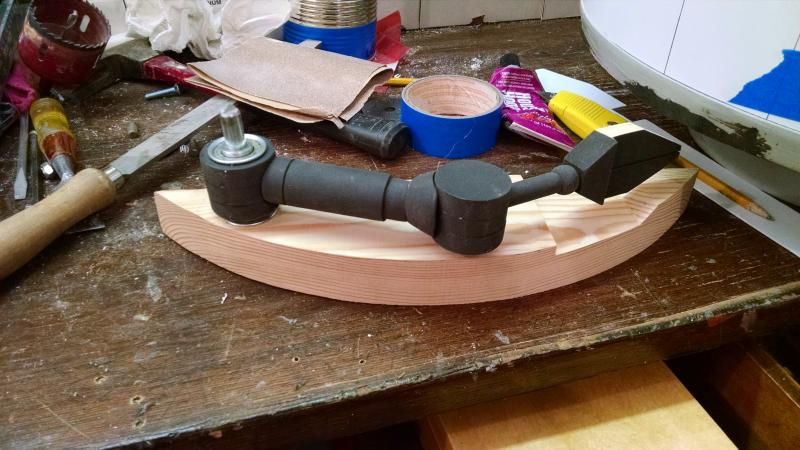
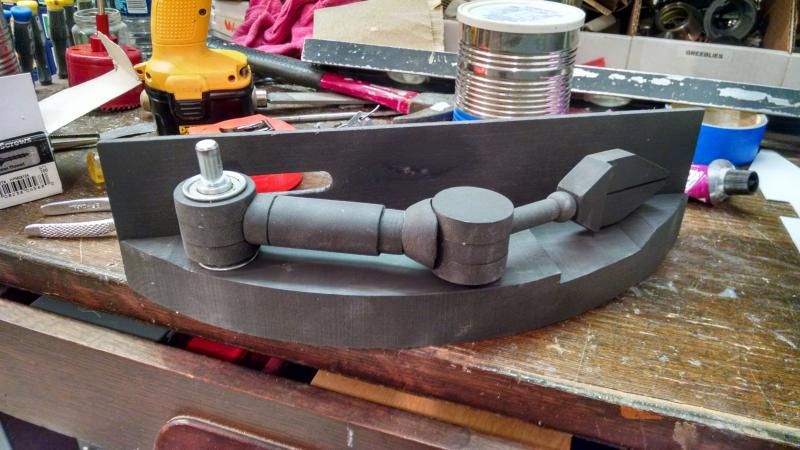
With bicycle fork in hand, the front caster seemed like the logical place to start-

IMG_20140706_181650345_HDR_zps928dd0ff.jpg


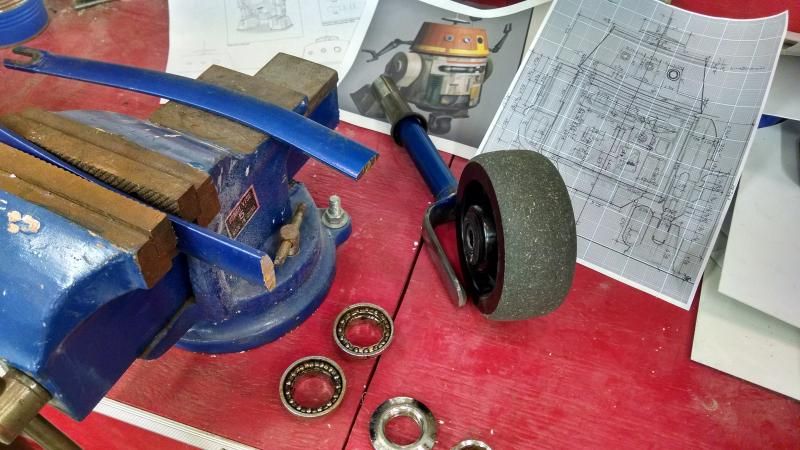
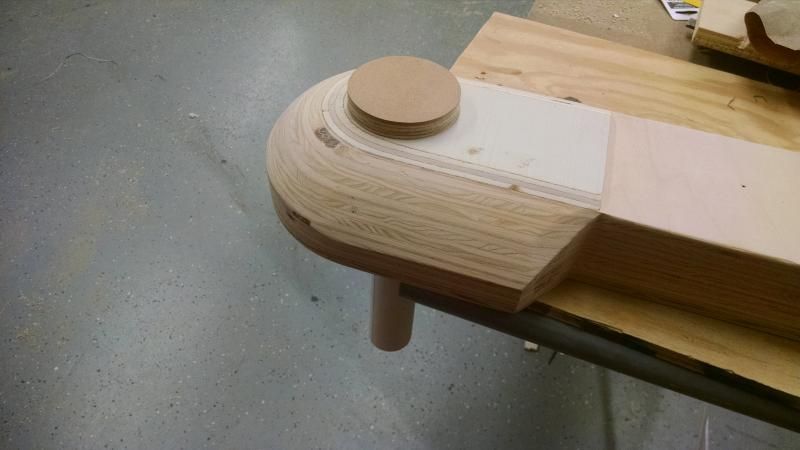
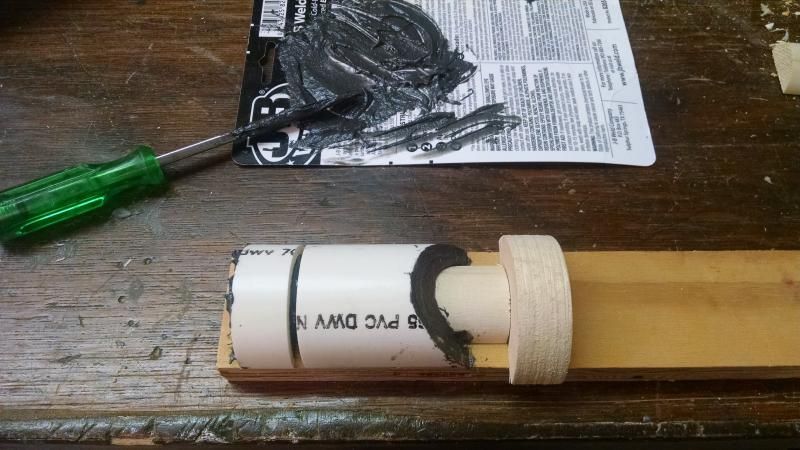
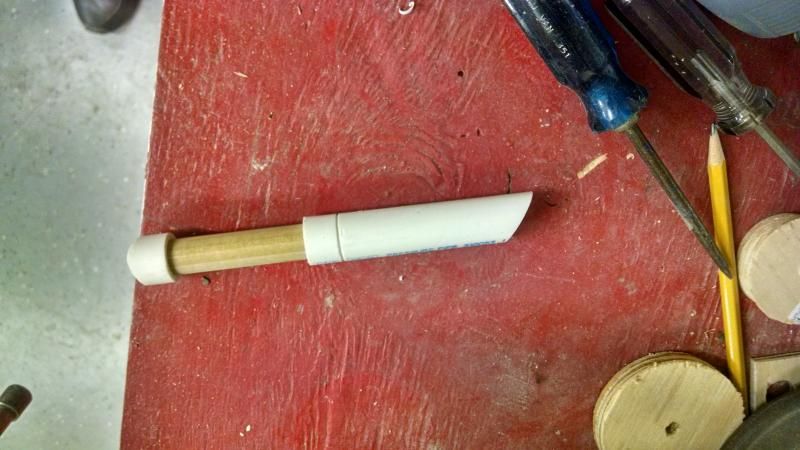
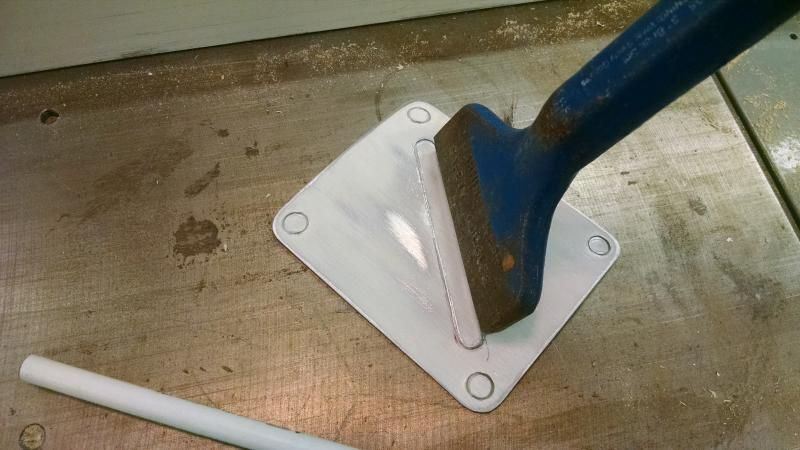
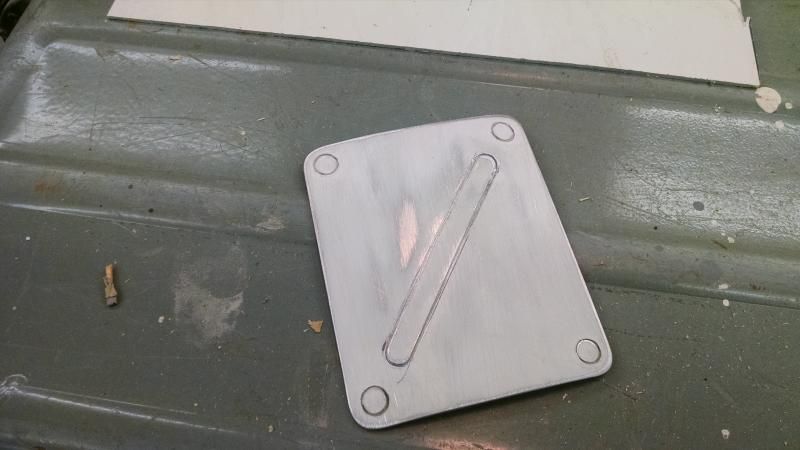
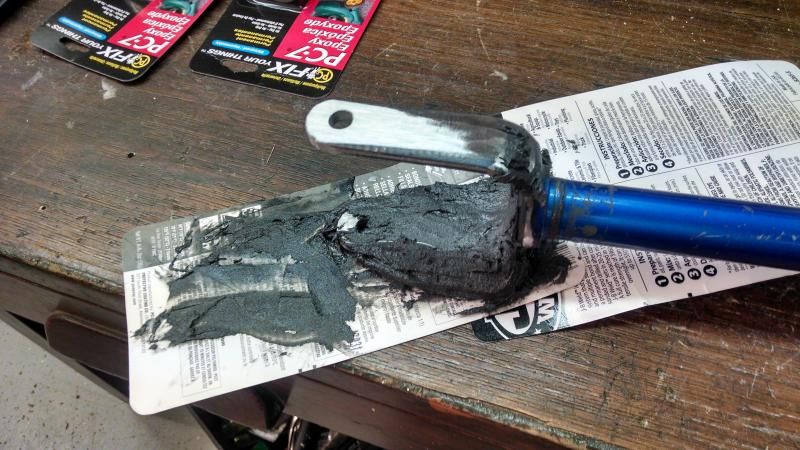
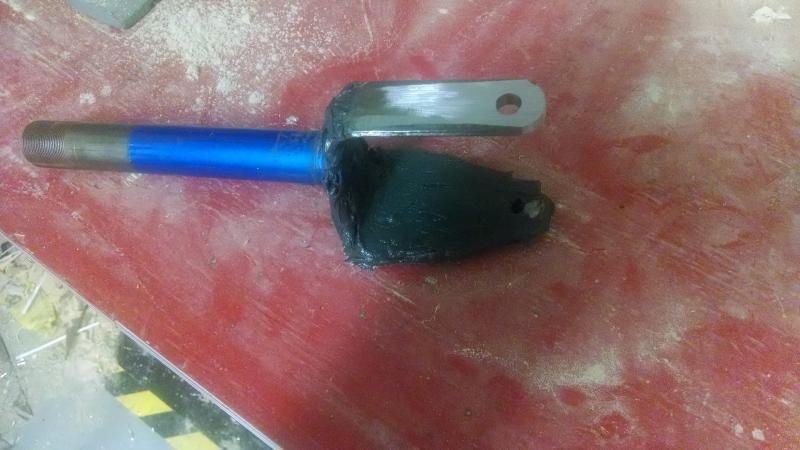
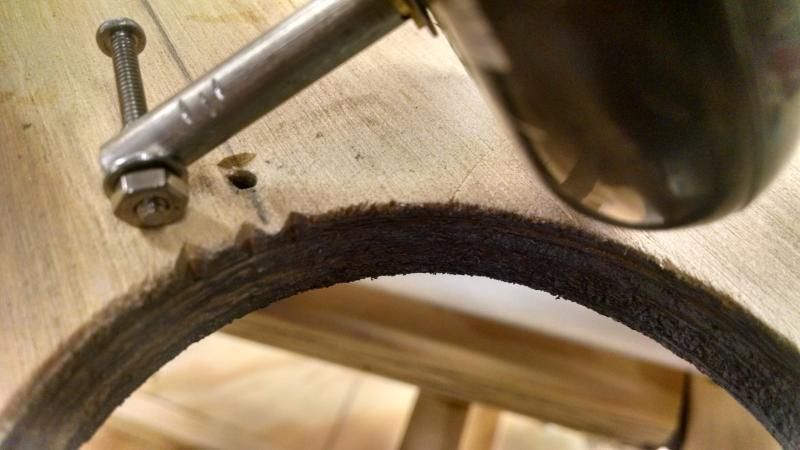
Using a recycled Schwinn middleweight bicycle fork as a basis, the front caster was fabricated with the help of PC7 epoxy and a 2x5 ebay caster-

IMG_20140707_210439808_HDR_zpsd68b3126.jpg


IMG_20140708_191330246_zpsf3690afb.jpg


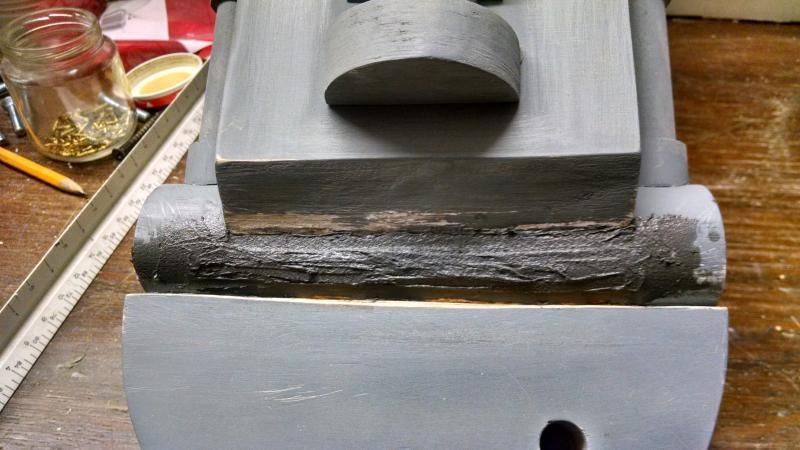
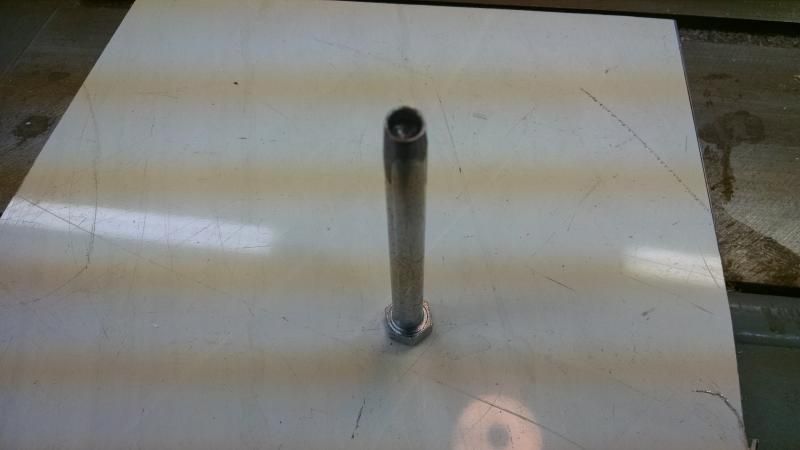
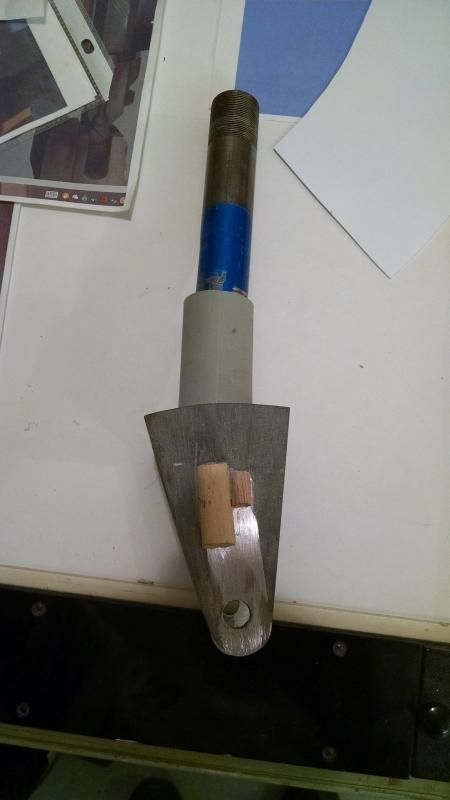
I hammered a bit of an offset into the fork so the wheel would follow the stem-

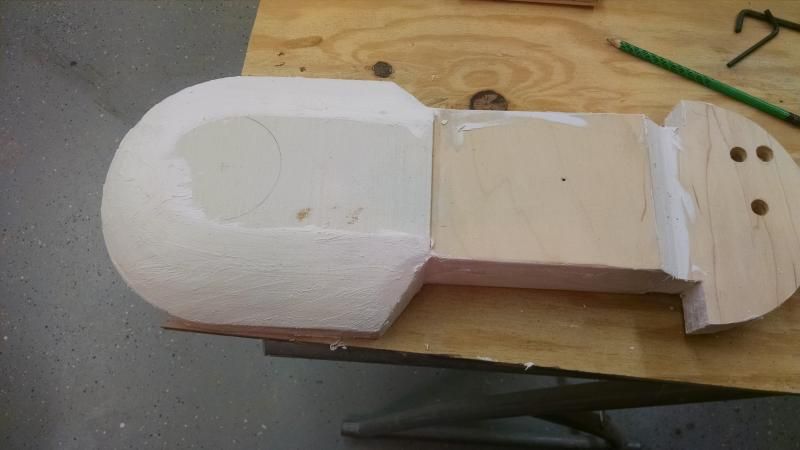
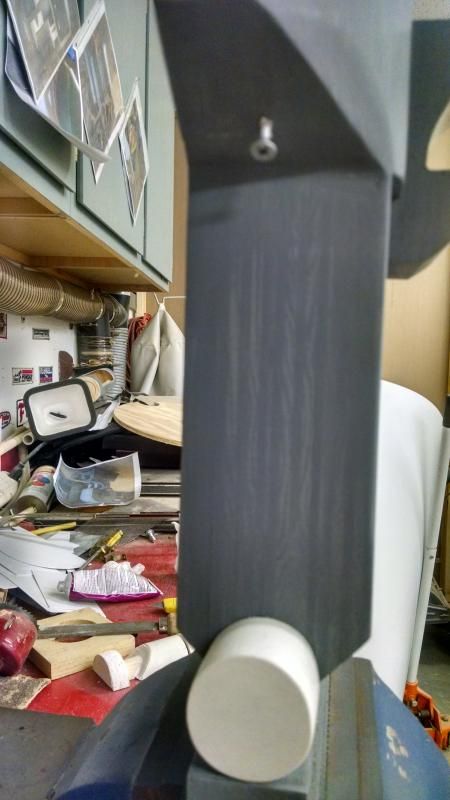
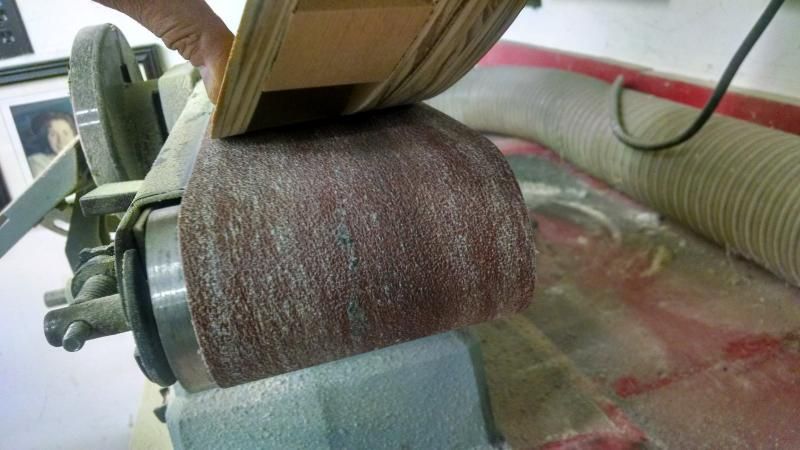
A lot of filing and sanding later-

IMG_20140803_165137632_zps66678626.jpg


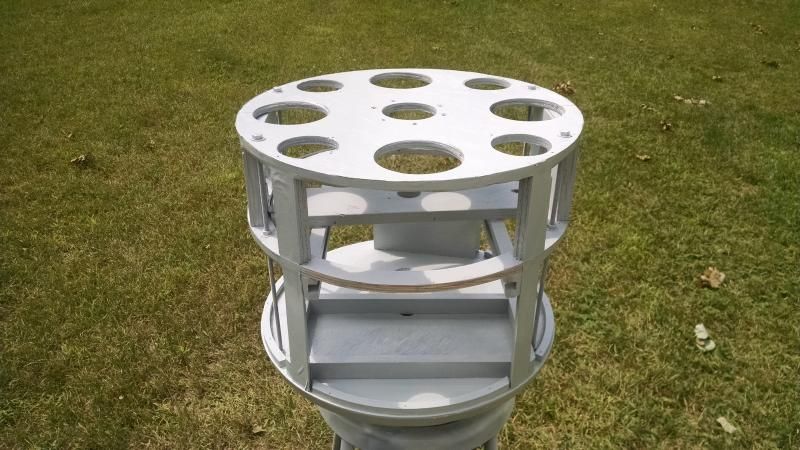
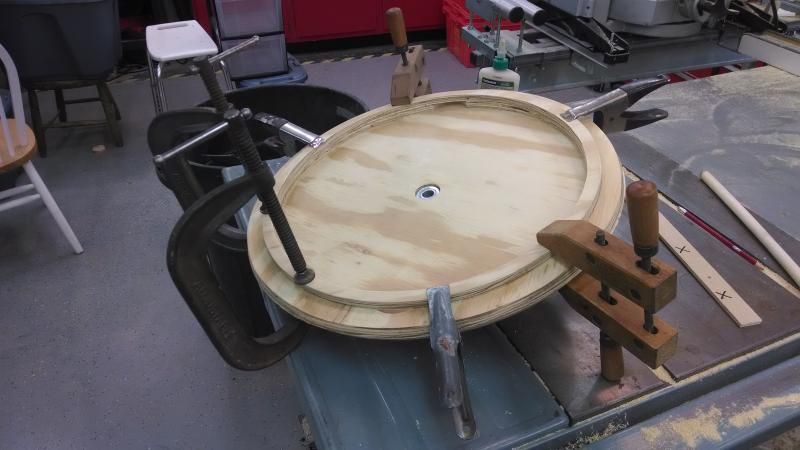
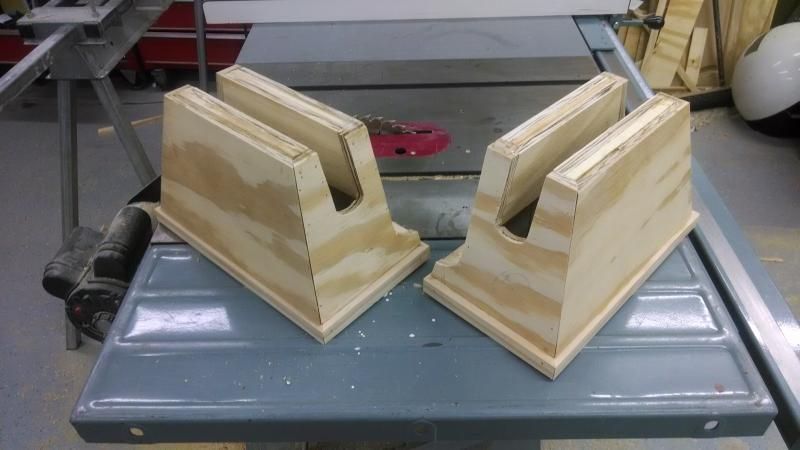
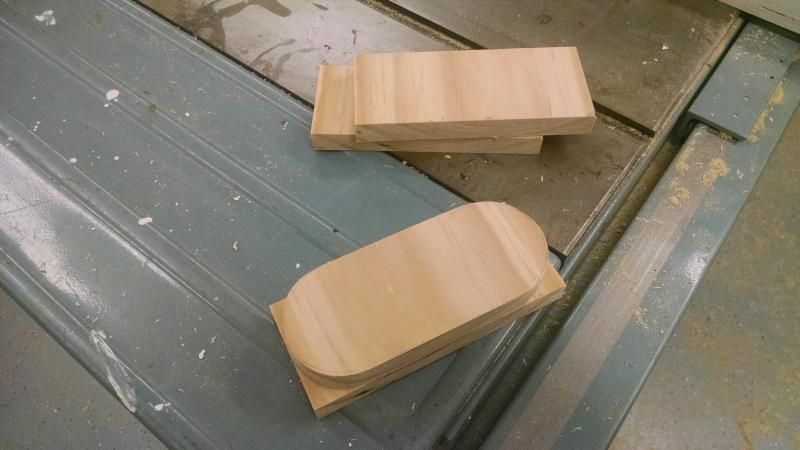
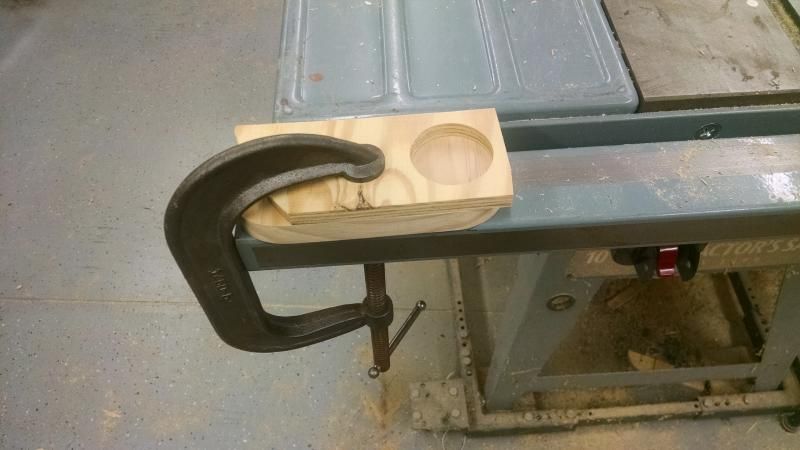
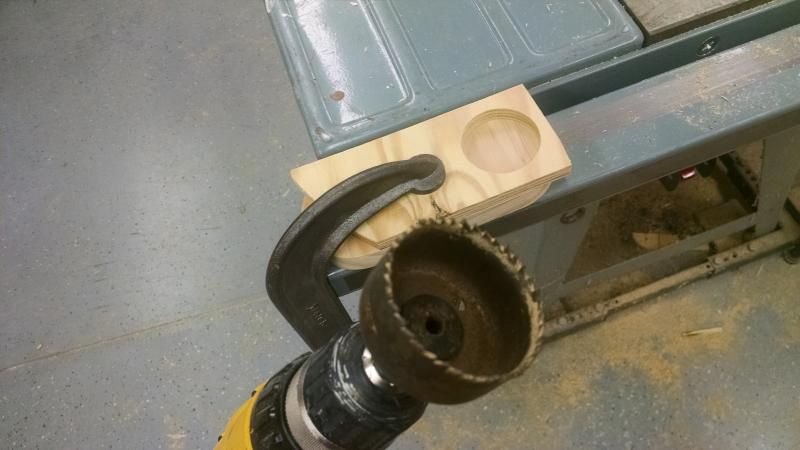
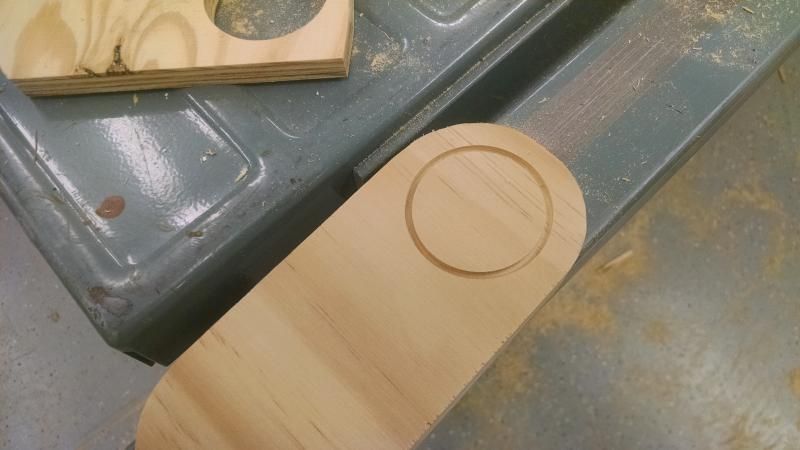
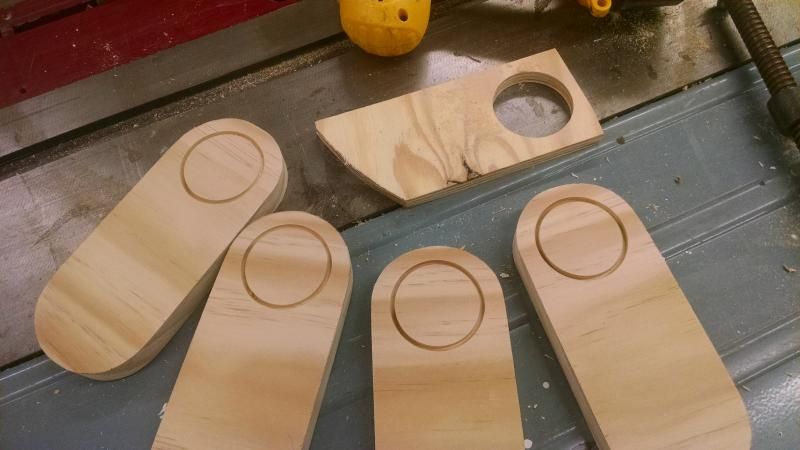
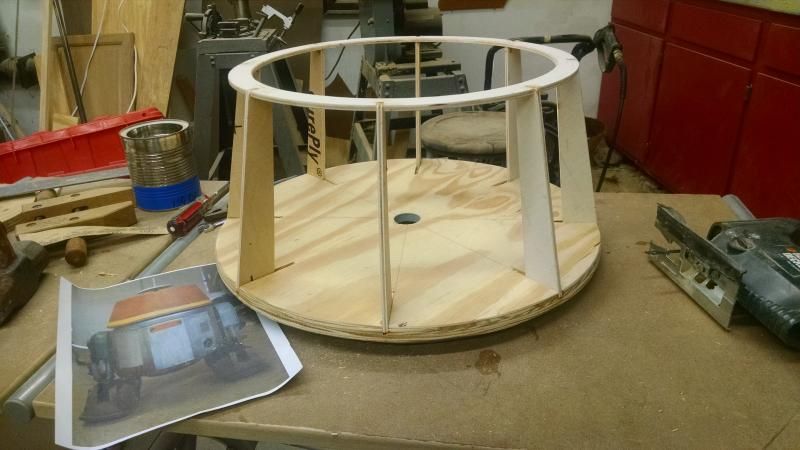
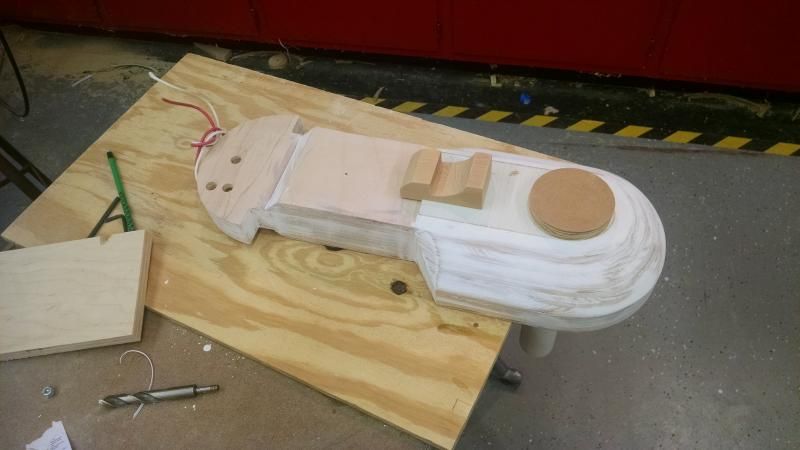
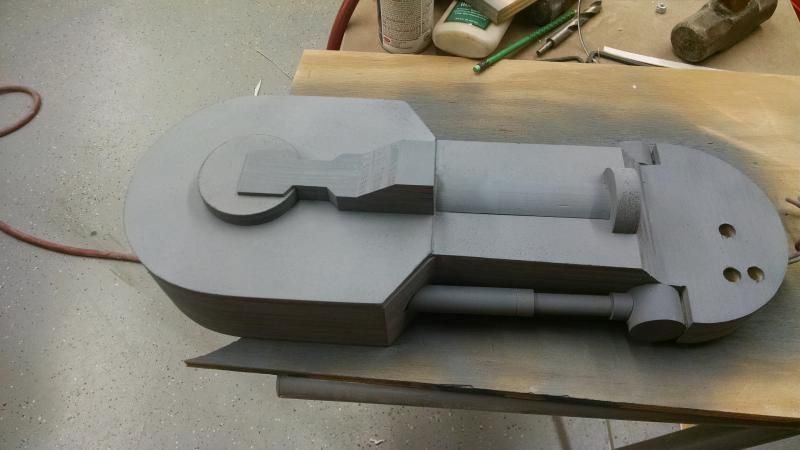
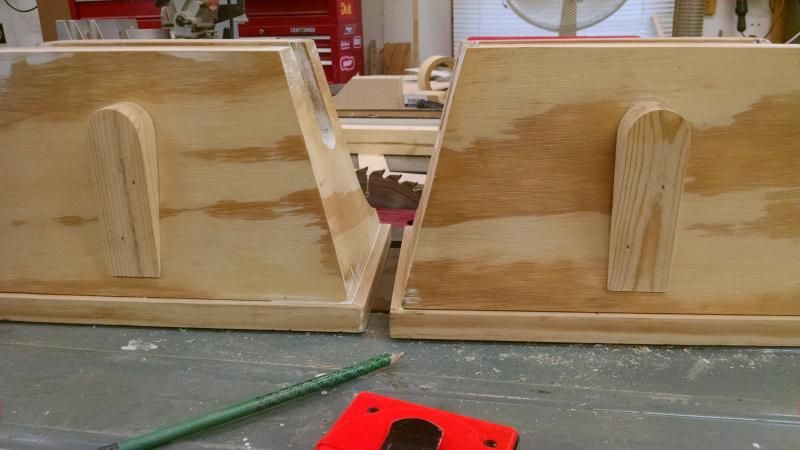
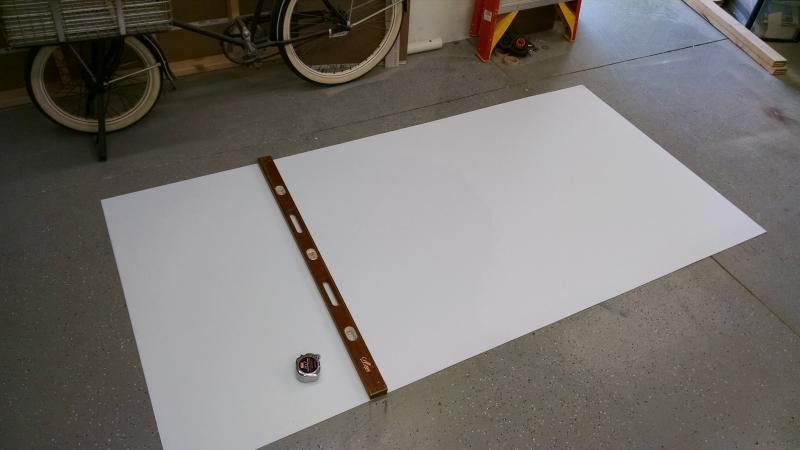
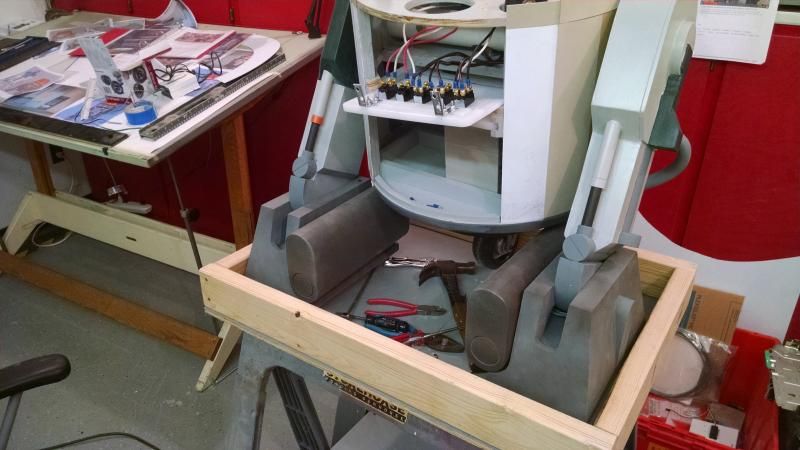
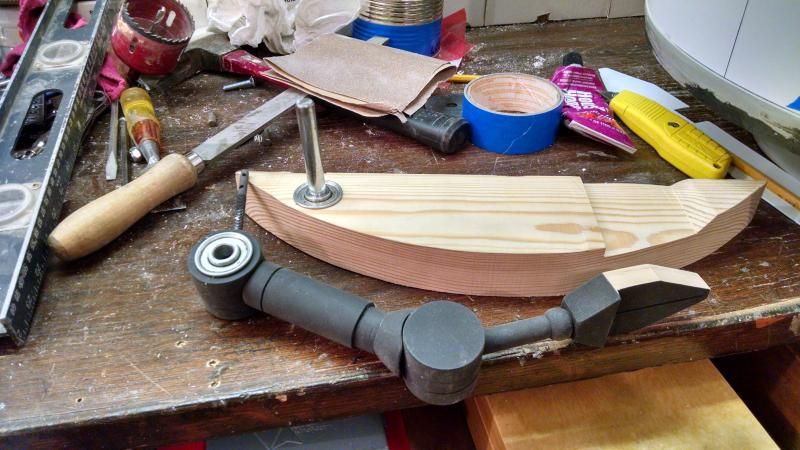
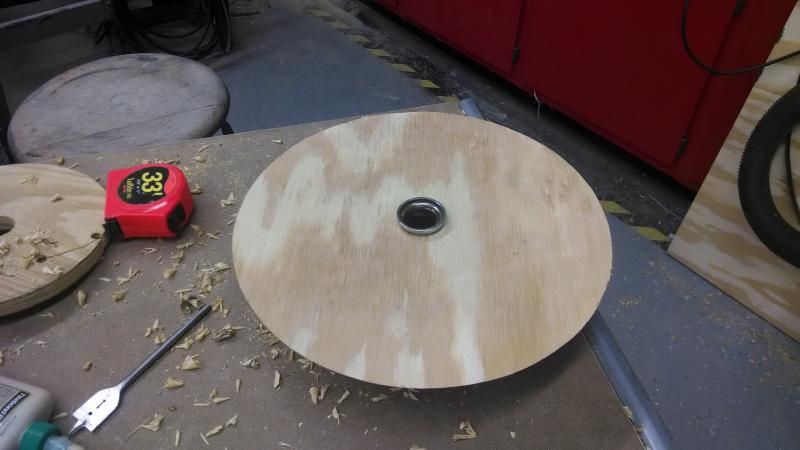
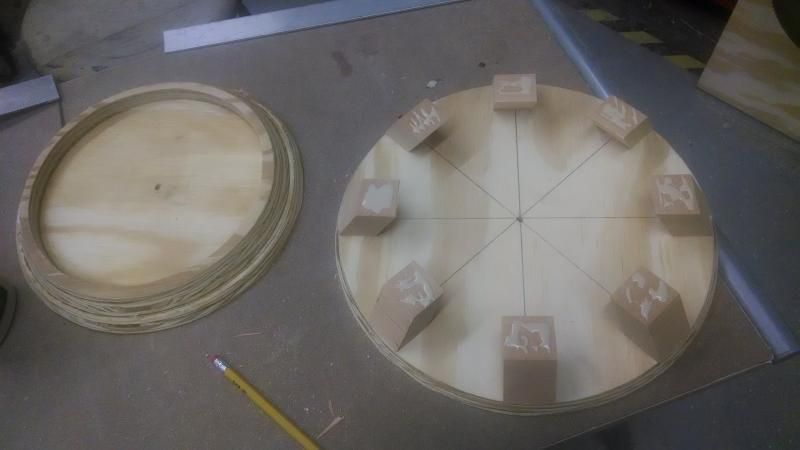
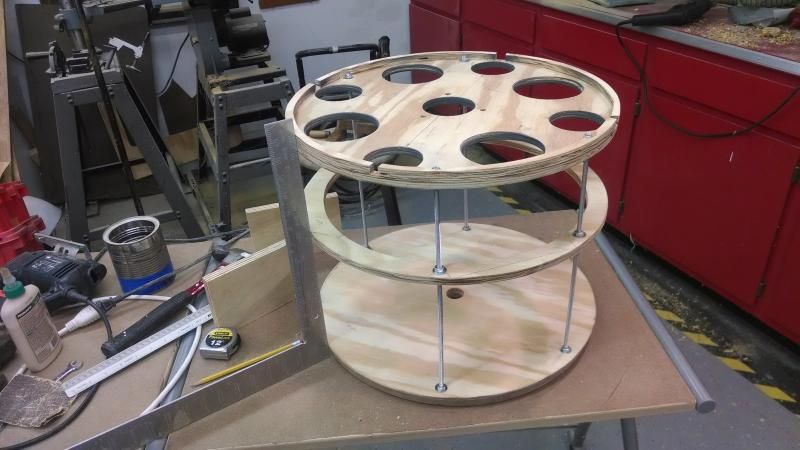
The base is 1/2" plywood discs, with pine blocks in between-

IMG_20140710_202139344_zps58d9b976.jpg


IMG_20140712_193955067_zps8f3fe66a.jpg

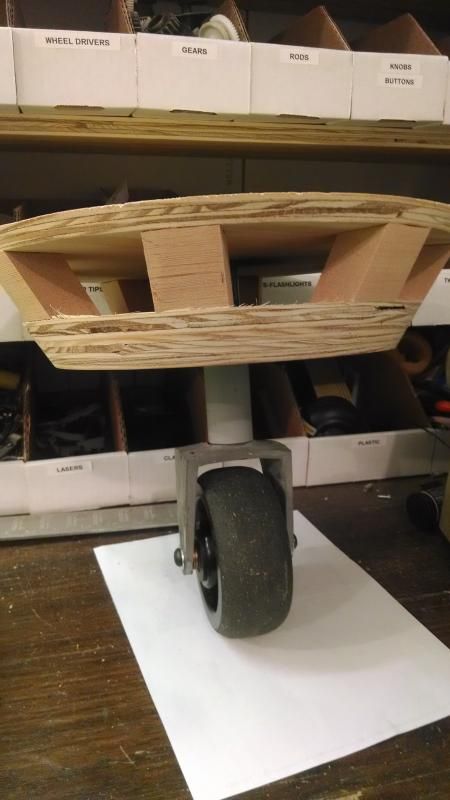
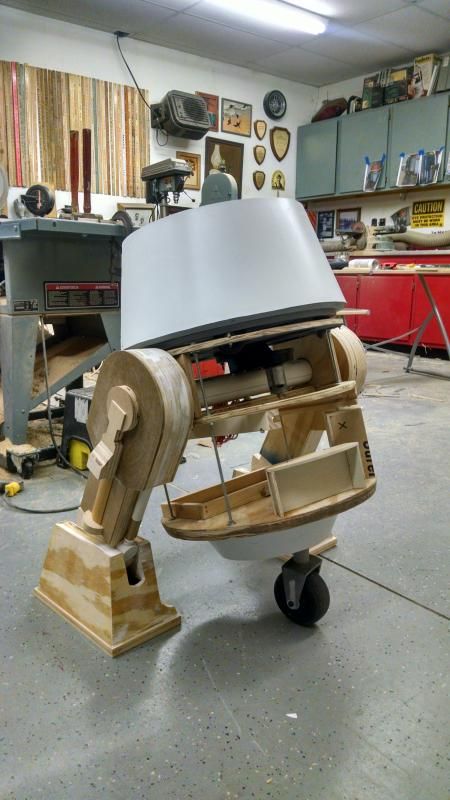
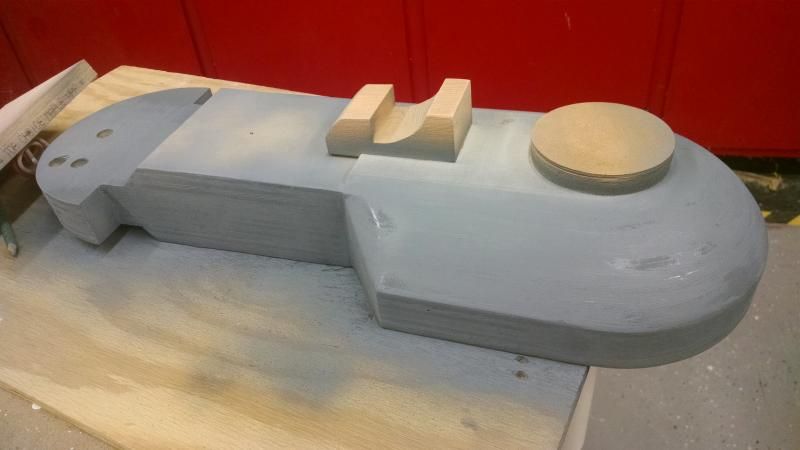
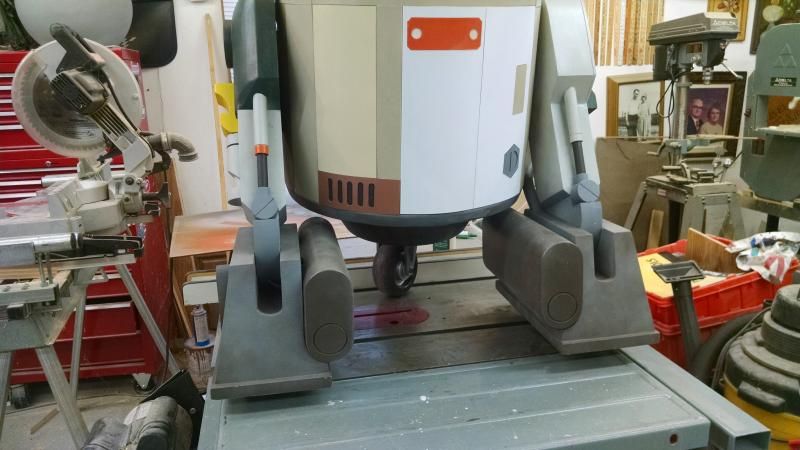
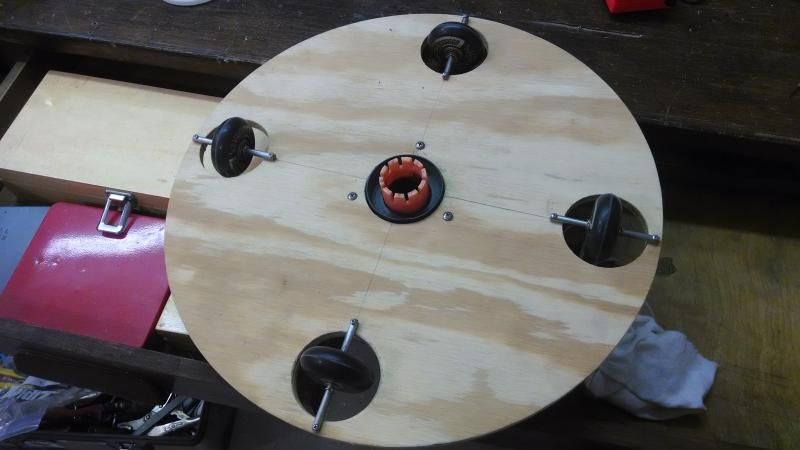
After some testing, I relocated the originally planned center location for the fork to closer to the front of the base so I could get a more necessary vertical positioning of the wheel. I plan on putting some miles on this little guy, and the caster has to track correctly on hard surfaces.

More to come!

Kurt
 
More construction pictures

Caster base-

IMG_20140708_185545937_zpsbf0d8678.jpg


Sanding down the center disc, to match the top and bottom discs-

IMG_20140710_202233440_HDR_zps24e5a5a0.jpg


I'm supporting the dome with an arrangement of recycled roller blade wheels around the perimeter, with a Power Wheels motor and gearbox to do the rotating-

IMG_20140712_185344595_zps256c5c8f.jpg


When I disassembled the casters, I marked them as 1,2,3,4 on the roller shaft and notched into the plywood, so I could match them back up after painting. This was a big time-saver, since the mounting holes on each shaft were slightly different on each roller assembly.

IMG_20140729_202923979_HDR_zpsfe5ea6a2.jpg


The frame is a straightforward set of 1/2" plywood discs, separated with 1/4" threaded rod, nuts and washers-

IMG_20140714_200409114_zps298fa94a.jpg


A set of wood tracks through the center of the frame will hold a nylon board to mount the electronics, and a couple of 1/4" plywood boxes will define the front body details. I removed the rim around the top of the frame, since it interfered with the dome skirt. I decided to just let the styrene I was using to cover the frame extend above the top of the frame without the wood backing it up. It proved to be very solid without the wood backing.

IMG_20140716_202636735_zps026beca1.jpg


The details are being made out of scraps of wood, copper and pvc pipe, as shown here-

The top ring was a 2"x1-1/2" bushing, but was sanded into the shape I needed. The grooves around the pipe were cut in with a hacksaw-

IMG_20140716_202819570_zpsc896d88f.jpg


Thanks for your comments- more to come!

Kurt
 
Last edited:
A quick base coat before I start adding components-

IMG_20140730_150153913_zpsd107cde9.jpg


Gluing a rim on the underside of the dome base. This is the surface that is going to ride on the roller blade wheels. The control wires will be running up through a piece of 1/2" copper pipe, which is 5/8" on the outside, just right to fit inside the radial bearing in the center of the dome base.

IMG_20140712_182744704_zpsb305bdf3.jpg


The feet are 1/2" plywood, glued and nailed at the corners. I used the same construction on my R2D2 feet and have had no issues after three years of hard use-

IMG_20140716_221600083_zps9db6910d.jpg


This is how I made the battery boxes. After doing all of the steps shown in the pictures and wrapping them in styrene, I discovered they were too tall to clear the body! So I tossed them out and remade them shorter. At that point, I was in no mood for more pictures, but you will notice that the battery boxes are shorter in the following photos. The boxes on the Lucasfilm droid are also shorter to clear the body when it is the three-leg position.

IMG_20140718_221038978_zpsd1810830.jpg


IMG_20140718_223010157_zps1e1bebc9.jpg


IMG_20140718_223252979_zpsf64541b9.jpg


IMG_20140718_223338621_zps63f3921a.jpg


IMG_20140718_223608893_zps42764ea1.jpg


This is the beginning of the dome frame.
IMG_20140718_221122303_zps8a2fea1f.jpg


I tossed a layer of styrene on it to take it to the Detroit Maker Faire.

IMG_20140725_214347502_HDR_zps5a7647b3.jpg


Everyone seemed to like him!

IMG_20140727_131348808_zps1a78fa3b.jpg


Thanks for checking back! More to come-

Kurt
 
Last edited:
Here's a few pictures of how the leg construction went. They are basically multiple layers of plywood, glued, sanded, filled and sanded some more. The left leg took about two hours on a table sander to get it down to the correct shape. The right leg was much easier.

IMG_20140728_160832447_zpsdeac07c0.jpg


The details on the sides are combinations of PVC and wood-

IMG_20140728_182851674_zpsd1b516e4.jpg


IMG_20140728_183001277_zps2a698906.jpg


IMG_20140728_184841385_zpsecb5b8d5.jpg


IMG_20140728_195803727_zps134af708.jpg


IMG_20140729_135635466_zps4f6f1e77.jpg


IMG_20140729_135644480_zpsdcfc42ed.jpg


IMG_20140729_135656539_HDR_zps45718edc.jpg


IMG_20140729_135739808_HDR_zpsbe688939.jpg


The bottom of the leg is supposed to look like a tube, so I grooved out a bit of the plywood and used the PC7 epoxy to shape it into a cylinder-

IMG_20140729_183025958_HDR_zps331ca9b0.jpg


IMG_20140729_204342548_HDR_zps3a34cb37.jpg


The two holes at the rear of the leg allow Chopper to stand on two or three legs by moving the locking pin into one or the other hole.

IMG_20140730_153519838_zps9a76245a.jpg
 
Last edited:
In keeping with the backstory on Chopper, being made out of spare parts, the front utility arm was made out of 1-1/4" PVC caps, PVC pipe, some wood, and an old golf club!


IMG_20140730_164813045_HDR_zps146100f2.jpg


IMG_20140730_191354720_zps926acbcc.jpg


IMG_20140730_191409945_zps6ff1131f.jpg


IMG_20140730_195656700_zpsd11eacfb.jpg


IMG_20140730_195710760_zps9ef8fc25.jpg


IMG_20140730_202635468_zps23476fe3.jpg


IMG_20140730_214423876_HDR_zps8c316f3d.jpg


While that was gluing, I cut some styrene to wrap the frame. The first layer was laid out for the panels, which were cut from the styrene sheet and glued to the first layer, after being painted the correct color.

IMG_20140731_111537006_zpsd68de8a6.jpg


IMG_20140731_123247379_zps002865d5.jpg


IMG_20140731_232452942_HDR_zps036ef114.jpg


I used 2' PVC through the frame, and a piece of 1-1/2" epoxied deep into each leg. once slid together, two bolts with retaining pins hold them together. The pins can be pulled and the legs moved from three leg to two leg display. The center caster is removed from inside the frame.

Thanks for checking back and the comments. I appreciate them!

Kurt
 
Last edited:
Once the panels are on and painted, it starts looking like a droid!

IMG_20140810_094421477_zps6cebd904.jpg


IMG_20140810_094501618_HDR_zps4d20dfb9.jpg


IMG_20140806_213212964_zps35f945ec.jpg


IMG_20140806_213156271_HDR_zpsf335c357.jpg


I used some recycled aluminum to make the motor holders for the feet-

IMG_20140802_151050956_zps580632c2.jpg


This makeshift metal brake worked for bending some aluminum for the back panel-

IMG_20140813_210240589_zps921e7c2b.jpg


Three brackets should hold it on-

IMG_20140813_222500455_zps6f59639e.jpg
 
Last edited:
The back panels have a few easy details-

IMG_20140814_214624419_zps9ff7c98a.jpg


Cut and glue. Easy, right?

IMG_20140814_214653369_HDR_zps9a6cd346.jpg


Cutting out the hex detail. Some people like using an xacto knife, but a sharp utility knife can cut accurately, too-

IMG_20140815_214914449_zpsba921293.jpg


I always try to use a straightedge I can see through. That way, I know where to stop cutting!

IMG_20140815_215352305_zps913e2c83.jpg


All glued up, or at least I thought it was-

IMG_20140817_103731176_zps05114372.jpg


The black buttons were carved out of automotive push fasteners that were pushed through a hole in the aluminum back to hold themselves on-

IMG_20140817_110715234_zpse20ab6ff.jpg


It took several tries to get the right glue for the job. Most of them would hold, but the plastic would spring back off the surface after an hour or two. 3M VHB tape finally did the trick-

IMG_20140818_152203366_zpsbb772190.jpg


Wiring switches to disconnect the feet motors and each battery separately-

IMG_20140818_181200267_zpsdf95aadc.jpg


You quickly run out of room inside a little droid!

IMG_20140823_152656520_zps76d3d1d1.jpg


Dome etching, done with a Plexiglas cutter

IMG_20140823_113516909_zps55701961.jpg


This is the side logic display. I used an LED light strip that is normally used for a Battlestar Galactica Cylon helmet. The VHB tape mounted the lens to the dome, and the red backing makes a great diffuser! After sticking the lens into the dome, the LED strip is mounted to a hardboard strip and screwed to the inside of the dome-

IMG_20140824_143855600_zps721b043c.jpg


Here's the finished product-

IMG_20140824_144222893_HDR_zpsb84391c9.jpg


More to come soon!

Kurt
 
Last edited:
Awesome... I have had zero interest in watching "Rebels" , but since early art showed up online, I've loved the look of this droid.

Look forward to seeing it complete!
 
Here's some of the build details- The front cable interface box is shaped out of a pine block, with the details carved in. The wires are reclaimed telephone cable, and the larger one is a parallel printer cable-

IMG_20140817_215316566_zps8878ec23.jpg


The small ones get painted.

IMG_20140818_102229210_zps828e45d3.jpg


The front caster detail is made from two different sized dowels, sanded slightly flatter than round... kind of an oval, cut in half. The small one trails the larger on both sides of the caster.

IMG_20140817_215310738_HDR_zpseb6f1ce0.jpg


The pivot I built for the front utility arm is also a block of pine with a radial bearing set into it. This will make a strong enough pivot so I don't need it supported on the top.

IMG_20140801_200859173_HDR_zps5d51f4e9.jpg


IMG_20140801_200917089_zps674b2710.jpg


A 1/4" backer keeps the kids from looking in...

IMG_20140801_213617110_HDR_zpseb6444d8.jpg


This was a fun part. I looked everywhere for the correct size and shape for the top antenna. I used an old repair antenna out of the 70's, a frypan, a large beveled faucet washer and a variety of PVC bushings to cut, grind and shape into...

IMG_20140818_123109417_zpsca3985b5.jpg


... the perfect Chopper antenna!

IMG_20140819_195551897_zpsb16039fc.jpg


Thanks for checking back... more coming soon!

Kurt
 
Last edited:
Curt I would like to just say cool build dude! But that would be a great injustice, thank you for posting your hard work, you've given me some good ideas for a build I have planned in the near future
 
I found a tin cone the right angle in a doll house modeler's store, (this was the roof of a birdhouse) and ran an elevator bolt through the center to give it a flat bottom, and to mount it to the frame.

IMG_20140827_193153493_zps94e6bd7b.jpg


I made this tool from a bolt. With the threads cut off, a hole drilled down the middle, and the outer edge ground toward the center hole, I had a handy little punch to imprint some aluminum.

IMG_20140826_203148797_zpsee3ca776.jpg


The front patch plate on Chopper has a pronounced circle punched in each corner, and tilted at an angle, I was able to use it for the ends of the diagonal slot that goes from corner to corner. A sharpened brick chisel put in the lines between the ends.

IMG_20140826_203239893_zpsc1b139dc.jpg


IMG_20140826_203201929_zps7c7ffc0b.jpg


Here's Chopper before weathering- several sides-

IMG_20140825_221405116_zps64e616cc.jpg


IMG_20140823_202247104_zps003831c4.jpg


IMG_20140827_075737710_zpsa62a0f0f.jpg


IMG_20140827_075652167_zps83aff59d.jpg


IMG_20140827_214113799_zpse14530a1.jpg


Hello world!

IMG_20140828_205510857_zpsd55b2d53.jpg


More to come! Thanks for checking back!

Kurt
 
Last edited:
After a bit of weathering, this is how it turned out-

IMG_20140831_180649923_zpsd8c09ba3.jpg


IMG_20140831_182659855_HDR_zpsd89e1c0f.jpg


IMG_20140831_182716289_zps0892b63e.jpg


IMG_20140831_182724420_zps3042e70d.jpg


IMG_20140831_182733974_zpsa9ceac76.jpg


IMG_20140901_182518742a_zps6779657f.jpg


A transport container seemed appropriate, so I came up with this-

IMG_20140915_160427172_zps67127250.jpg
IMG_20140915_201214013_zpsf04439e6.jpg


Still recycling parts, I used replacement toilet paper rollers and a recycled printer carriage to construct the dome arms. When finished, they will extend from the dome, and bend at the elbow.

IMG_20140920_143744343_HDR_zps56cc2e42.jpg


IMG_20140920_172523144_HDR_zps4f54021d.jpg


Still finishing up the control system for the dome arms, but I hope to have everything operational soon!

Kurt
 
Last edited:
This thread is more than 5 years old.

Your message may be considered spam for the following reasons:

  1. This thread hasn't been active in some time. A new post in this thread might not contribute constructively to this discussion after so long.
If you wish to reply despite these issues, check the box below before replying.
Be aware that malicious compliance may result in more severe penalties.
Back
Top