'70s starship scratchbuild

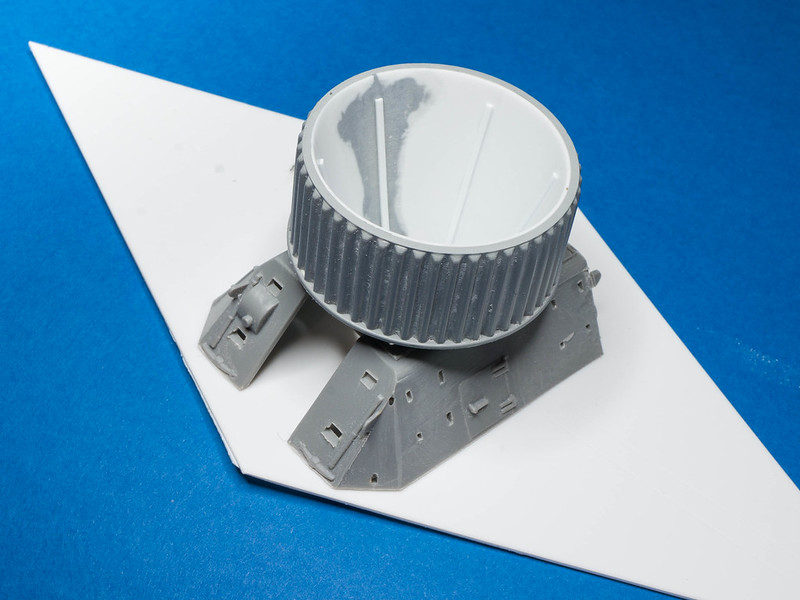
It's cool isn't it? The complete coupler is that thing plus the two light grey screw rings - I think the "teeth" get driven against the hose by the rings when they're screwed down.

The only problem is that a friend suggests it might well be made of polypropylene, which is very very hard to paint and glue. I think a pro would cast it in resin but I don't have any experience with that, so one option would be to use it as a concept and make something similar from styrene.

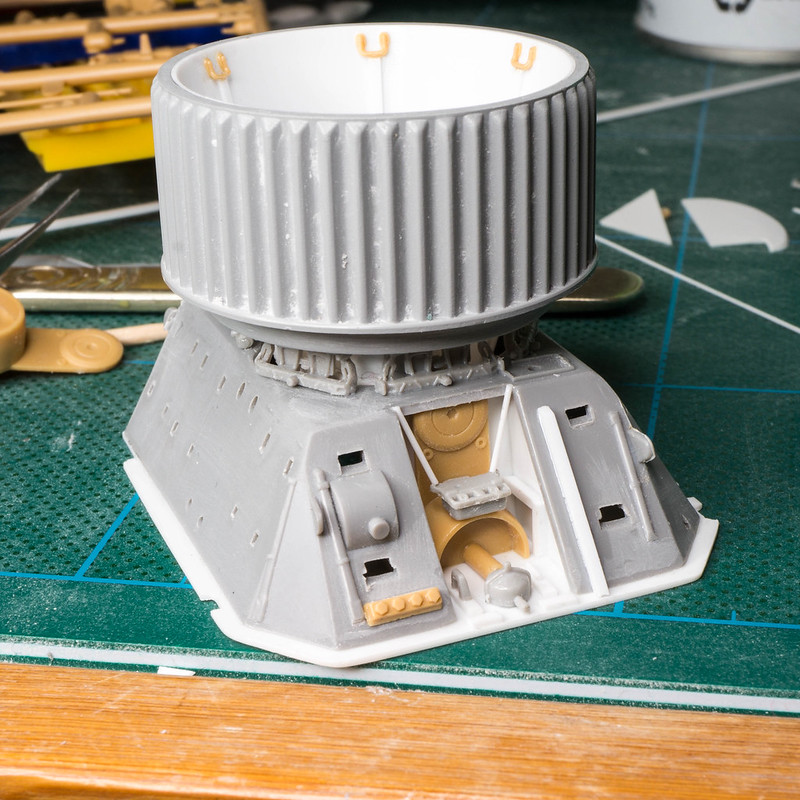
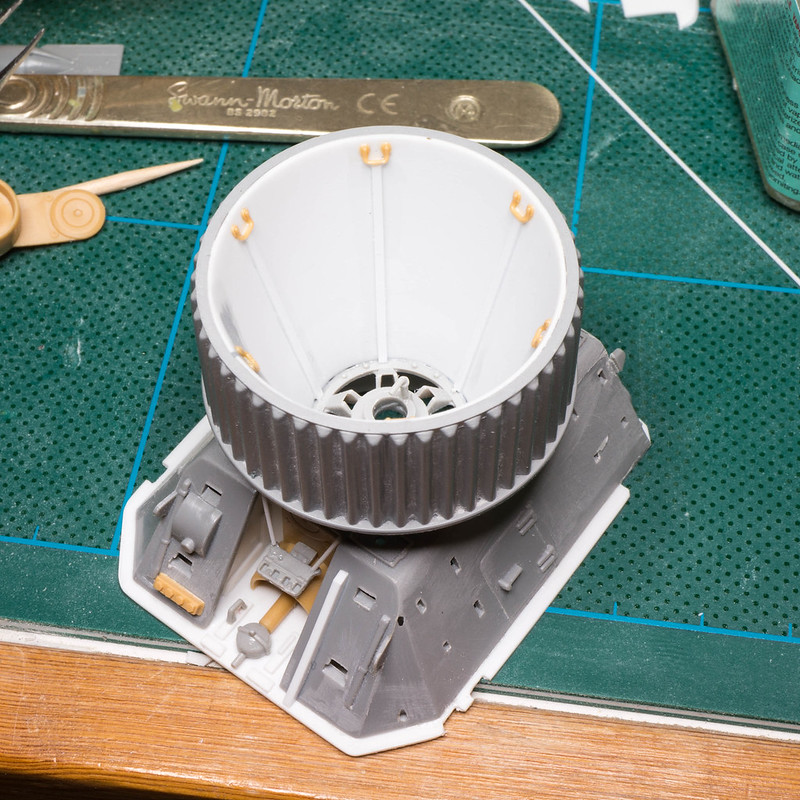
I got two more bits today - a couple of those plastic eggs for silly putty. I'm thinking they might make nice NASA-style engine bells which would look pretty cool. Still playing, really, which is frustrating because I'd like to get the back plate on so that I can detail the hull, but I need to make any engine cut-outs first.

Will
 
I had the same paint dilemma with the coupler. I want to put the same on my ship, and a friend told me the painting would be hard. This coupler make a great motor, with nozzle flaps...
 
I think its PE. After a soapwash it glued
100_3213.JPG
I wouldnt know about paint. If you plan to cut off a piece you could do a little trail and error.
Those groove threads are quite deep.
 
I think you're right.

I did some material tests with my various engine bits. The good news is that the threaded pipe coupler rings are ABS, or at least they stick really well with Tamiya ABS cement. They also stick to ping pong balls with CA. The bad news is that nothing else sticks to anything else. So I think the coupler rings with ping pong ball inserts are going to be the main drive nozzles. I now need to figure out what to fit them to since they're a bit too flat against the ship. I quite like the idea of having half a ping-pong ball on the other side, as though it's some kind of combustion or detonation chamber. Then some struts and gubbins to tie it all together. I might also build up a truncated pyramid from sheet as a base - not sure.

Incidentally the Tamiya ABS cement is very thick. It's like going back in time!

I do like that coupler interior part but it has some nasty sink marks on the teeth, and I really want to use stuff that I can glue easily rather than have stuff break off or be unpaintable later. I suppose I could screw it into the ring and support it that way, but then I have to fit the other side against the ship somehow. Hmm.


Cheers,


Will
 
I got fed up with things that didn't stick to other things, removed the bit of ping-pong ball from the hose ring, and used an internet tool for metalworkers to lay out a frustum touching the ID of the ring at the back and again at the narrow point. I extended this a bit further since I found a nice piece for the "flame holder" or whatever spacey equivalent it is:


The frustum (truncated cone, fact fans) insert is from 0.5mm styrene sheet, cut with a compass cutter and formed around a wooden spoon handle with boiling water. I didn't brace the back of the cone join except for the narrow end, since it would have fouled the ring. I think it would have been a lot easier to brace it and trim or file away the bracing where it touches the ring, since I had to do a fair bit of filling and sanding to remove a dip and seam where the edges wanted to pull apart.

Given the sanding, I thought I'd better fit some ribs to disguise the smoothness (or not!) of the inside.


The mounting is a 1/72 AFV part, I'm sure plenty of people will spot what it is :) I might raise the bell up a little bit with some tubes and such, not sure yet.

Cheers,

Will
 
Someone else probably could, I don't have any experience in that area :) I think I'll just proceed with what I have at the moment and save the inner part for another model.

I did one of the jobs I'd been putting off and made a stand mount (of sorts) so I could close up the back of the inner hull. That was two lengths of K&S tube, I'm thinking the stand will either be a tuning fork shape, or just have two prongs? These are wired for power inside the ship.


(embiggen)

and here's the view from the inside. I've now sanded, filled, primed and sanded the hull so hopefully I can think more about the details and less about the shape from hereon in.


I also did a bit more on the engine mount - first of all it got a backing plate so I can get it glued nicely onto that, and then have a nice easy job to fit it to the hull later. Then I added various AFV bits including some track links as mounting points for the engine bell.


and some grab-handles because the bare rib ends were a bit unfinished-looking:


I boxed in the recess at the bottom where the gun would've been, in future it would be easier to do this before fitting all the details rather than afterward, oh well :)

Total number of different AFVs which have donated parts to this build so far: 4 (or maybe 5?)

Cheers,

Will
 
Looking real good...!
Casting is easy like hell. esp. when it comes to parts that can be made in a open mold.
Come iver and I'll show you how :)

Good progress so far :D
 
Hey, I just had a wisdom tooth out yesterday! Plus there was some other stuff going on this week, I think mainly "worrying about wisdom tooth". All better now, I'm just looking round the office thinking I should really tidy it up before doing any more modelling...

W
 
OK, found a bit of modelling time at the weekend, found the missing bits, and fitted them (plus some more!)


Need to leave this bit alone now, and figure out how to build out the rest of the back end.

W
 
Well that looks really good, man!
Glad your modelling mojo is still there though wisdome's gone.
Star Destroyer and Galactica back ends are a great inspiration for me cause both studio scale models proof me every time I drool over them, how '2D' my kitbash thinking is. It would be so cool, to have a session together - when ever you plan a trip to Germany, we can host you/your family in our studio. IF we build together ;)
 
Hehe, I might take you up on that - I'm always keen to visit Germany. We were in Muenster just before Christmas a couple of years ago which was lovely, but we only had three or four days - nowhere near enough time!

You're right about those models - I like the SD back end particularly - it has a really nice mix of sculptural shape and detail work.

Will
 
Thanks! I had another look at extending the back end today but ended up working on the underside.


I wasn't going to have detail this deep on the outer hull, but I thought it fitted, so now we have some "space intakes". Maybe they're for air-breathing engines during atmospheric flight, or gas cloud dipping?

I'm not sure about the two plates in between the intakes, I thought they were a nice fit for the space, but I'm starting to dislike them - they don't follow any of the existing lines.

Cheers,

Will
 
This thread is more than 9 years old.

Your message may be considered spam for the following reasons:

  1. This thread hasn't been active in some time. A new post in this thread might not contribute constructively to this discussion after so long.
If you wish to reply despite these issues, check the box below before replying.
Be aware that malicious compliance may result in more severe penalties.
Back
Top