PixelFlames
New Member
.JPG")

Let me know what you think, ill post some pictures and update as i move along.
Attachments
Last edited:

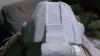
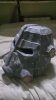
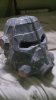
 You might be right i might need another layer or 2 of body putty This is an example of the detailing i want to add to my helmet. the guy calls it Multiput its similar to gun gum that is used on exhausts. I'm not sure if its epoxy putty but epoxy putty comes in TINY 10g amounts for EXPENSIVE prices. any idea what else I can use. Maybe i could try and mold the body putty or stick wire and steel bits to it using the glue gun... I'm going to give my helmet a coat of primer next week and try a few things ill post back on my progress.
View attachment 353982You might be right i might need another layer or 2 of body putty


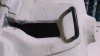
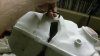
 I had a little trouble with the symmetry of it all. So i drew a couple of guidelines and now its a little lopsided the other way. haha


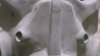
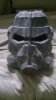
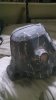
 The face is symmetrical yay and almost smooth. I'm getting somewhere. Moving slowly but steadily.a bit more sanding needed ans a hole or 2 to fill. and then ill continue with the center line and then up to the top and sides of the helmet i'm hoping that will go quite quickly. i will do the rear and neck piece last.
.JPG")