[Team Fortress 2] Heavy's "Sasha" Minigun Build Log

Tatsutetsu

Member
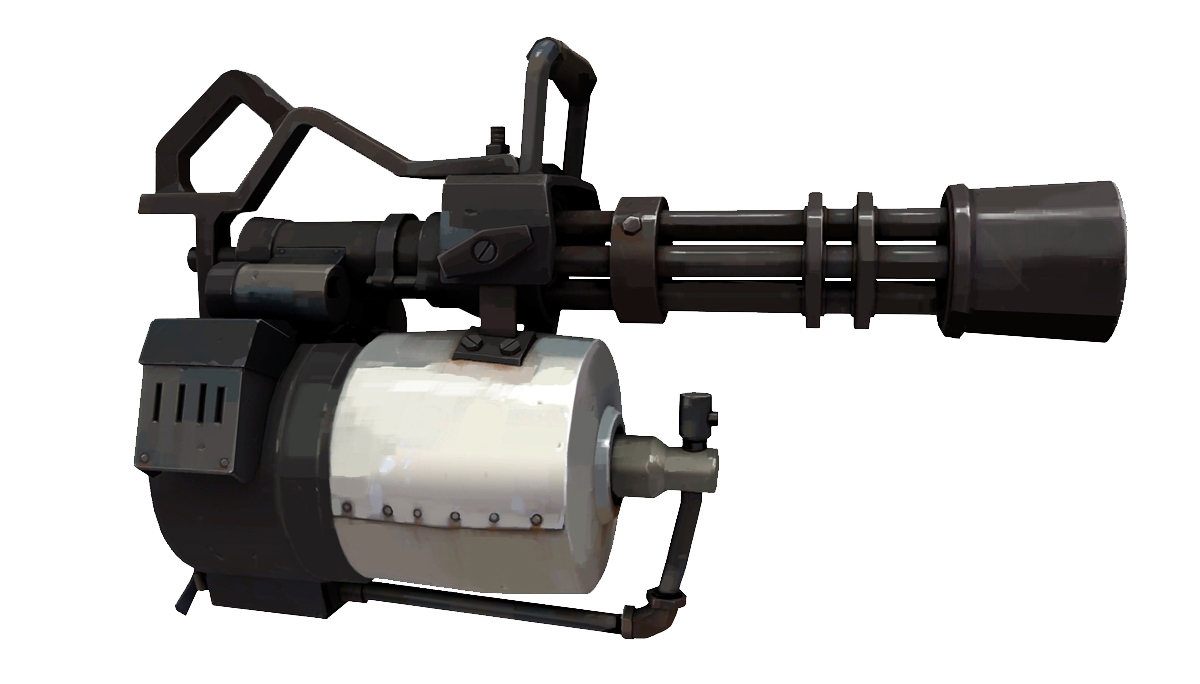
I figured I’d share my progress on the Heavy’s minigun “Sasha” from Team Fortress 2, that I’m currently cranking out for an upcoming convention, that I hope you fellow TF2 fans out there will enjoy.
Minigun_concept1_zpse676cc88.png


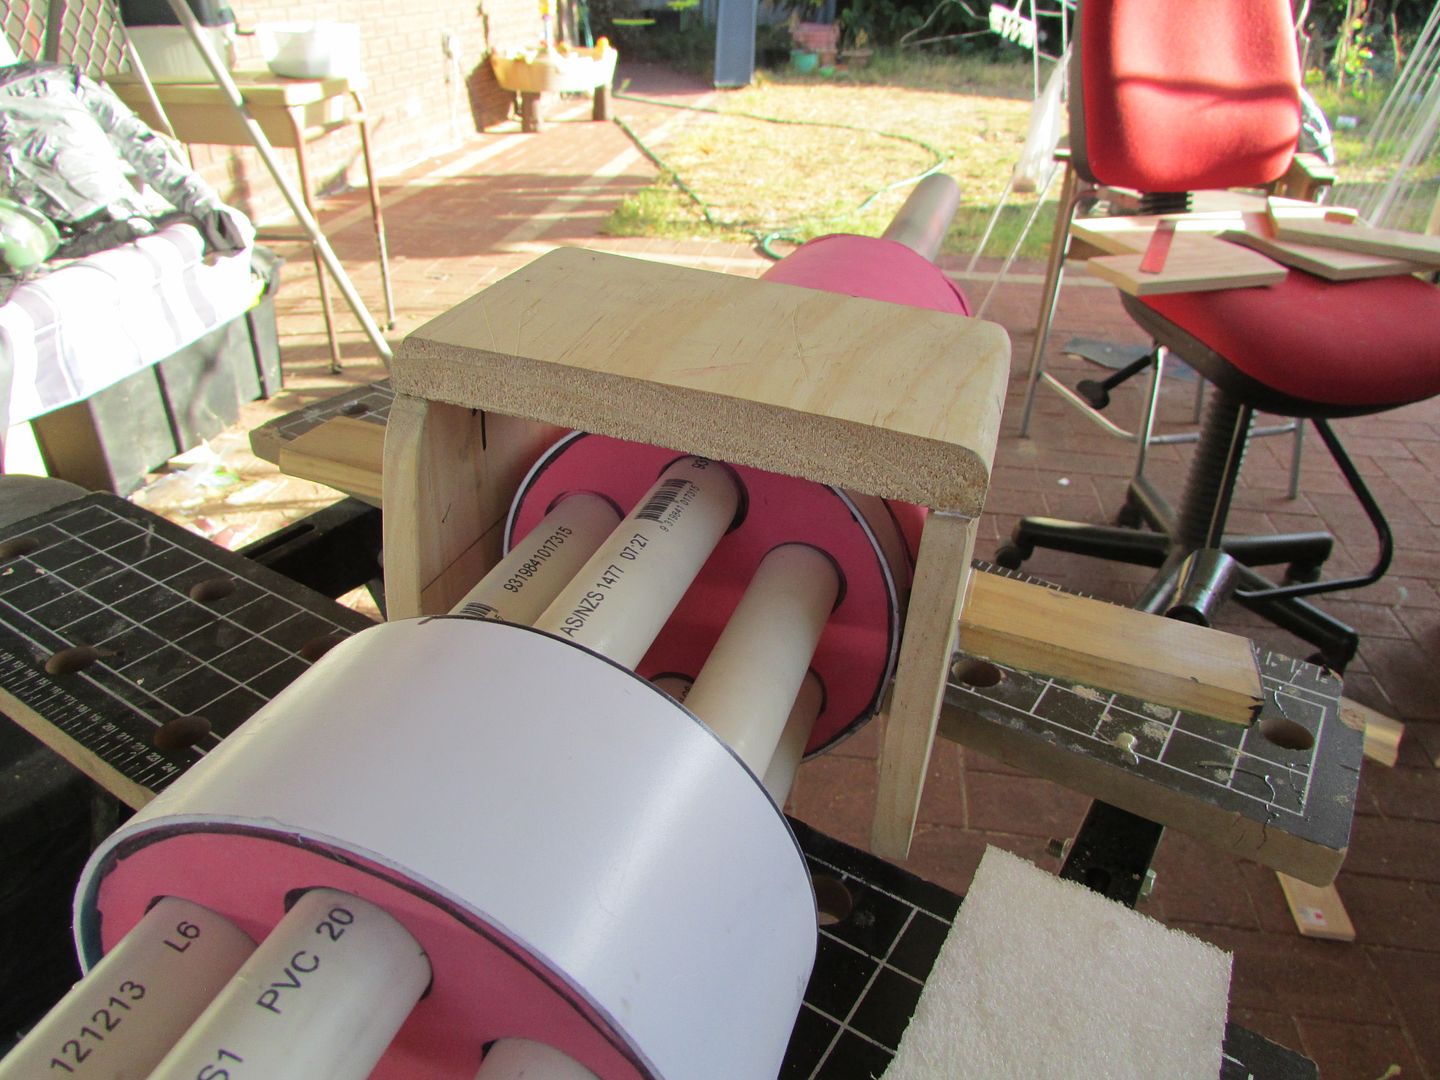
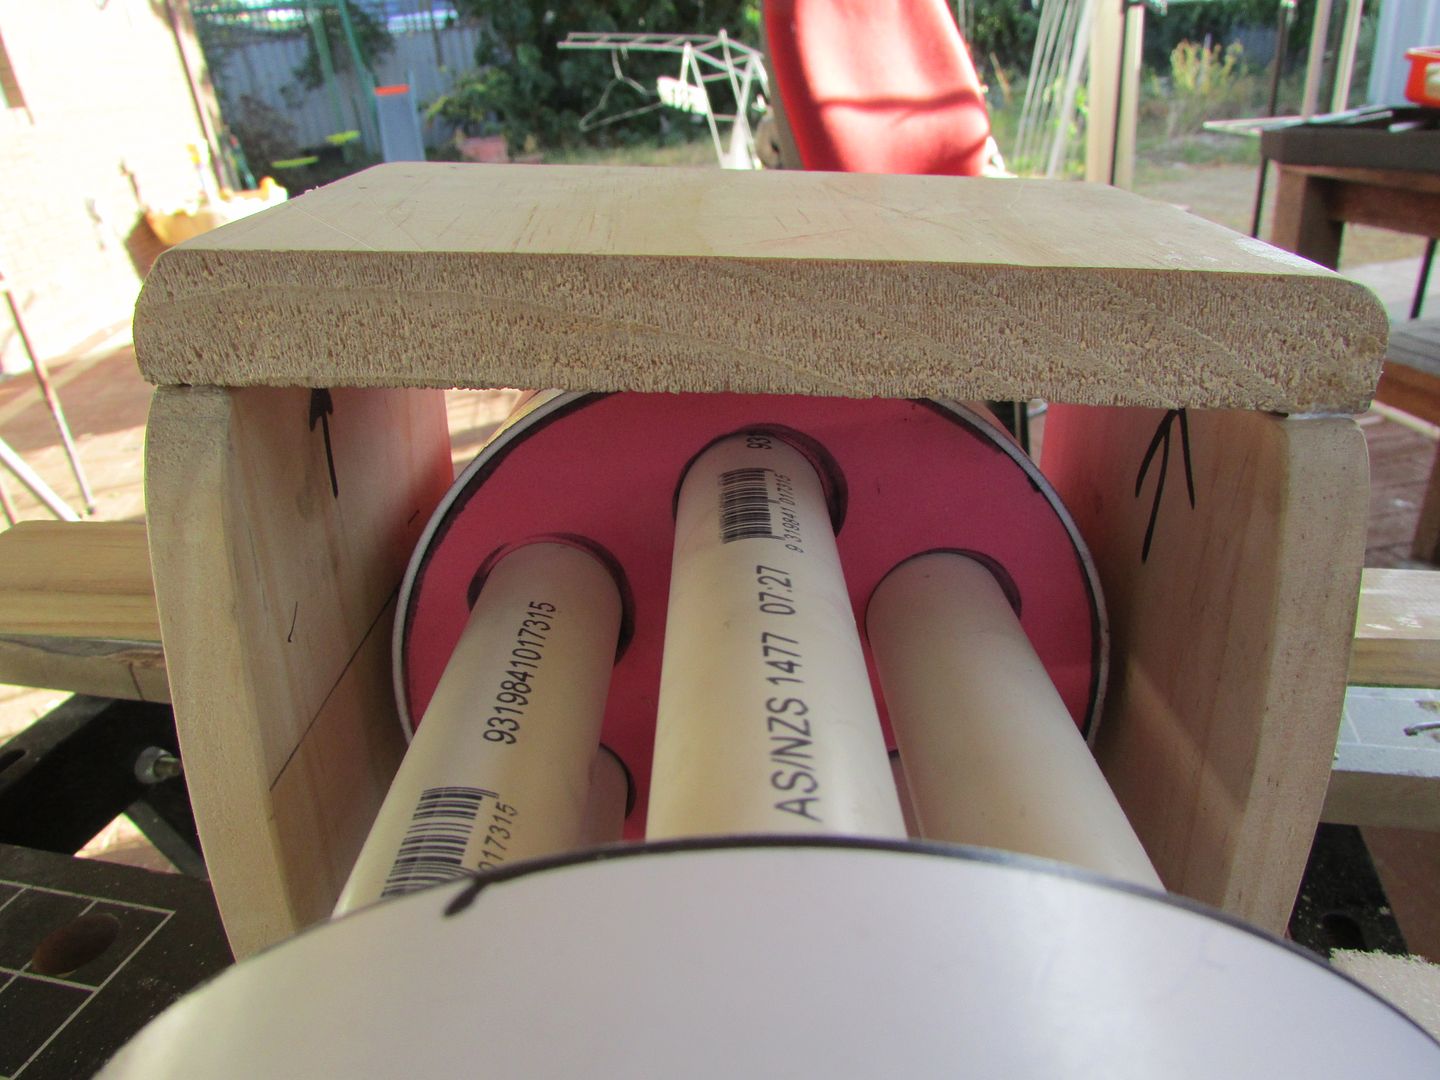
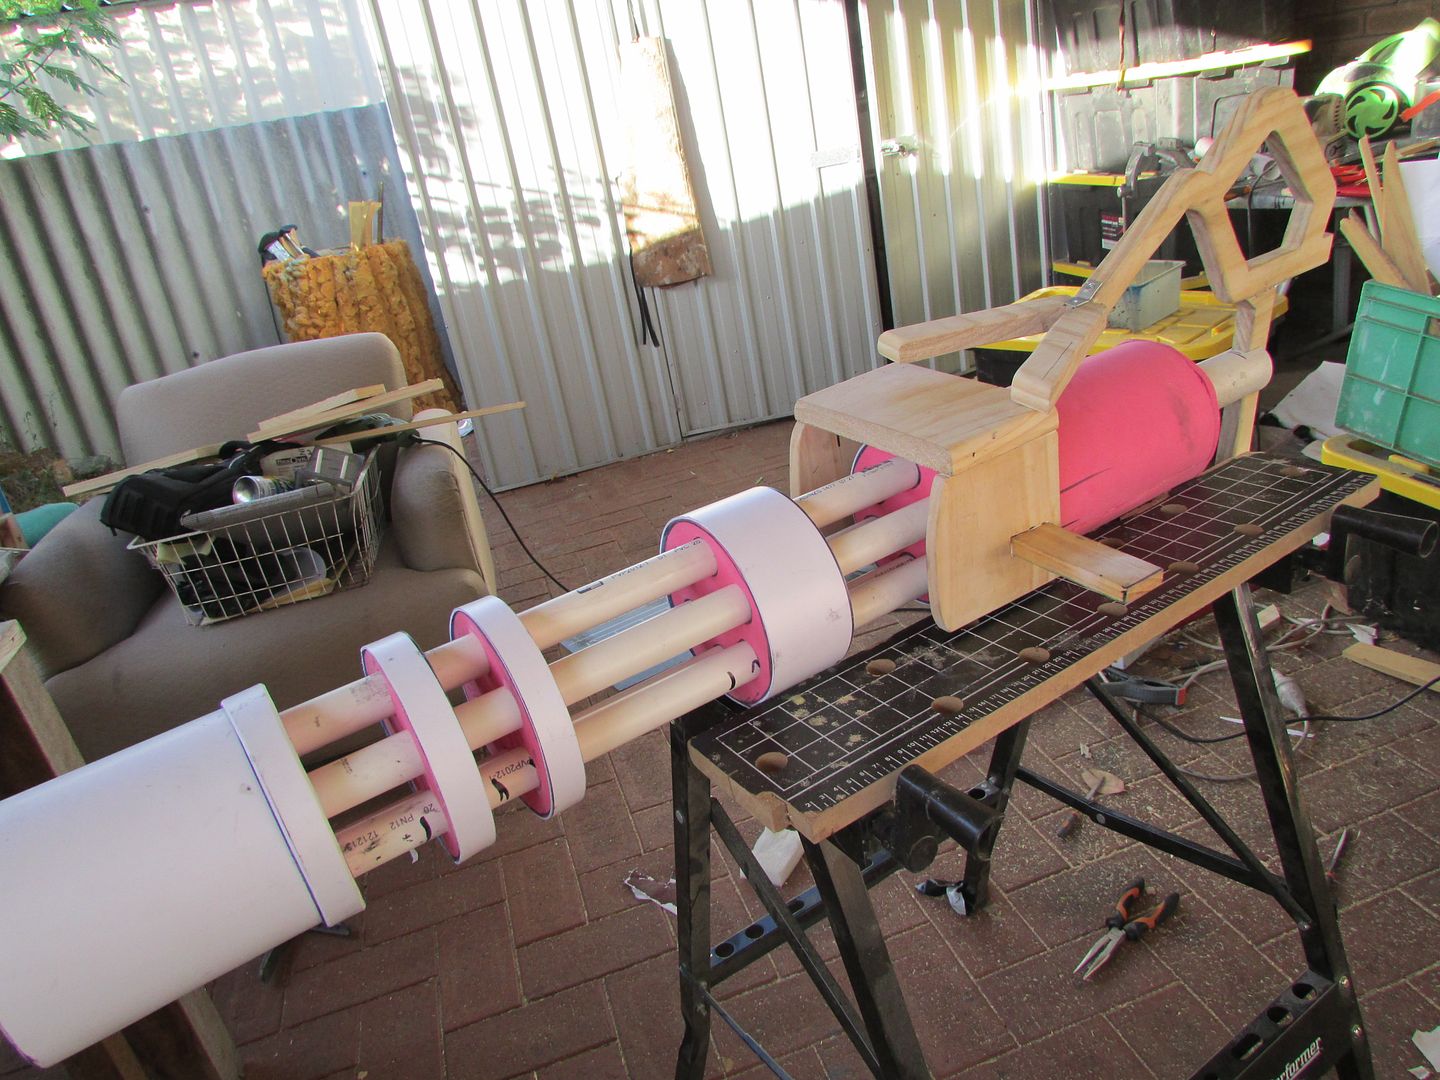
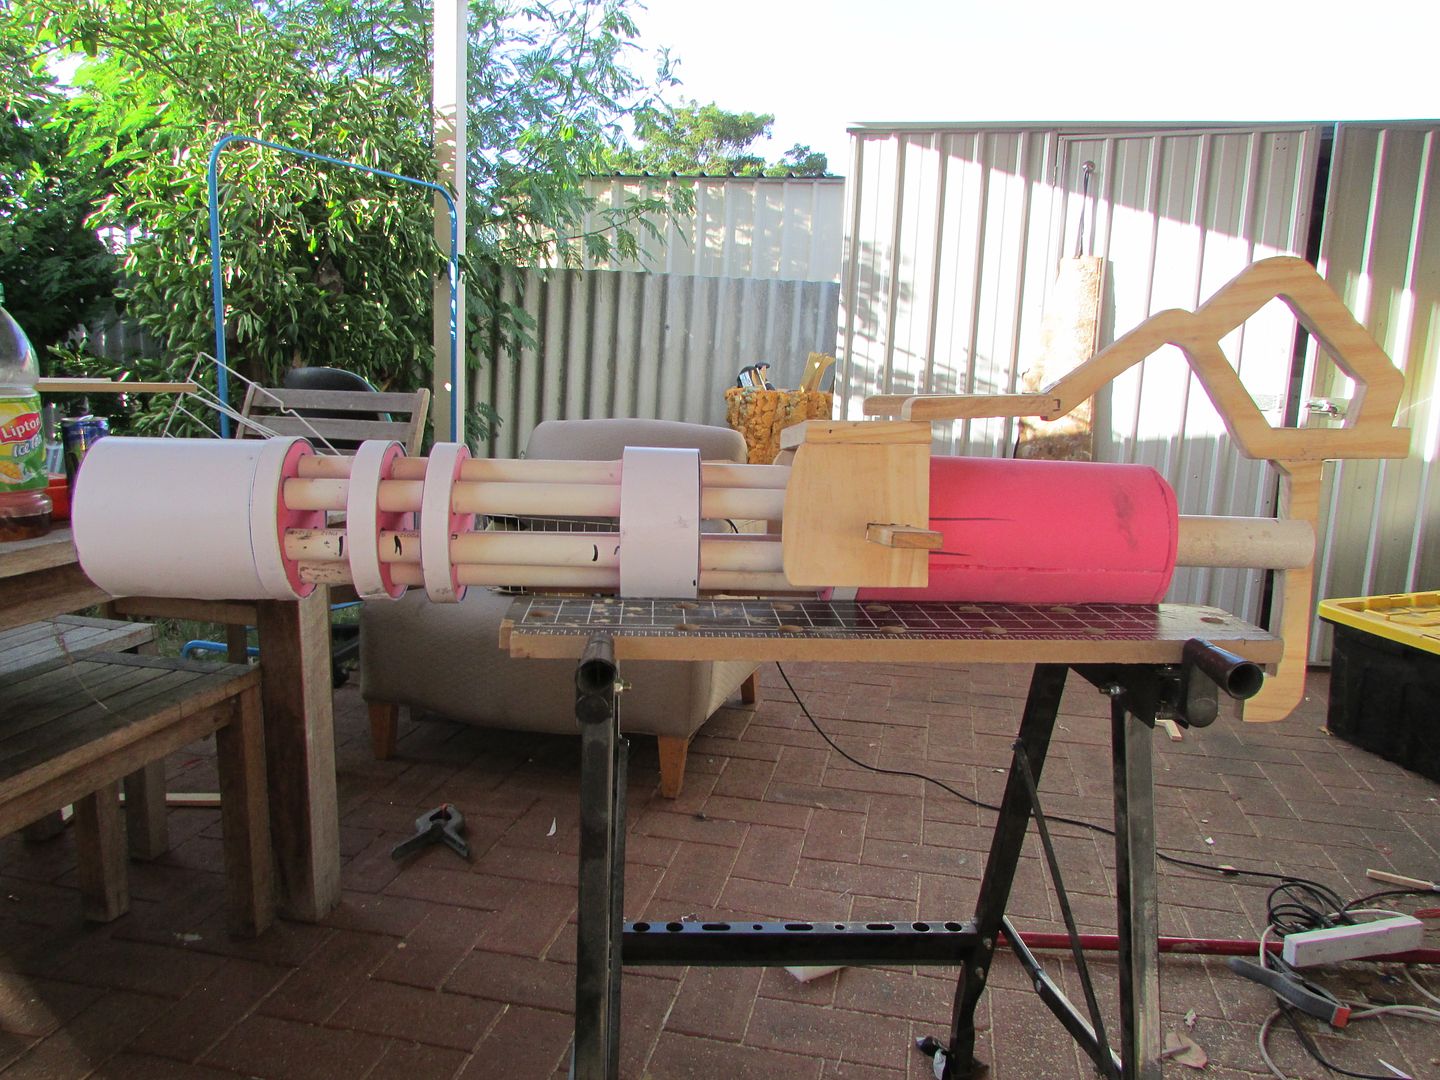
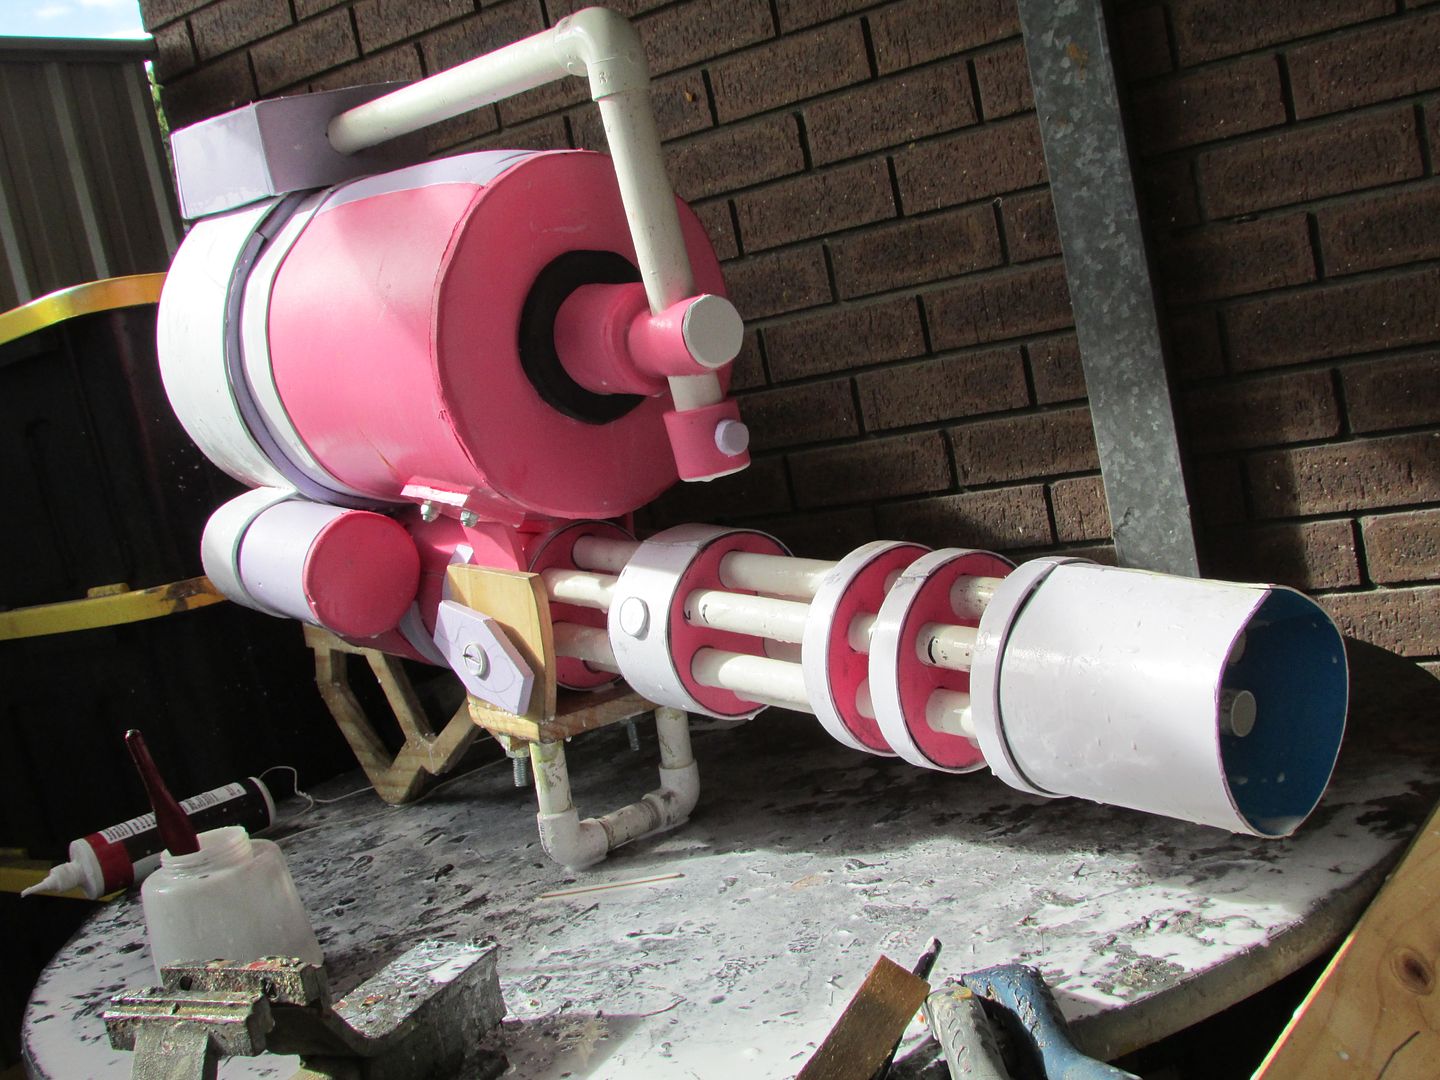
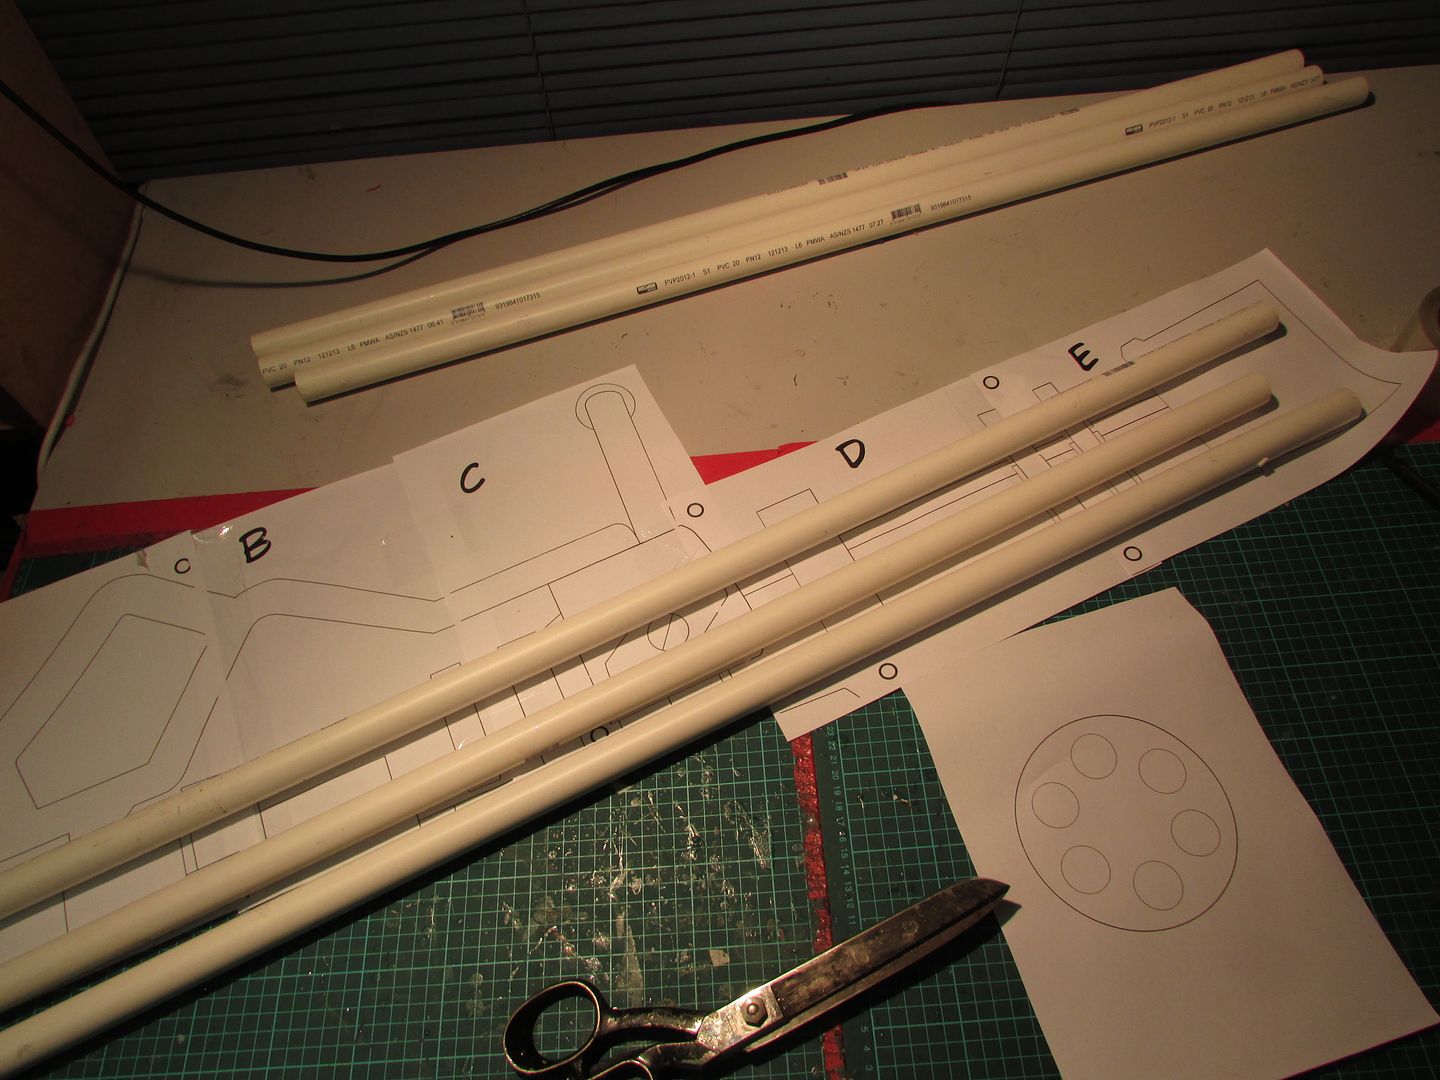
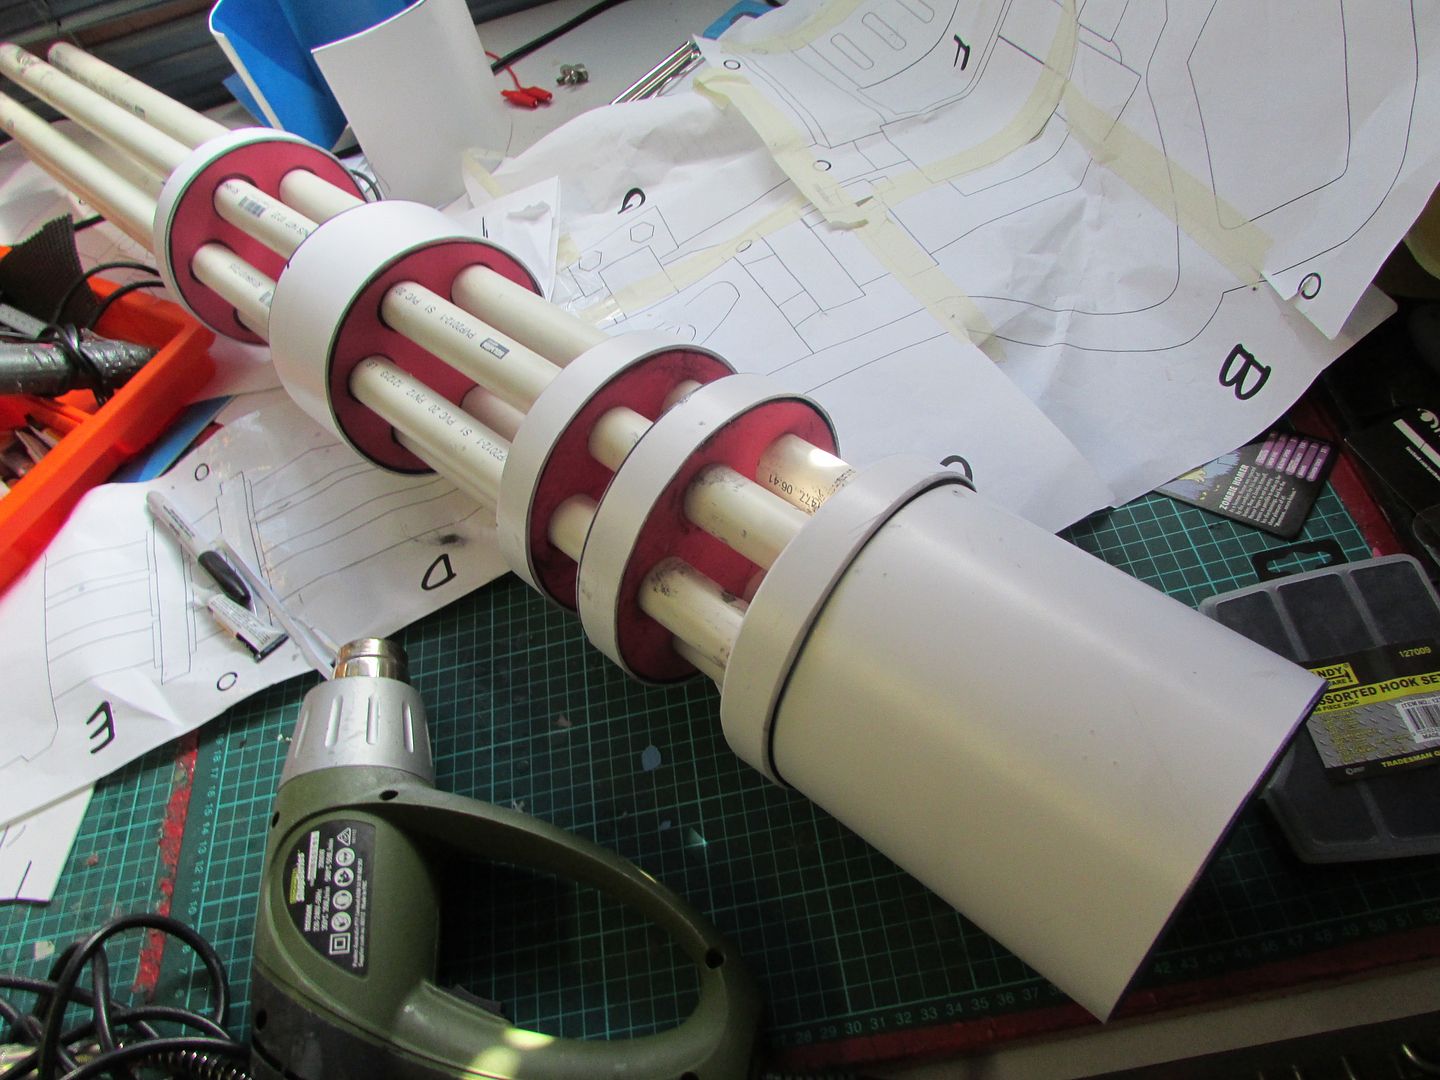
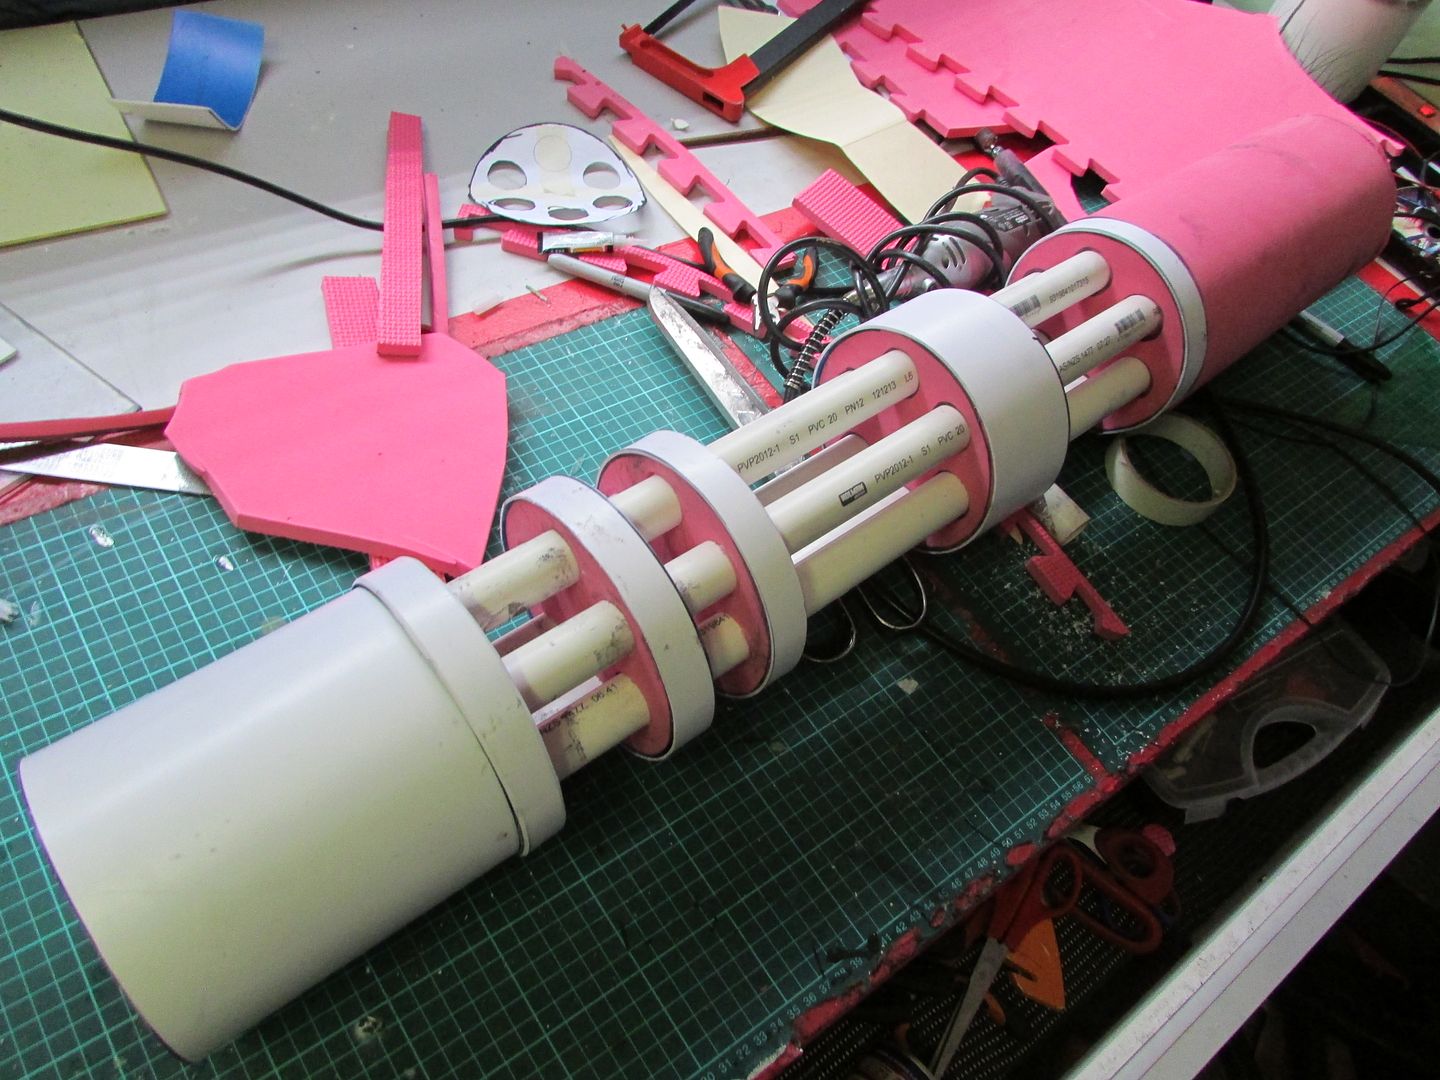
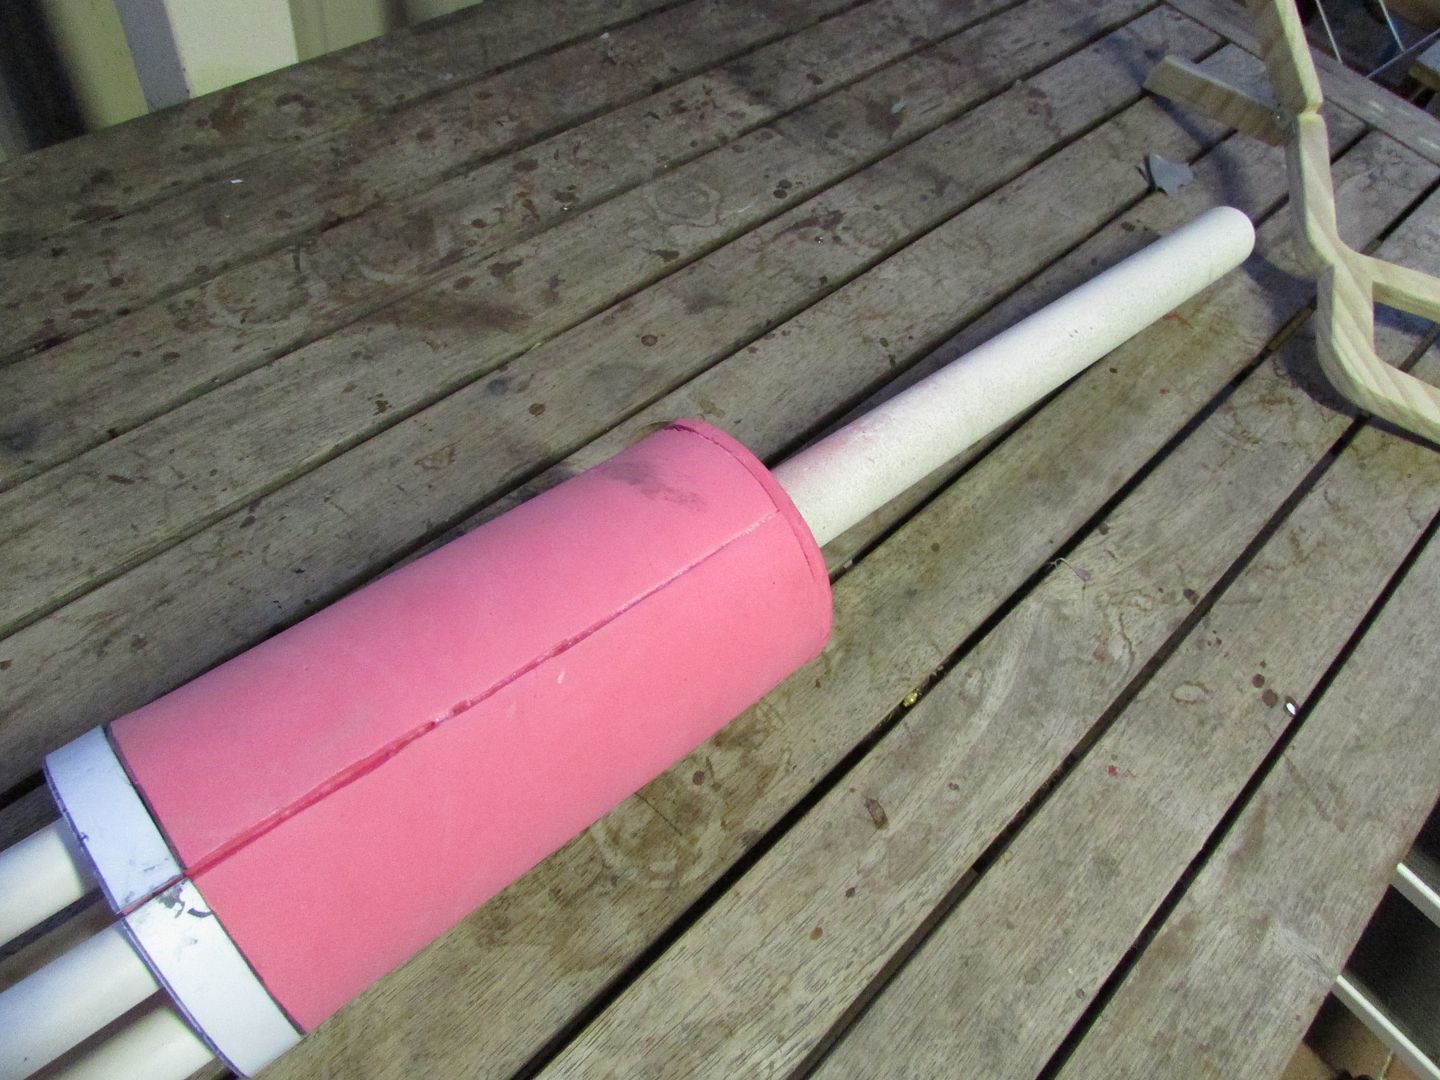
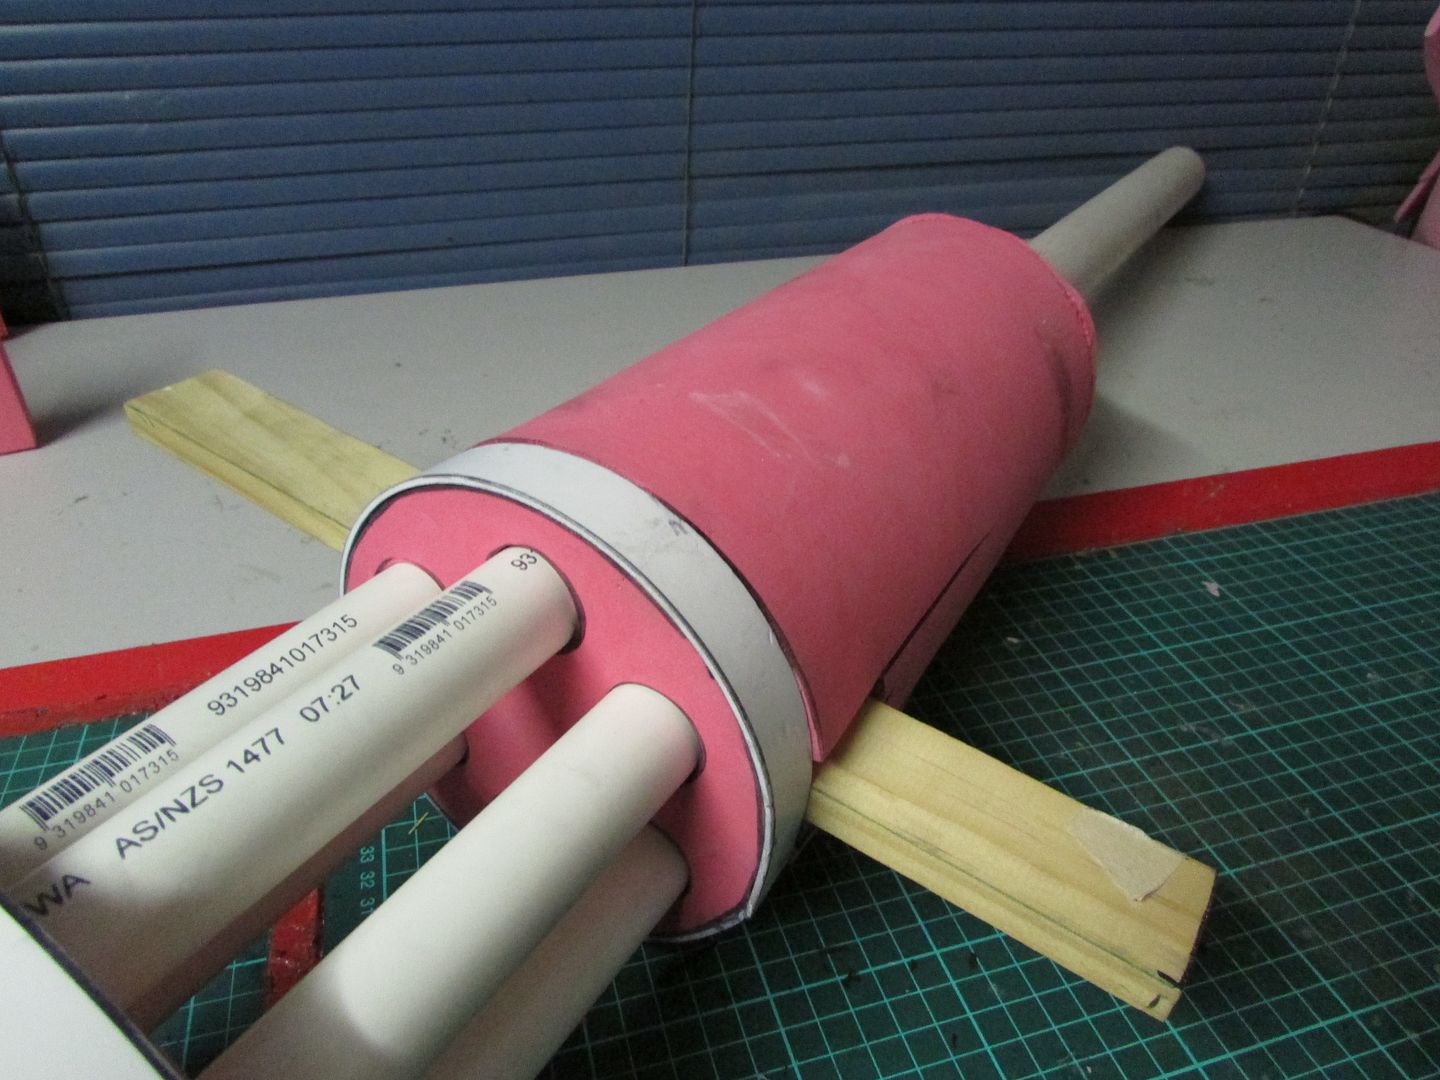
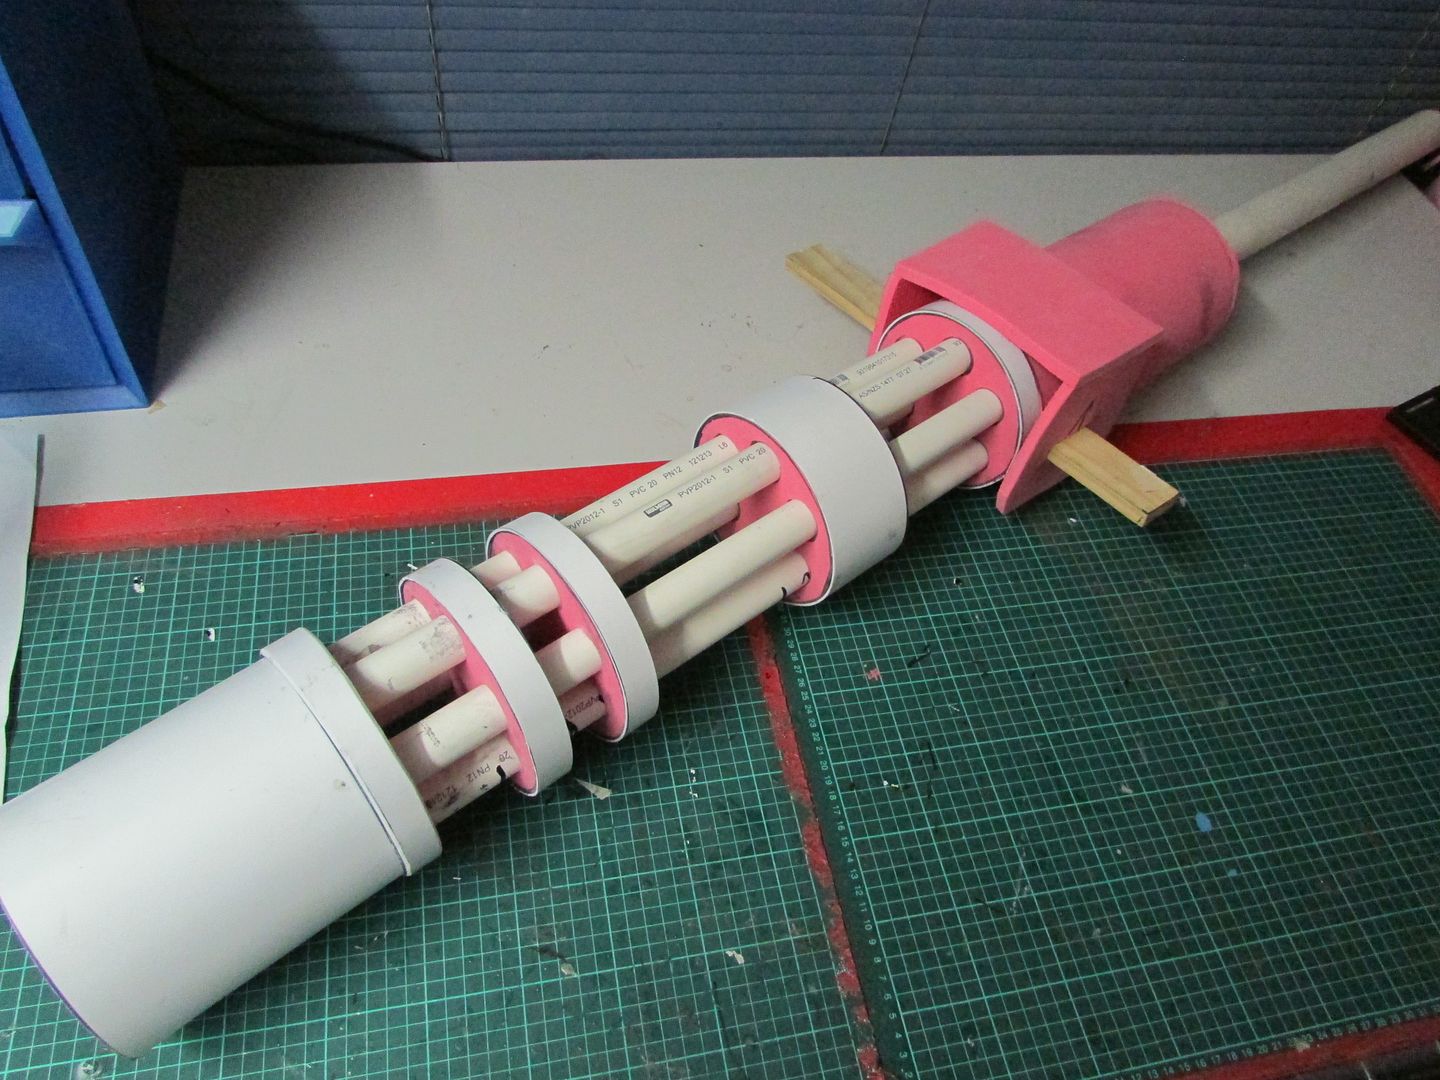
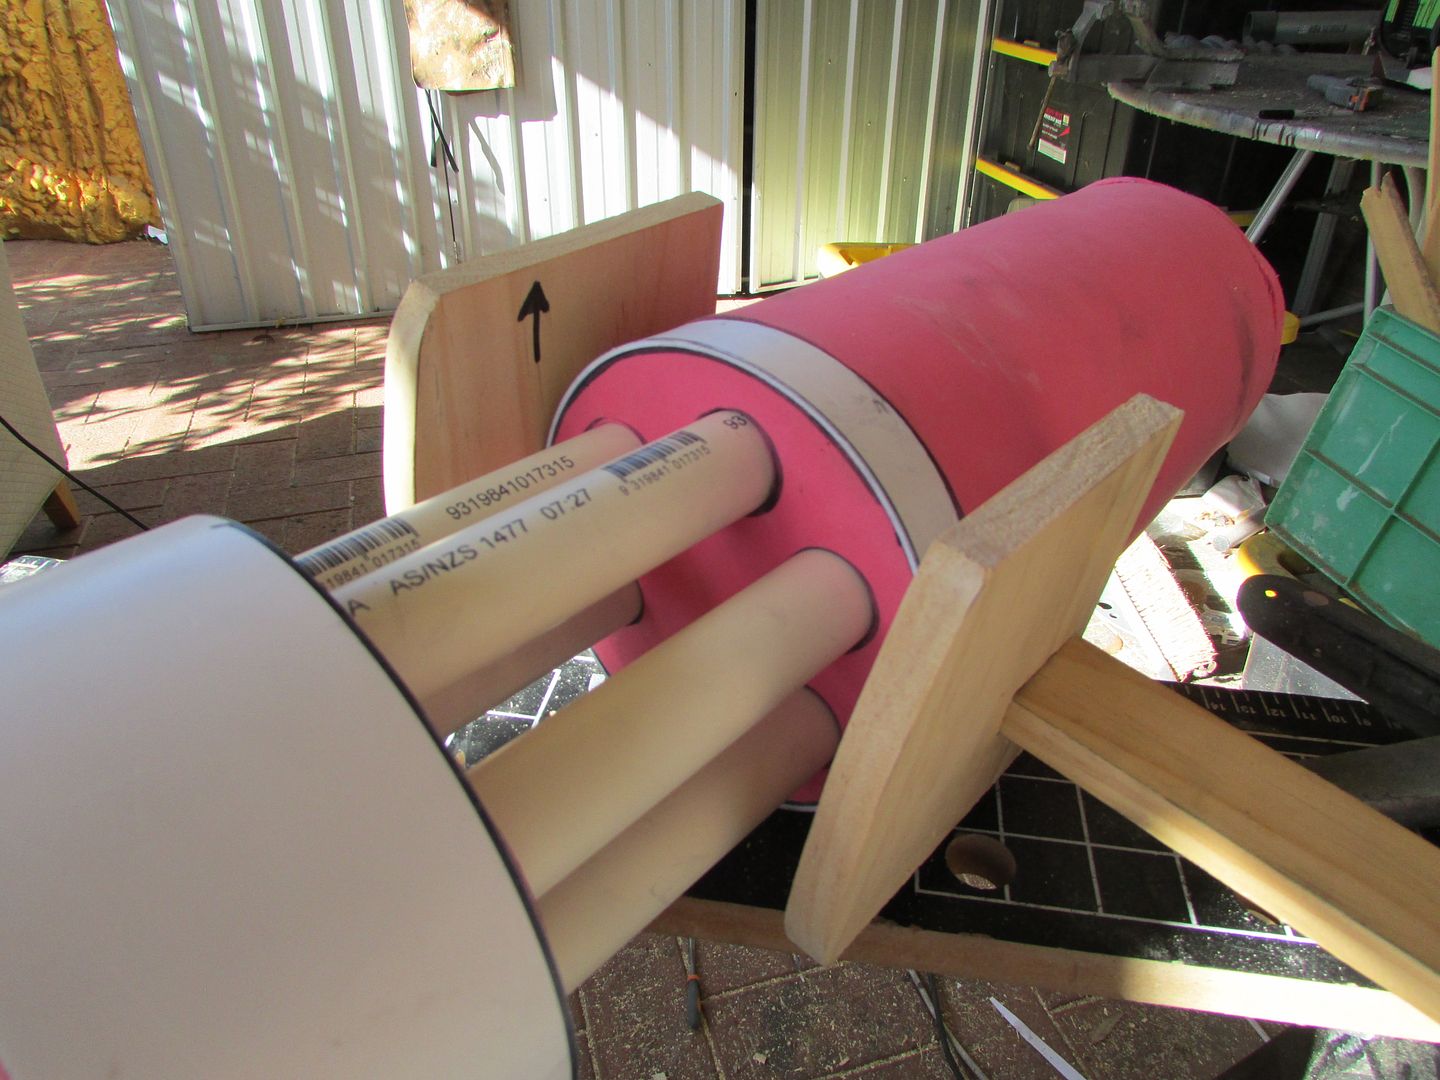
For starters in terms of scaling I’ve chosen to base all dimensions of the gun relative off a 25mm diameter PVC pipe that I’m using for the gun barrels and scaled my vector blueprints of the gun to match suit.

IMG_2243_zps31d16a1f.jpg


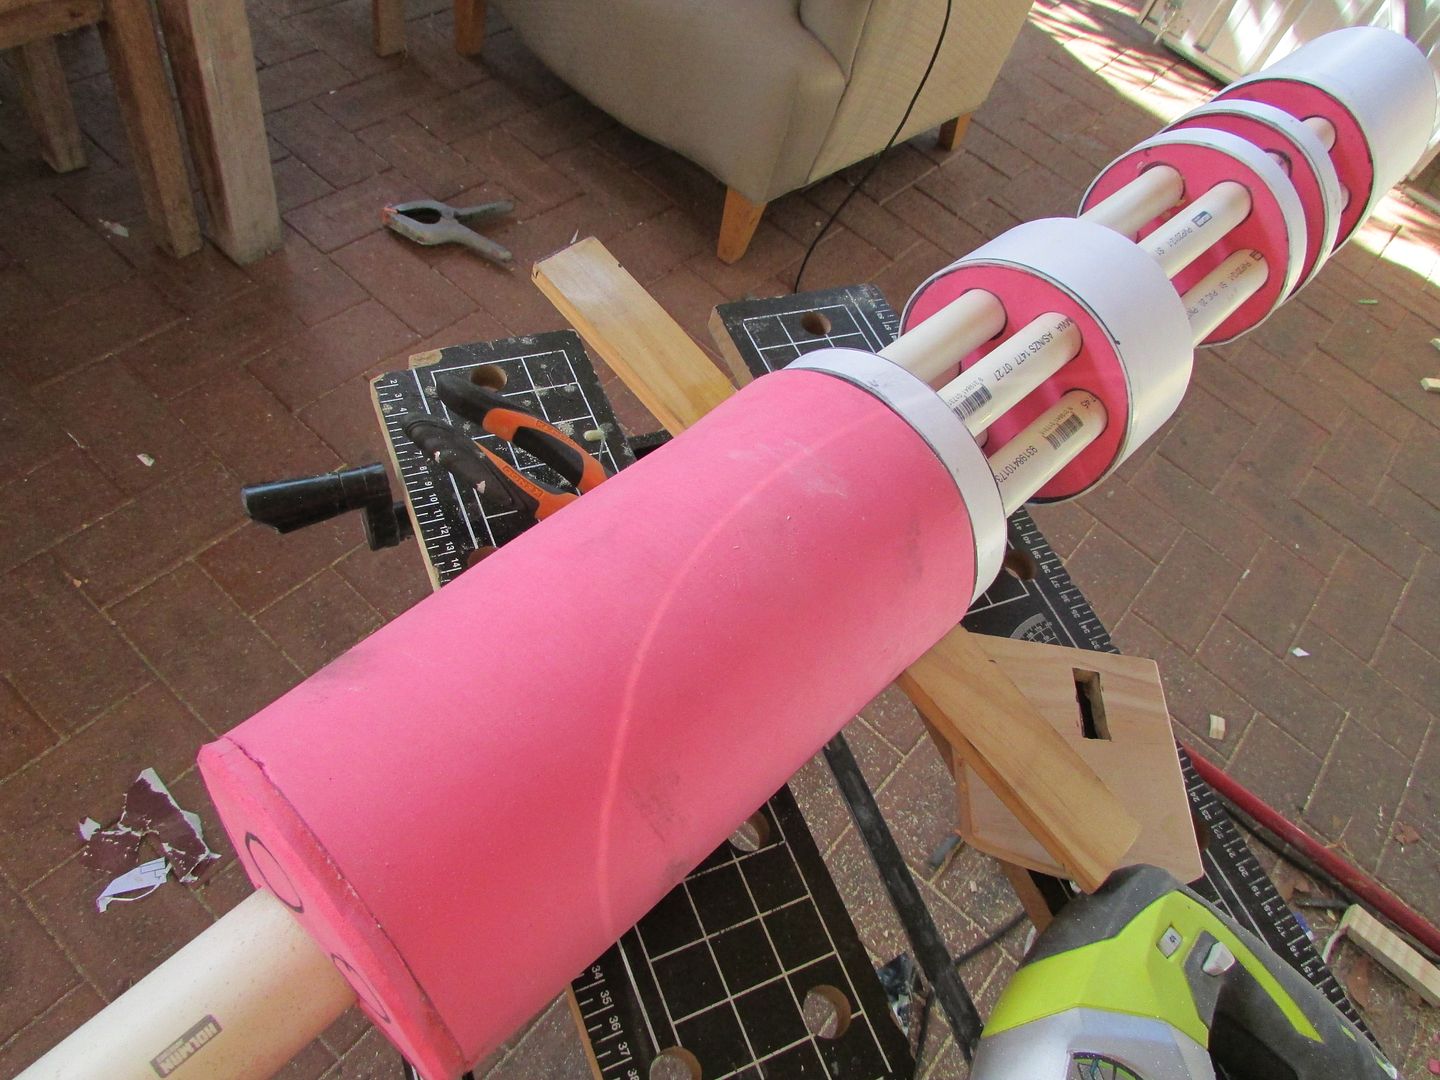
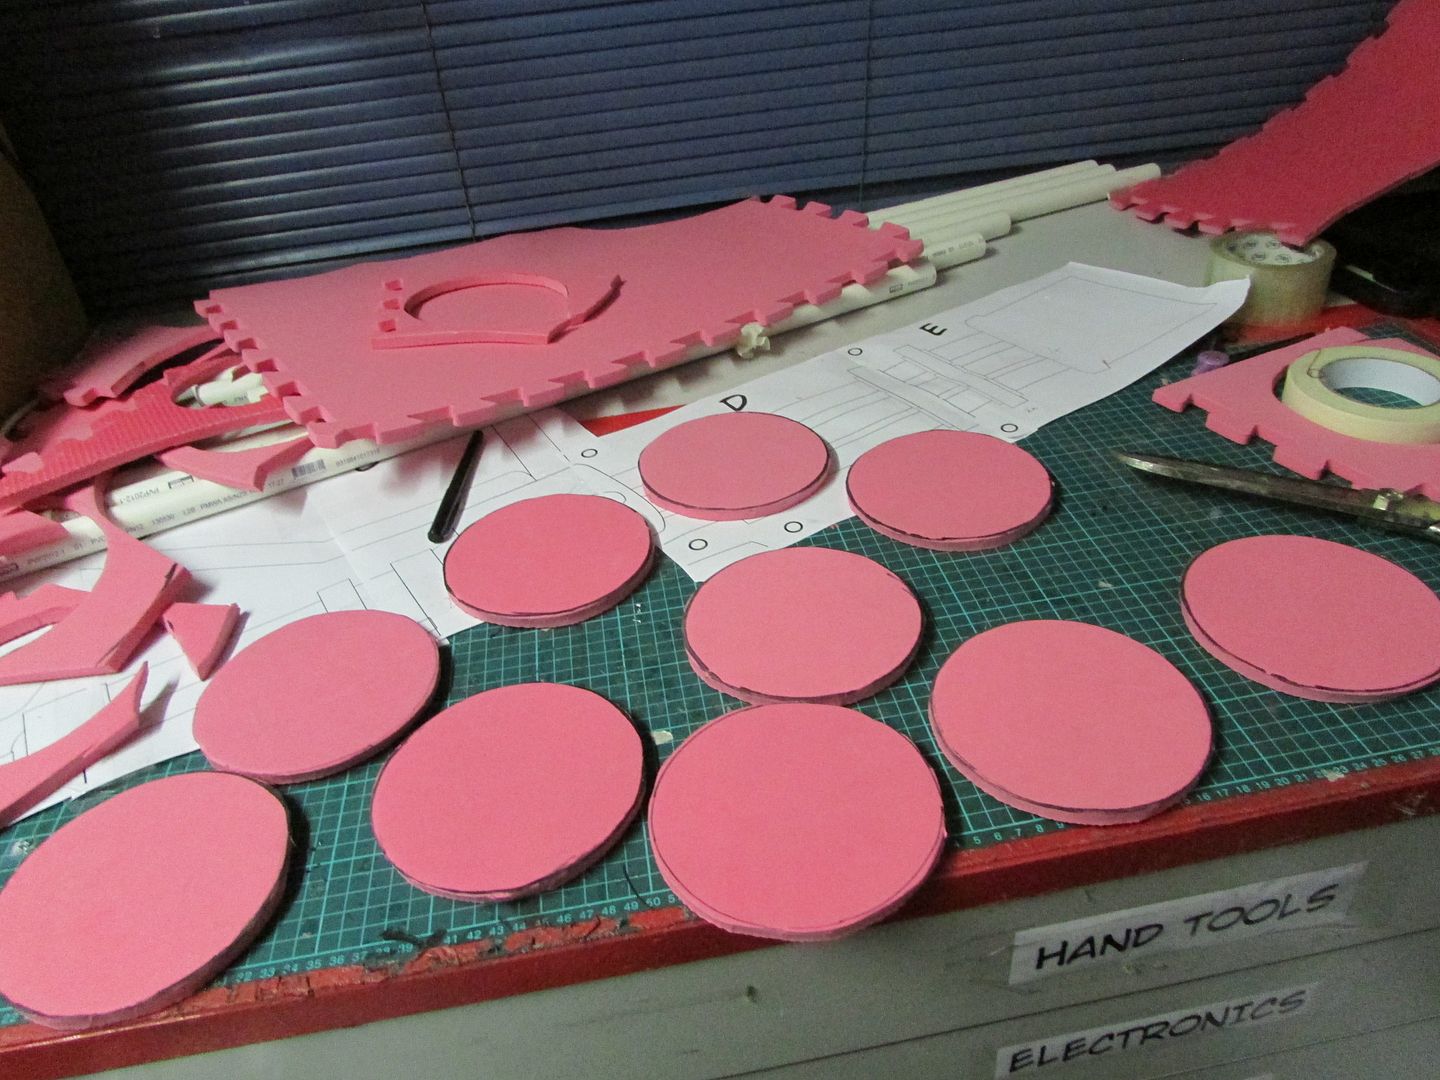
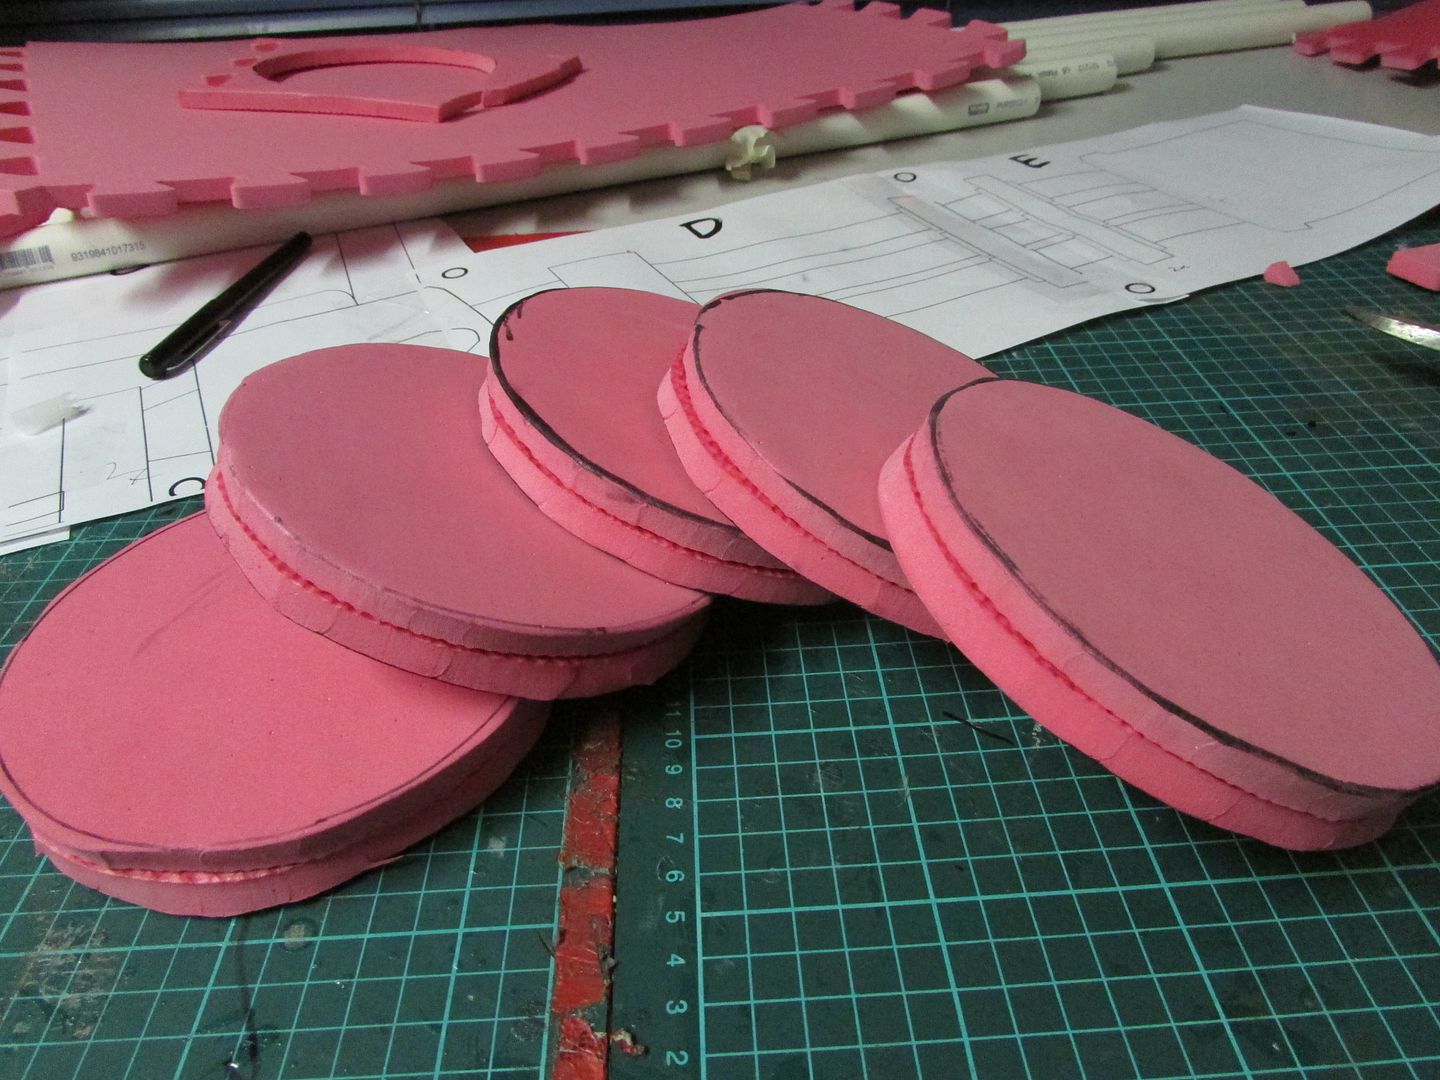
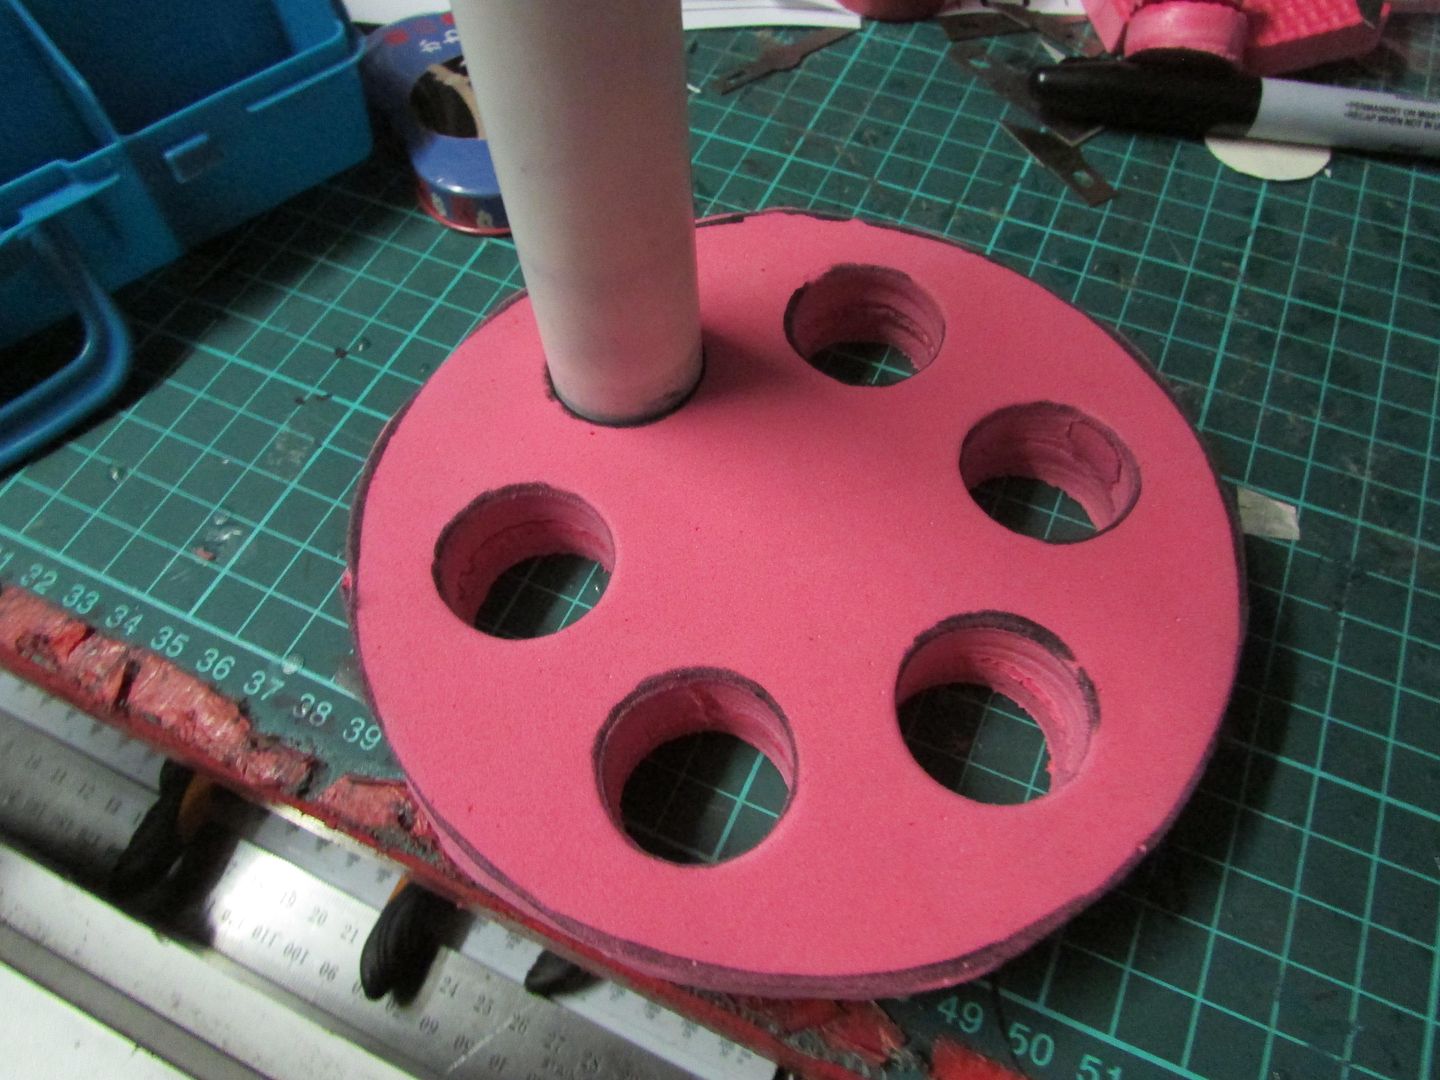
For the barrel clamps, to get the thickness I wanted I decided to superglue some 130mm diamter EVA craft foam circles that I cut out of some foam gym mats back to back. Supergluing in this manner hides the less desirable pattern of the material whilst leaving the nicer smooth side for all to see.

IMG_2245_zpsb3903ab6.jpg


IMG_2249_zps384e02a0.jpg


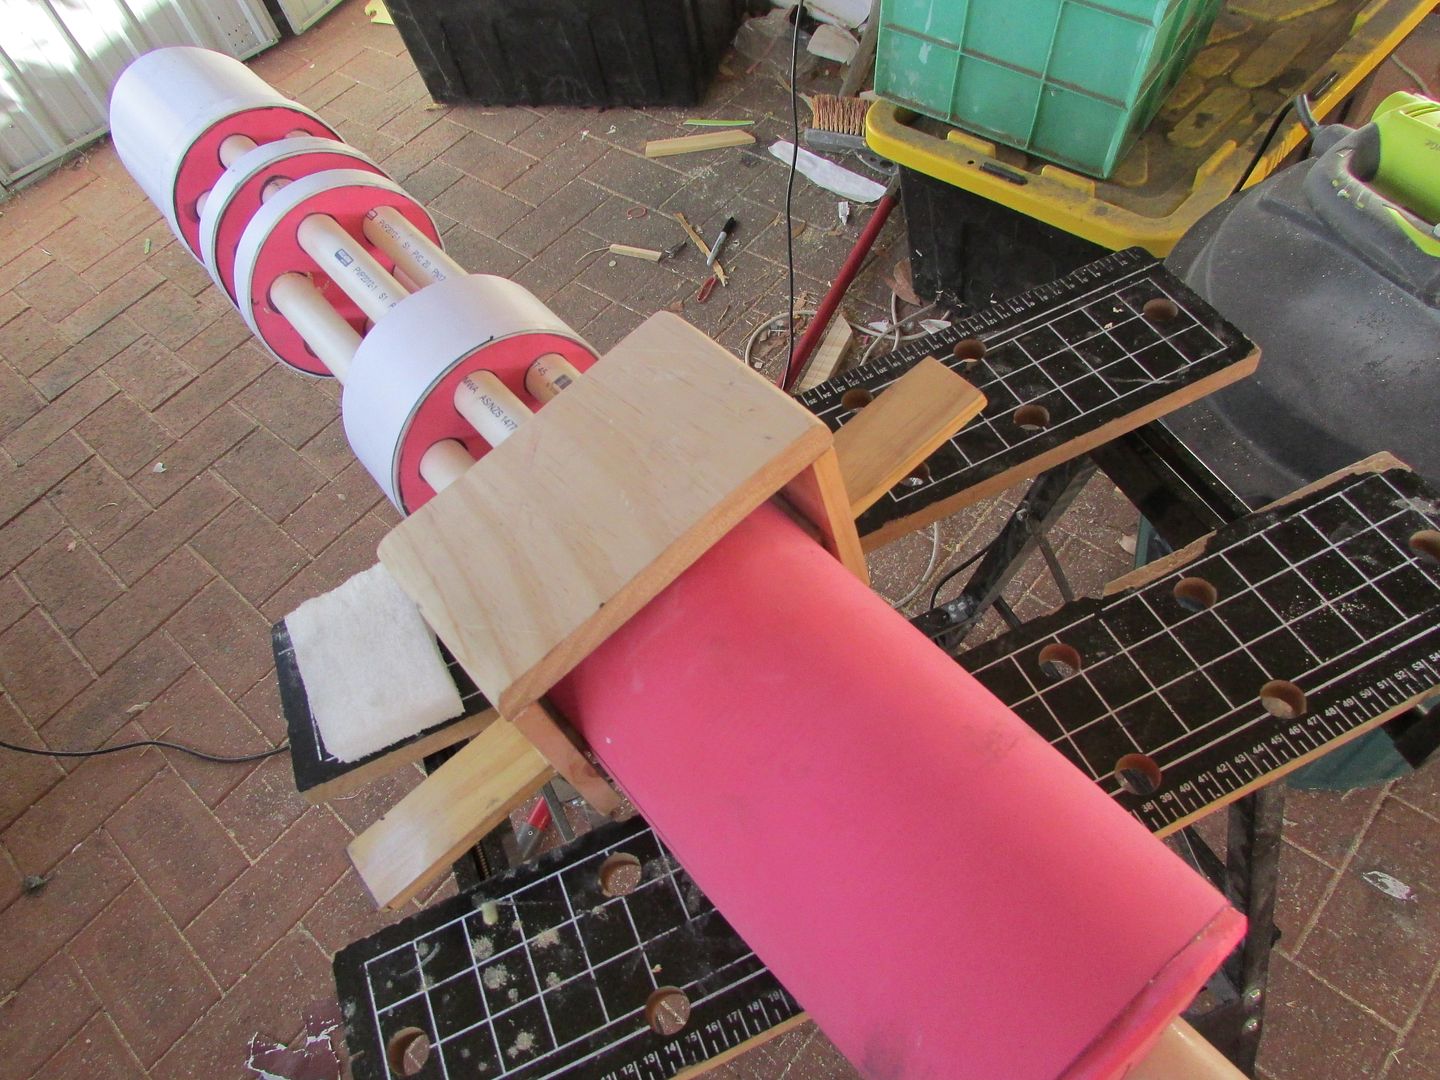
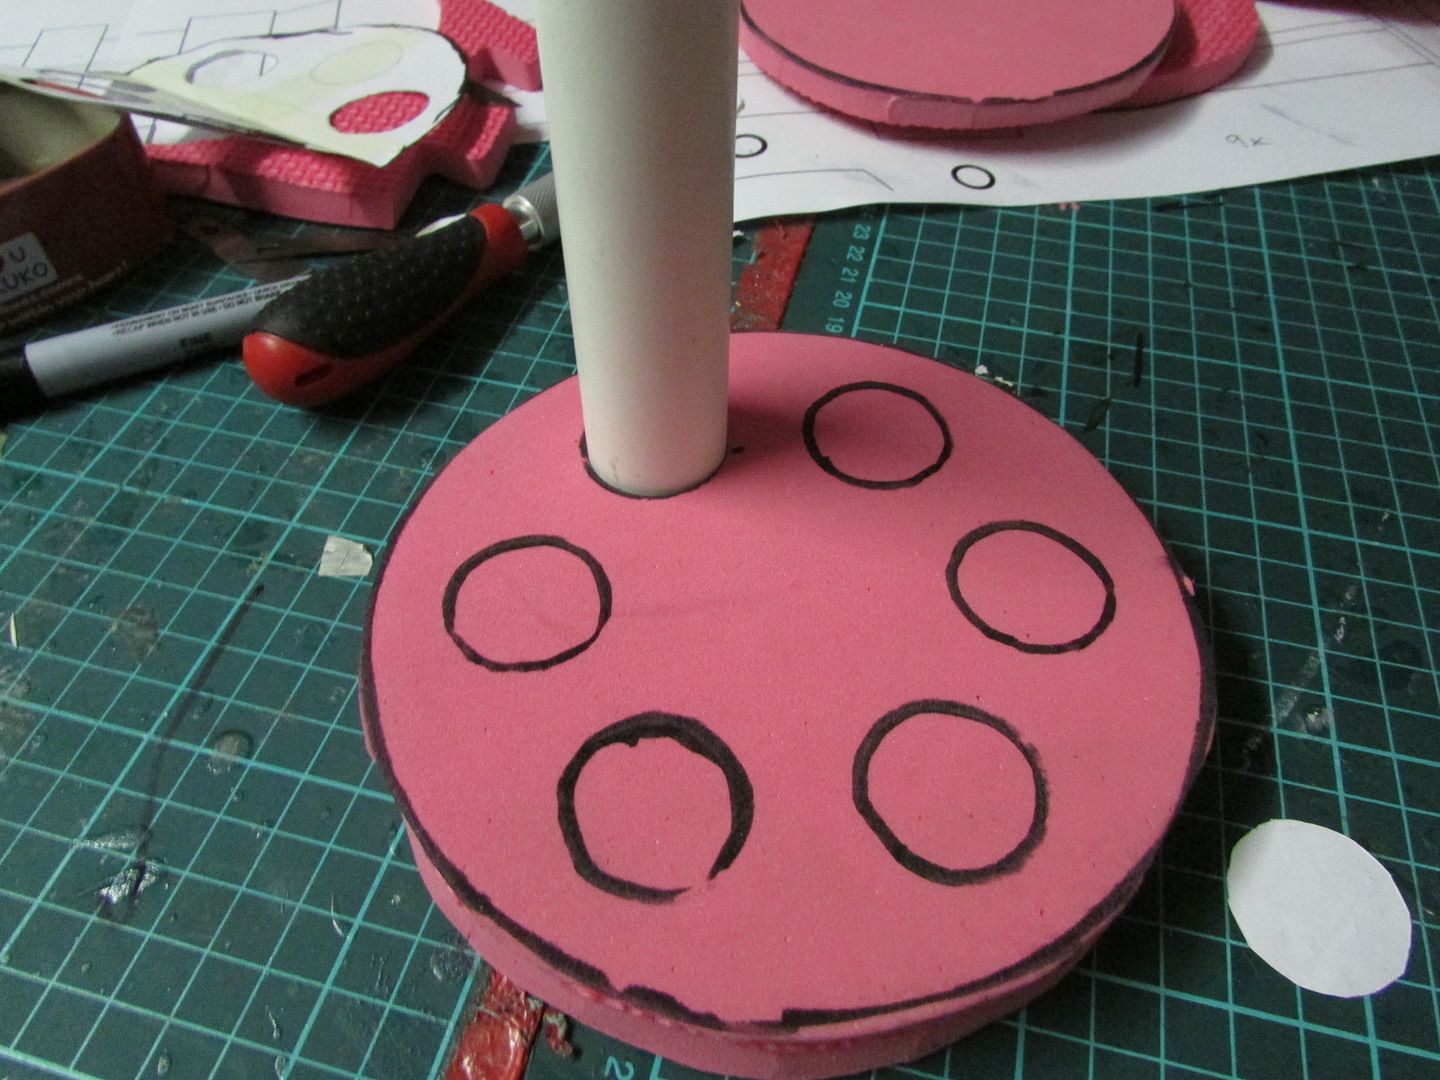
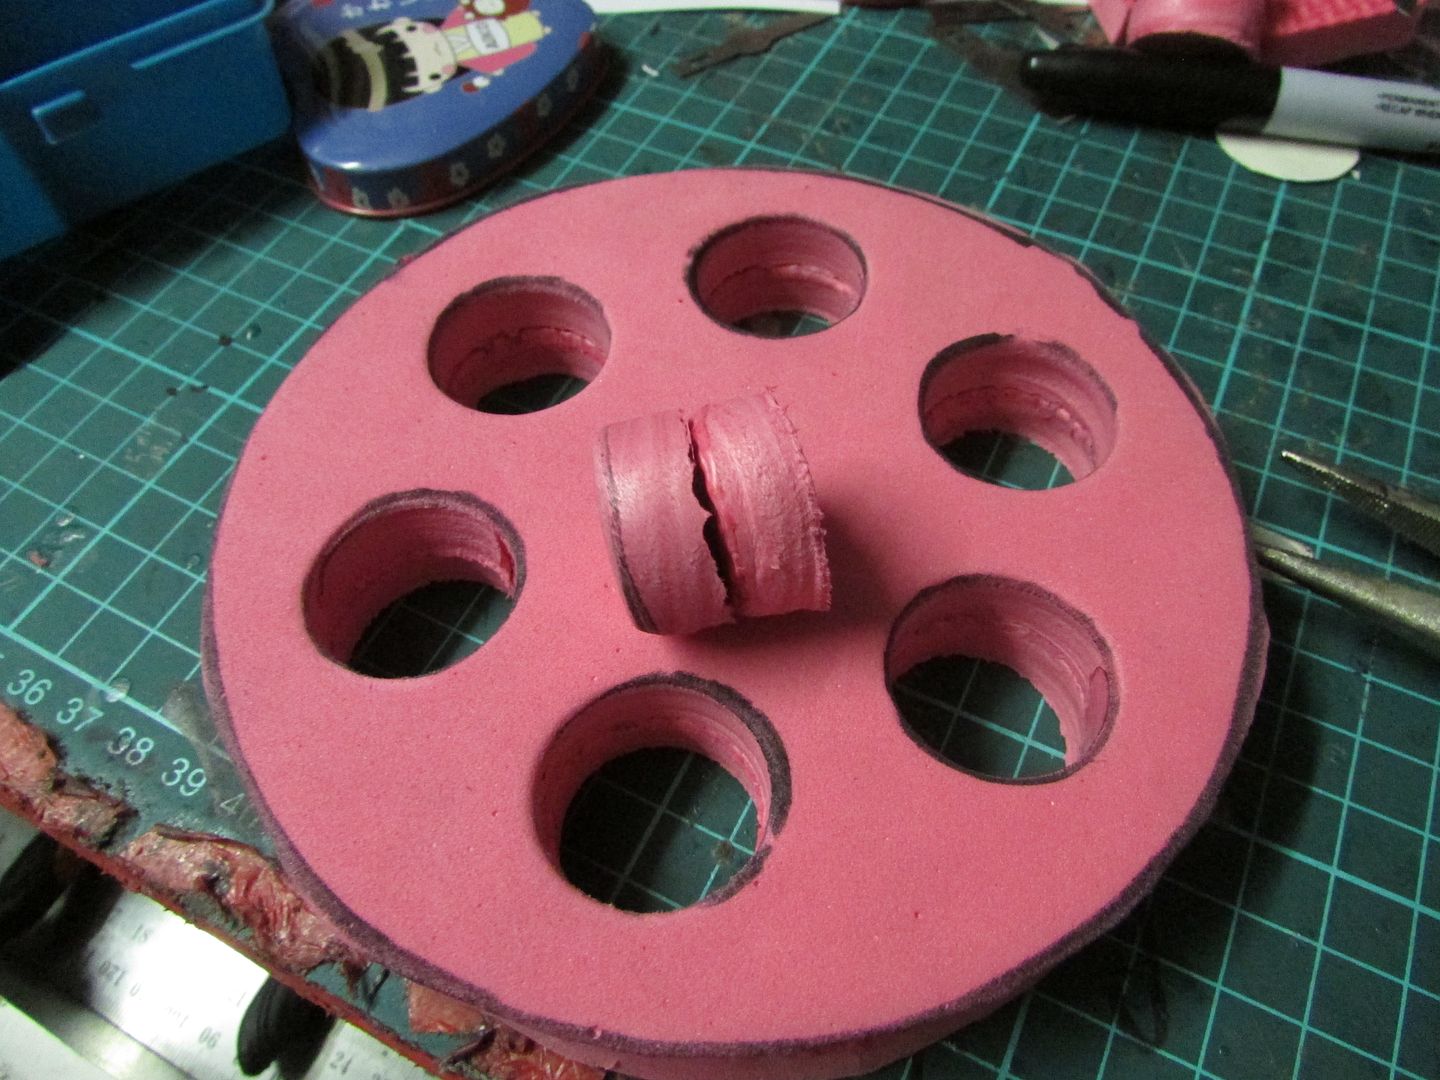
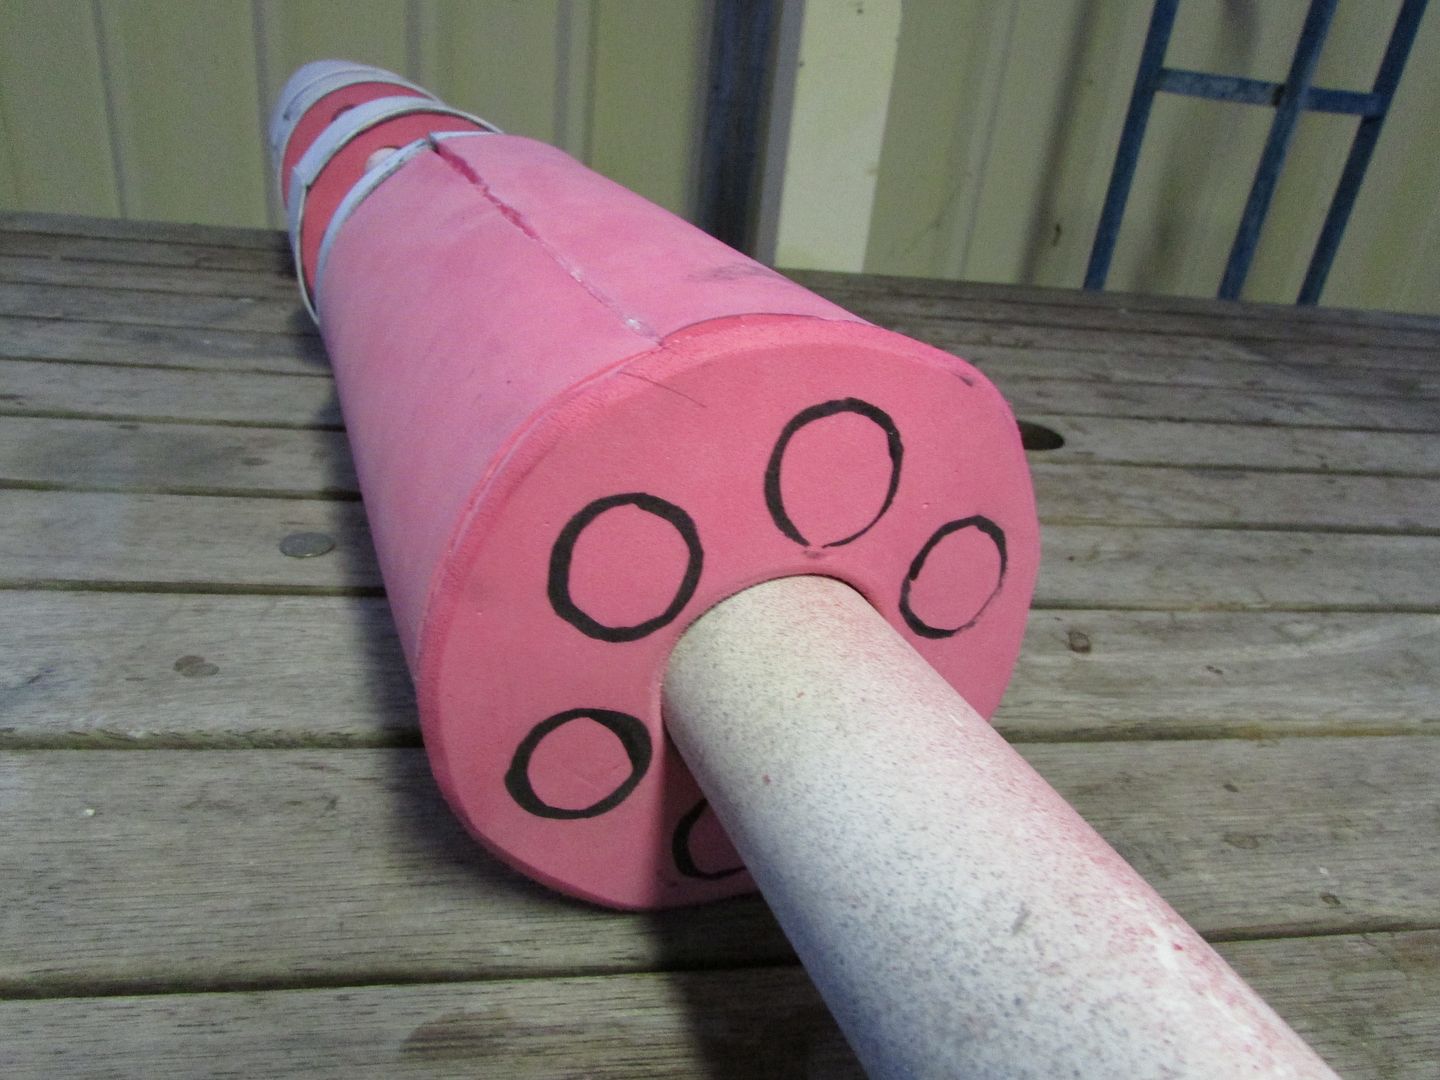
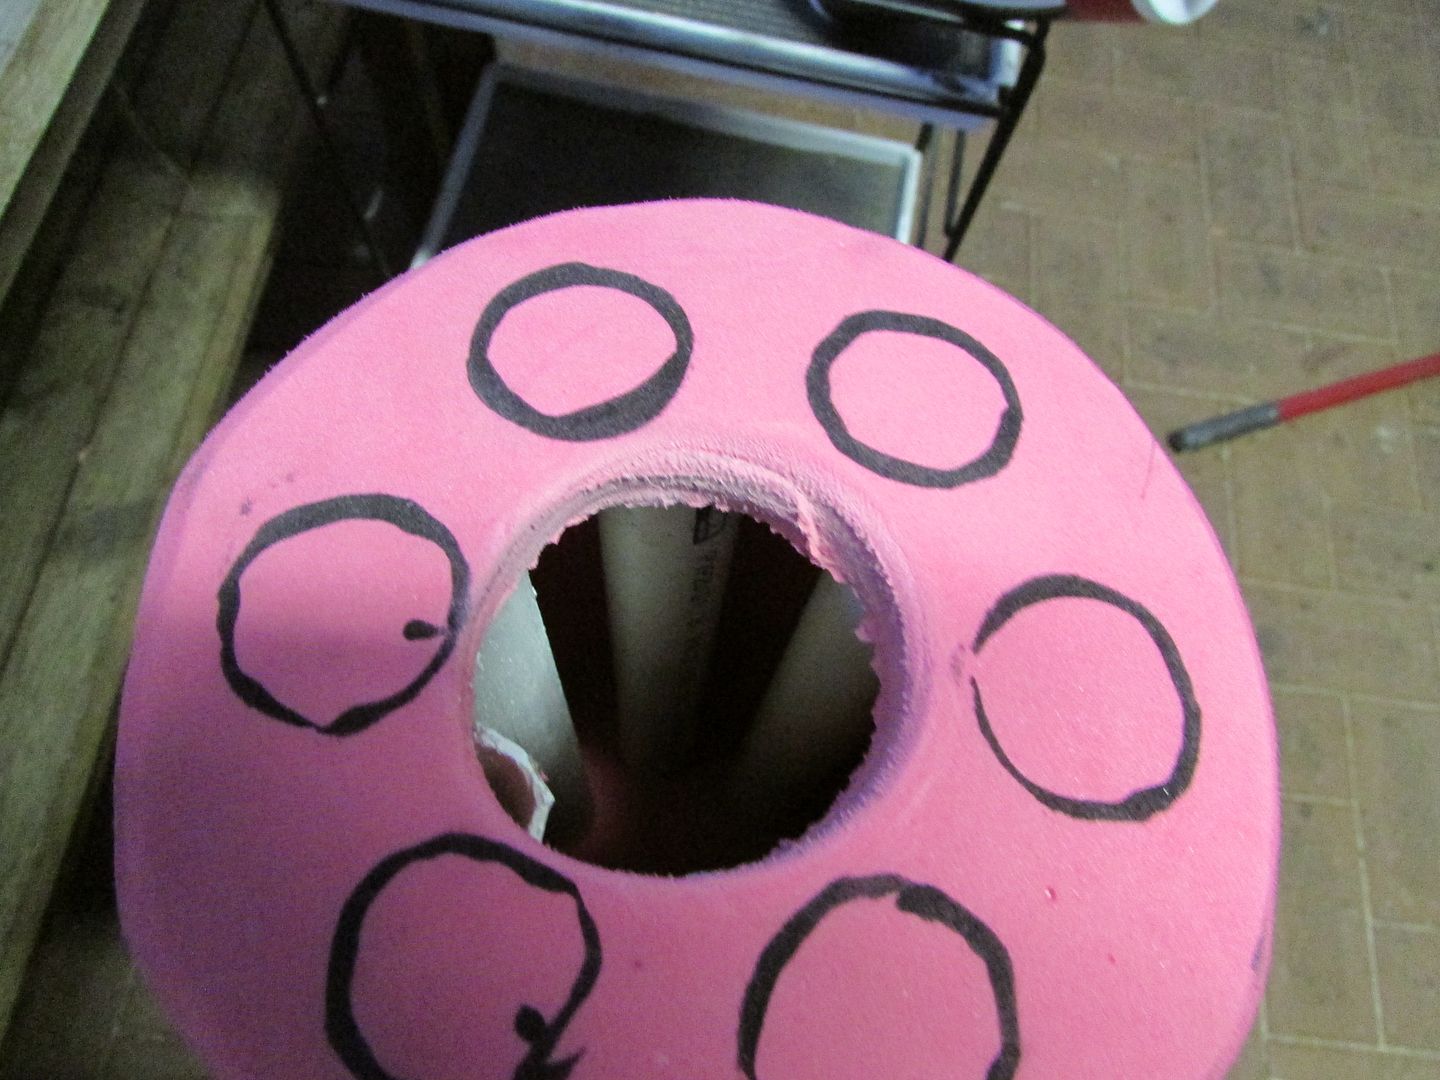
For the holes that the barrels are meant to sit in I plotted out the locations of where each one ought to sit and ended up cutting out the circular holes using the PVC pipe itself like a cookie cutter, using twisting motions making a kind of EVA foam core sample.

IMG_2251_zpsd0e4d1c9.jpg


IMG_2253_zps0afba44e.jpg


IMG_2254_zps001cf2e5.jpg


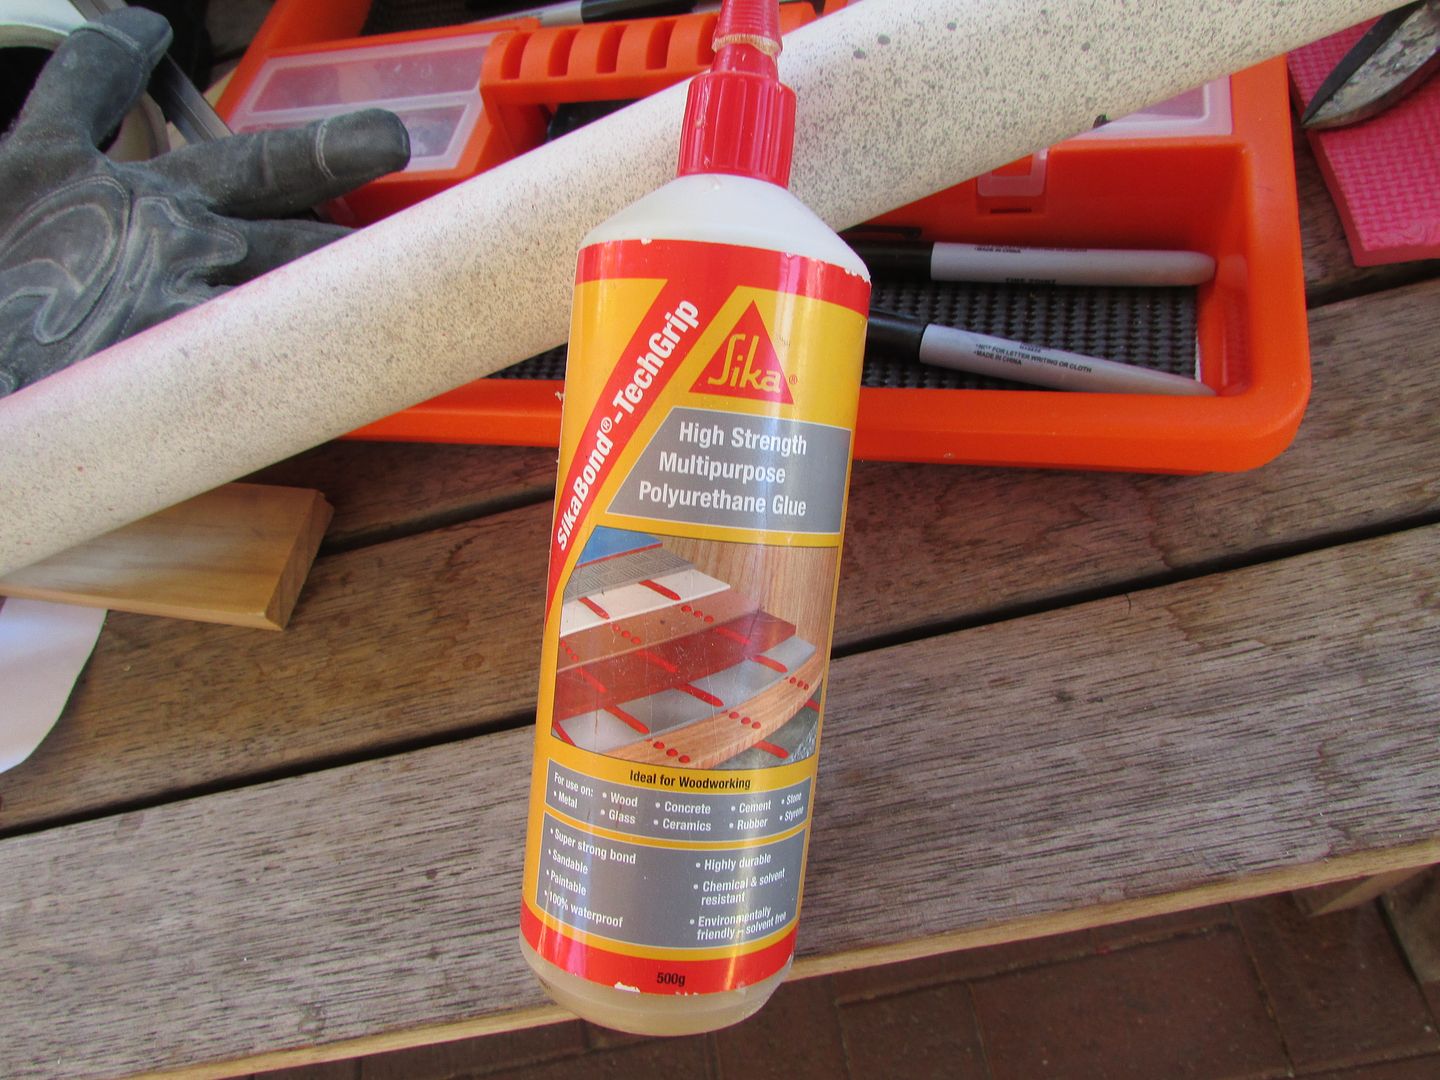
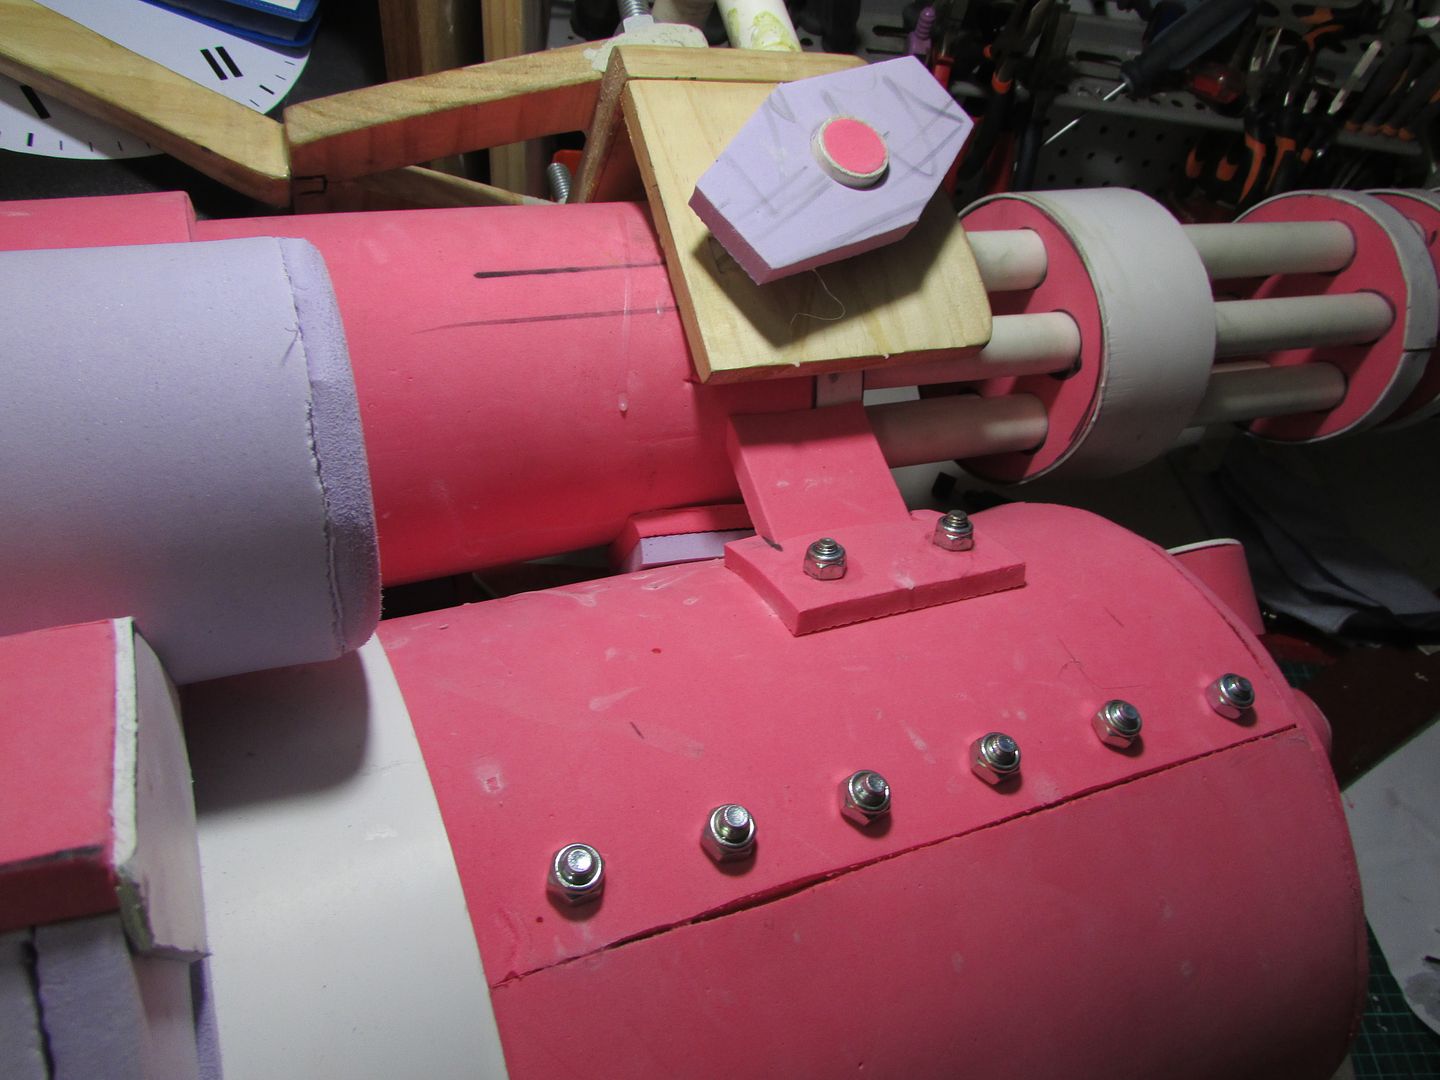
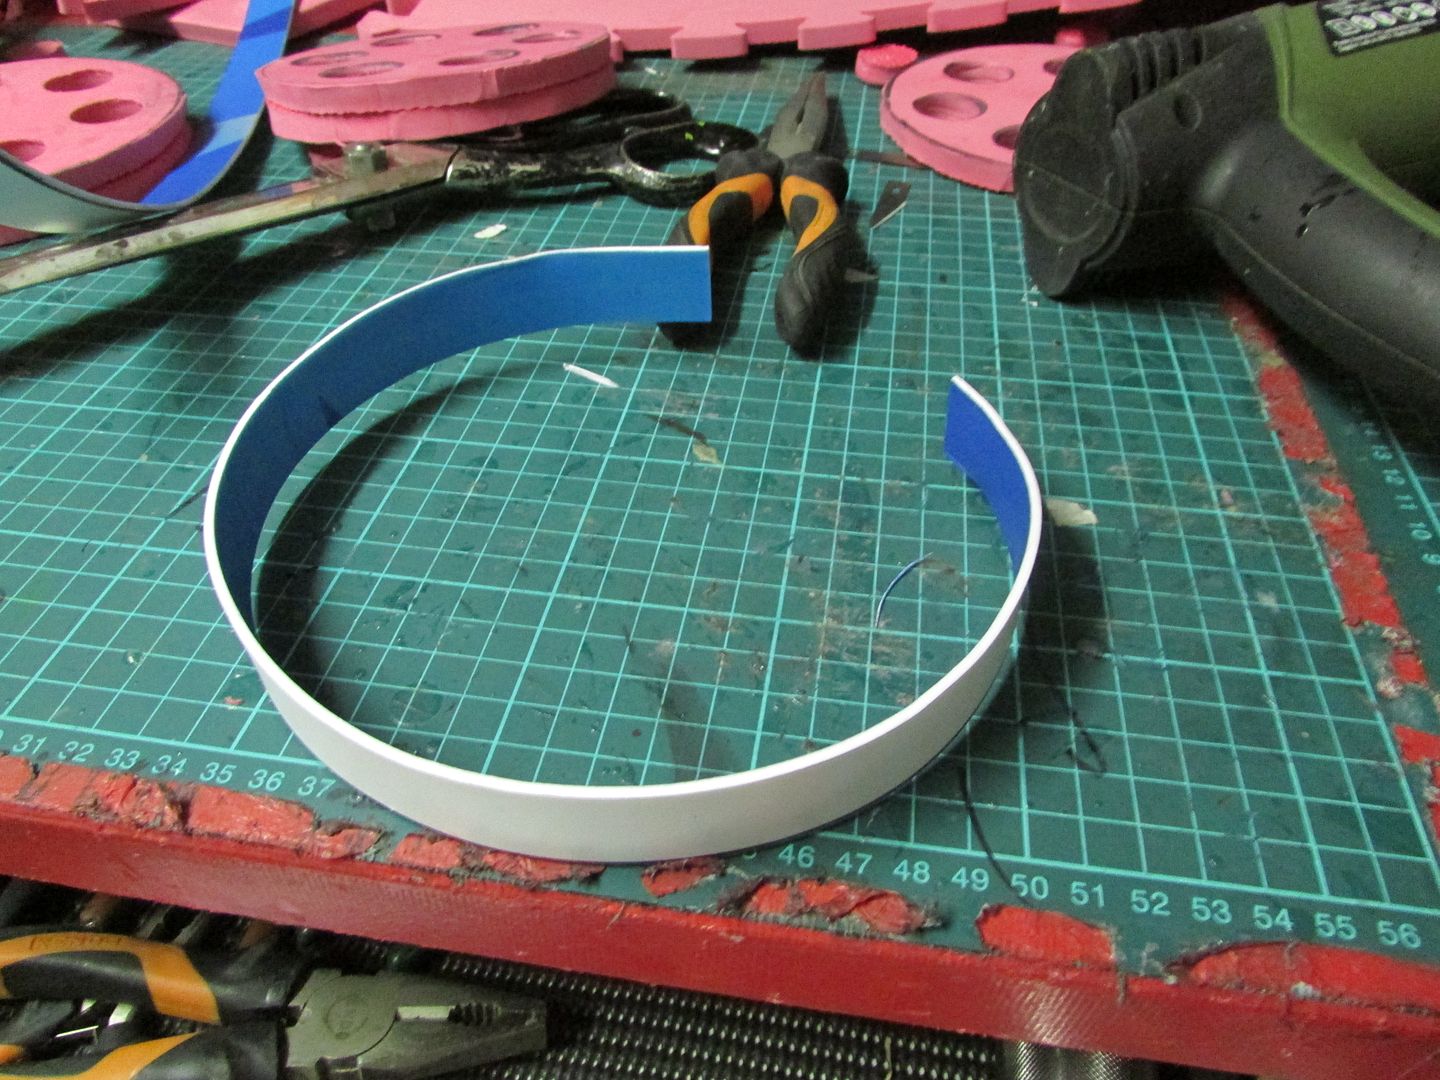
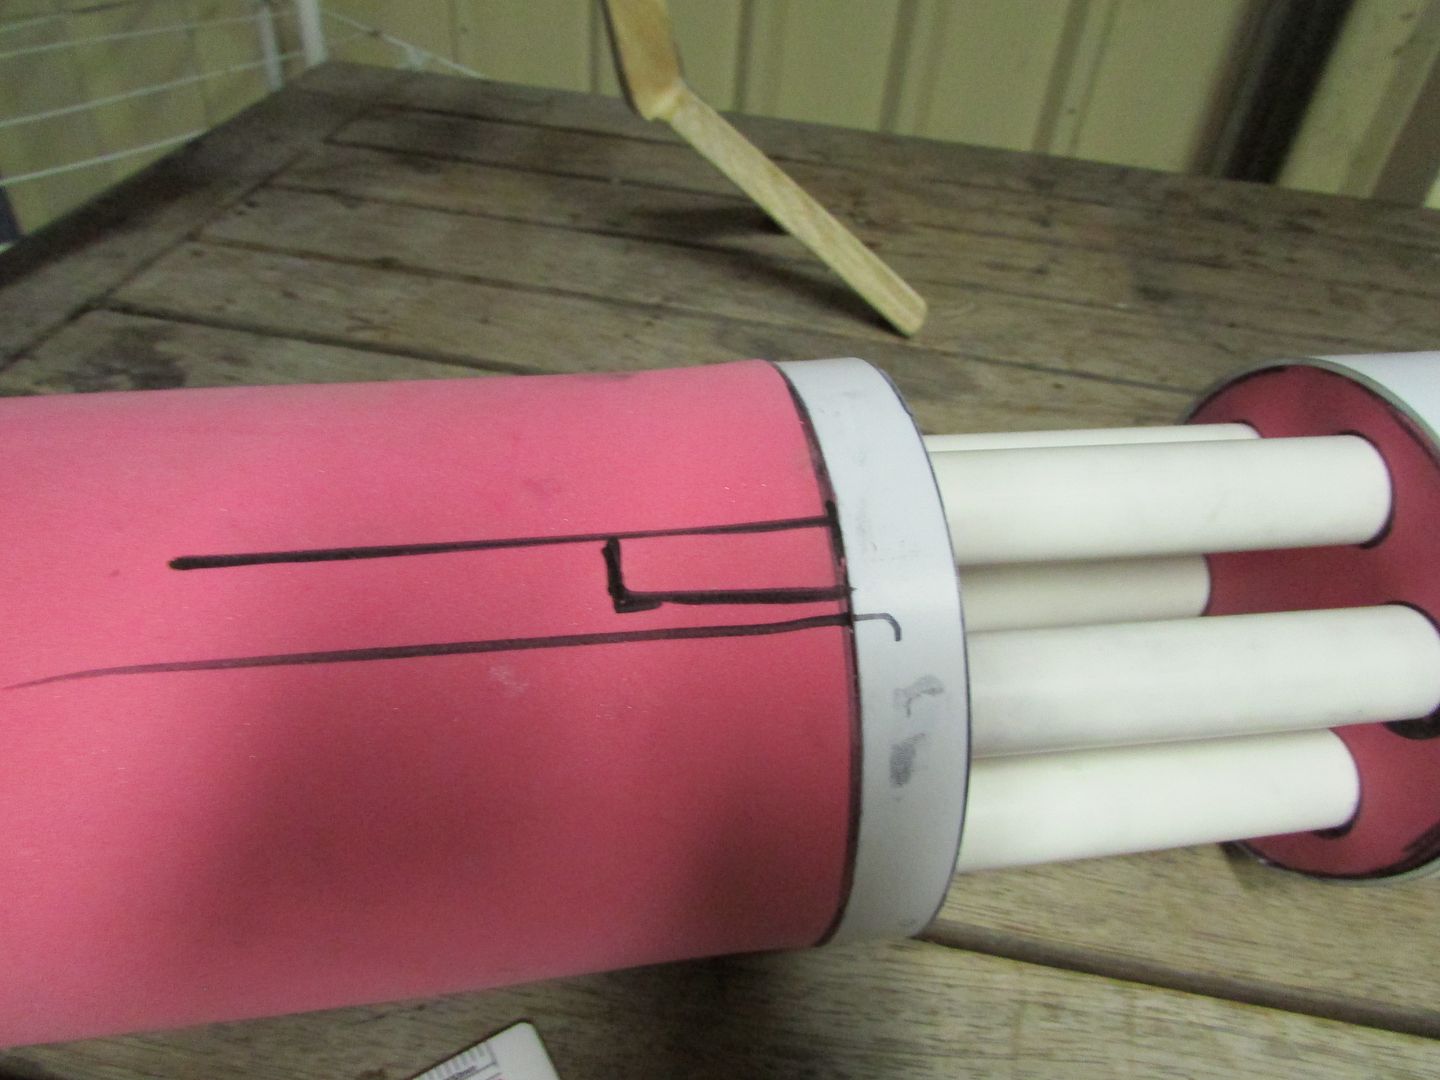
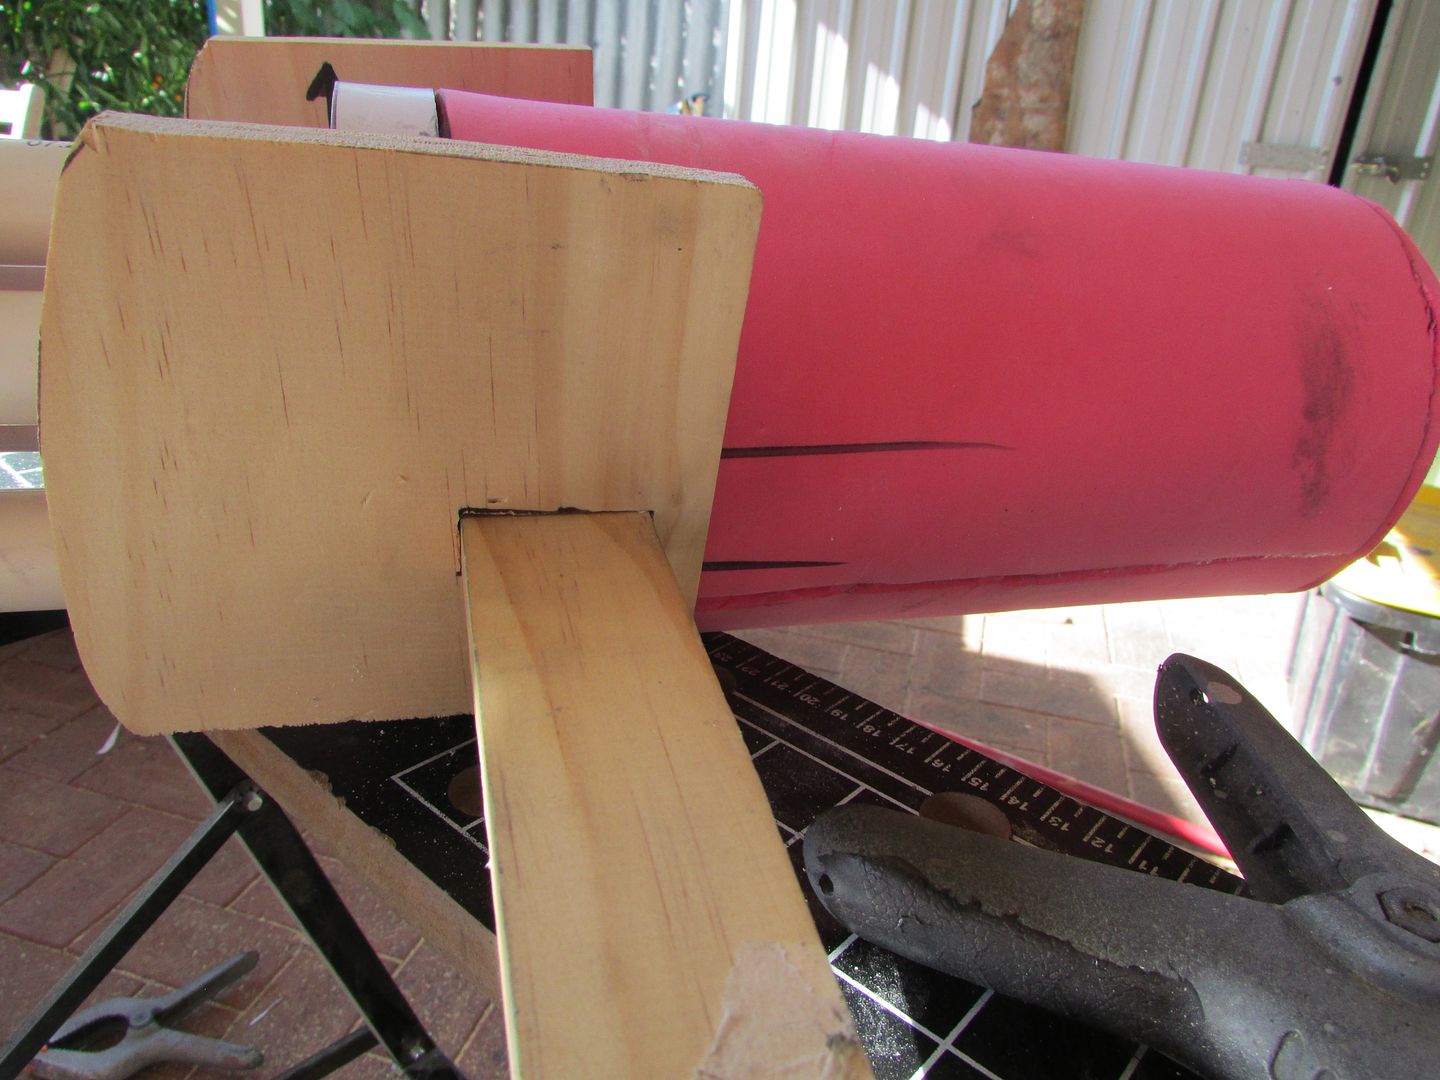
Now to hide the interfacing seams of each of the barrel clamps, originally I was going to use automotive filler and sand it over but thankfully I decide to opt out for some cut to length PVC sheeting that I bent into a circle using a heat gun and superglued onto the foam.

IMG_2257_zps714f9ccb.jpg


IMG_2259_zps5a192e1d.jpg


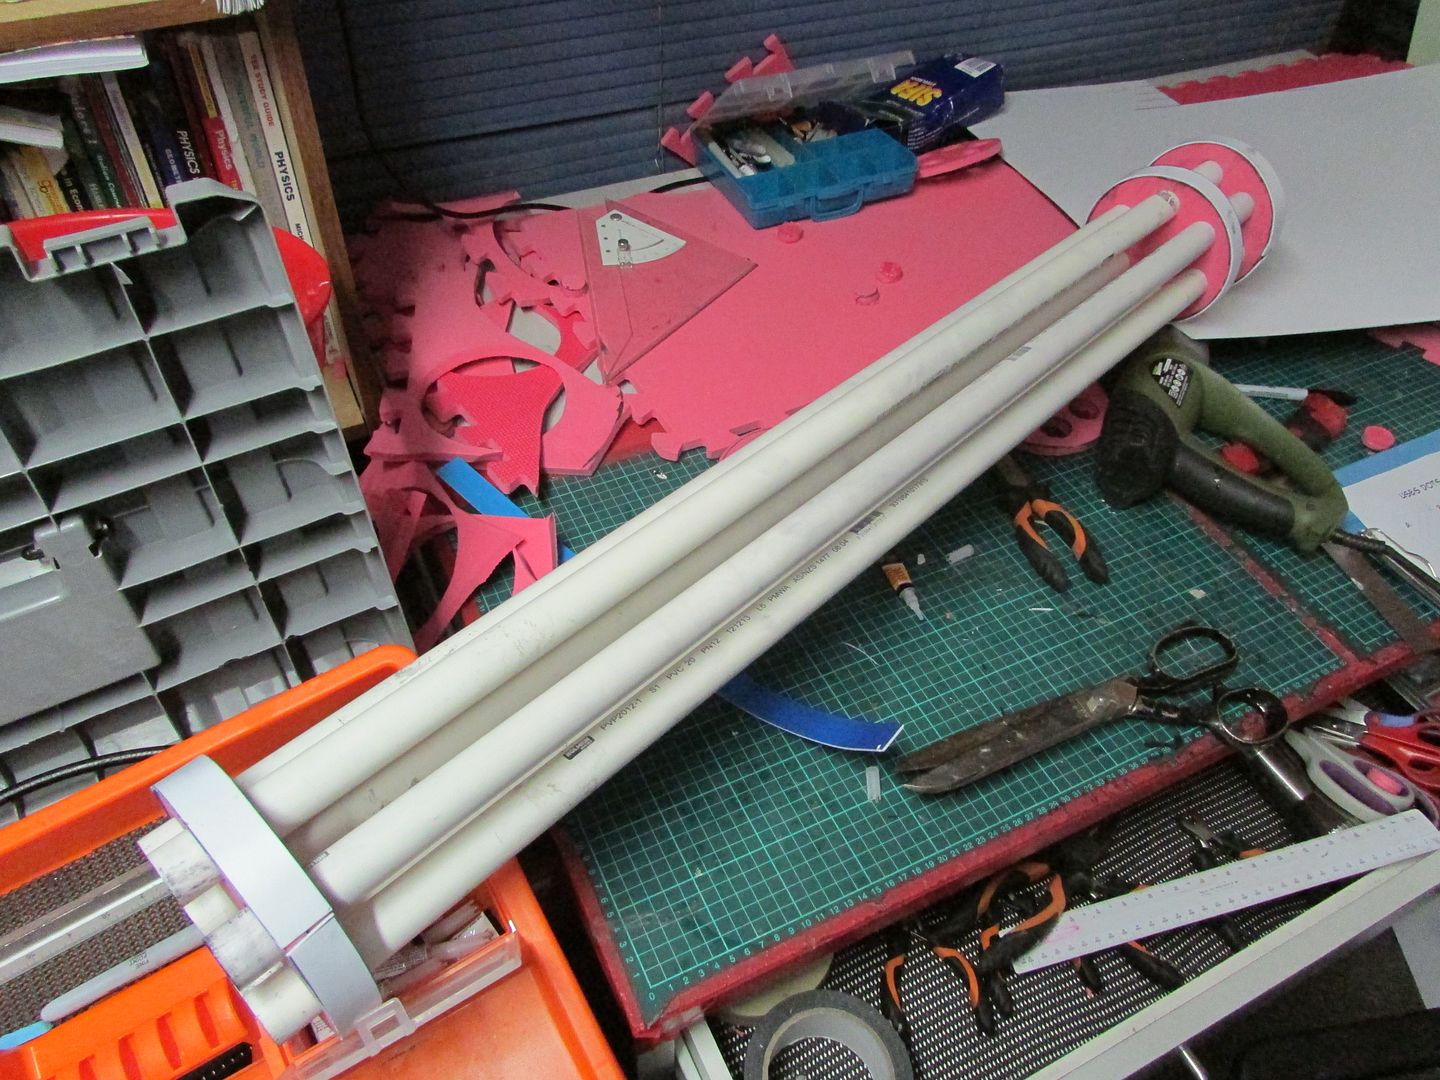
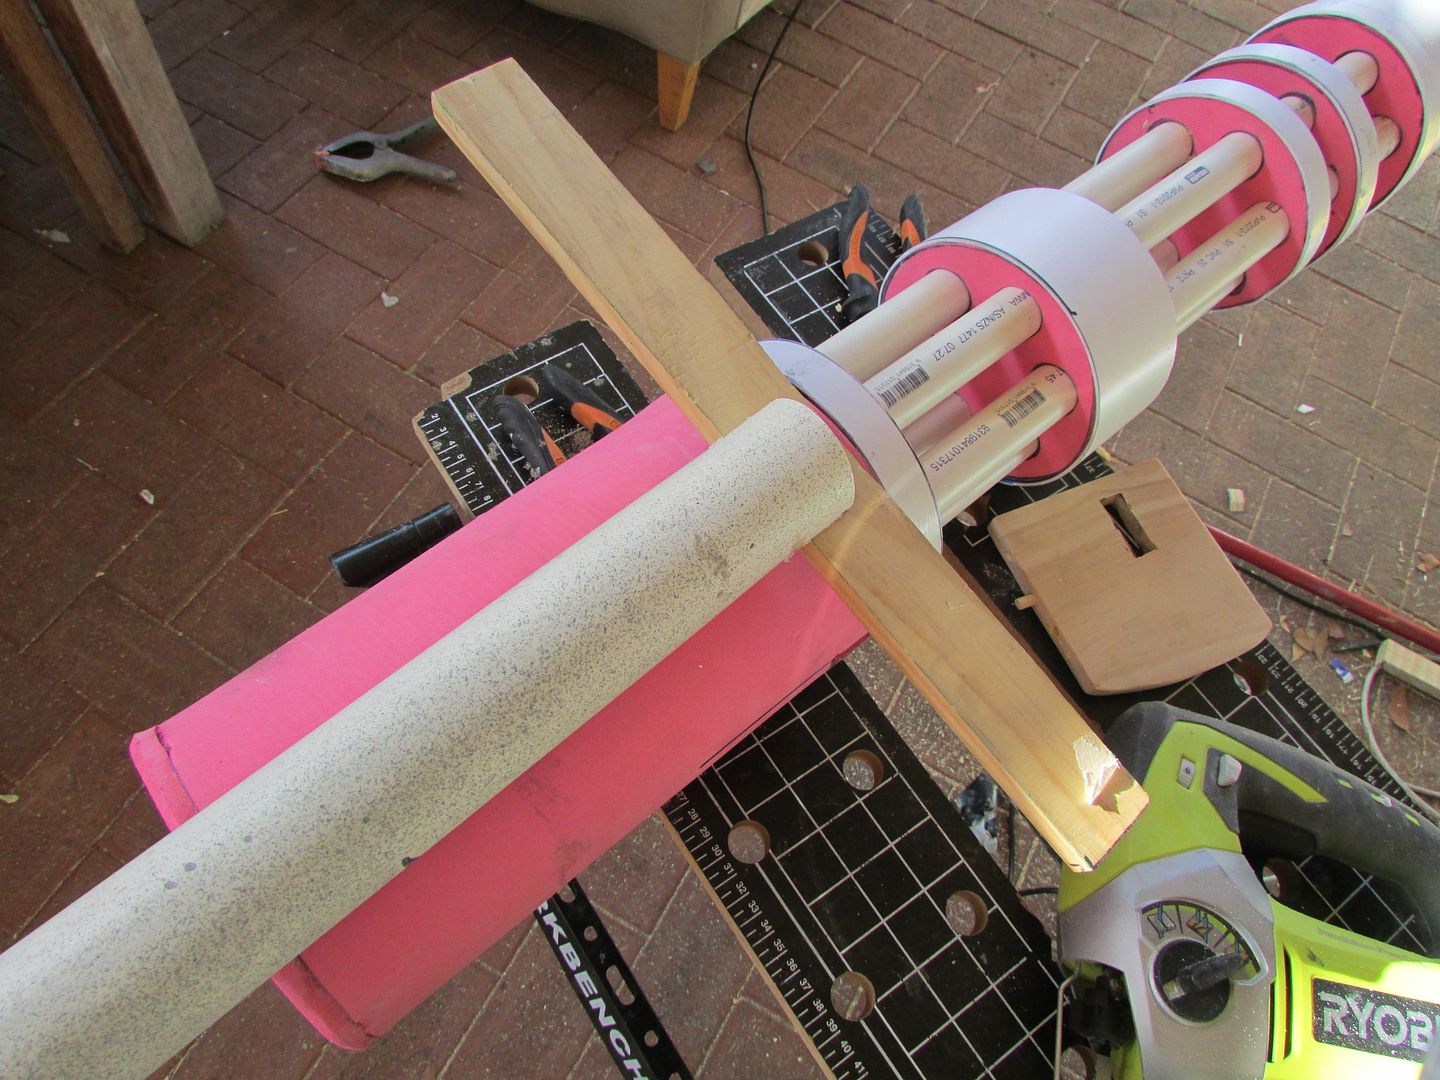
With all the clamps put together it was just simply a matter of knocking them down the PVC pipe till it sat where it needed to match the vector blueprint, to which i superglued into place, I should also not the end muzzle was made using PVC sheeting I had bent with a heat gun.

IMG_2263_zpsdf4dae2b.jpg


IMG_2265_zps88fce0ce.jpg


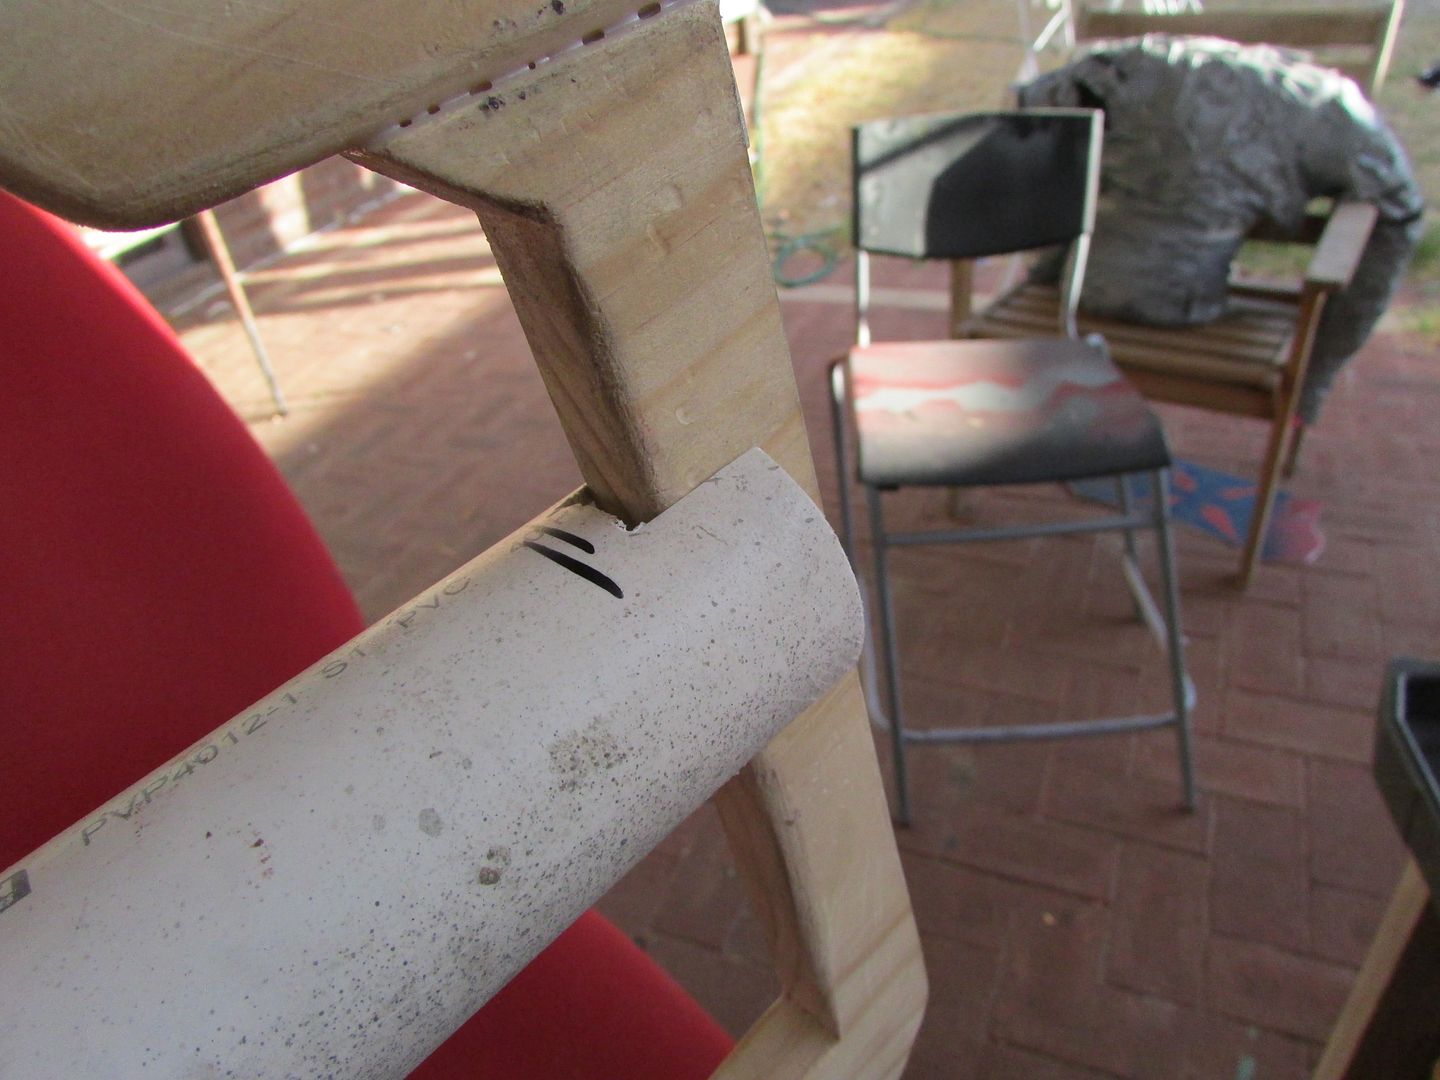
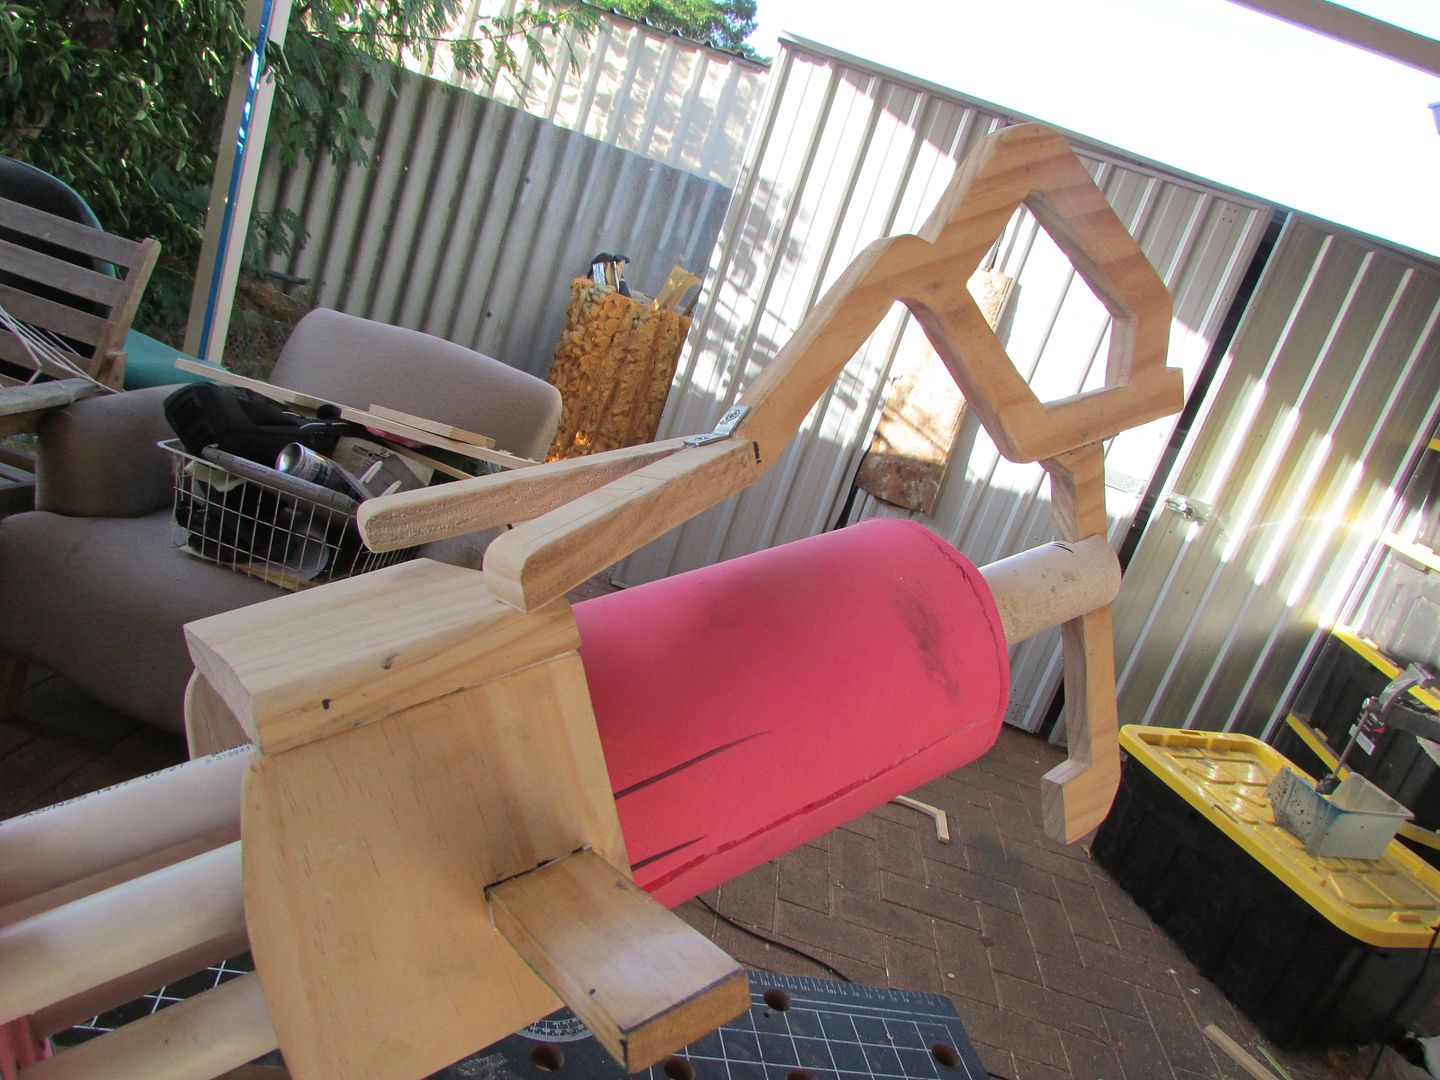
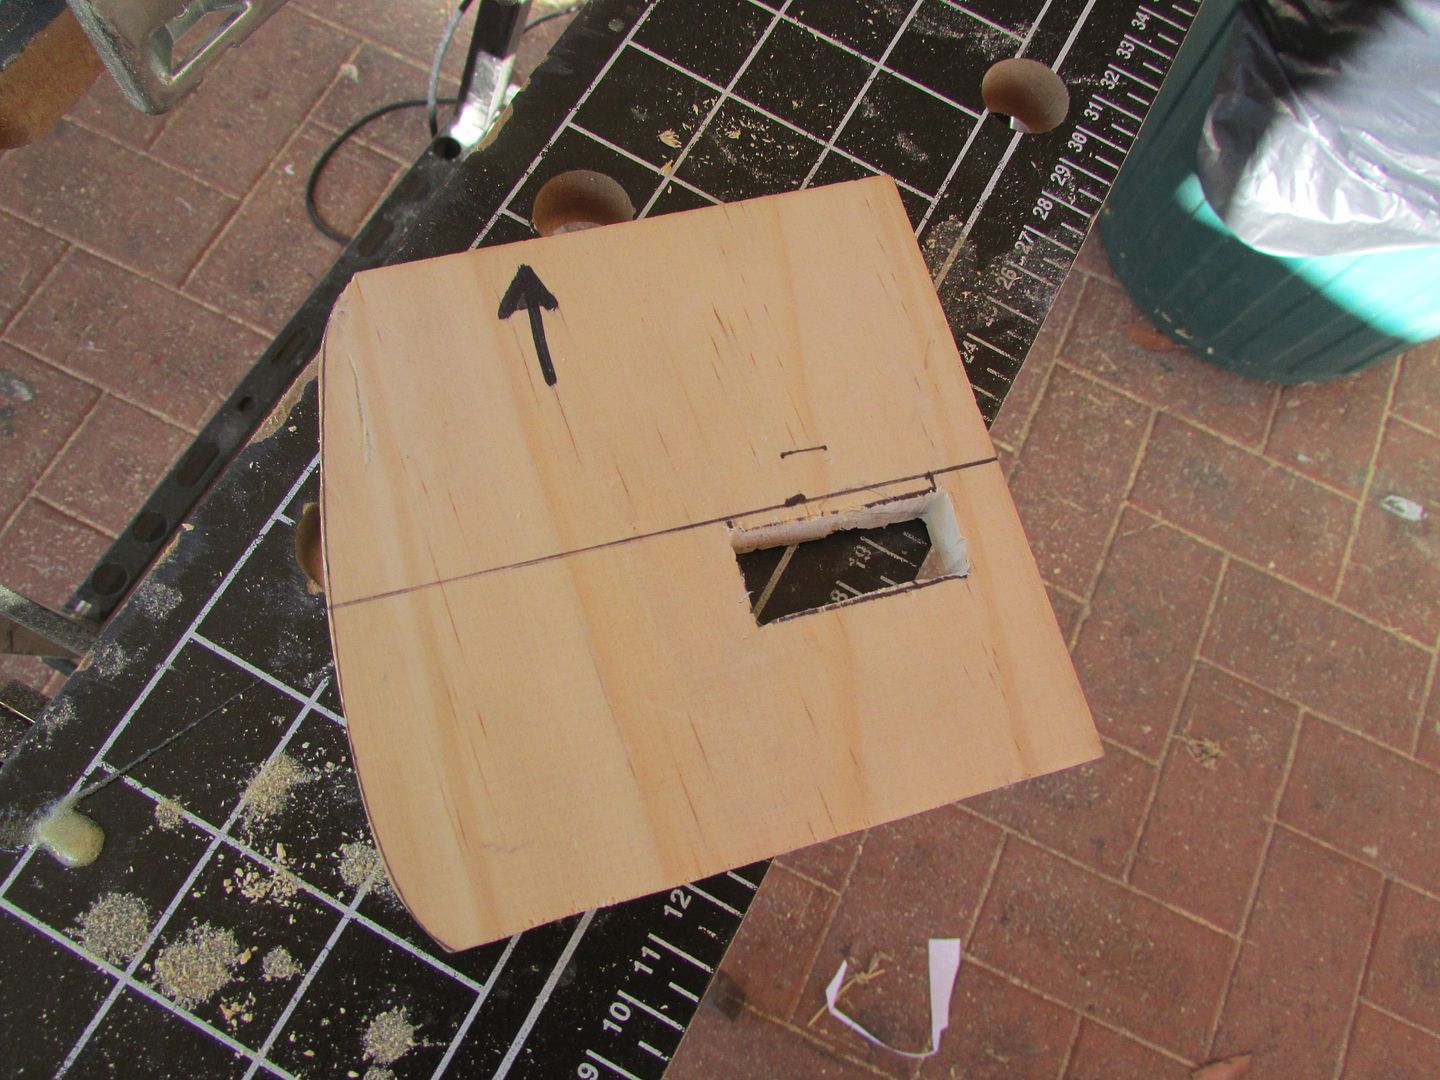
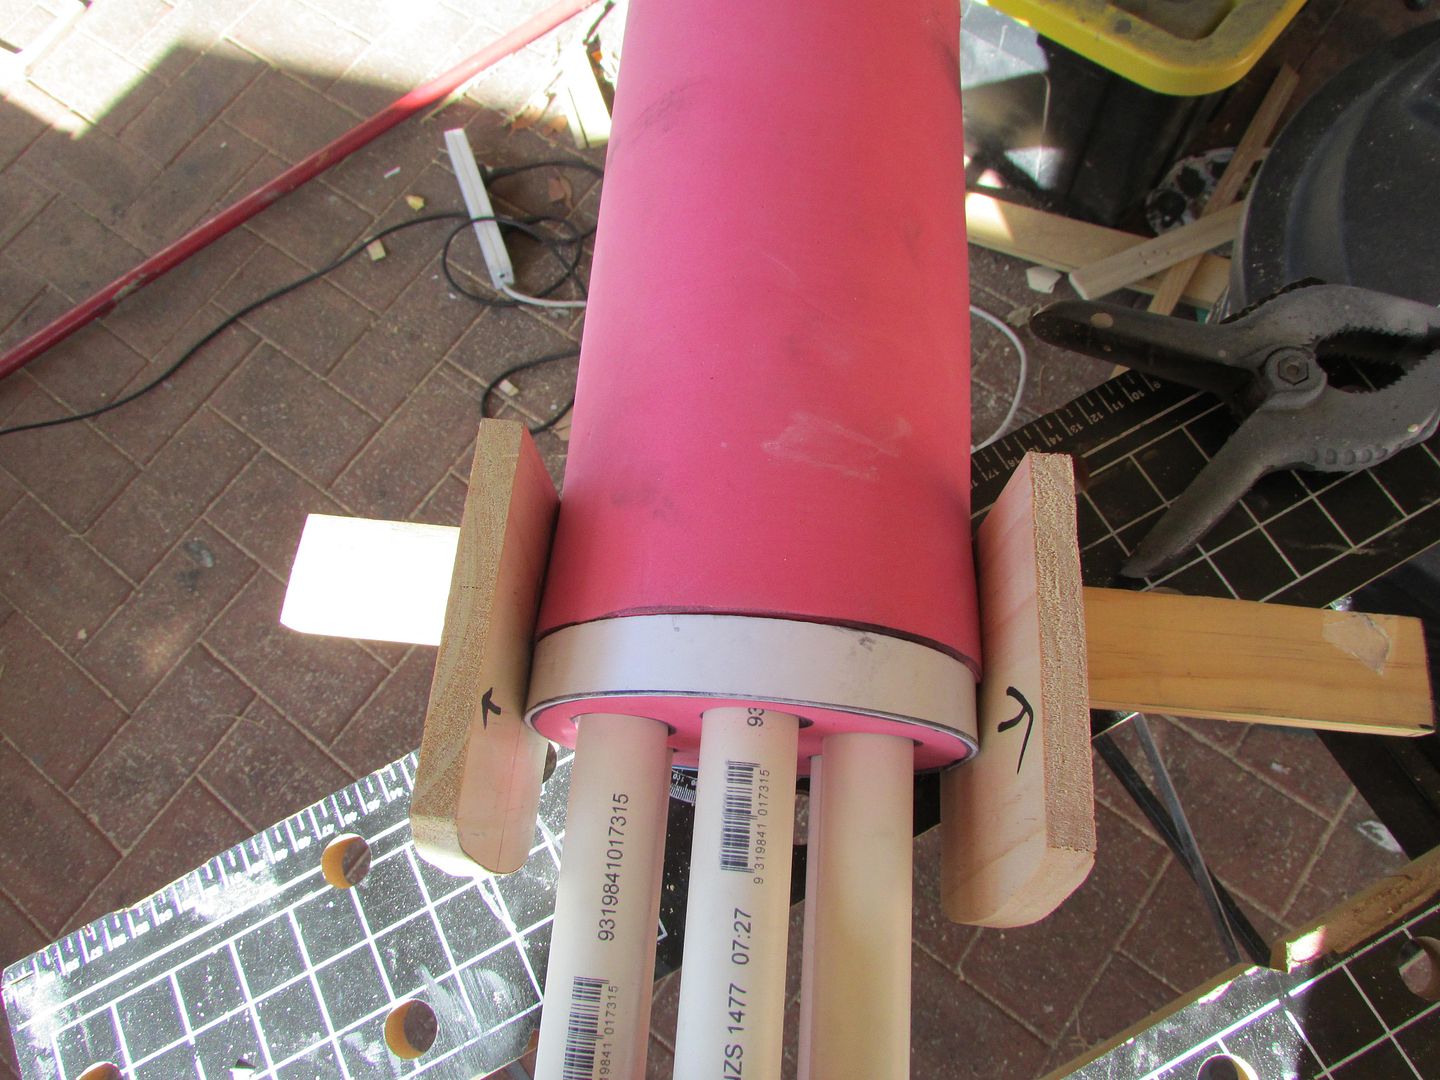
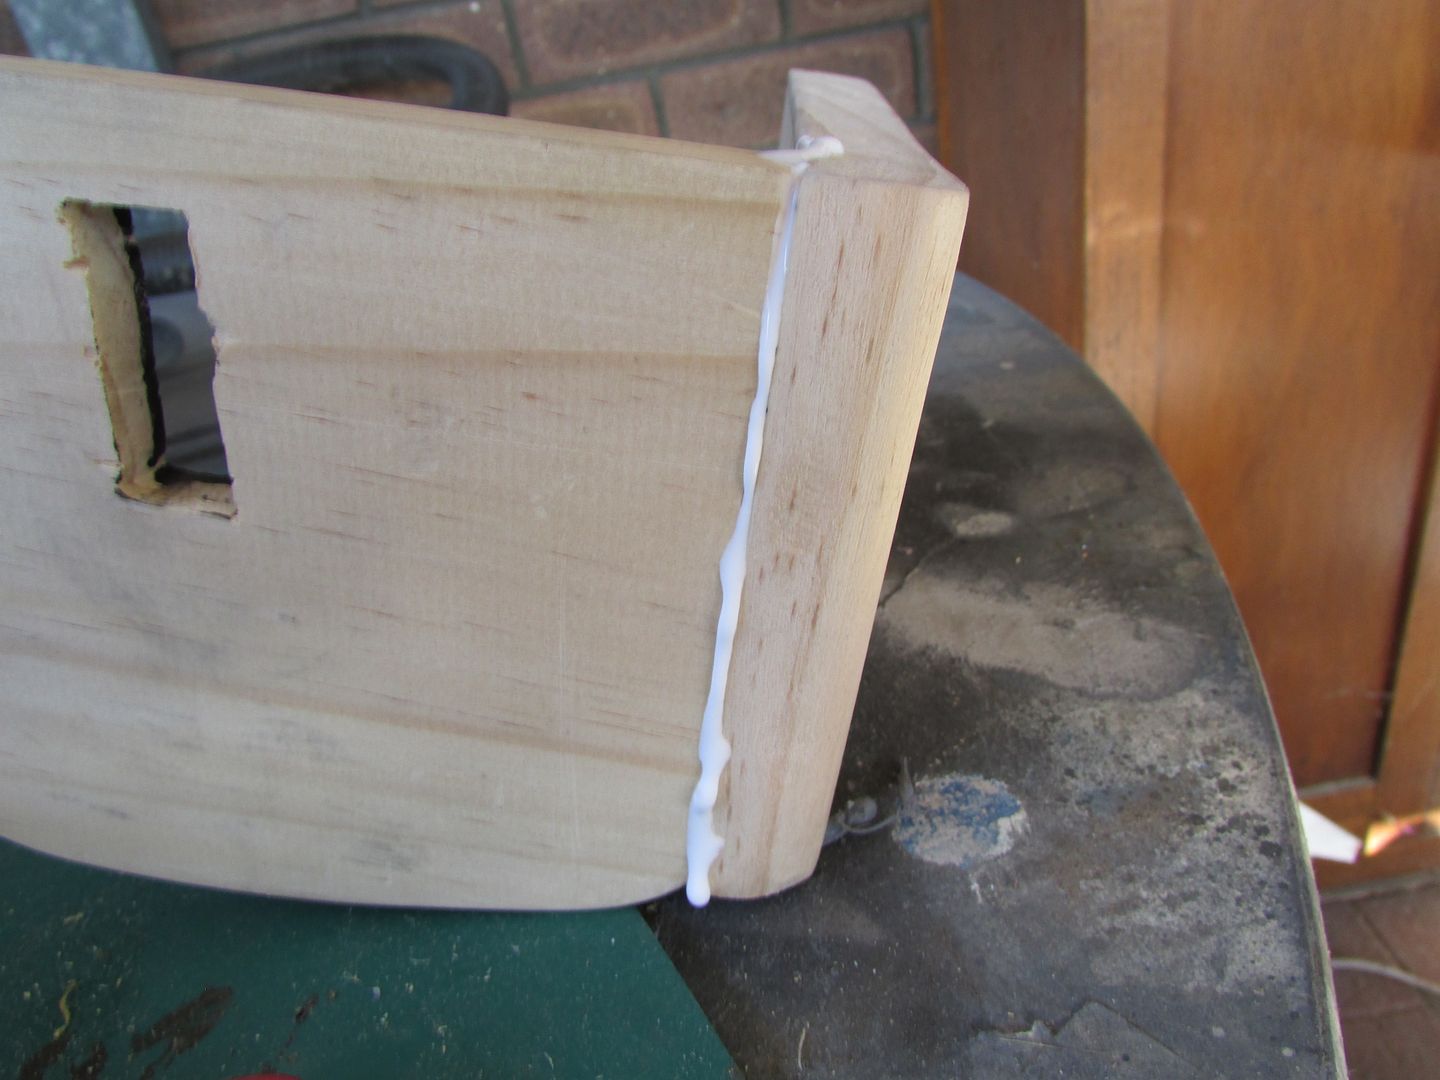
Now to start work on the frame to support everything, so look forward to that.
 

Doing some more work on the gun I’ve managed to cut out the start of what will become the frame that supports everything using some 18mm thick pine.


IMG_2413_zps95969261.jpg


IMG_2414_zps2313a9d3.jpg


IMG_2416_zpsf1253d9d.jpg


For the edge on one of the frame components, I used a belt sander and a fine grit belt to shape the corners till they became nicely curved and then spent a good portion of the day sanding every other sharp edge to a nice chamfer.

IMG_2419_zps2d80fc6a.jpg


For the upper frame I’ve decided to break the entire thing up into three components, there’s the actual handle grip that you hold onto, the perpendicular support guide for the minigun barrels and drum and a diverging ‘v’ part that’ll also support the gun barrels and overall weight of the weapon.

IMG_2420_zpsb1c15ed2.jpg


To assemble these three components I decided to go with good old fluted dowels to ensure a strong connection is established when I applied the wood glue.

IMG_2421_zpsee56d2ce.jpg


IMG_2440_zps6396459f.jpg


IMG_2423_zpse94b2a44.jpg


However as strong as a bond this will make, my over cautious pragmatic nature had me screw on some brackets to make doubly sure that the pieces won’t separate, seeing as this entire frame will be supporting the weight of the entire gun.


IMG_2447_zps7ec23681.jpg


So as you can see its starting to take shape, now I’ve gotta somehow attatch the minigun barrel part that i made prior to this frame and then to that the massive drum.


IMG_2452_zps32a4b2c6.jpg


IMG_2451_zpsa62f9eec.jpg

 
Trying to figure out a way to mount the main body of the minigun to the frame I've made I decided to do some mock-ups to see what support methods would work. One of them that proved quite promising involved feeding a 30mm diameter PVC pipe down the centre of the main cylinder body.

IMG_2457_zpscb6ff11a.jpg


Being the most central point along the entire body with enough adhesive it should do a nice enough job to support everything.

IMG_2459_zpsee0a9dae.jpg


IMG_2460_zps776879e0.jpg


But for added support I’ve also decided that I’ll install a crossbar perpendicular to the body and take advantage of the small clearance made by the PVC pipes.

IMG_2464_zpsa123d091.jpg


IMG_2466_zps4e6182b3.jpg


IMG_2468_zps873fc737.jpg


So the combination of the two gives more than enough support I find, so now I have to trim this support member to length to fit in the frame.

IMG_2473_zps835443ae.jpg
 

So having gotten the dimensions from the foam mock-up for the central support cover, I've gone about cutting out the actual one out again pine.

The design rationale behind this is to have the side panels to support the cross bar wooden member that will be holding up the minigun rotor, so the placement of the rectangular slots and overall assembly strenght is vital.


IMG_2478_zps963542b7.jpg


Hopefully this explains a bit better of what I mean; The rectangular bar is wedged between the extending PVC pipes inside the rotor and is acting against them.

IMG_2480_zpsf890b566.jpg


And in turn the side plates will support that rectangular bar when everything is glued into place and I trim off the excess protruding sides.

IMG_2481_zps962f21fc.jpg


IMG_2482_zps72b19cad.jpg


However to finish this part off I need to attach the top cover which is just a basic rectangular block that I’ve rounded the edges with a belt sander

IMG_2475_zps17f808c3.jpg


IMG_2483_zpsb8877a4a.jpg

To put everything together, again I’m using good old fluted dowels. However due to the thinness of the side panels, I have to use 6mm diameter ones this time around.

Also a pro tip my dad taught me when drilling holes to a specific depth, is to tape off a section of the drill bit to act as a depth gauge so you know when to stop going deeper; a very convenient and simple solution I find .

IMG_2486_zps21197ae4.jpg


Any who, to install the dowels again, I first predrilled the holes I wanted to make with a 3mm bit to maximise the precision and accuracy of when I do the proper 6mm one.

IMG_2485_zps974f7604.jpg


IMG_2487_zps979a473d.jpg

Filled the holes with wood glue and tapped the dowels down gently with a mallet. Too hard and you'll run the risk of splitting the work piece and have to start over.

IMG_2489_zps16ac0ec7.jpg


I then had to mark out and drill the corresponding holes on the cover piece and then assemble everything with more wood glue.​

IMG_2490_zpsc47bd7bc.jpg


IMG_2491_zps346846fb.jpg
 
Looking good. :)
Glad to see another TF2 Heavy Minigun build going on at the same time as mine. When we're done, we should duel. :)
 
Finally have a chance to update the second half of my progress on the gun. Any who picking up where I've left off I’ve gone and cut a notch in the central PVC support pipe so it can couple with the perpendicular crossbar.

Rationale behind that is that when these two pieces are bonded together and set in place inside the rotor casing it’ll make a support structure that should support the weight of the entire gun just fine.

IMG_2494_zps52c6dd89.jpg


To bond everything inside I’ve used Sika high strength multipurpose polyurethane glue which takes a while to set but when it does, foams up and solidifies into an incredibly strong bond.

IMG_2495_zpsfa653dca.jpg


With the support structure glued in place internally I could then put on the top cover I had made earlier.

IMG_2498_zps1d47b14d.jpg


IMG_2502_zps97cce245.jpg

I also applied some wood glue to the side slots as I fed the crossbar into place.

IMG_2500_zpsab361a50.jpg


IMG_2504_zps3df9c209.jpg

For the back of the support PVC pipe I cut it to length with a hacksaw and then again cut in a small notch to accept the handle width.

IMG_2511_zps7d9907d8.jpg


Here's a mock up of what it looks like without gluing on the handle, and you can see it's really starting to take shape.

IMG_2512_zps2aeebe52.jpg


IMG_2513_zps3f240df8.jpg


IMG_2515_zps3f529c53.jpg
 
Looking good. :)
Glad to see another TF2 Heavy Minigun build going on at the same time as mine. When we're done, we should duel. :)

Thank you!

Oh my goodness yes, I imagine if we crossed the streams so many things around us would die :D

also I’ve been following your incredibly gorgeous build as well :)
 
How's the weight on it?

Doing a quick measurement standing on the scale and taking into account my weight it's currently at 5.5kg (12.1254 lb) so very manageable to the average person, largely thanks due to the EVA foam and all that hollow empty space inside all the foam work.
 
That's awesome. I've been toying around with making one of these for a group cosplay and the EVA looks like the route I'd like to go, due to the weight.
 
That's awesome. I've been toying around with making one of these for a group cosplay and the EVA looks like the route I'd like to go, due to the weight.
Definitely, also for added strength I'd highly recommend putting in webs and honeycombs inside large hollow spaces, kind of like the inside of an IKEA table tops
 
Definitely, also for added strength I'd highly recommend putting in webs and honeycombs inside large hollow spaces, kind of like the inside of an IKEA table tops

Awesome. Thanks for the advice!

What sort of coating, if any, are you going to put on the foam parts? Smooth cast?
 
Working on the little box on the underside of the gun I've hot glued together some corogated flute board and then skinned it witht he EVA foam to hide the grainy surface of the flute board.
IMG_3503_zpsbd714188.jpg

For added strength I also hot glued in some webs to the internals of box, so it won’t as readily collapse in itself when pressure is applied but still be lightweight.
IMG_3511_zps685238e6.jpg

Now to detail the gun, I managed to scavenge some sheared locknuts that were being thrown out from a renovation. I saw these and thought that they looked immensely cool to be attached to something so no better occasion than on Sasha here.
IMG_3524_zpseea7b318.jpg

To aid in adhesion I also sanded the underside of each of the nuts before using the epoxy glue, to increase the surface area.
IMG_3525_zps52bc048b.jpg
 
This thread is more than 9 years old.

Your message may be considered spam for the following reasons:

  1. This thread hasn't been active in some time. A new post in this thread might not contribute constructively to this discussion after so long.
If you wish to reply despite these issues, check the box below before replying.
Be aware that malicious compliance may result in more severe penalties.
Back
Top